Upload and Download Files on AWS S3 Bucket
This guide demonstrates how to configure file upload and download operations using the Amazon S3 data source in ToolJet. Learn how to use Upload Object, generate signed URLs, and manage S3 buckets directly from your applications.
Before building the UI, check out the docs for AWS S3 data source to learn about setting up AWS S3 and adding the data source.
UI Components
Once you have successfully added the AWS data source, build a basic UI using the following widgets:
- Dropdown: For selecting a bucket in S3 storage.
- Table: For listing all the objects inside the selected bucket in dropdown.
- Text Input: For getting a path for the file that is to be uploaded.
- File picker: For uploading the file.
- Button: This will be used to fire the upload query.
Query Builder
We'll create the following queries using the query builder in your ToolJet app.
- get_buckets
- list_objects
- upload_to_S3
- download
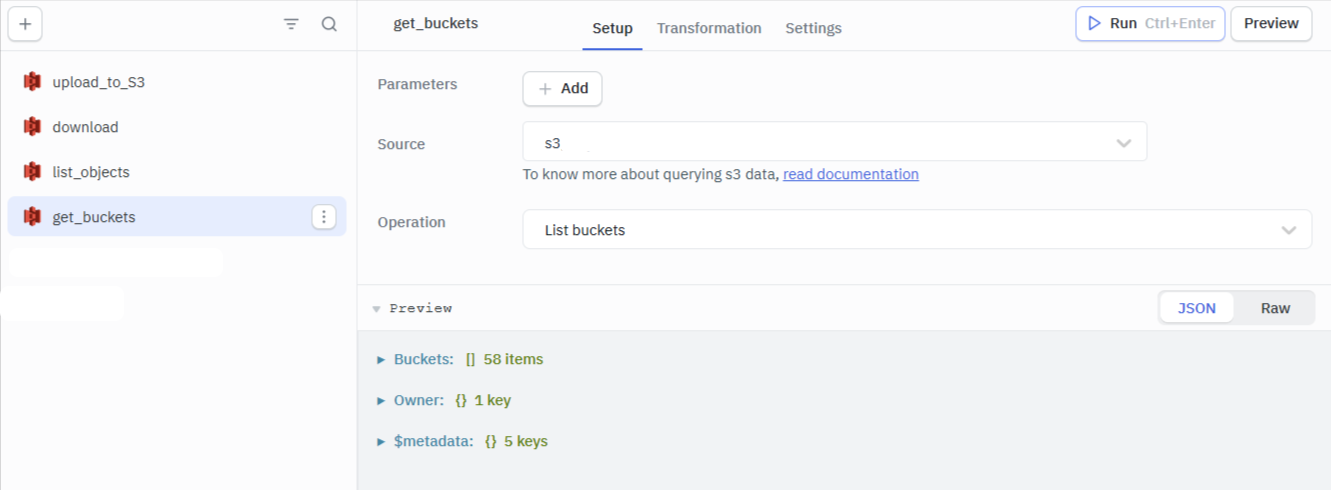
Get Buckets
This query will fetch the list of all the buckets in your S3. Just create a new query, select AWS S3 data source, and choose List buckets operation. Name the query get_buckets and click Save.
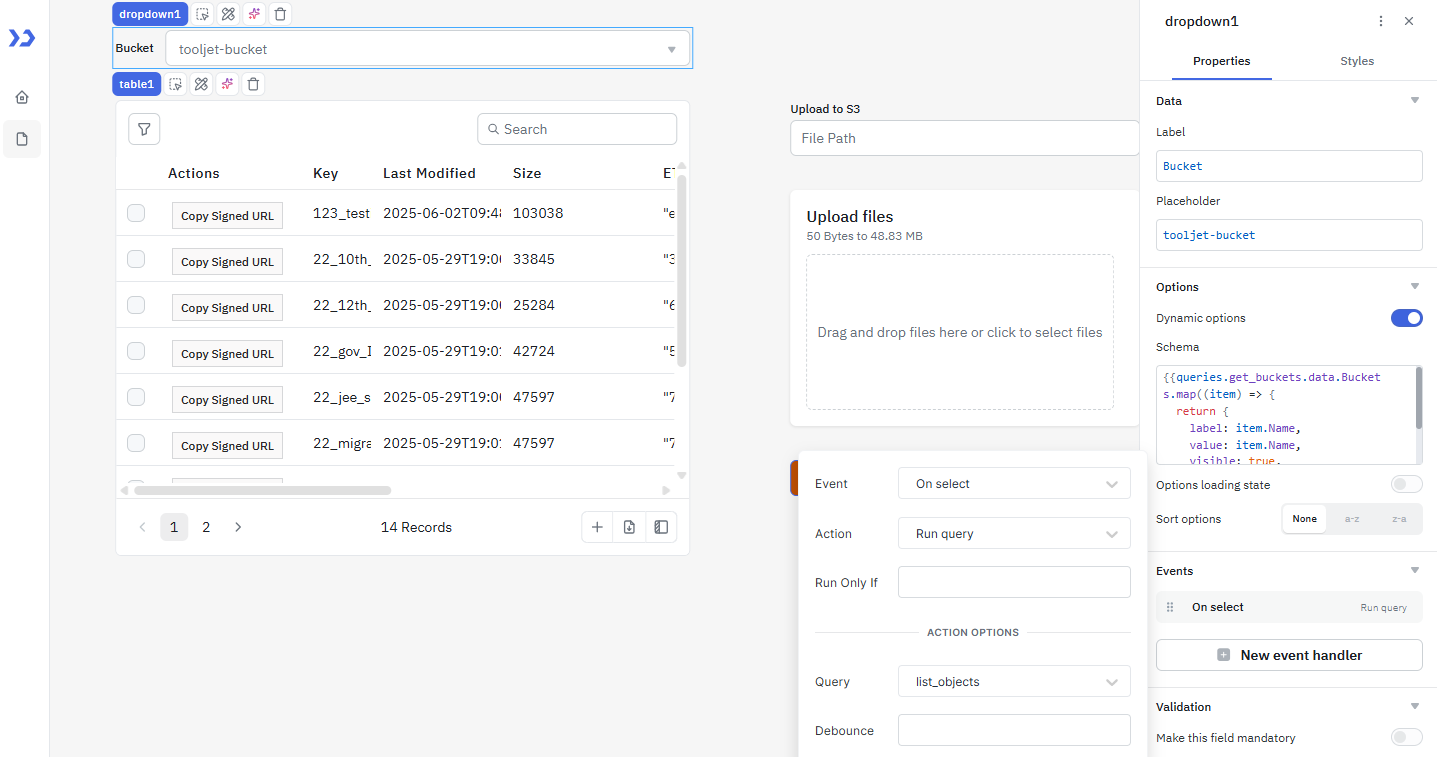
Now, let's edit the dropdown widget from Component properties.
-
Label: Set the label as Bucket.
-
Schema: Enable the Dynamic Options and enter the code mentioned below. Here, we are mapping the data returned by the query as the returned data is array of objects.
{{
queries.get_buckets.data.Buckets.map((item) => {
  return {
    label: item.Name,
    value: item.Name,
    visible: true,
    default: false
  }
})
}}
- Event Handler : Add an event handler, with the event On Select, set the action to Run Query and select the list_object query.
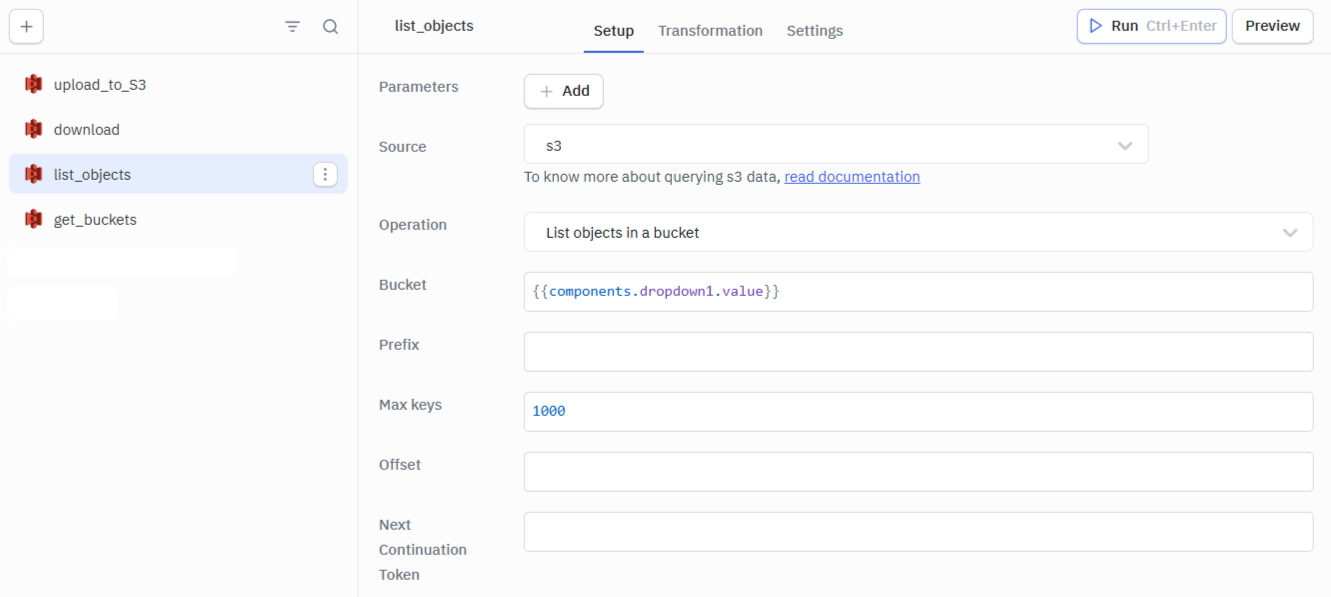
List Objects
This query will list all the objects inside the selected Bucket in dropdown. Select List objects in a bucket operation, enter {{components.dropdown1.value}} in the Bucket field - this will dynamically get the field value from the selected option in dropdown.
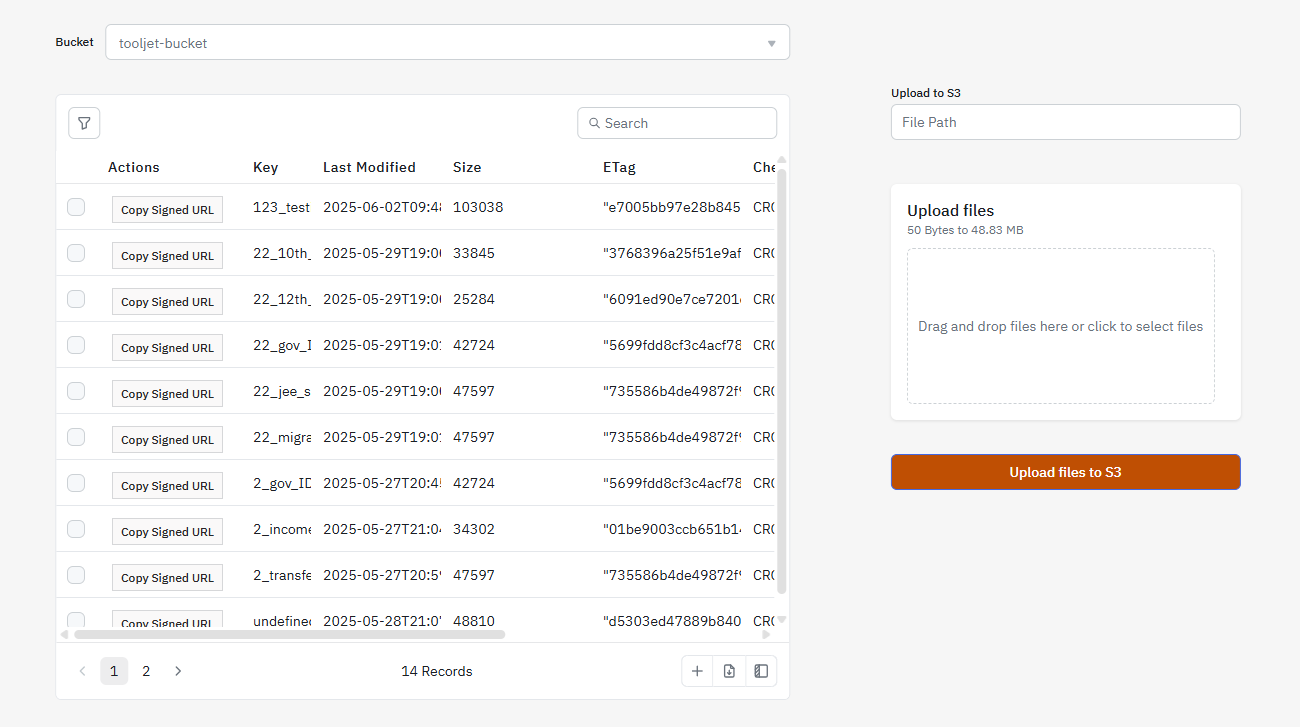
Let's edit the table widget from Component properties.
-
Table data:
{{queries.list_objects.data['Contents']}} -
Add Columns:
-
Key: Set the Column Name to
Keyand Key toKey -
Last Modified: Set the Column Name to
Last Modifiedand Key toLastModified -
Size: Set the Column Name to
Sizeand Key toSize -
ETag: Set the Column Name to
ETagand Key toETag
-
-
Add a Action button: Set button text to Copy signed URL, Add a handler to this button for On Click event and Action to Copy to clipboard, in the text field enter
{{queries.download.data.url}}- this will get the download url from the download query that we will create next.

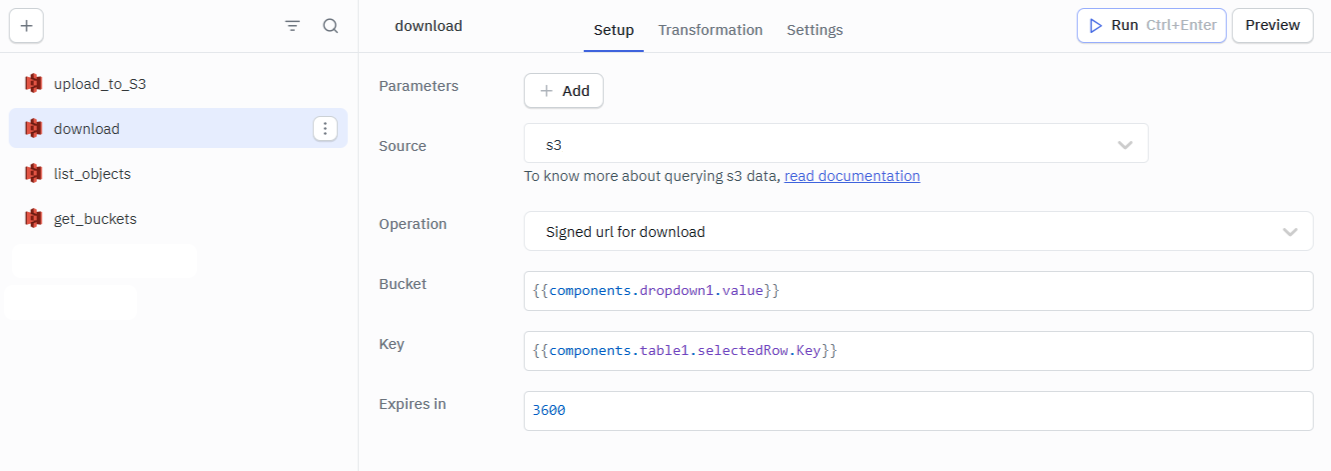
Download
Create a new query and select Signed URL for download operation. In the Bucket field, enter {{components.dropdown1.value}} and in Key enter {{components.table1.selectedRow.Key}}.
Edit the properties of the table, add a Event handler for running the download query for Row clicked event. This will generate a signed url for download every time a row is clicked on the table.
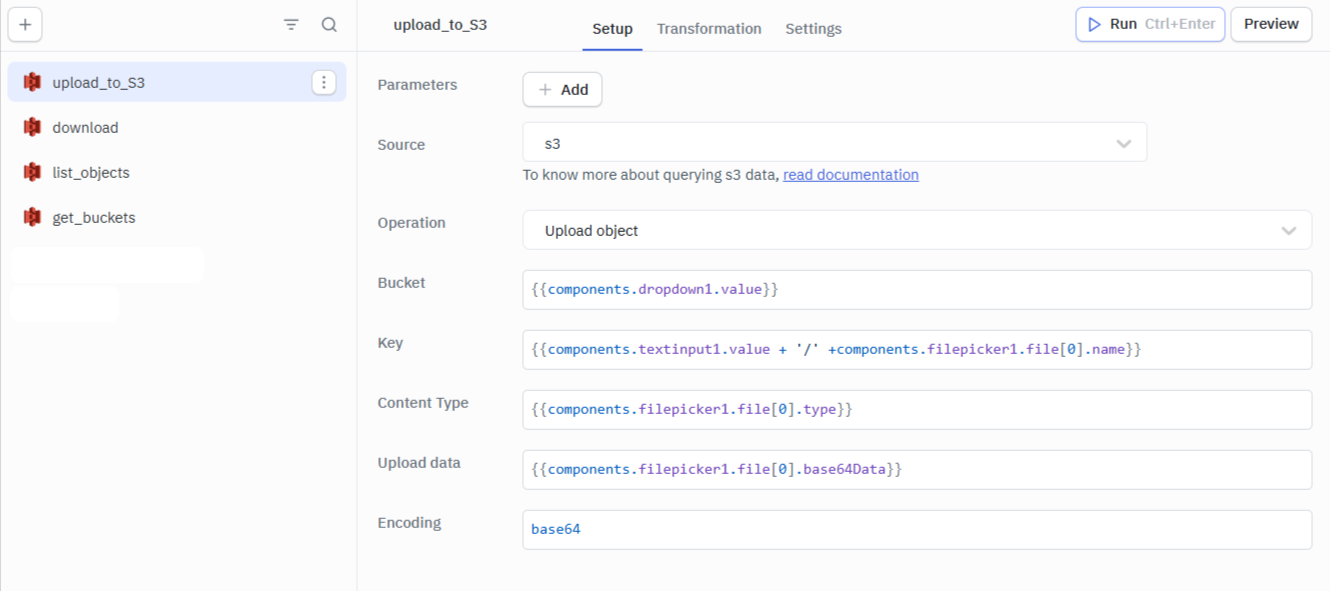
Upload to S3
Create a new query, select the Upload object operation. Enter the following values in their respective fields:
-
Bucket:
{{components.dropdown1.value}} -
Key:
{{ components.textinput1.value + '/' +components.filepicker1.file[0].name}} -
Content type:
{{components.filepicker1.file[0].type}} -
Upload data:
{{components.filepicker1.file[0].base64Data}} -
Encoding:
base64
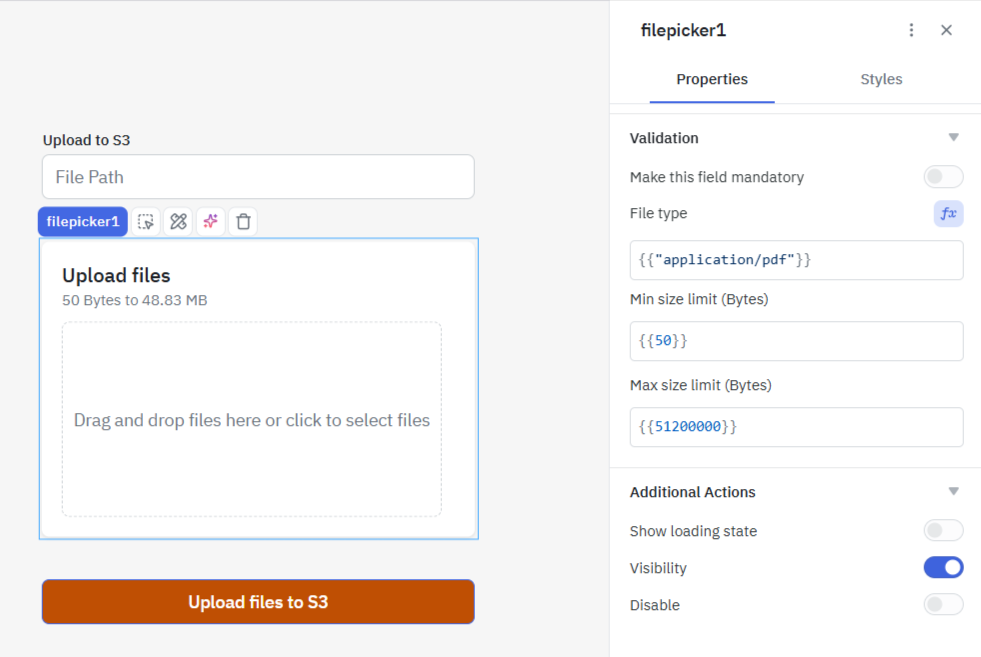
Configure the File Picker
Click on the widget handle to edit the file picker properties:
-
Change the Accept file types to
{{"application/pdf"}}for the picker to accept only pdf files or even{{"image/*"}}for the picker to accept only image files. In the screenshot below, we have set the accepted file type property to{{"application/pdf"}}so it will allow to select only pdf files. -
Also, in the properties section, disable the Allow picking multiple files to avoid conflicts.
-
Add an Event Handler : Go to the advanced tab of the upload_to_S3 query and add an event Query Success, an add an action to a Run Query and select the query list_objects, so that whenever a file is uploaded the tabled is refreshed.
File types must be valid MIME type according to input element specification or a valid file extension.
To accept any/all file type(s), set Accept file types to an empty value.