Database Editor
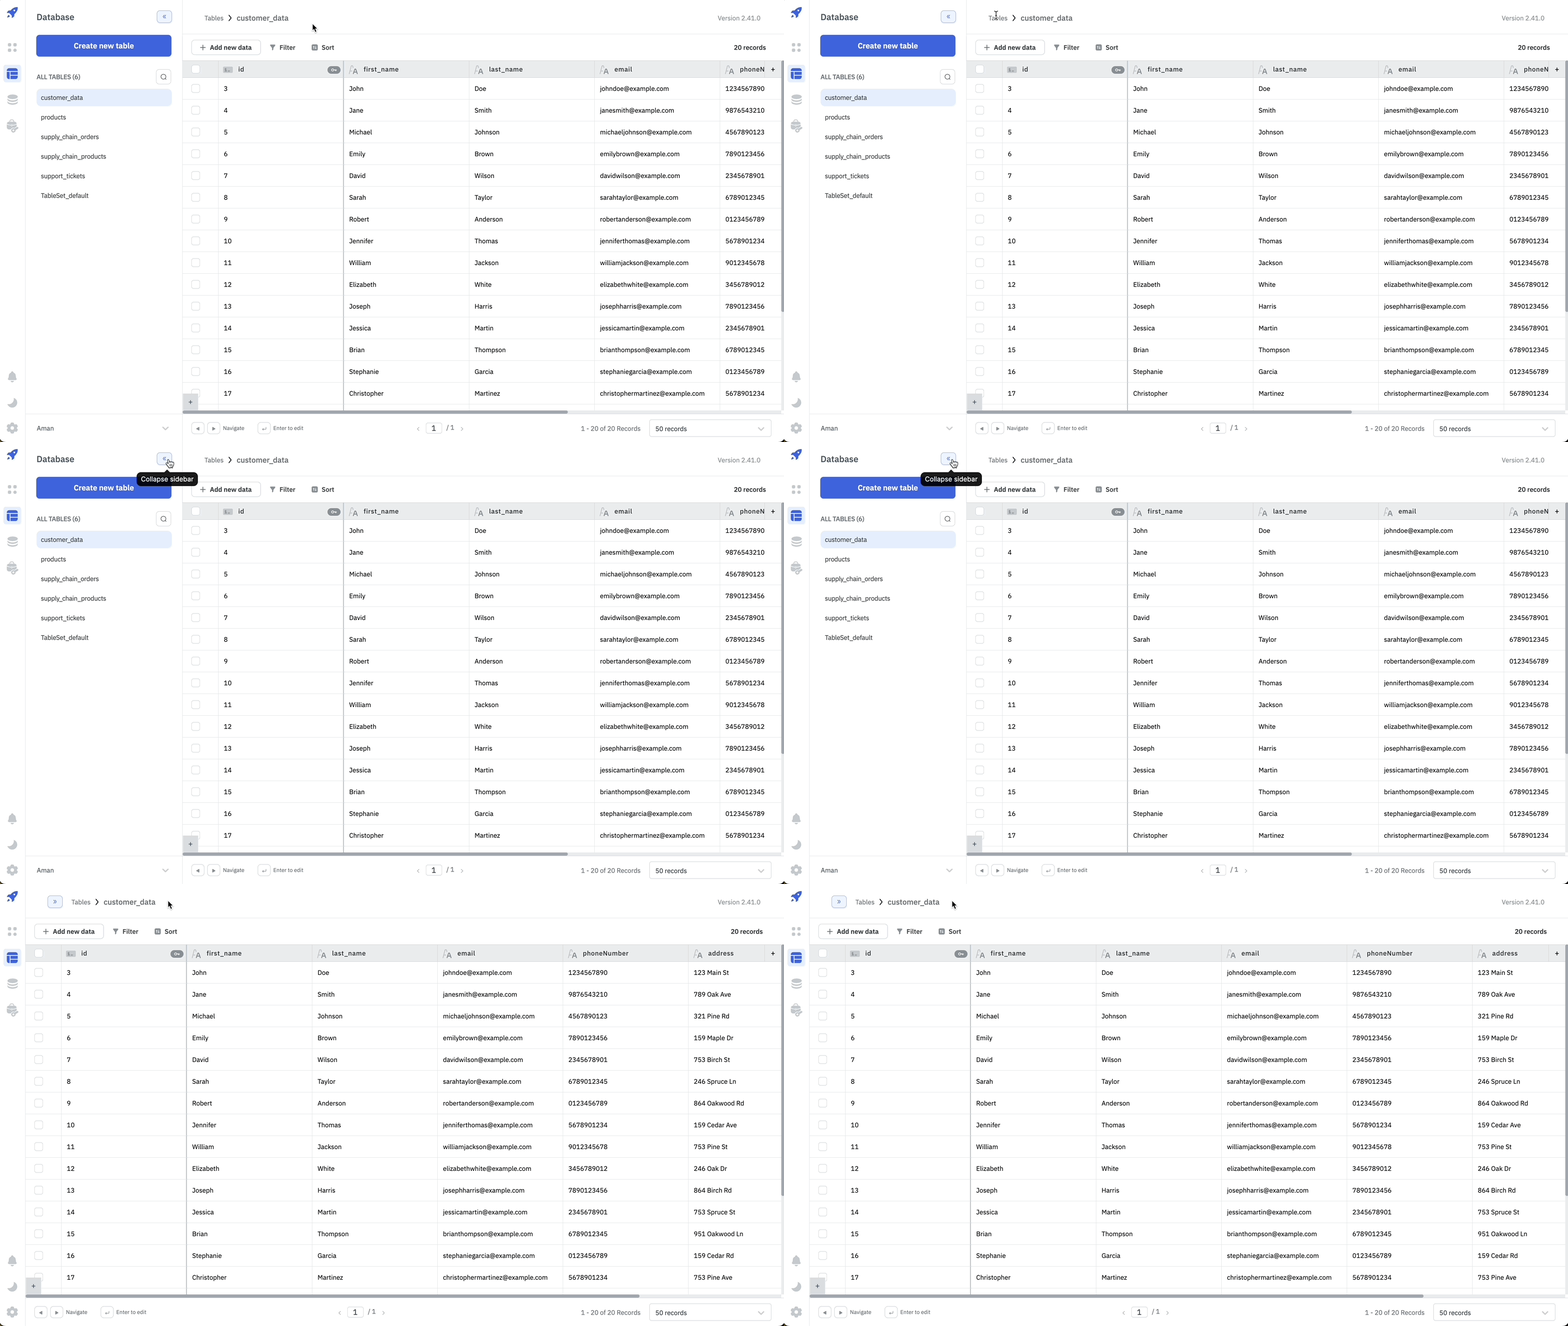
You can manage the ToolJet Database directly from the Database Editor. ToolJet Database organizes the data into tables that can have different structures. All the tables will be listed lexicographically on the left. Click on any of the tables to view the table data.

The sidebar on the left can also be collapsed to give more space to the database editor.
Create New Table
To create a new table in the ToolJet Database:
- Click on the Create New Table button on the top left corner of the Database editor.
- A drawer will open from the right. Enter the details of your new table.
To create a new table, you'll need to:
- Enter a Table name.
- By default, an id column with serial data type is automatically created as the primary key of the table. You can change the primary key to any other column.
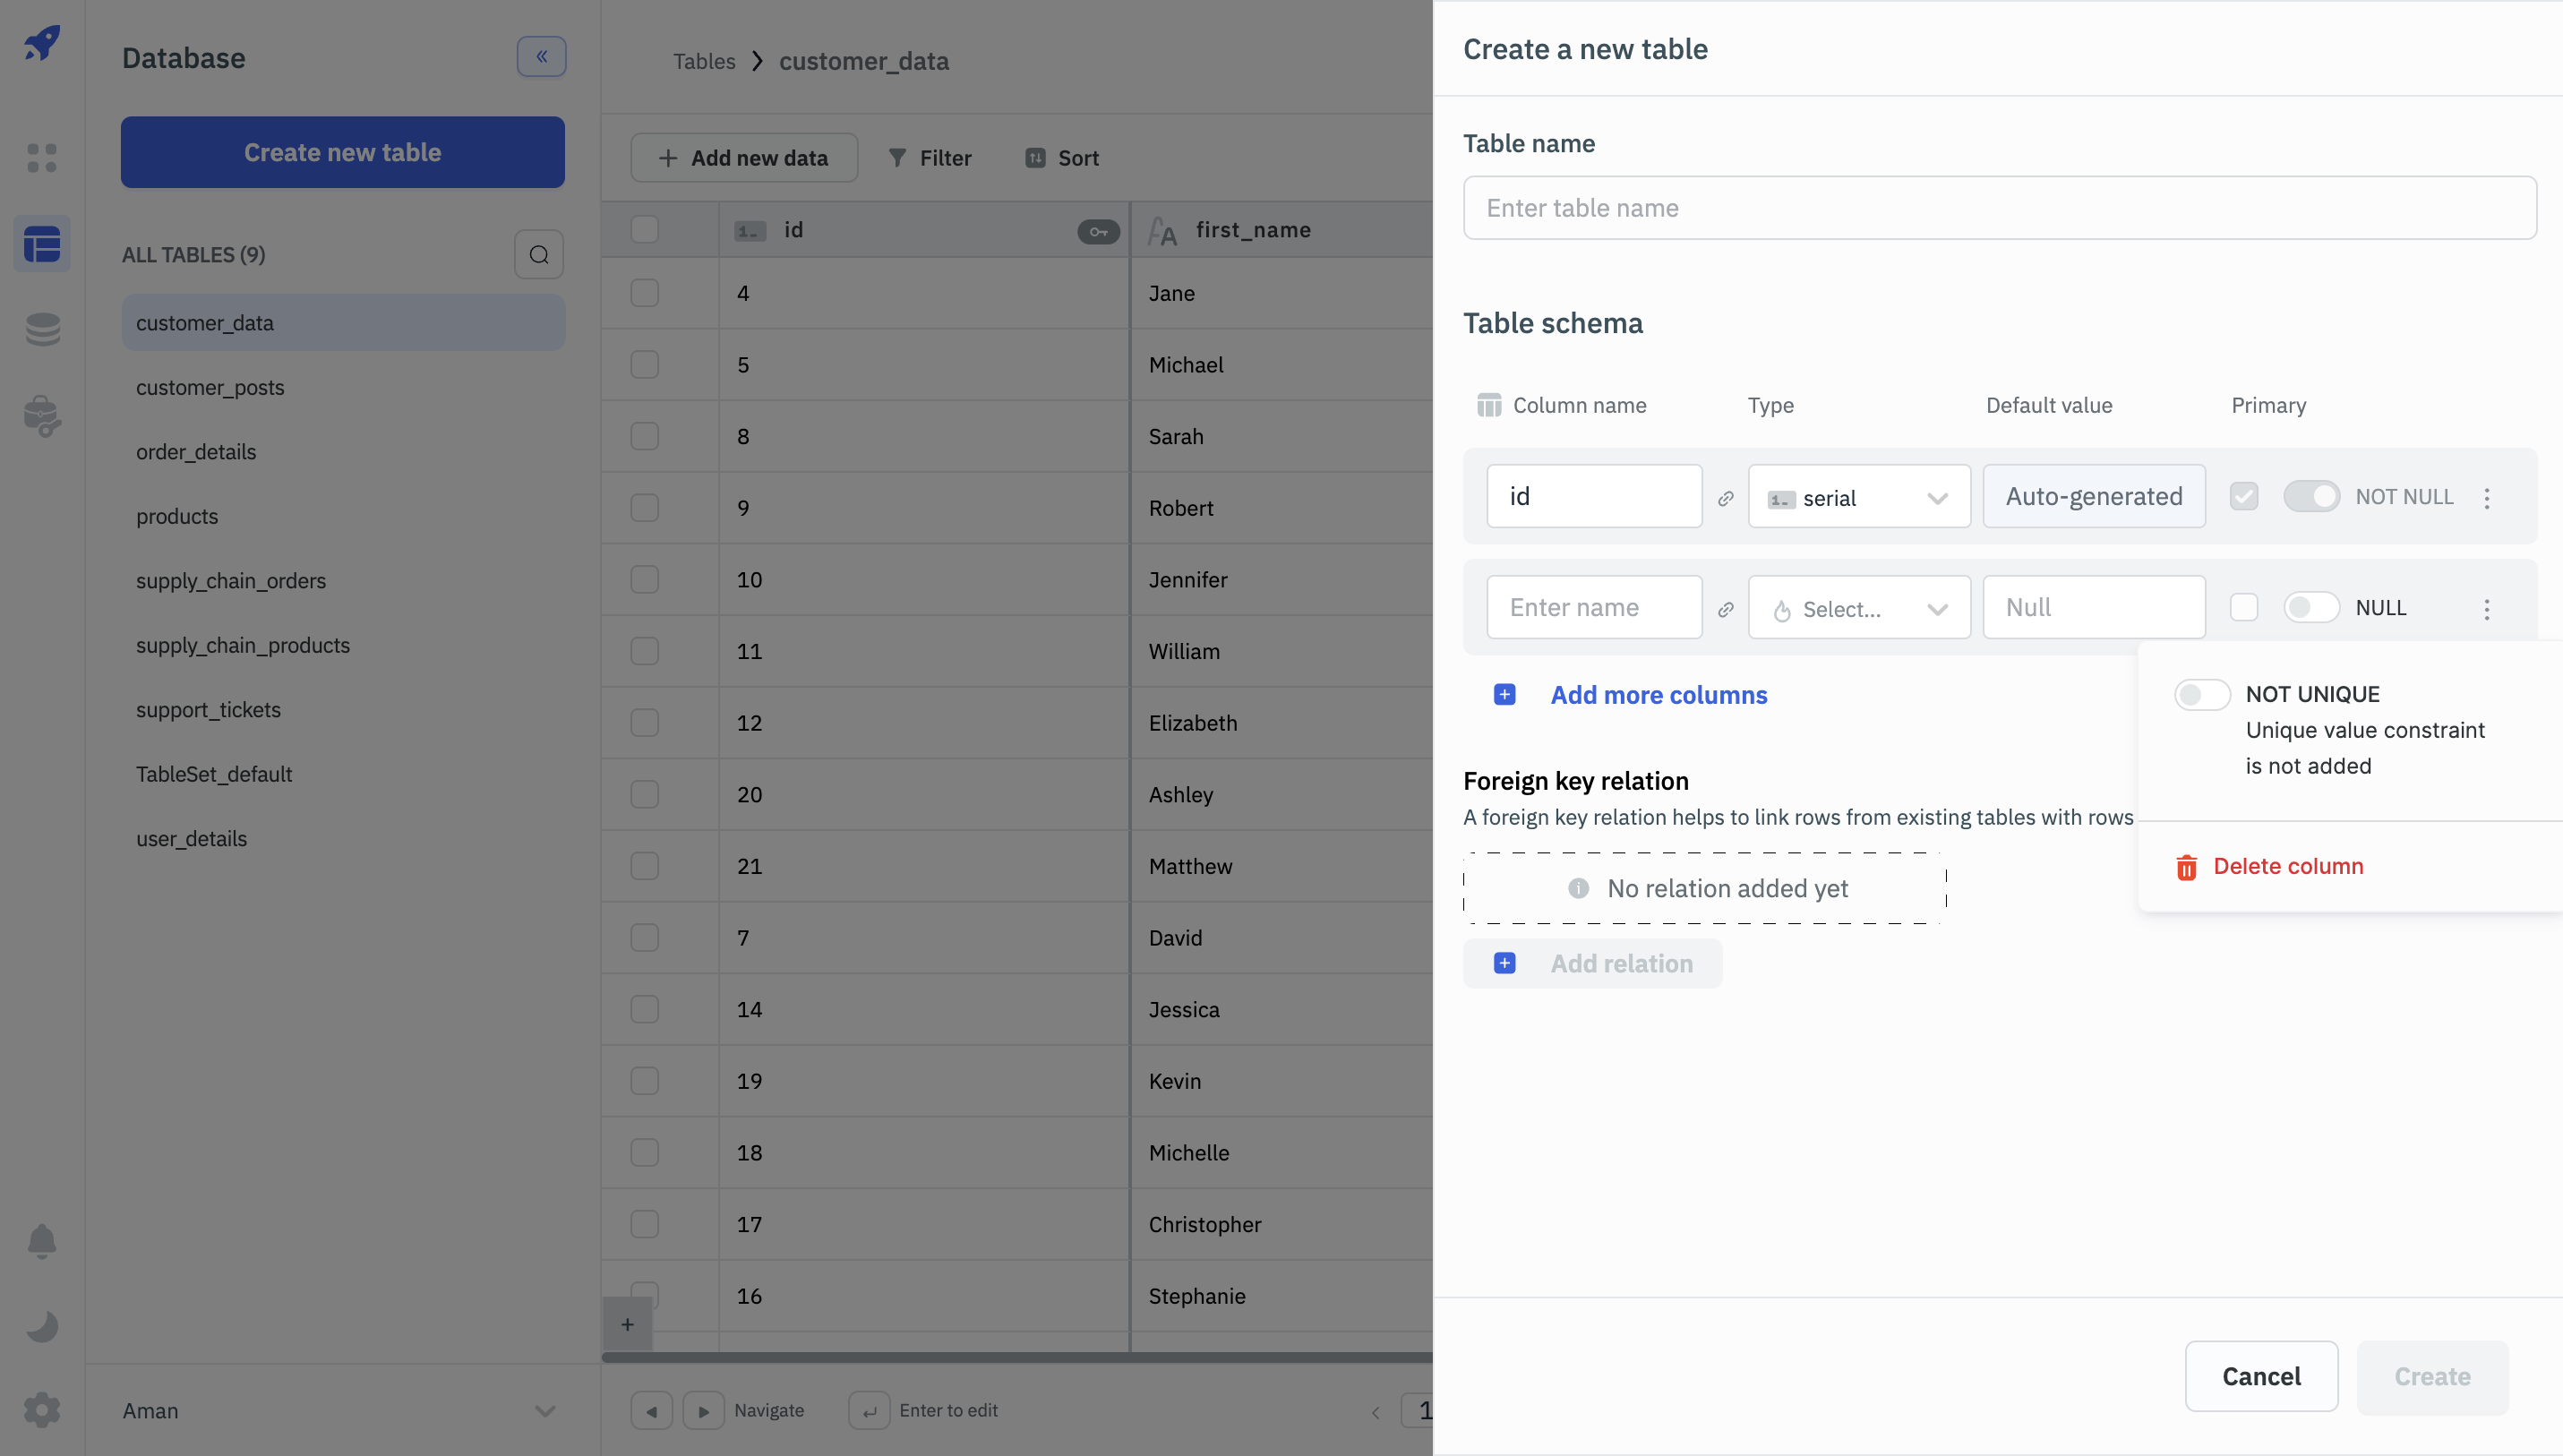
- Add Columns:
| Option | Description |
|---|---|
| Column name | Enter a unique name for the column. |
| Data type | Select the appropriate data type for the column from the dropdown menu. For more information on available data types, see the Supported Data Types section. |
| Default value (optional) | Specify any default value to be assigned to the column. If left blank, the column will allow null values. |
| Primary Key | Check this box to designate the column as the Primary Key. Multiple columns can be selected, creating a composite primary key. |
| NULL/NOT NULL toggle | Use this toggle to determine whether the column should allow null values or require a value. By default, null values are permitted. |
| Unique toggle | Click the kebab menu and toggle the Unique option to add a unique constraint to the column, ensuring all values are distinct. By default, duplicate values are allowed. |
| Foreign Key | Click the + Add Relation button to establish a foreign key relationship, linking this column to a primary key or unique constraint column(s) in another table. |
Column Constraints
ToolJet Database supports several column constraints to maintain data integrity and enforce rules on the data stored in the tables. These constraints include:
Primary Key: The primary key constraint ensures that the values in the designated column(s) are unique and not null across all rows in the table. It serves as a unique identifier for each record in the table.
Foreign Key: The foreign key constraint establishes a link between the data in two tables, ensuring referential integrity. It requires that the values in the foreign key column(s) of the source table match the values in the primary key or unique constraint column(s) of the target table.
- Source Table: The current table on which constraint is to be added.
- Target Table: The table that contains the column to be referenced.
Unique: The unique constraint ensures that the values in the designated column(s) are unique across all rows in the table, allowing for null values.
Not Null: The not null constraint ensures that the designated column(s) cannot have null values, requiring a value for every row in the table.
For a detailed overview of which constraints are allowed for each data type, refer to the Permissible Constraints per Data Type table.
Adding and Modifying Data
Add New Data
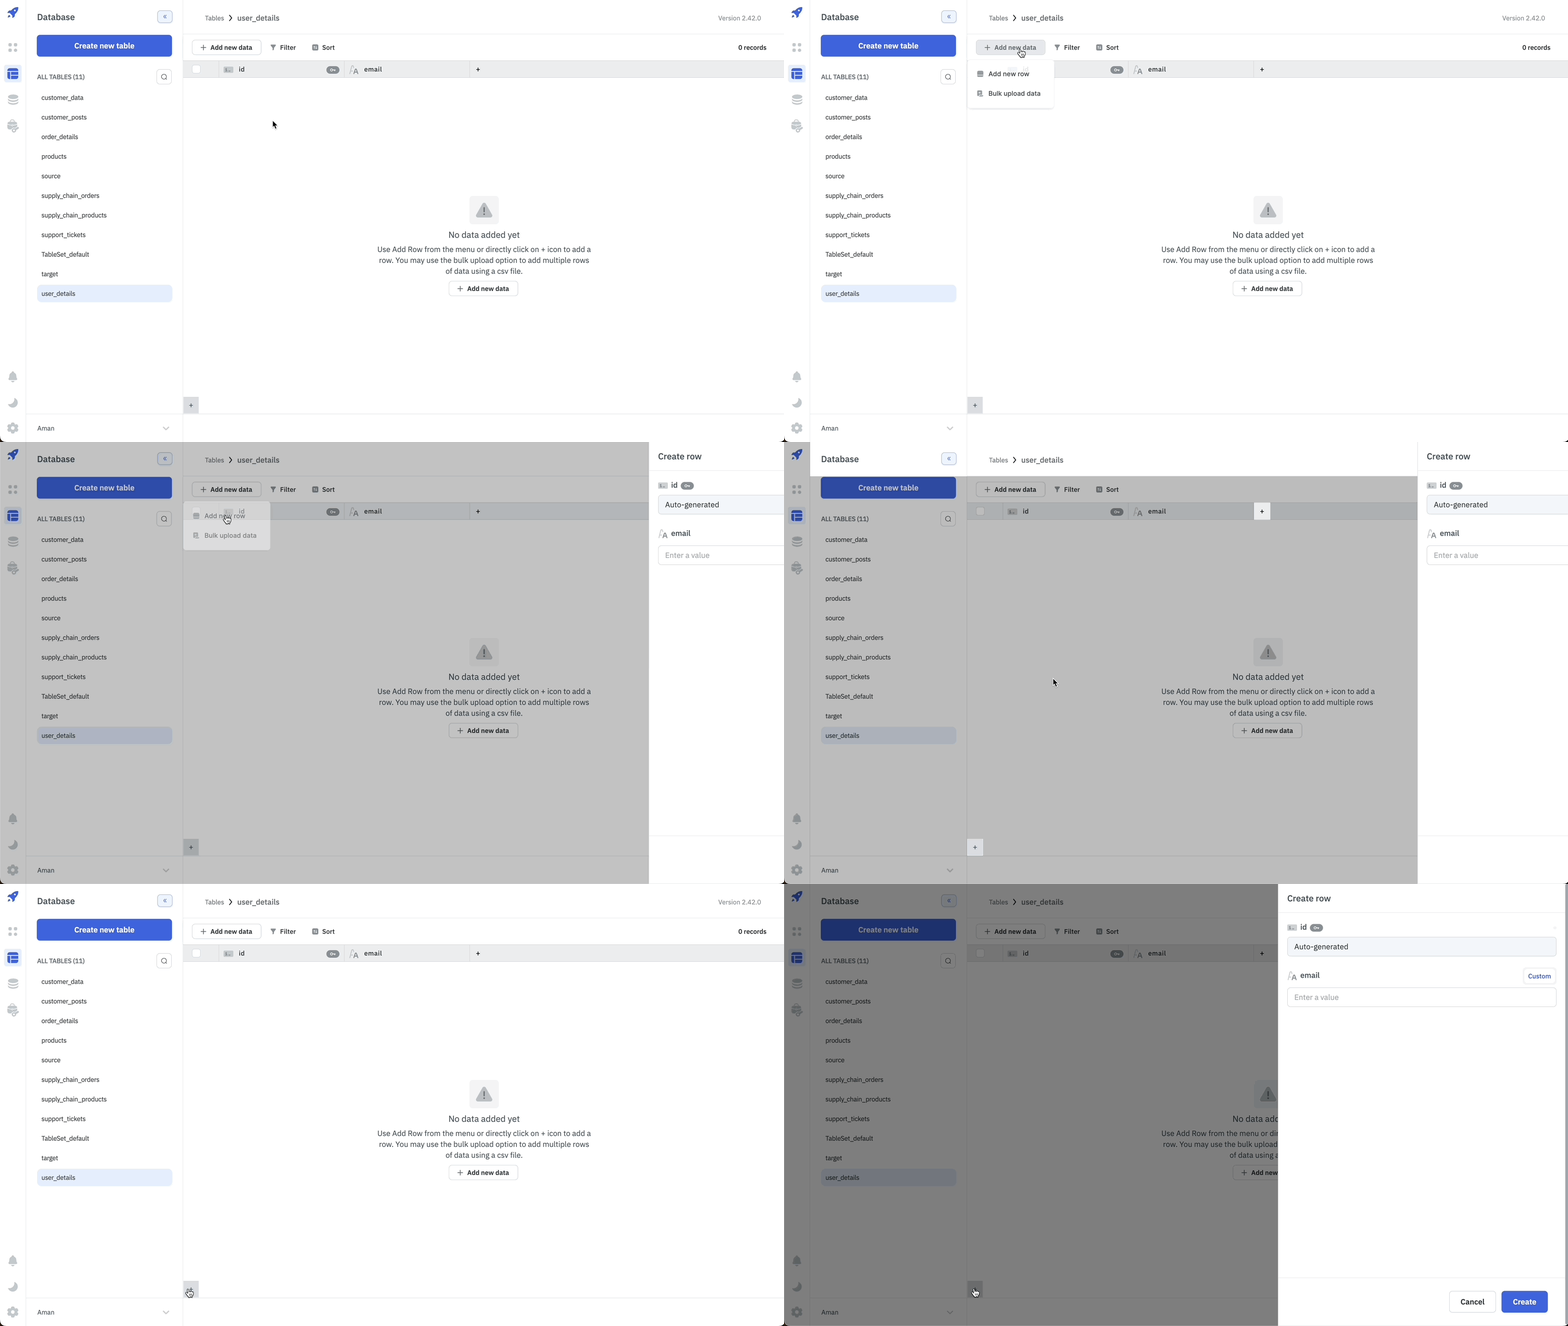
The Add new data button on the top of the table editor allows you to add data to the table. You can either Add new row or Bulk upload data to add the data to the table.

Add New Row
To add a new row to a table, either click on the Add new data button on top and then select the Add new row option or click on the + button present at the bottom left.
A drawer from the right will open up where the values for the new row can be provided.
Edit Row
To edit a row, hover on the row that you want to edit and the expand icon will appear next to the checkbox of that row. Click on the Expand icon to open the drawer and edit the row.

Edit a Cell
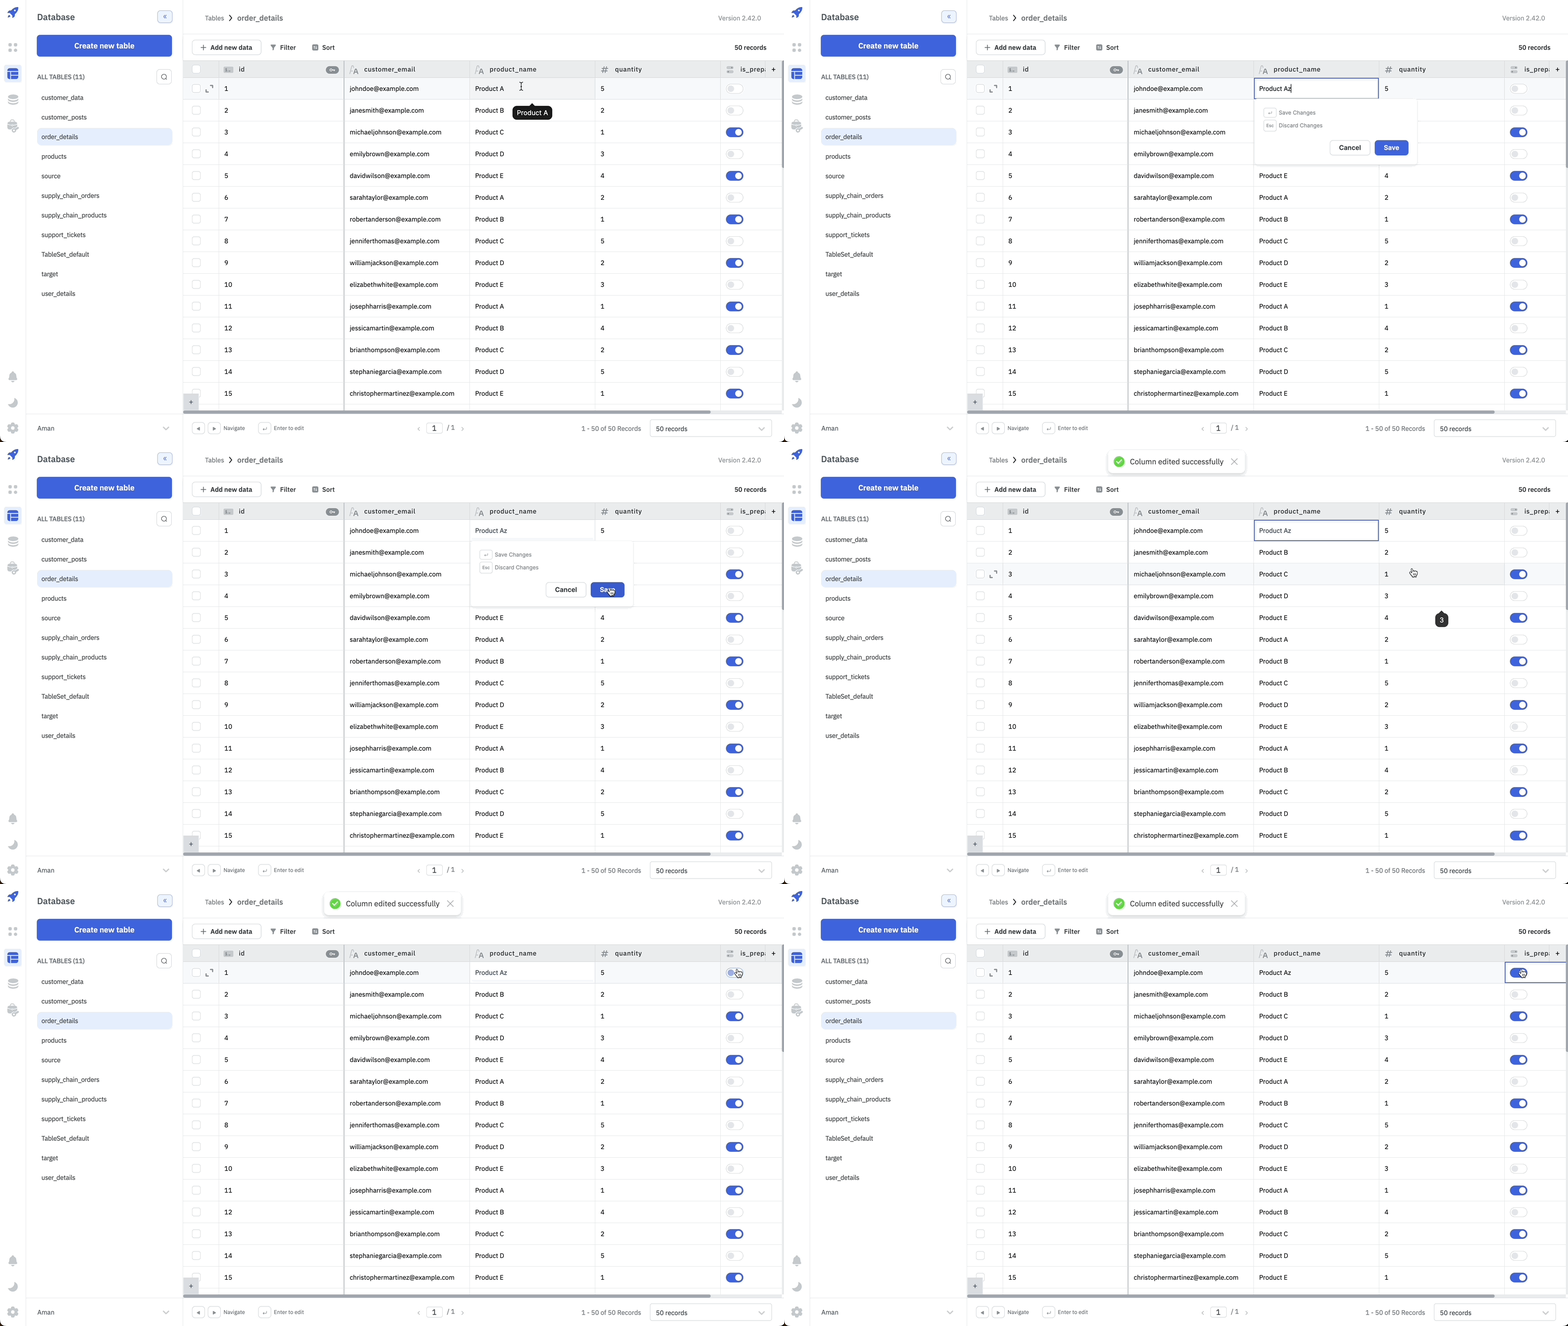
- Double-click on the cell you want to edit.
- Enter the new value.
- Click on the Save button or press Enter to save the changes.
- For boolean-type columns, use the toggle to change the value.
Bulk Upload Data
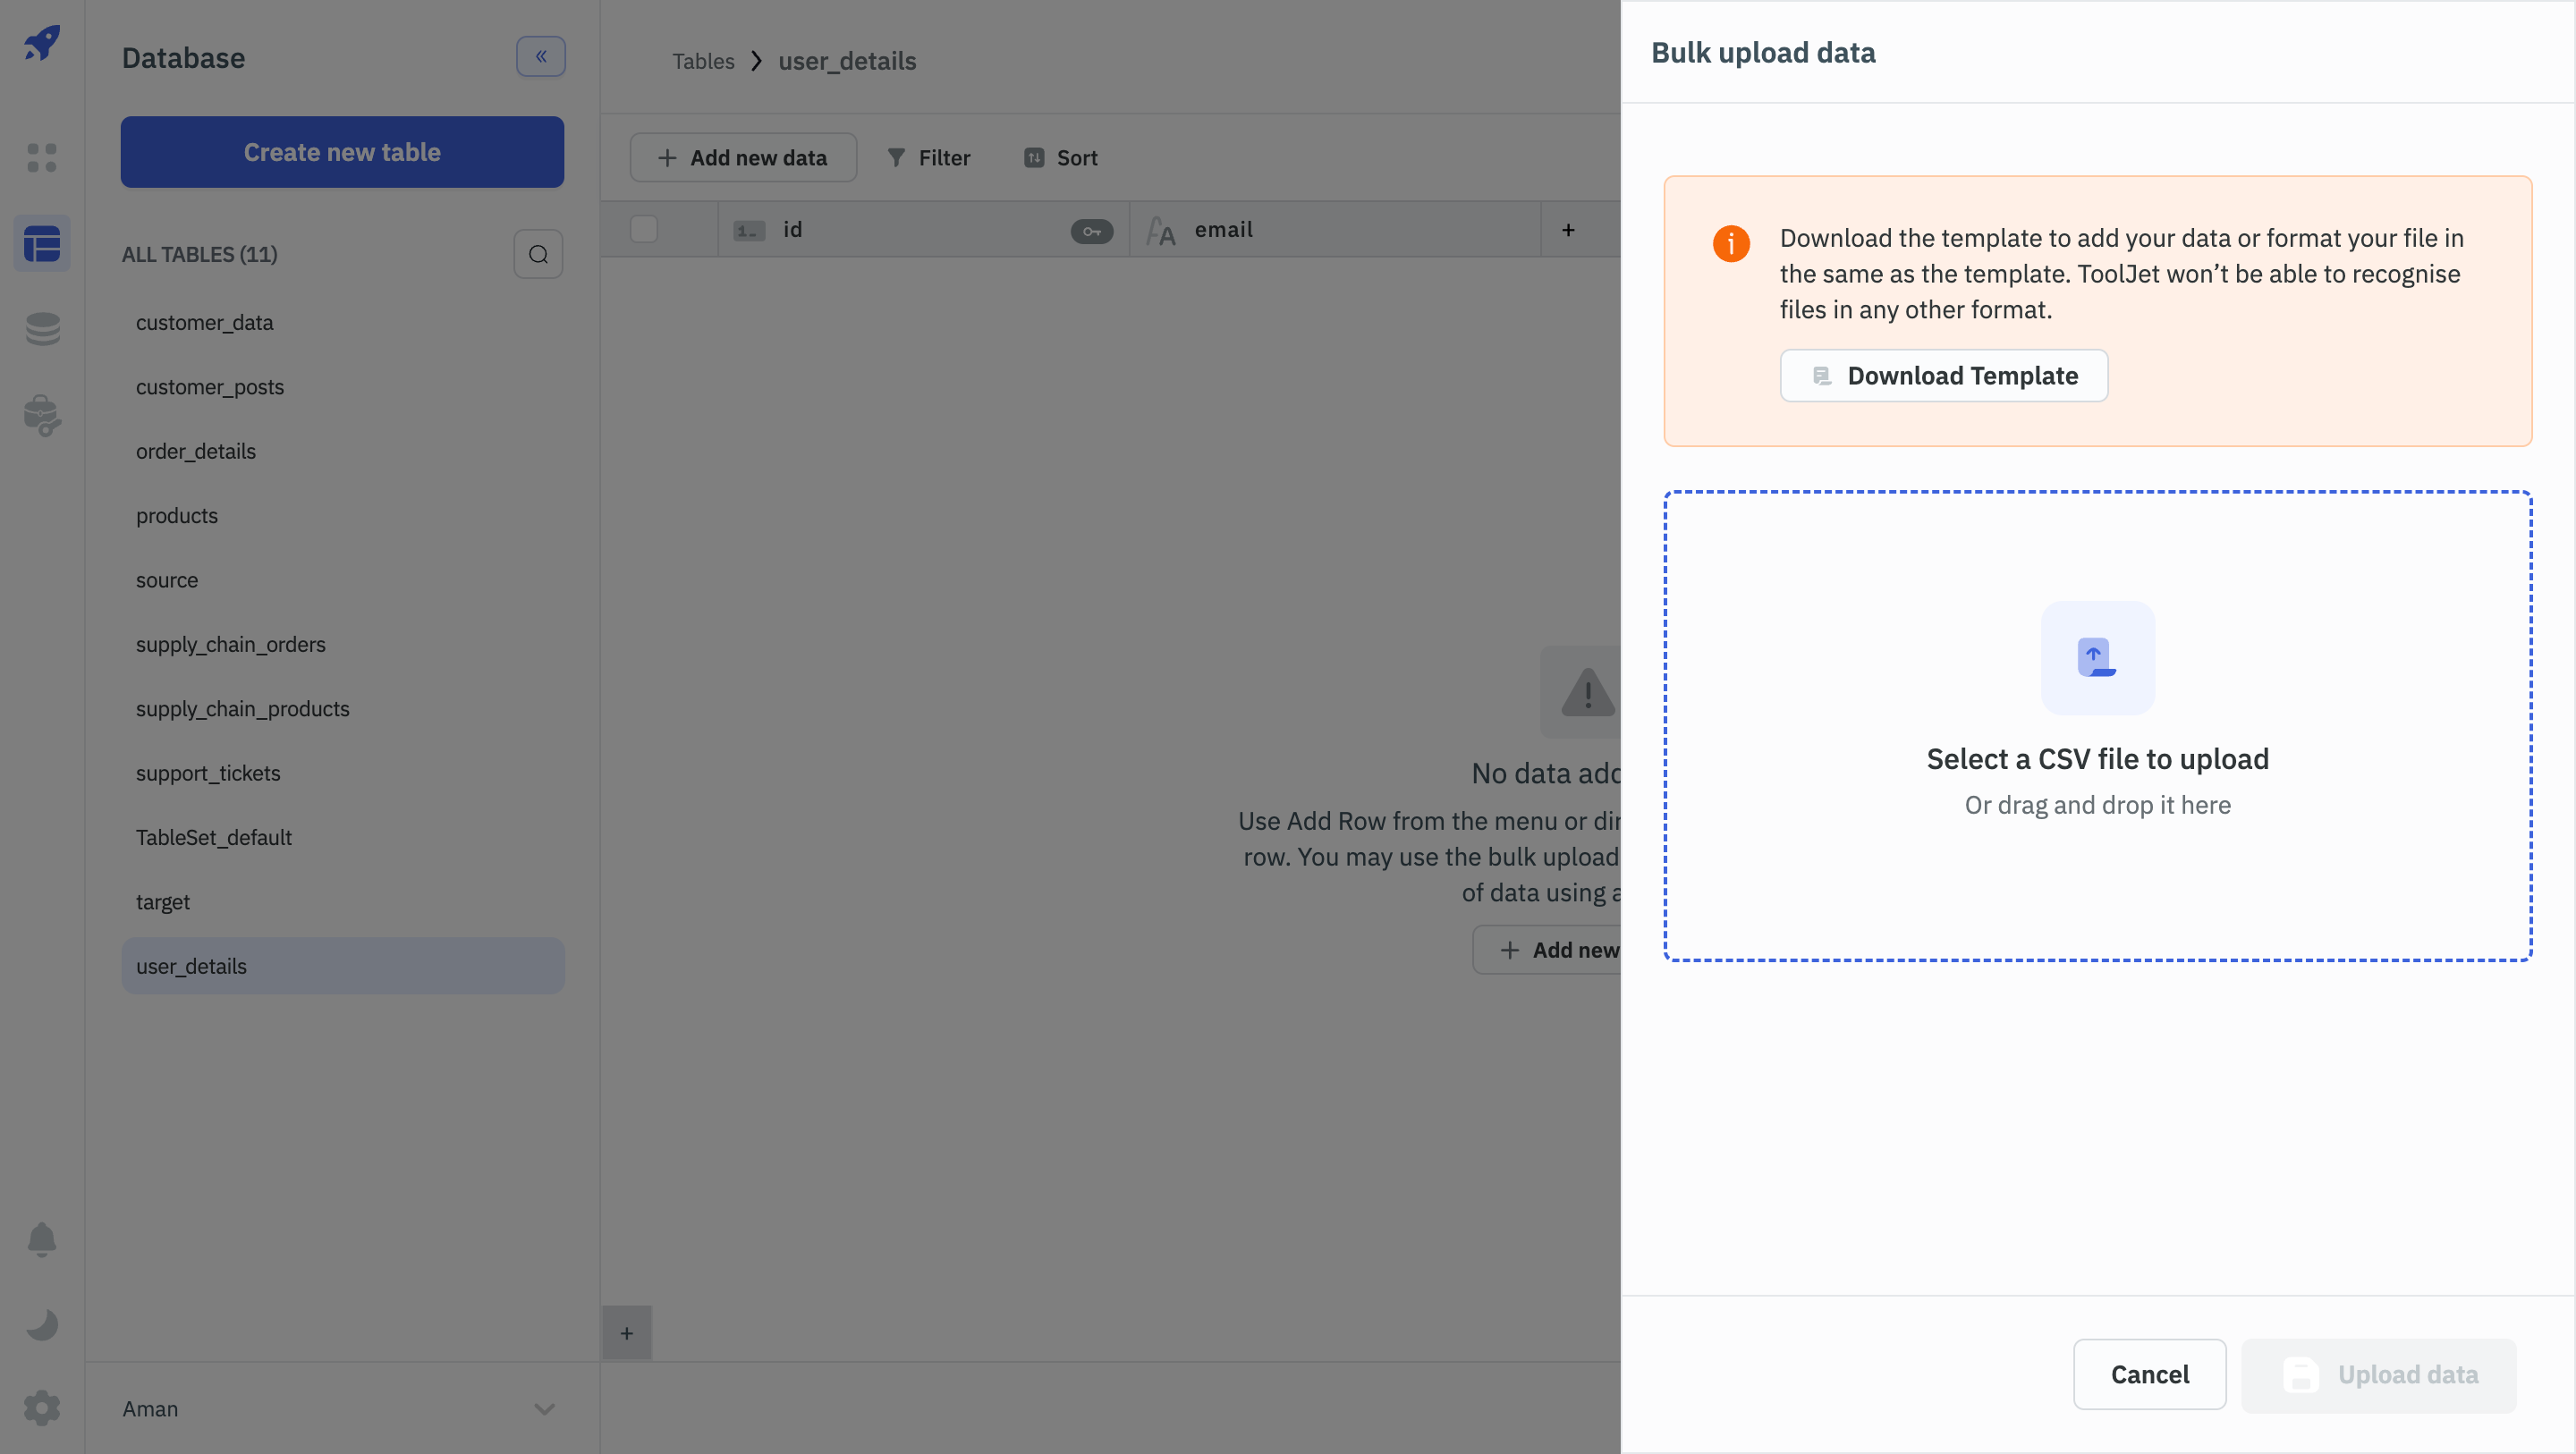
You can bulk upload data to the ToolJet database by clicking the Bulk upload data button at the top of the database editor. On clicking the button, a drawer will open from the right from where you can upload a CSV file. This file is used to insert records onto the table. If data for the id column is missing, it will insert a new record with the row data; if the id is present, it will update the corresponding record with the row data.
From the drawer, users can download the template CSV file in which they can enter the data to be uploaded to the ToolJet database's table or format their CSV file in the same way as the template file.
Once the CSV file is ready, click on the file picker to select the file or drag and drop the file in the file picker. Now, click on the Upload data button to upload the data to the ToolJet database.
Requirements:
- The data types of columns in the CSV file should match those in the ToolJet database table.
- The
idcolumn with aserialdata type should not contain duplicate values. - All the column constraints should be satisfied. For example, if a column is marked as
Unique, it should not contain duplicate values in the CSV file.
Limitations:
- There is a limit of 1000 rows per CSV file that can be uploaded to the ToolJet database.
- The CSV file should not exceed 2MB in size.
You can overcome the above limitations in the self-hosted version by adding the following environment variables:
TOOLJET_DB_BULK_UPLOAD_MAX_ROWS: Specifies the maximum number of rows that can be uploaded. The default is 1,000 rows.TOOLJET_DB_BULK_UPLOAD_MAX_CSV_FILE_SIZE_MB: Specifies the maximum CSV file size for bulk uploads. The default maximum size is 5 MB.
Delete Records
To delete one or many records/rows, click the checkbox to the right of the record or records you want to delete. As soon as you select a single record, the button to delete the record will appear on the top, click on the Delete record button to delete the selected records.

Filter
Add Filter
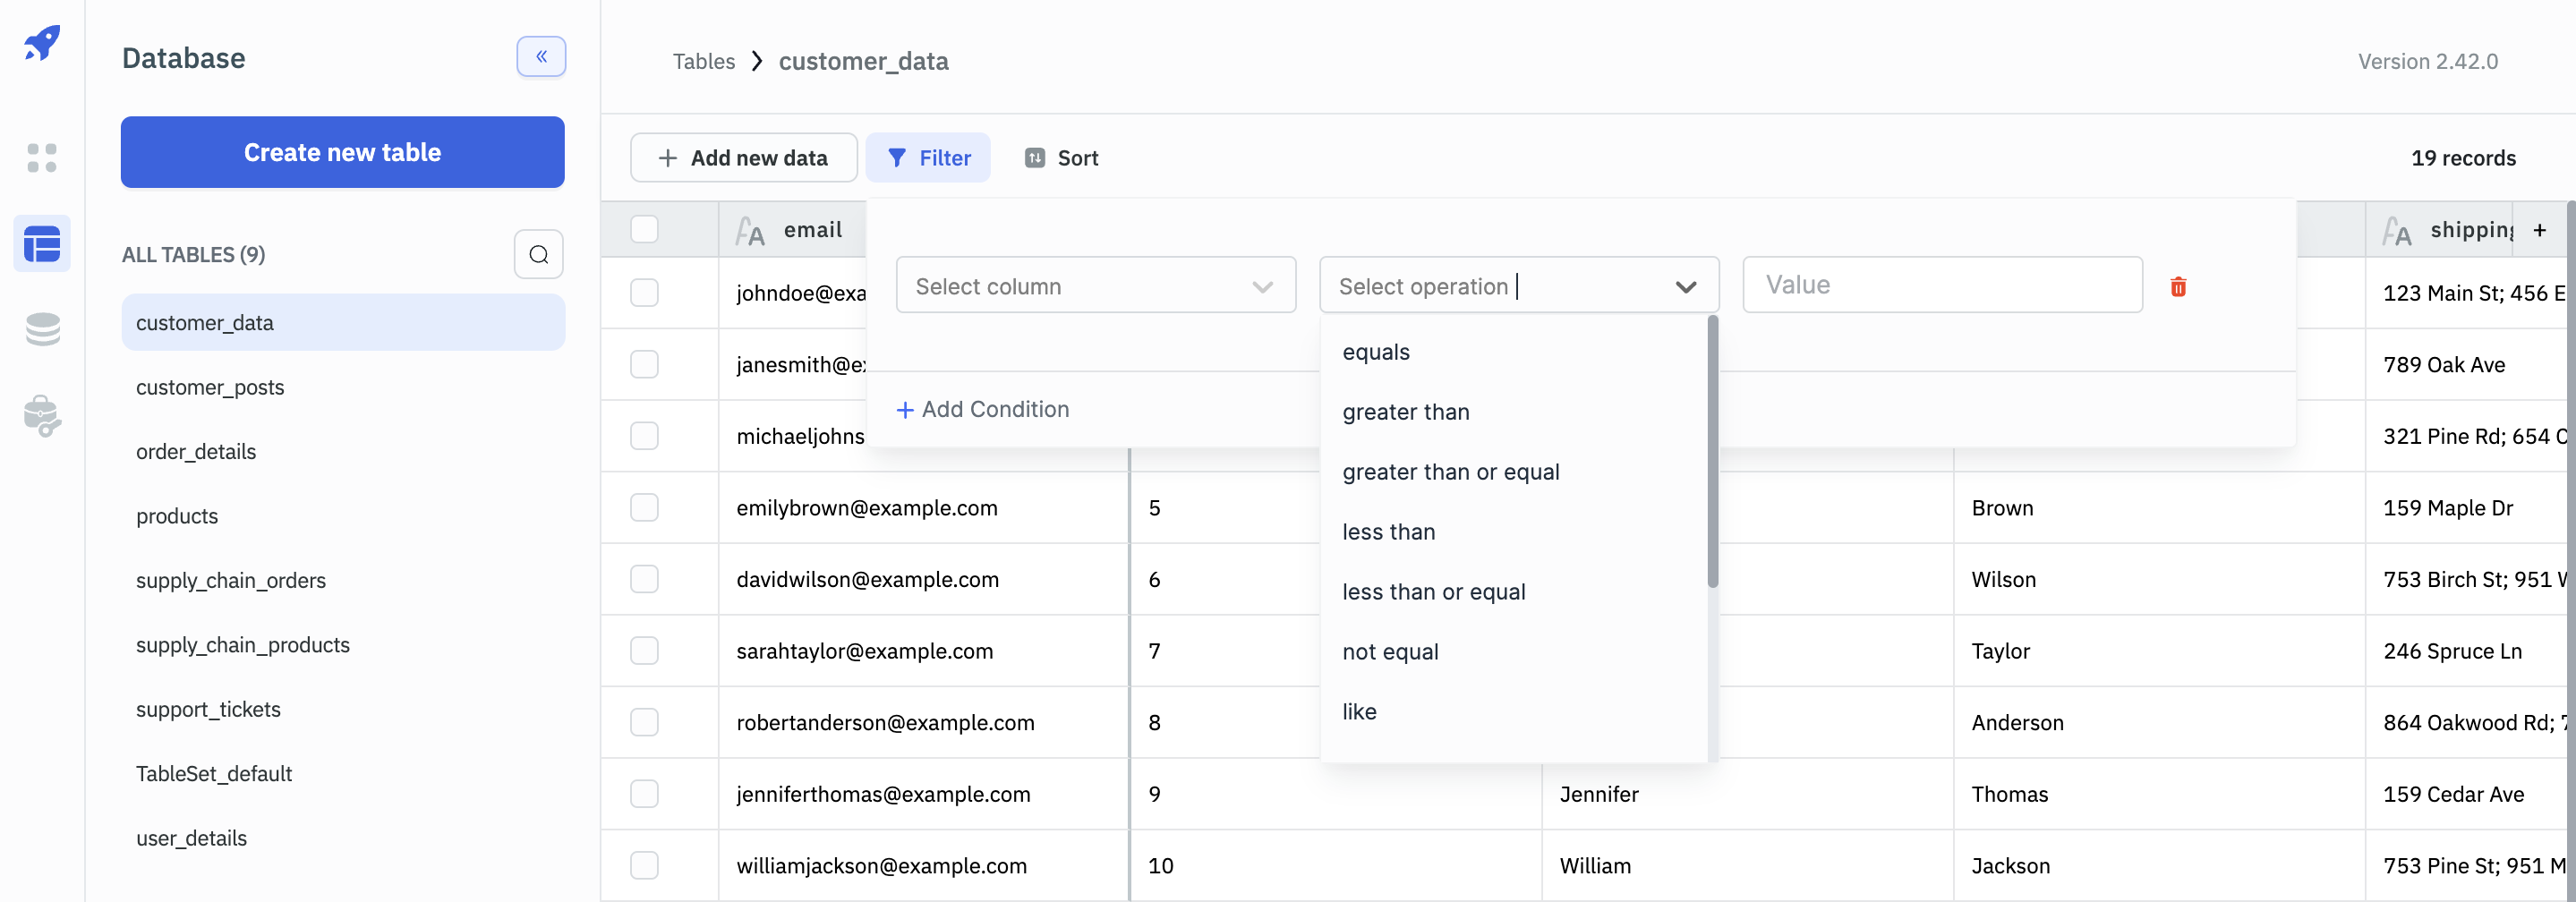
You can add as many filters as you want into the table by clicking on the Filter button present on the top of the database editor.
Adding a filter on the table data
- Select a column from the Columns dropdown.
- Choose an operation.
- Enter a value for the selected operation.
Available operations are:
| Operation | Description |
|---|---|
| equals | This operation is used to check if the value of the column is equal to the value entered in the input field. |
| greater than | This operation is used to check if the value of the column is greater than the value entered in the input field. |
| greater than or equal | This operation is used to check if the value of the column is greater than or equal to the value entered in the input field. |
| less than | This operation is used to check if the value of the column is less than the value entered in the input field. |
| less than or equal | This operation is used to check if the value of the column is less than or equal to the value entered in the input field. |
| not equal | This operation is used to check if the value of the column is not equal to the value entered in the input field. |
| like | This operation is used to check if the value of the column is like the value entered in the input field. This operation is case-sensitive. ex: ToolJet will not match tooljet |
| ilike | This operation is used to check if the value of the column is like the value entered in the input field. This operation is case-insensitive. ex: ToolJet will match tooljet |
| match | This operation is used to check if the value of the column is like the value entered in the input field. This operation is case-sensitive. ex: ToolJet will not match tooljet. This operation uses regular expressions. ex: ^ToolJet$ will match ToolJet but not ToolJet Inc. |
| imatch | This operation is used to check if the value of the column is like the value entered in the input field. This operation is case-insensitive. This operation uses regular expressions. ex: ^ToolJet$ will match ToolJet but not ToolJet Inc. |
| in | This operation is used to check if the value of the column is in the list of values entered in the input field. ex: (1,2,3) |
| is | This operation is used to check if the value of the column is equal to the value entered in the input field. This operation is used for boolean data types. |
Clear Filter
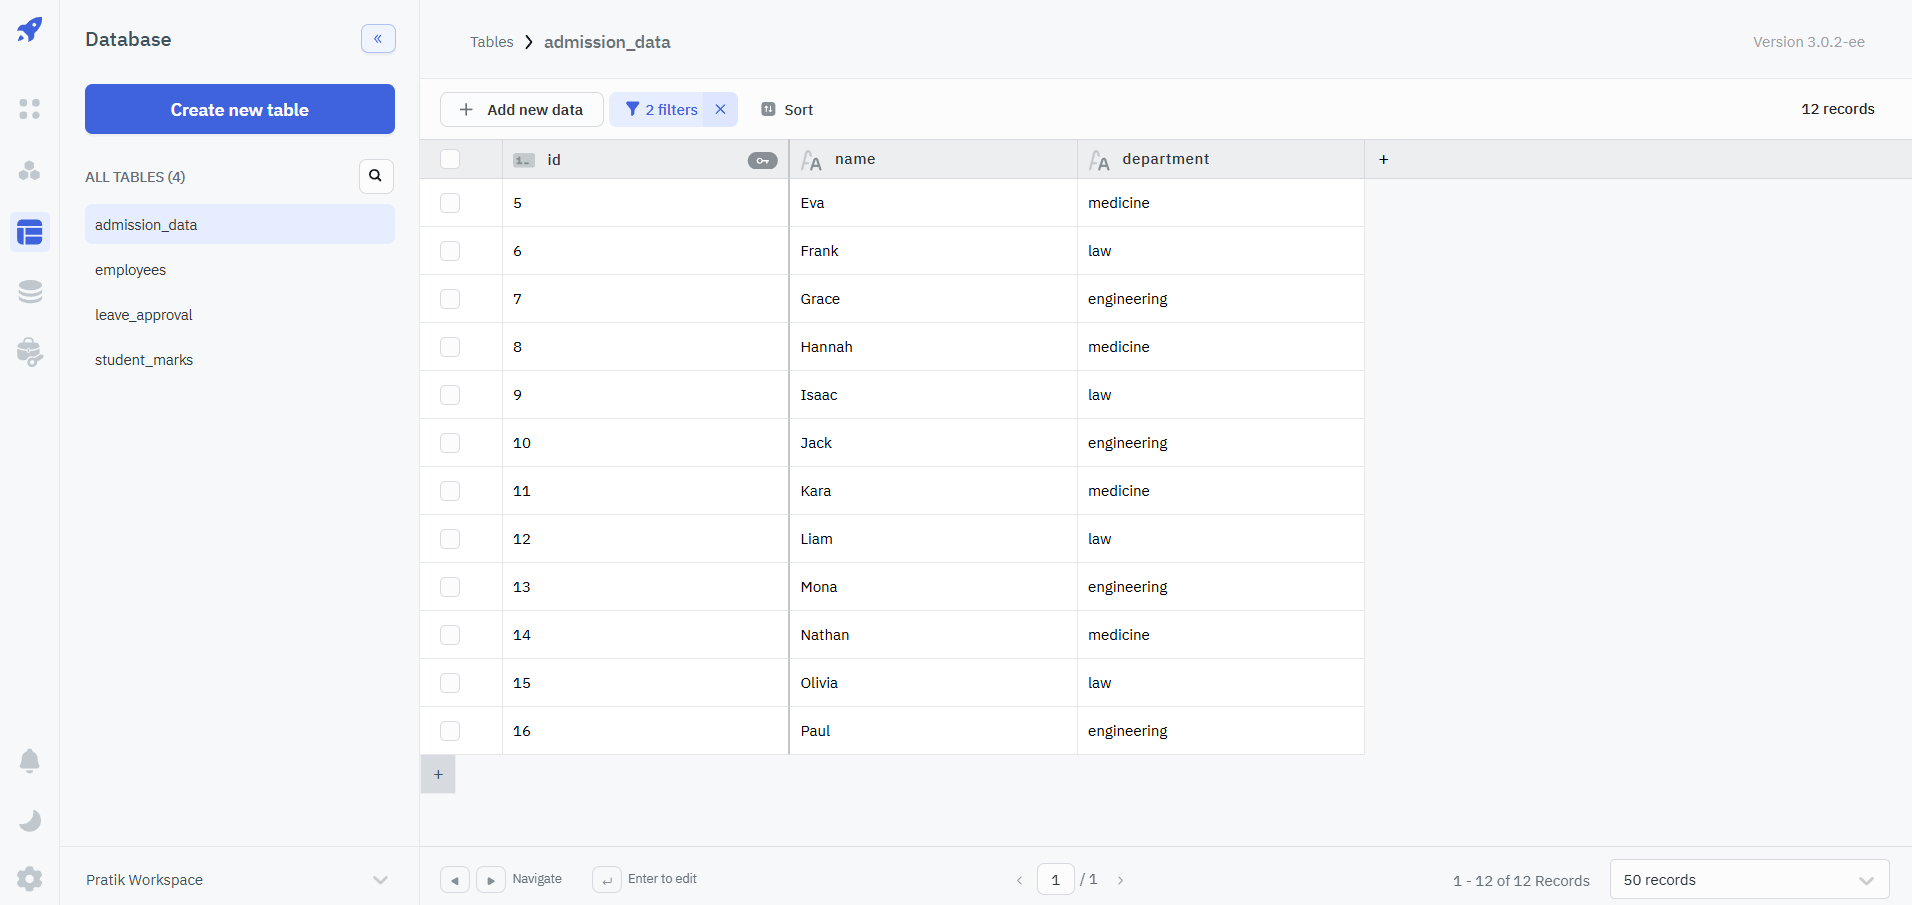
You can either delete filters individually or clear all the filters together.
Sort
To sort the table data, click on the Sort button on top, select a column from the dropdown, and then choose an order ascending or descending.
