Overview
ToolJet Workflows enable users to create complex, data-centric automations using a visual, node-based interface. They are designed to streamline repetitive tasks, organize multi-step operations, and make internal tools smarter and more efficient.
Use Cases
- Sending automated emails or notifications based on user actions.
- Updating multiple databases or APIs after a single event.
- Processing approvals, ticketing, or form submissions automatically.
- Orchestrating complex internal processes across tools and teams.
Triggering Workflows
Workflows can be triggered in the following ways:
- From ToolJet Applications – Trigger workflows via in-app actions, such as button clicks or form submissions.
- Using Webhooks – Start workflows by receiving HTTP requests from external systems.
- Using Scheduler – Automate recurring tasks at specified intervals.
Adding Logic
Enhance your workflows with logic nodes to handle different scenarios:
- If-Else Node – Create conditional branches based on your data.
- Loop Node – Iterate over lists or datasets to perform repeated actions.
You can configure workflow timeout and memory limits using environment variables. Refer to this guide for more details.
Create Your First Workflow
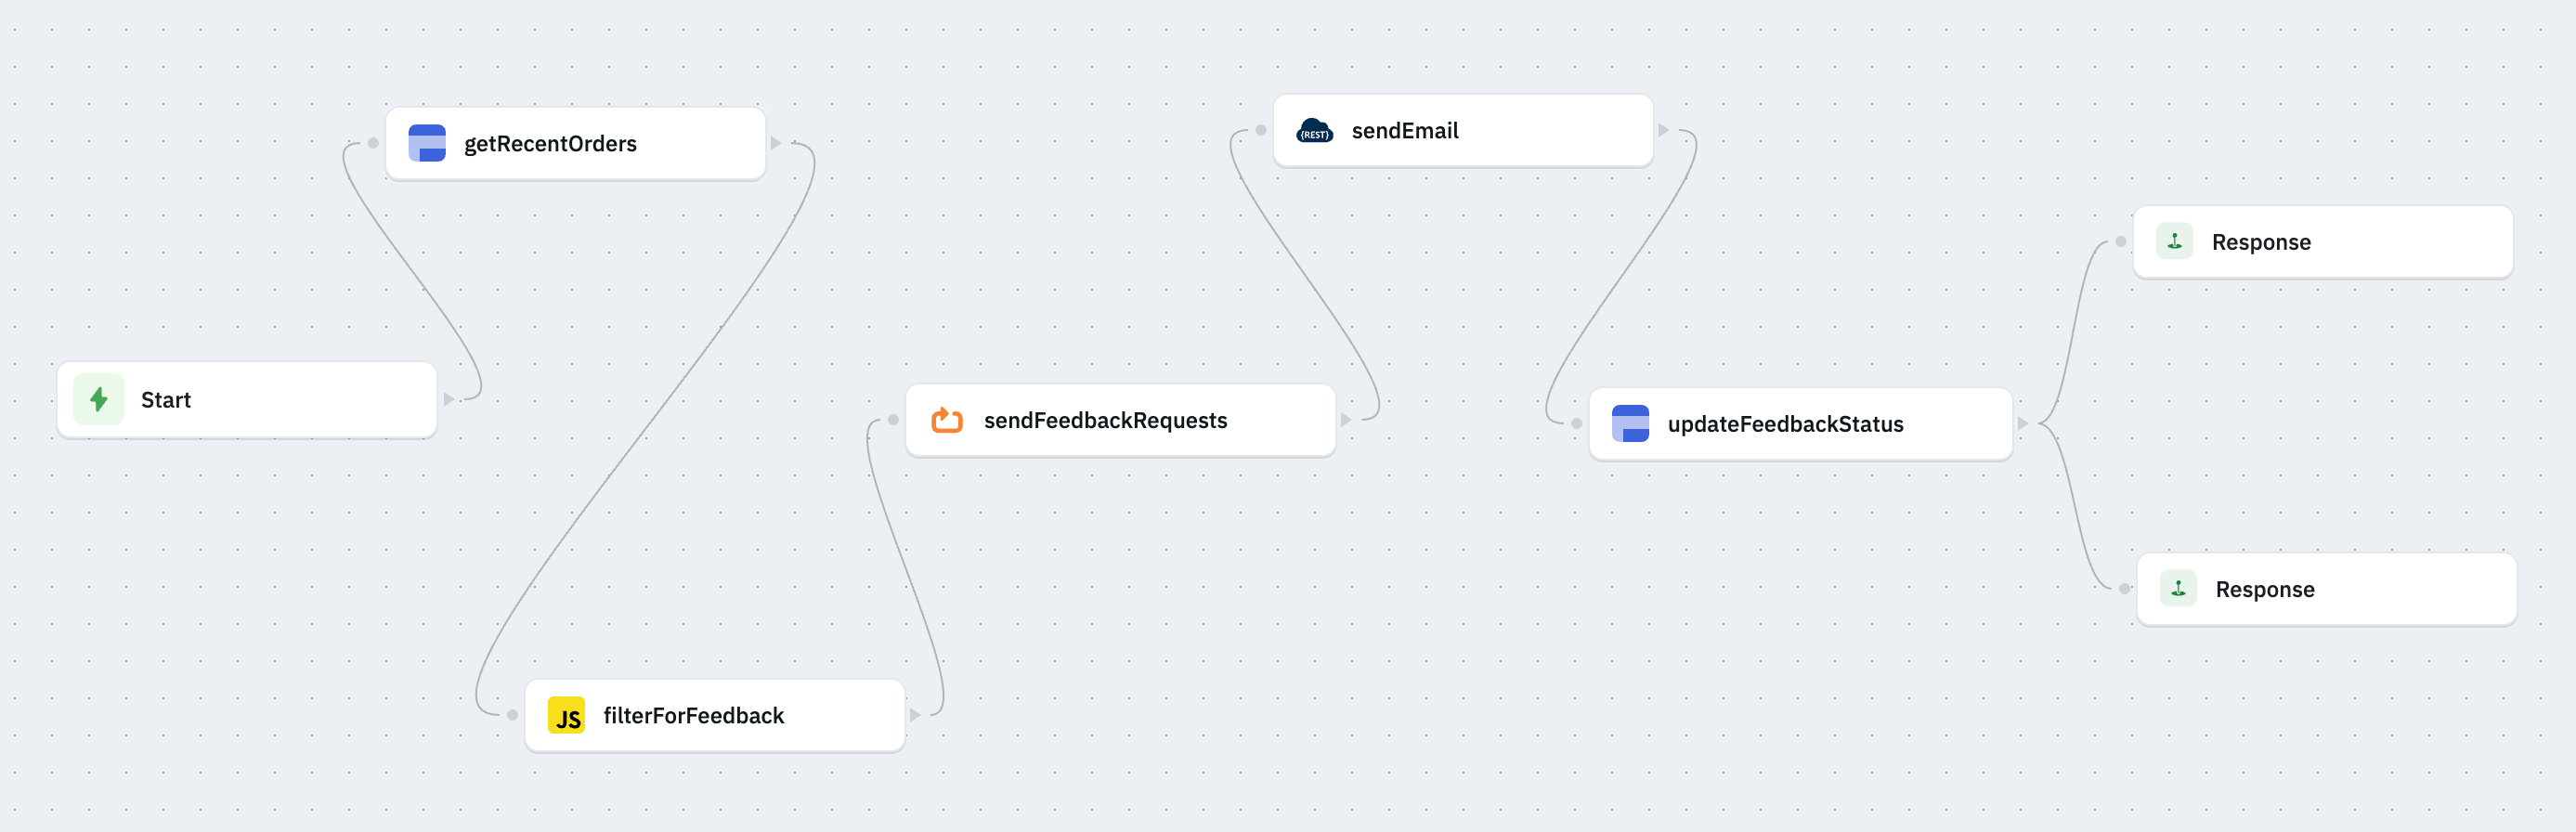
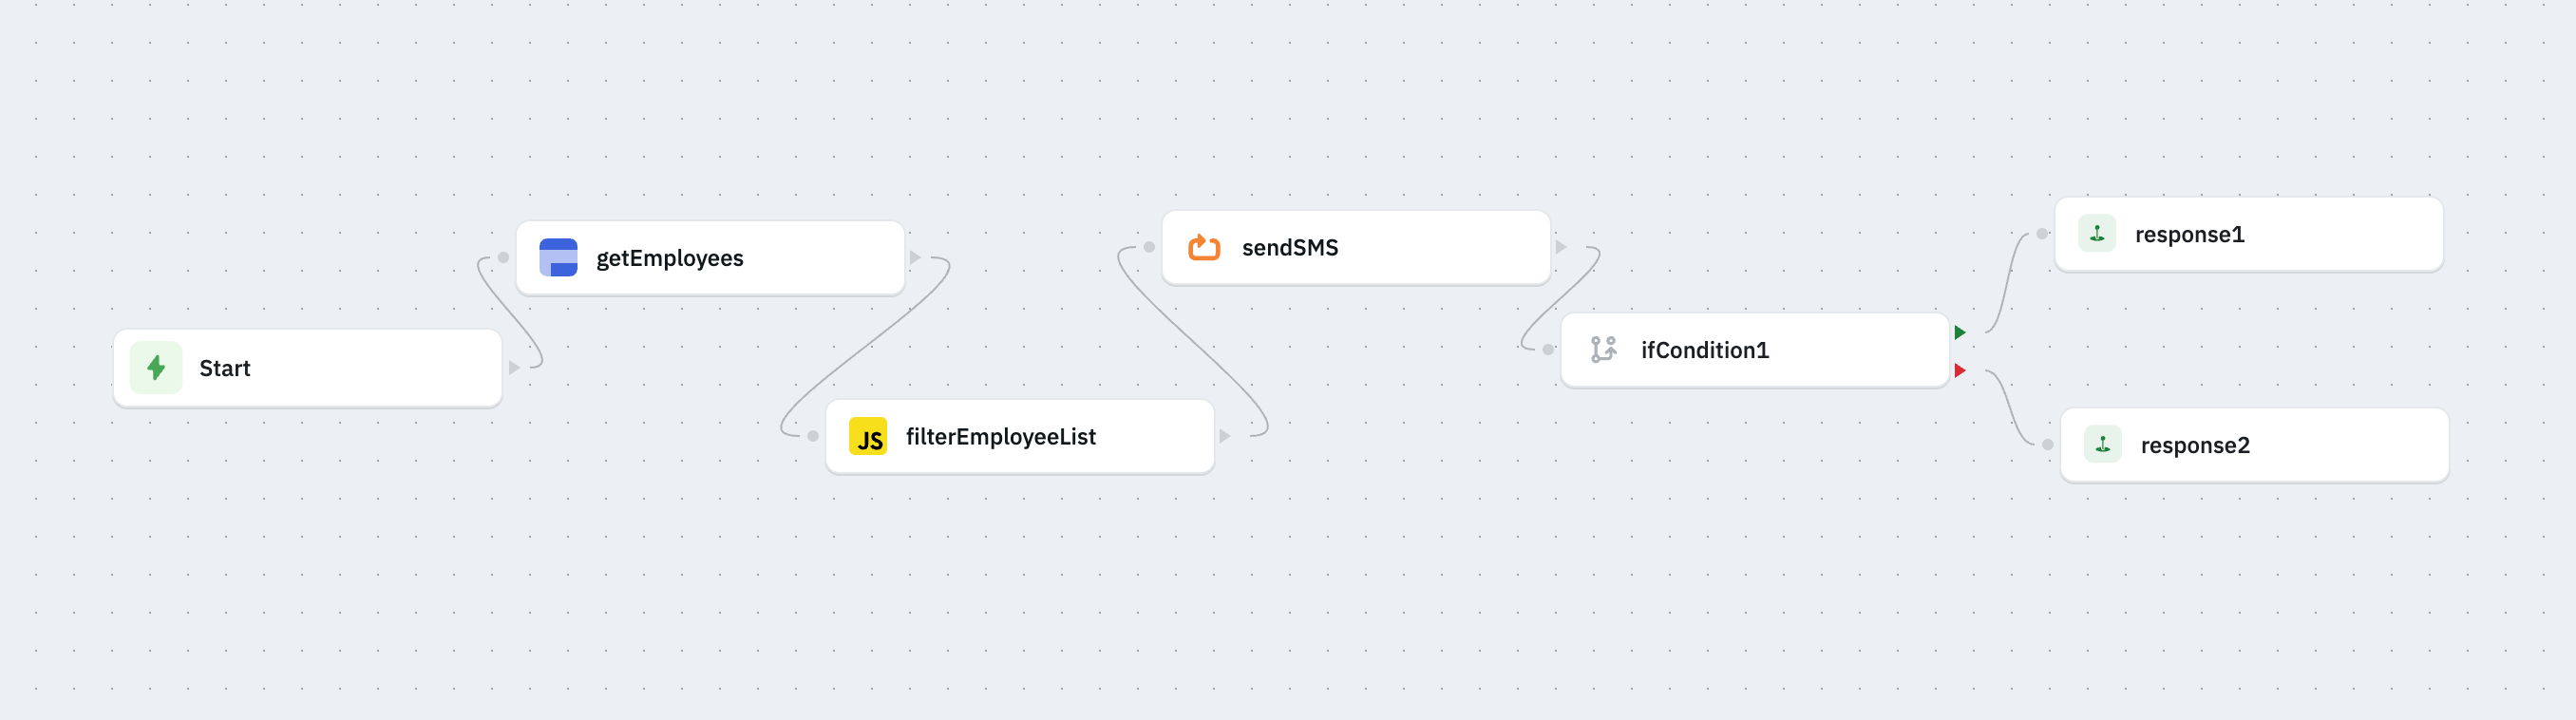
This guide will walk you through creating your first workflow in ToolJet. You'll learn how to use the Workflow builder to create a simple automated process that fetches data from a database, filters it, and sends notifications based on certain conditions.
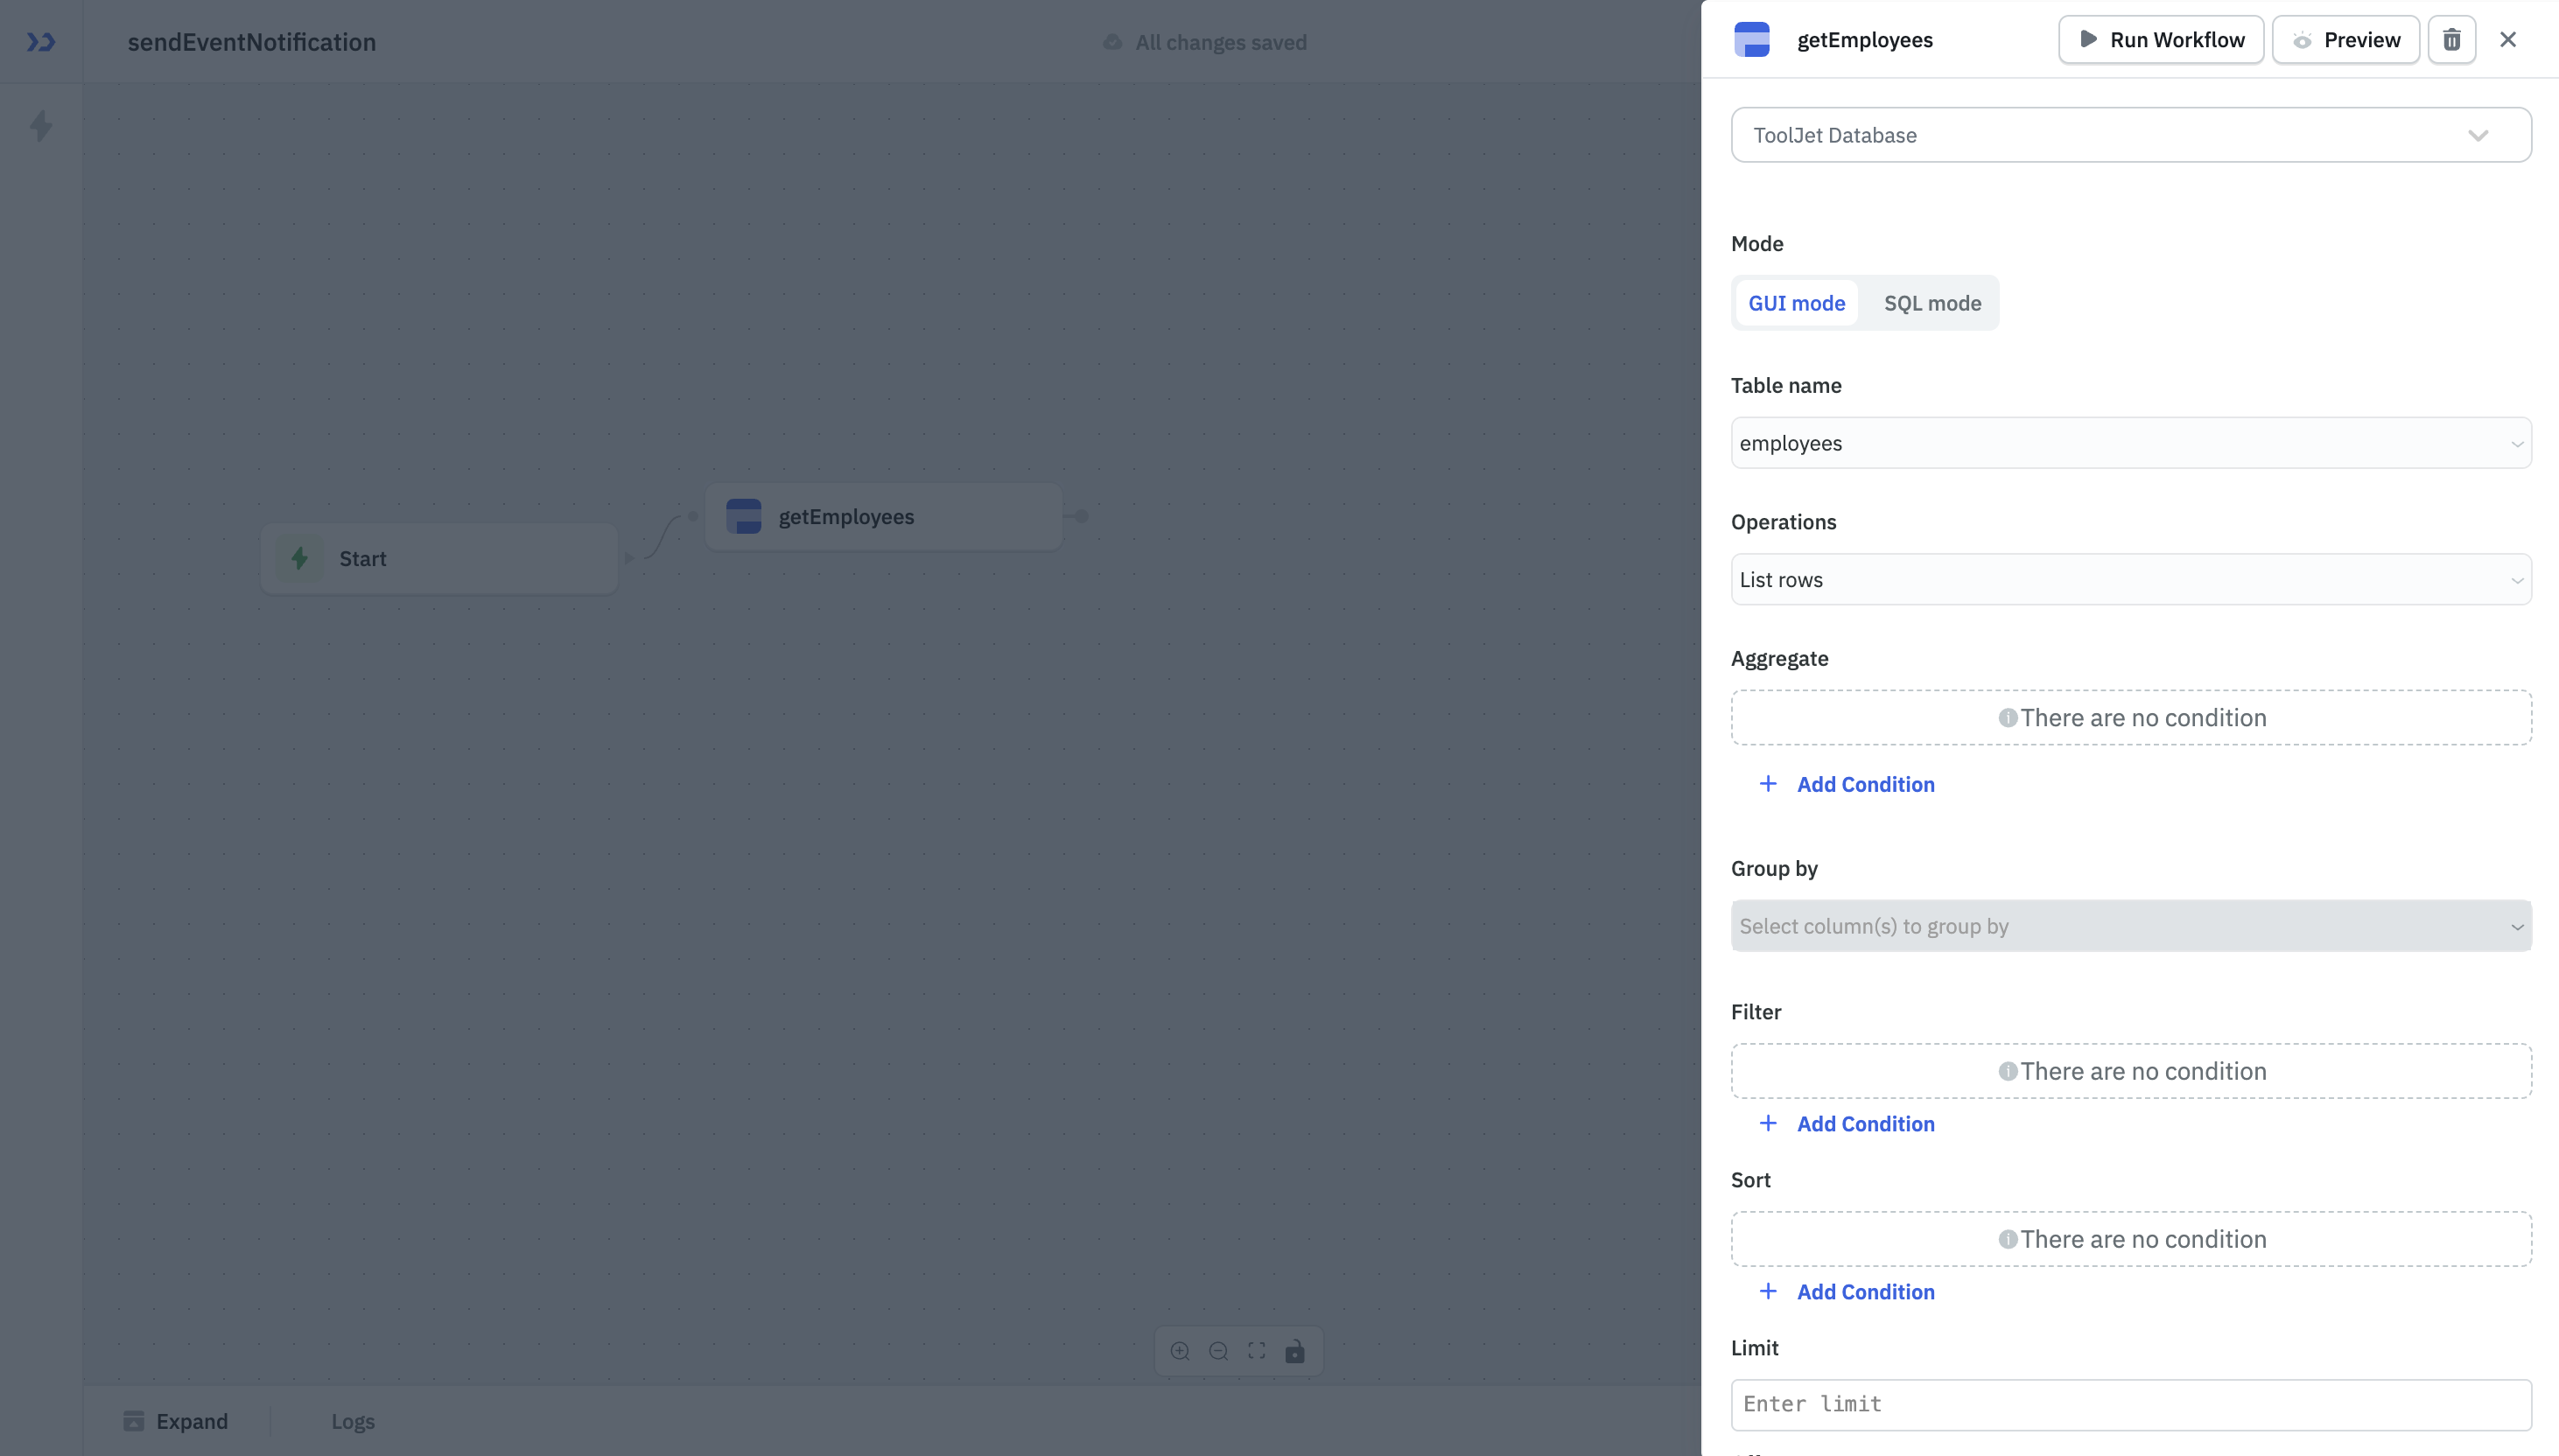
Step 1: Add a Database Query Node
You'll start by fetching employee data from a ToolJetDB table named employees.
- You'll see a Start node already on the canvas. This is the entry point of your workflow.
- Create an outgoing node from the Start node, and select the ToolJetDB node. Rename the node to getEmployees.
- Select Table name as employees and Operation as List view.
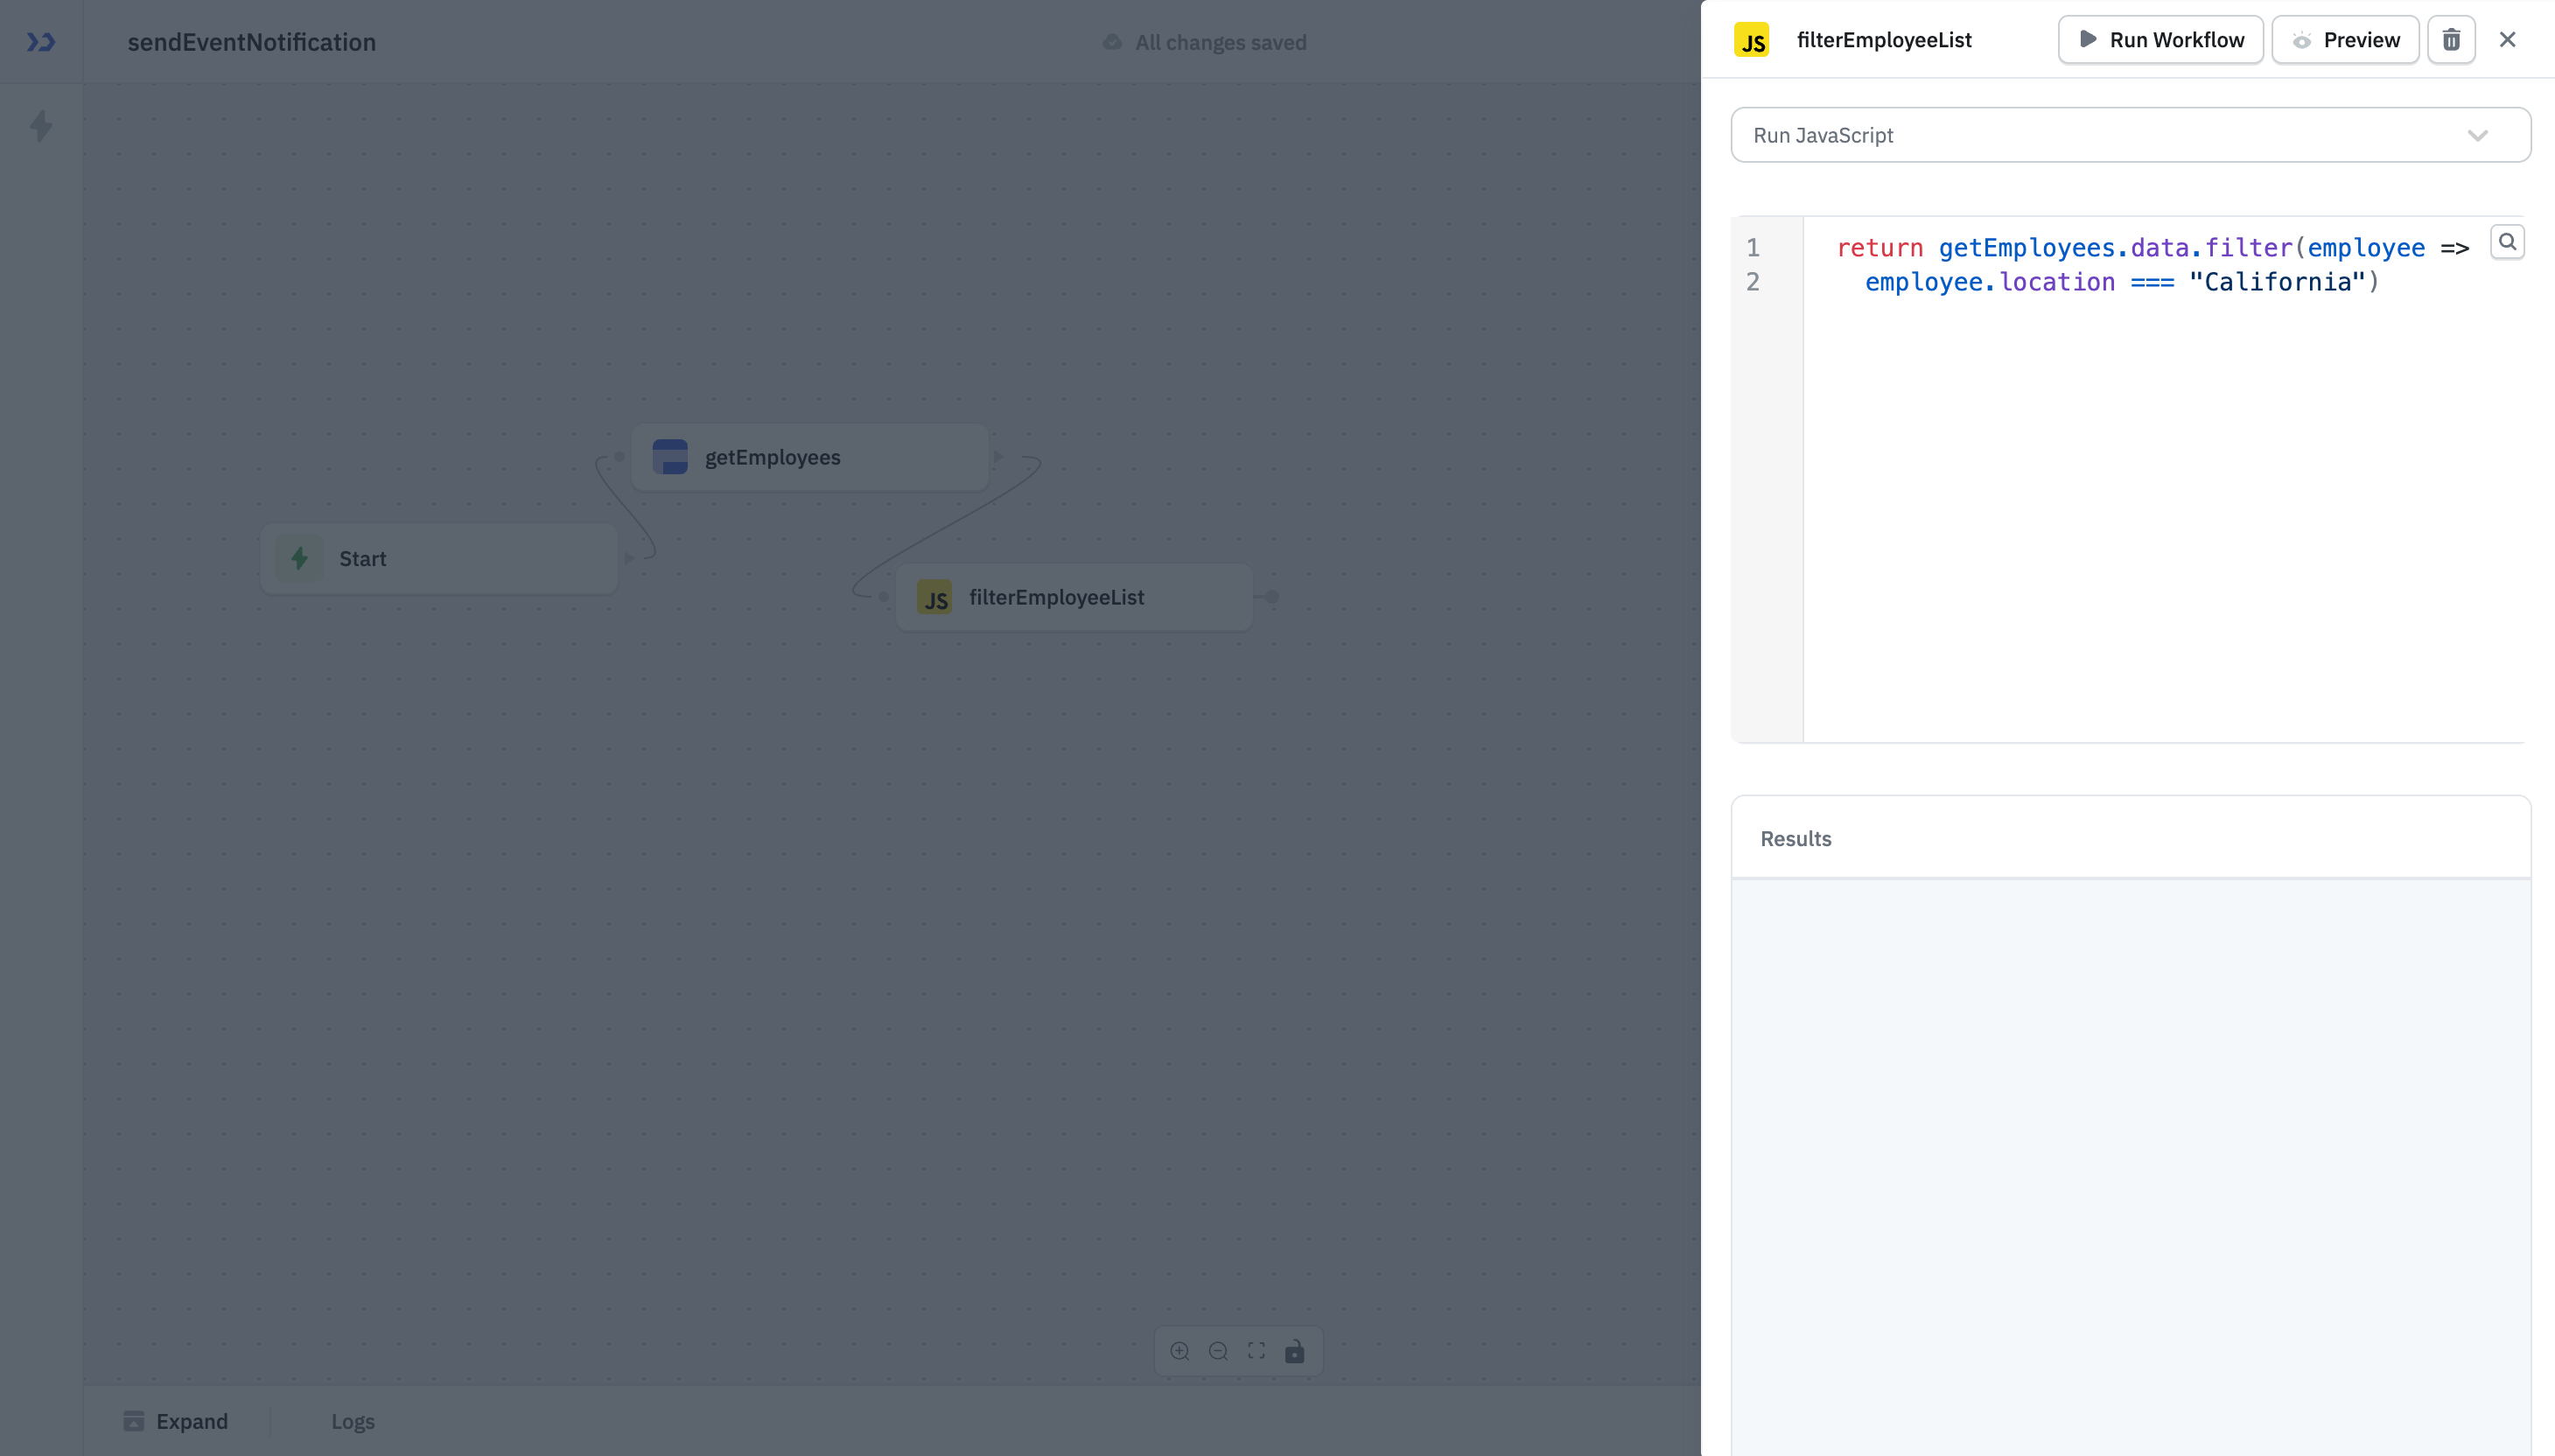
Step 2: Transform Data Using RunJS Node
Next, you'll filter the employee data to include only those from California.
- Create an outgoing node from the getEmployees node, and select the RunJS node. Rename it to filterEmployeeList.
- Enter the code below to filter out employees who are from California.
return getEmployees.data.filter(employee =>
  employee.location === "California")
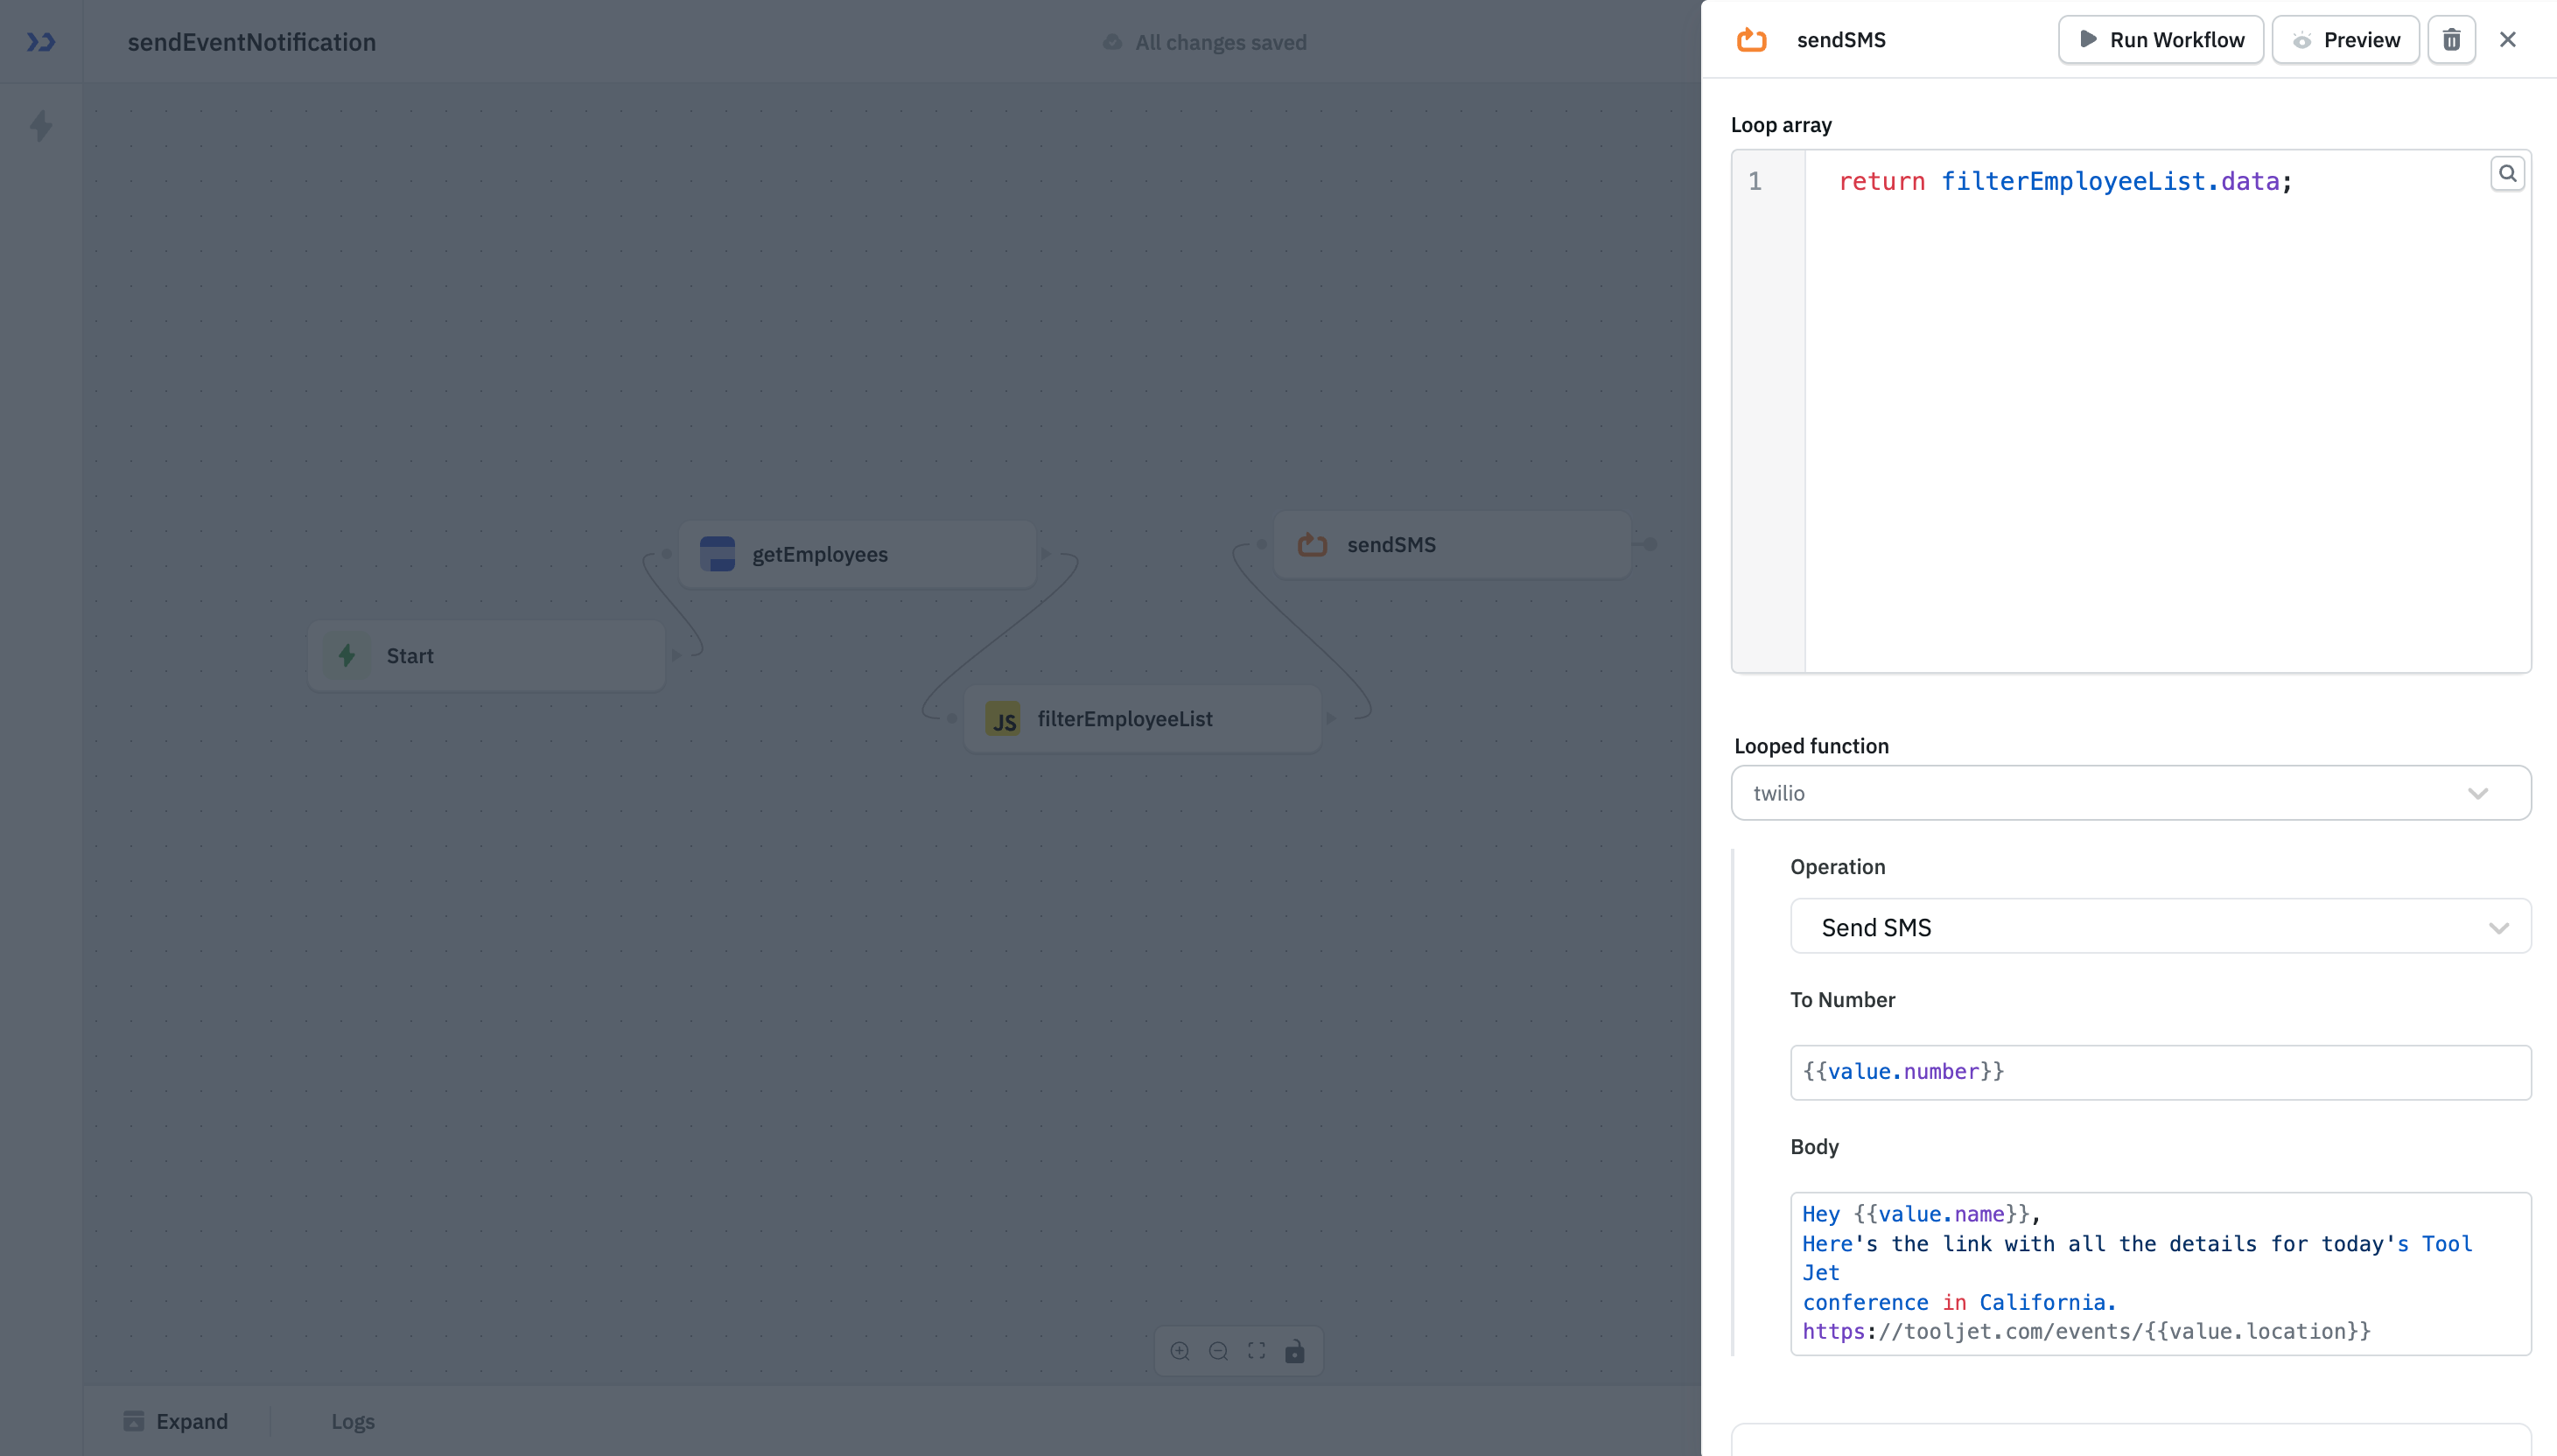
Step 3: Send Notifications
Next, you'll implement a loop to send SMS notifications to the filtered employees. The Loop node allows you to iterate through an array and perform an operation on each element.
- Create an outgoing node from the filterEmployeeList node, and select the Loop node. Rename it to sendSMS.
- Under Looped function, select Twilio as the data source. Configure the Operation as Send SMS, enter
{{value.number}}in the To Number field. - Under the Body field, enter the following message:
Hey {{value.name}},
Here's the link with all the details for today's ToolJet
conference in California.
https://tooljet.com/events/{{value.location}}
Step 4: Configure the Response Node
Finally, you'll set up conditions to handle the success or failure of the SMS sending process.
- Create a new outgoing If condition node from the sendSMS node.
- Enter this in the input field:
sendSMS.status === "ok" ? true : false - Create an outgoing Response node from the green arrow to configure the response when the If condition node returns true.
Enter the following code to show the output as success when the SMS is successfully sent:
return ({output: "success"}) - Similarly, create an outgoing Response node from the red arrow to configure the response when the If condition node returns false. Enter the following code:
return ({output: "failure"})
Step 5: Executing the Workflow
Click on the Run button on the top-right to execute the workflow. The logs panel will expand and provide an overview of all the nodes executed in this workflow.
Congratulations on creating your first workflow! This workflow fetches data, transforms the data, sends SMS notifications, and handles success or failure responses.
As you saw in this example, ToolJet Workflows provides a streamlined way to extend the capabilities of your ToolJet applications and automate complex processes.