Using Form Component
In this guide, we’ll build a simple app using the Form component to:
- Add records to ToolJet Database
- Validate user inputs
- Add conditional form behaviour
- Refresh data automatically after submission
Step 1: Create a Table in ToolJet Database
Create a table named products with the following columns:
name(varchar)category(varchar)quantity(int)price(int)supplier_email(varchar)rating(int)low_stock_note(varchar)
Add a few sample rows to the table.
Step 2: Create a Query to Fetch Data
-
Open the Query Panel and click Add to create a new query. Select ToolJet Database as the datasource.
-
Select products as the Table name and List rows as the Operation.
-
Rename the query to fetchData.
-
Enable
Run this query on application load?so the data loads automatically when the application starts.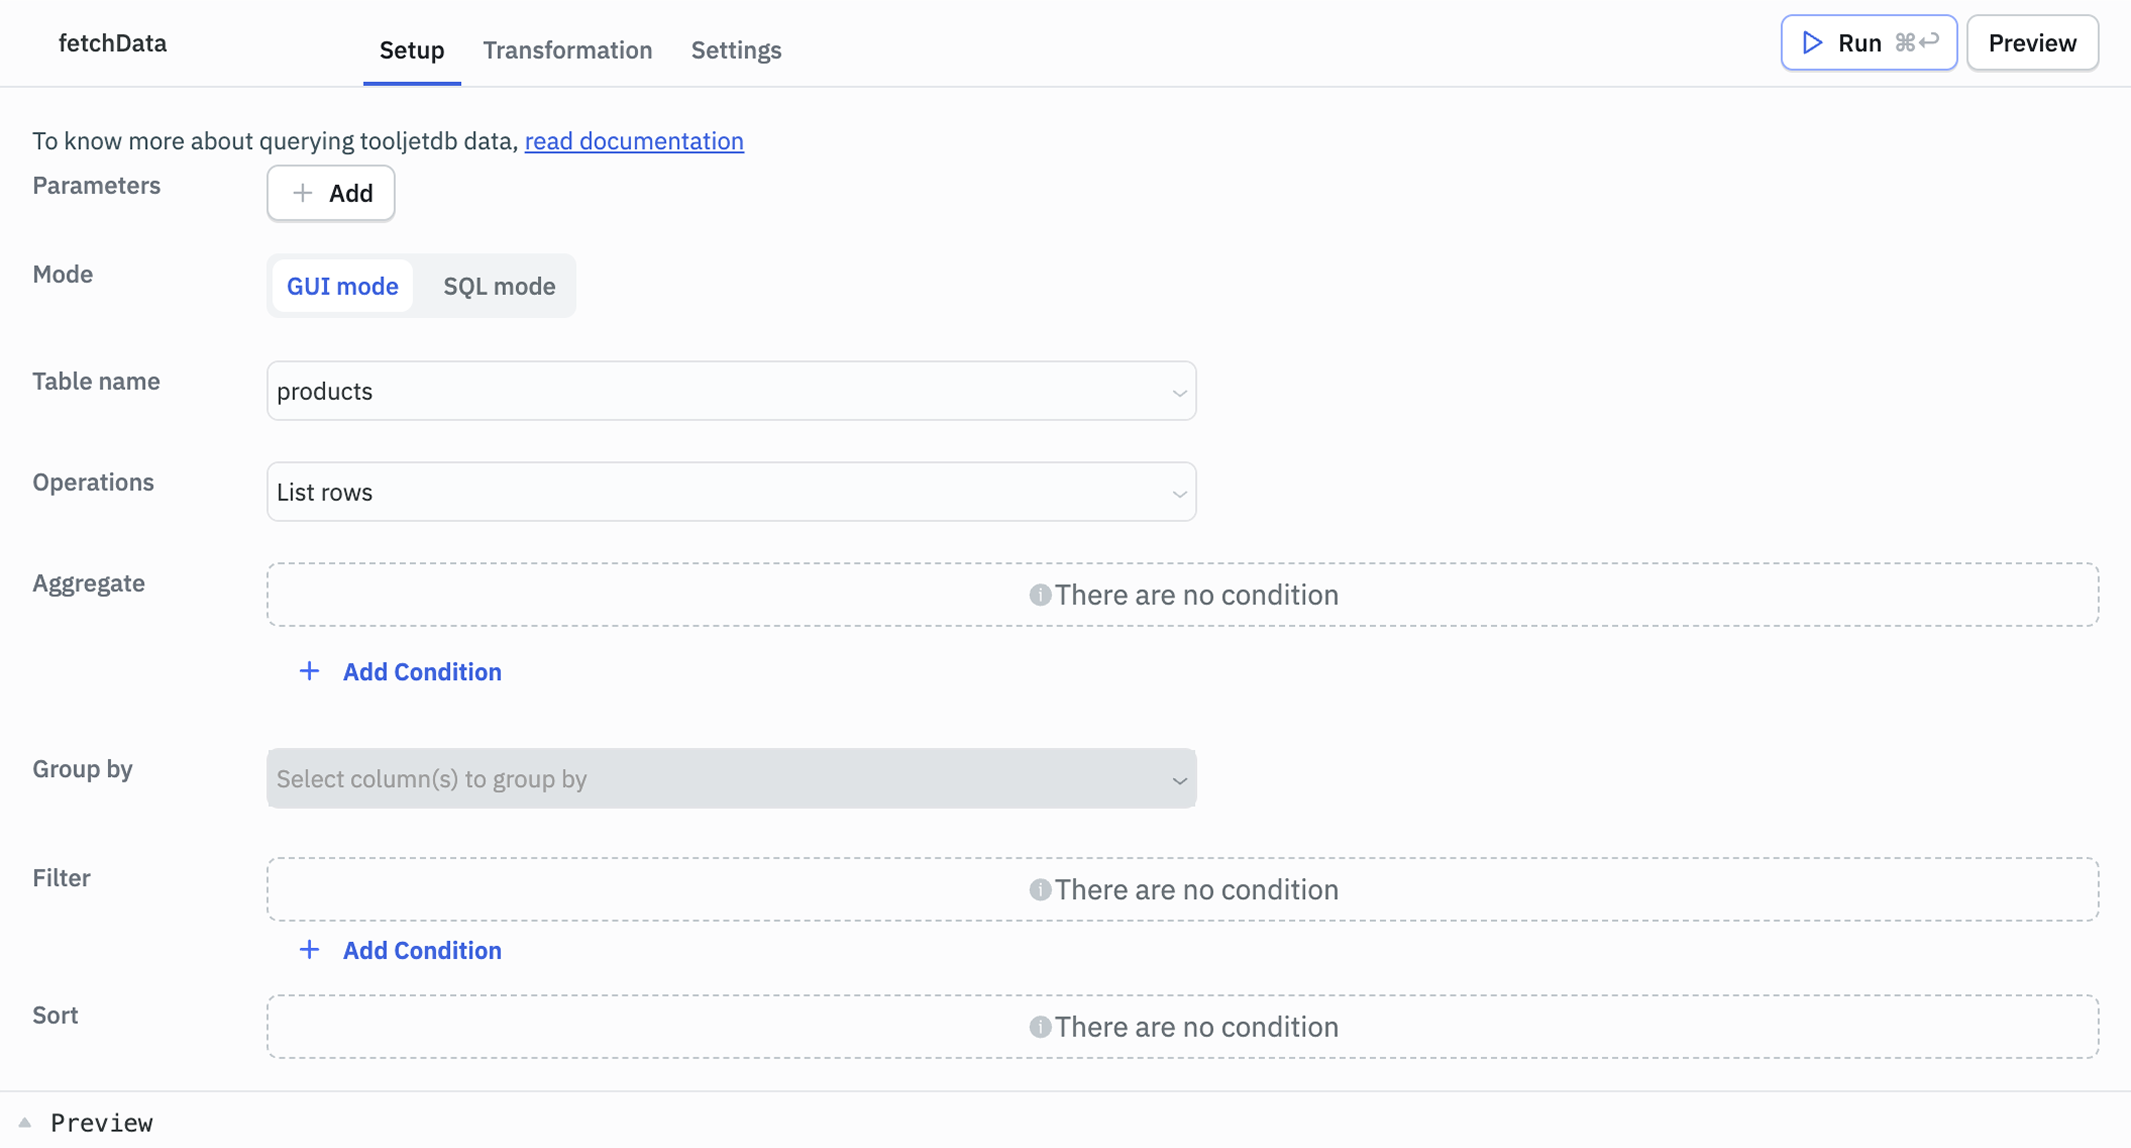
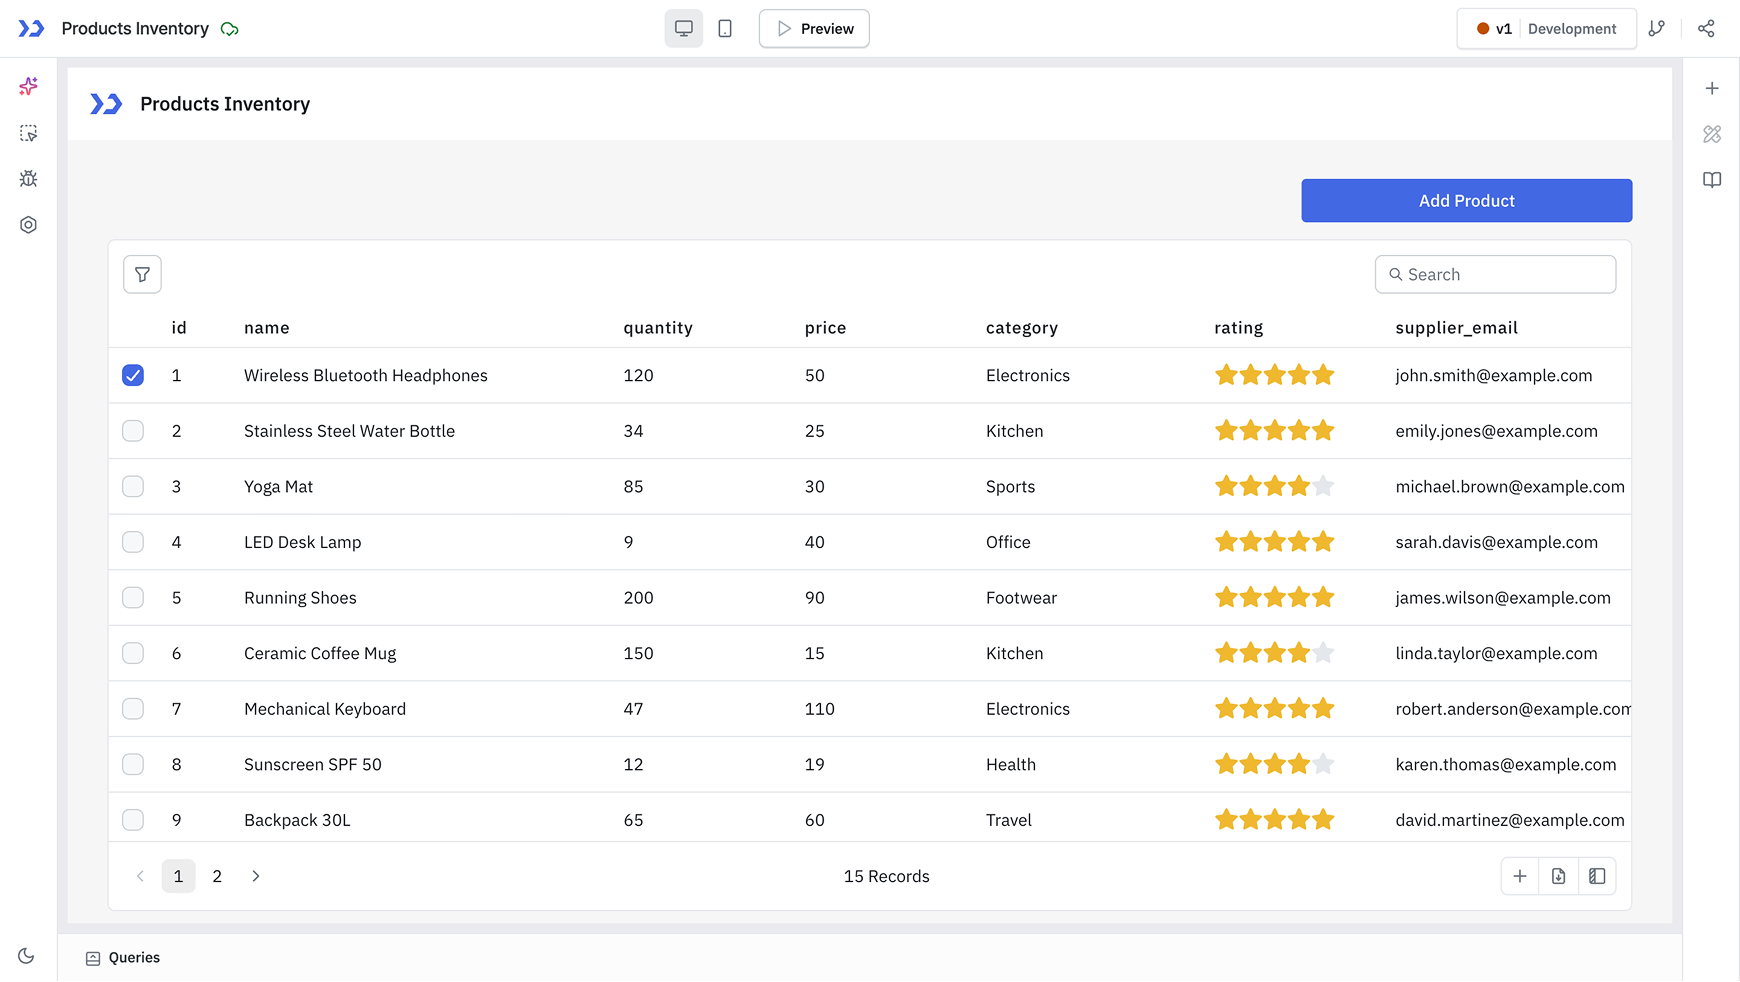
Step 3: Create the UI
-
Create a new application.
-
Drag a Table component onto the canvas.
-
Set the Table's Data property to:
{{queries.fetchData.data;}} -
Drag a Modal component above the Table.
Step 4: Create the Form
-
Drag a Form component inside the Modal.
-
Disable the Header and Footer of the Form from its Properties panel since the Modal already provides these.
-
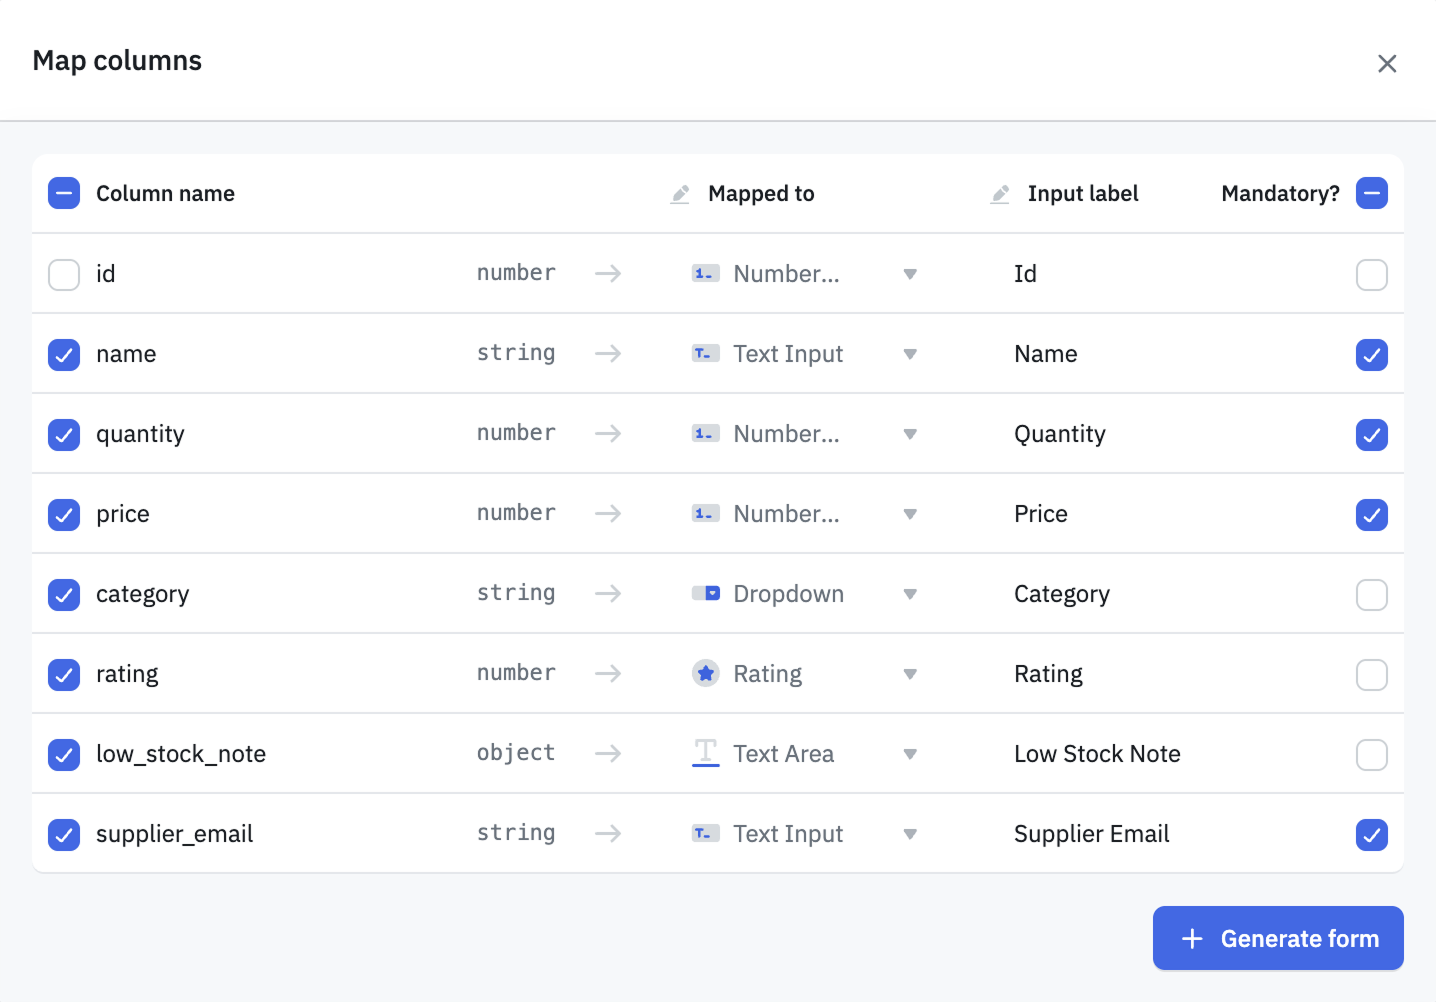
In the Generate form from field, select the fetchData query.
-
Adjust the field mapping as needed and click Generate form.
-
Adjust the Form layout as needed.
-
Add two buttons to the Modal's footer : Cancel and Add.
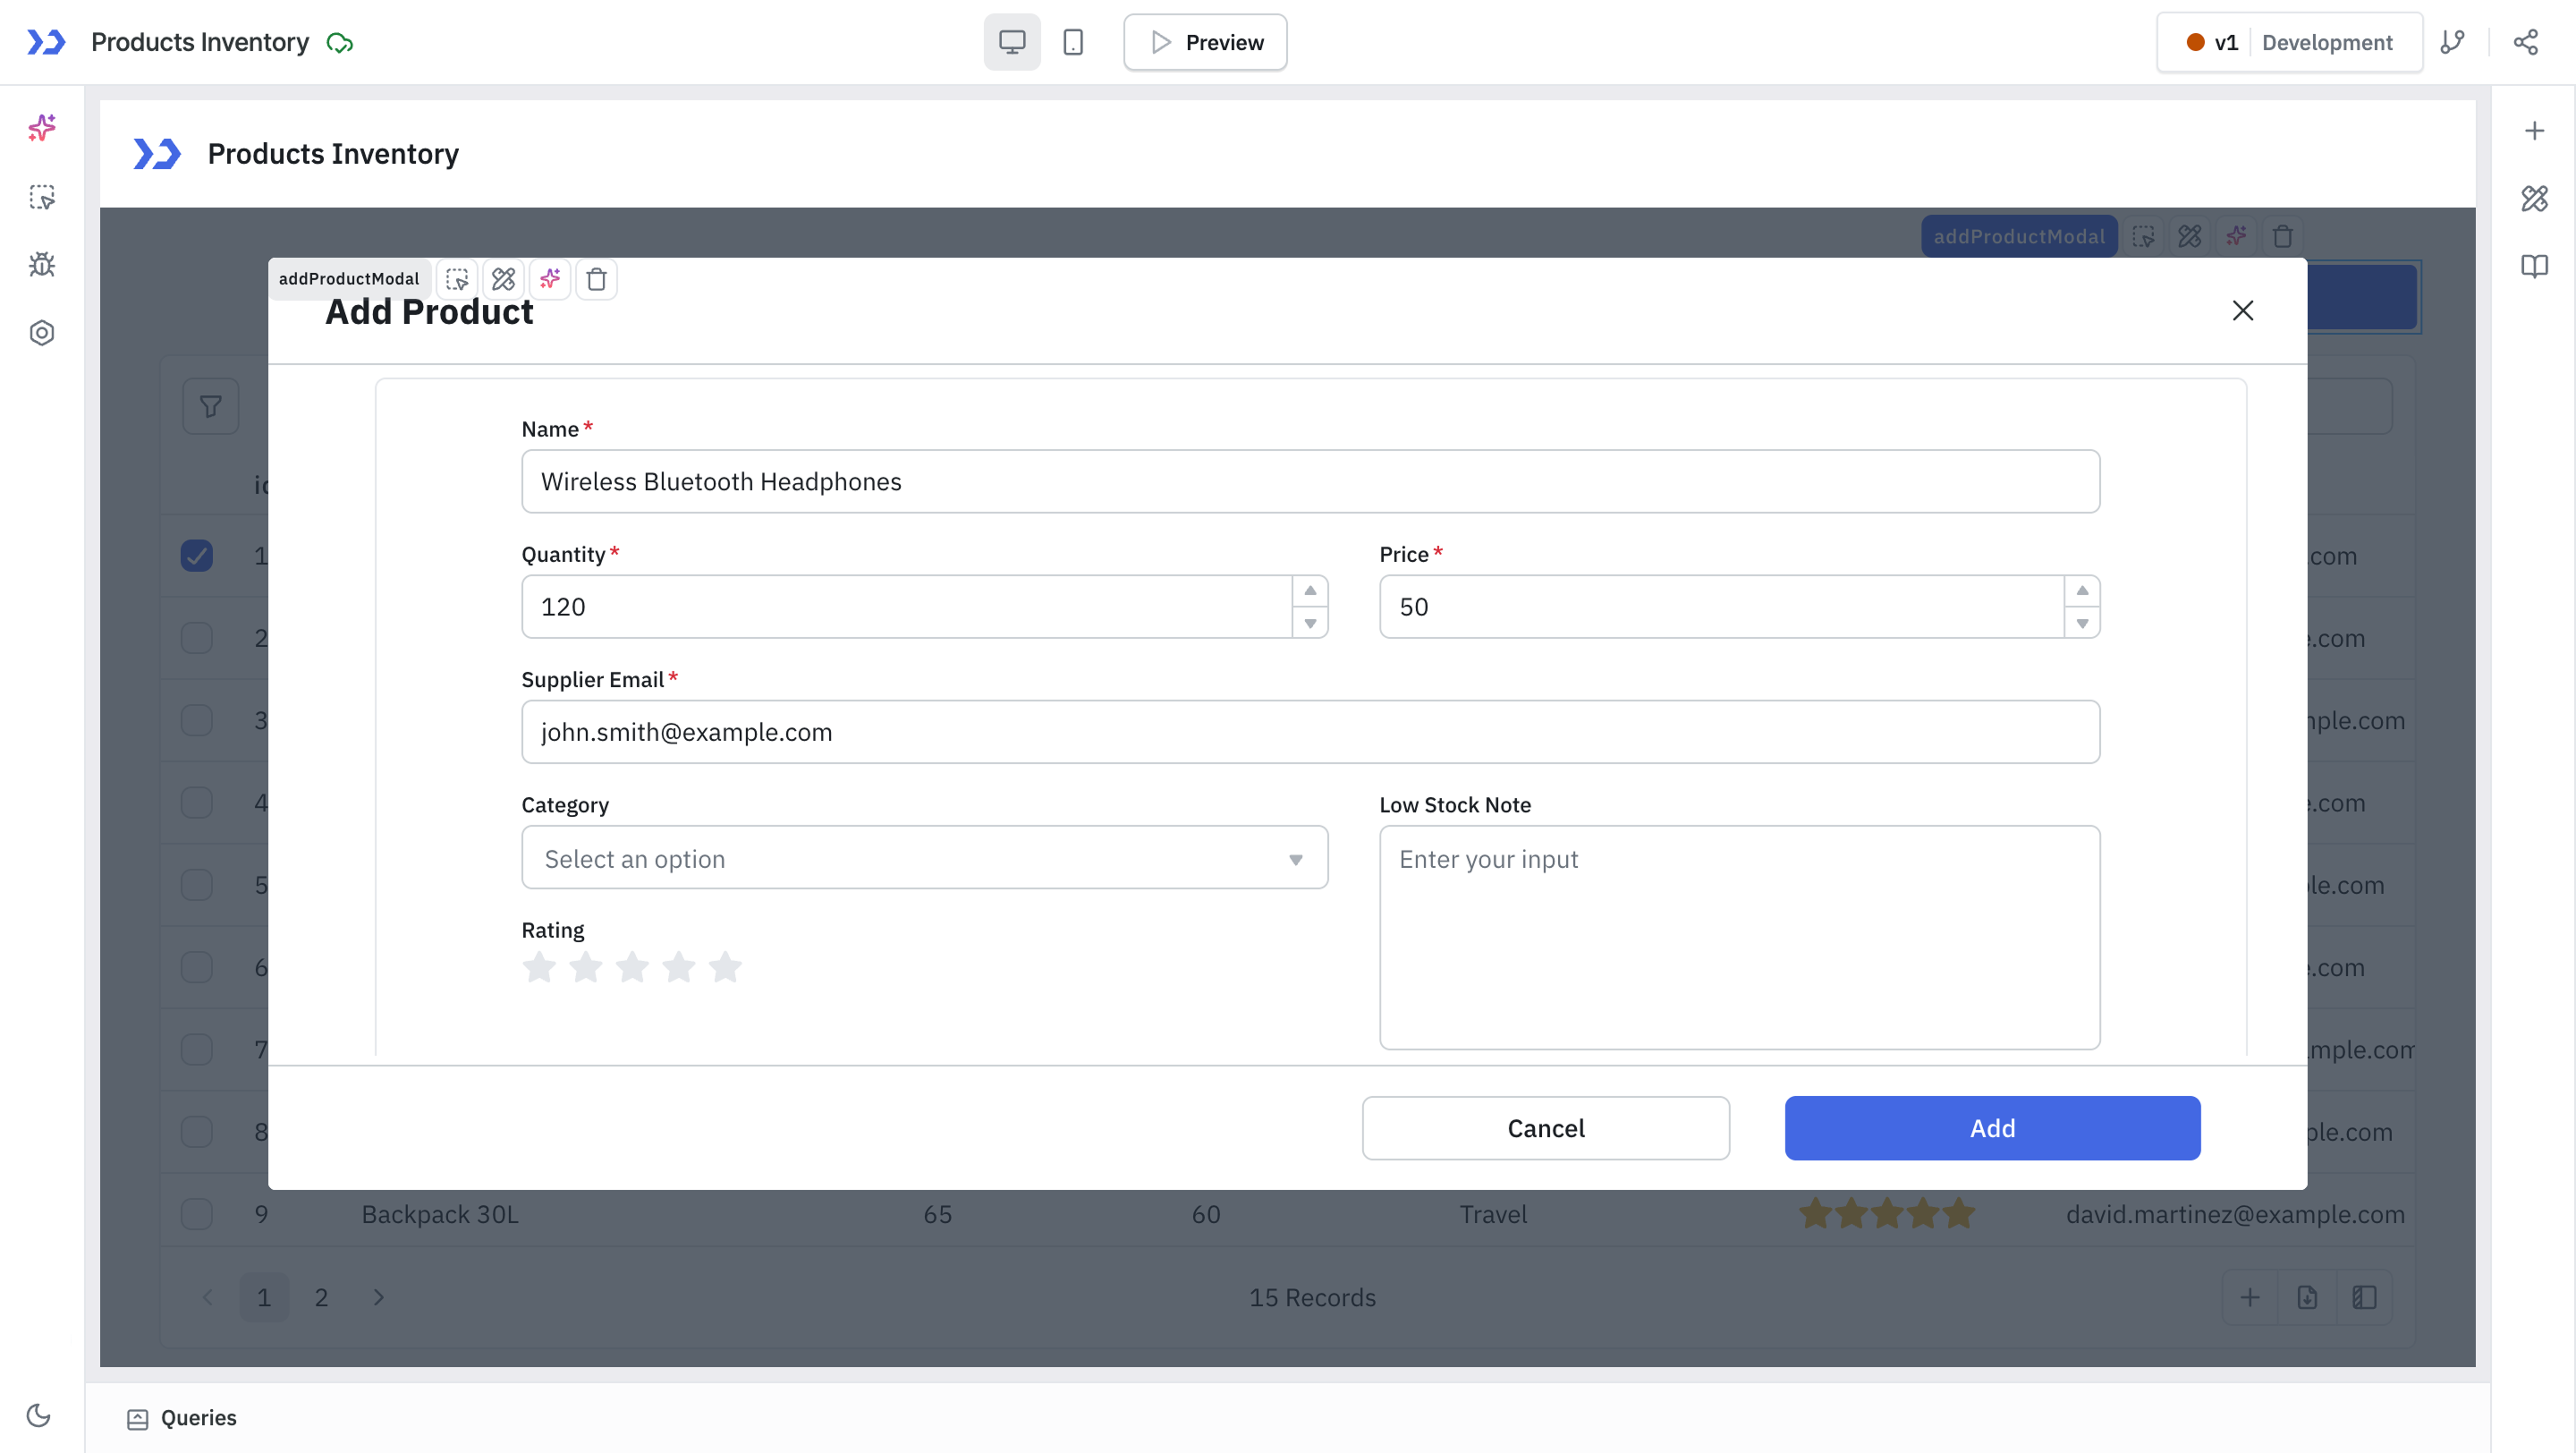
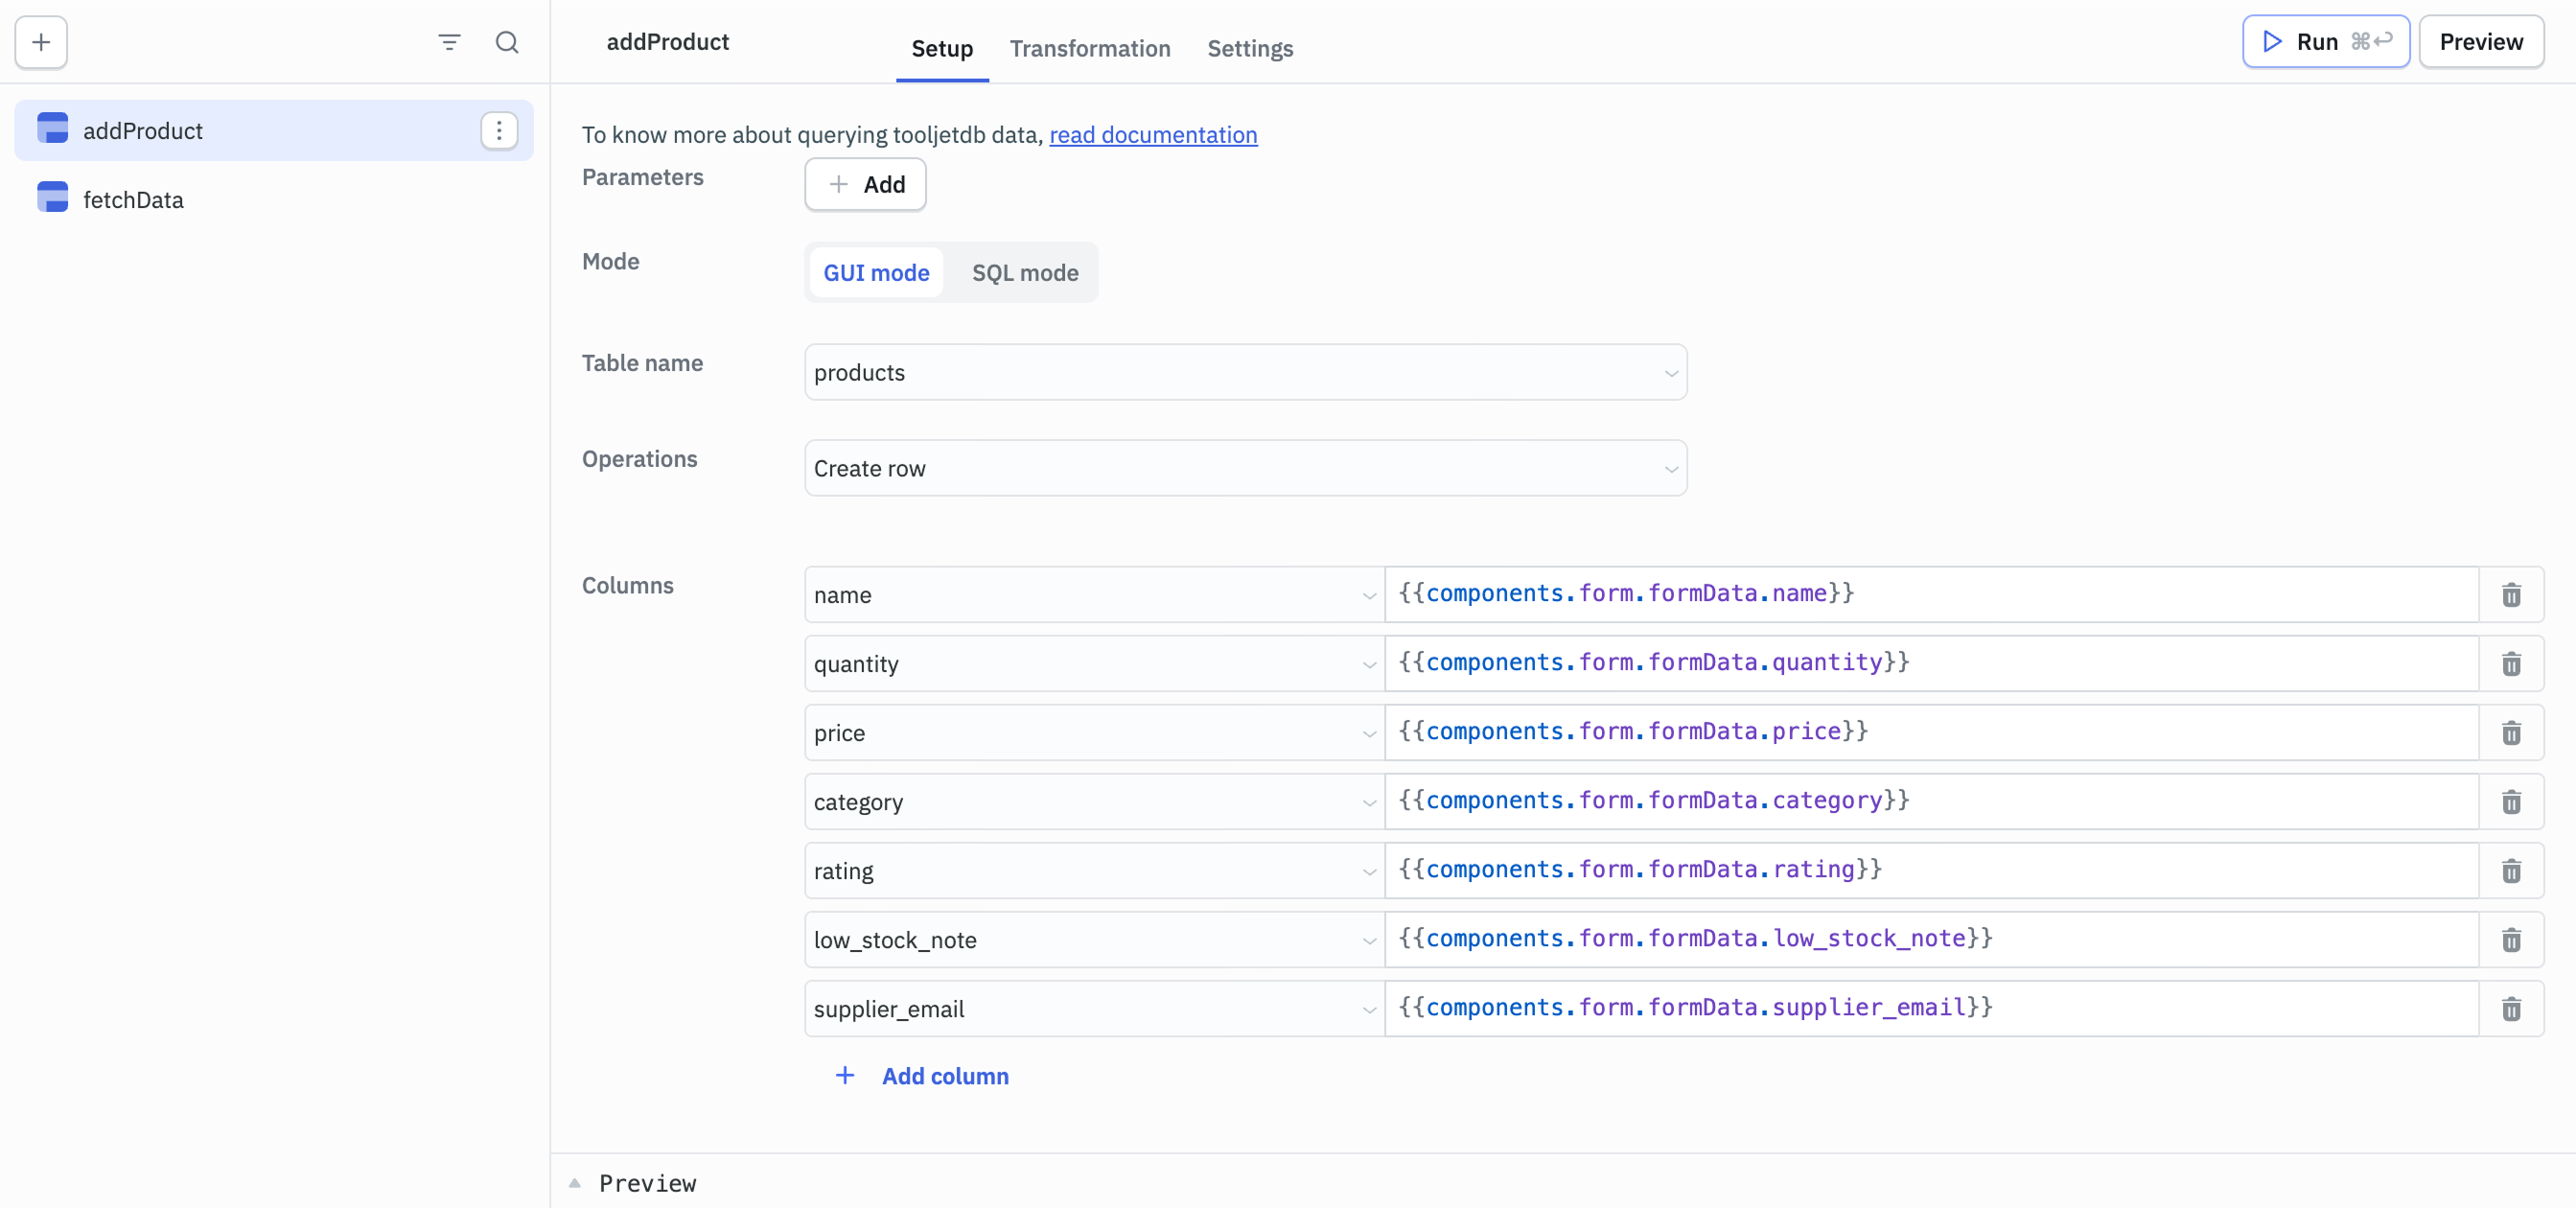
Step 5: Insert Data Using the Form
Create a new query to write form data to the database:
- Name: addProduct
- Operation: Create row
- Table: products
Map each column to its corresponding form field:
name            → {{components.form.formData.name}}
category        → {{components.form.formData.category}}
quantity        → {{components.form.formData.quantity}}
price           → {{components.form.formData.price}}
rating          → {{components.form.formData.rating}}
low_stock_note  → {{components.form.formData.low_stock_note}}
supplier_email  → {{components.form.formData.supplier_email}}
Step 6: Connect Events and Refresh Data
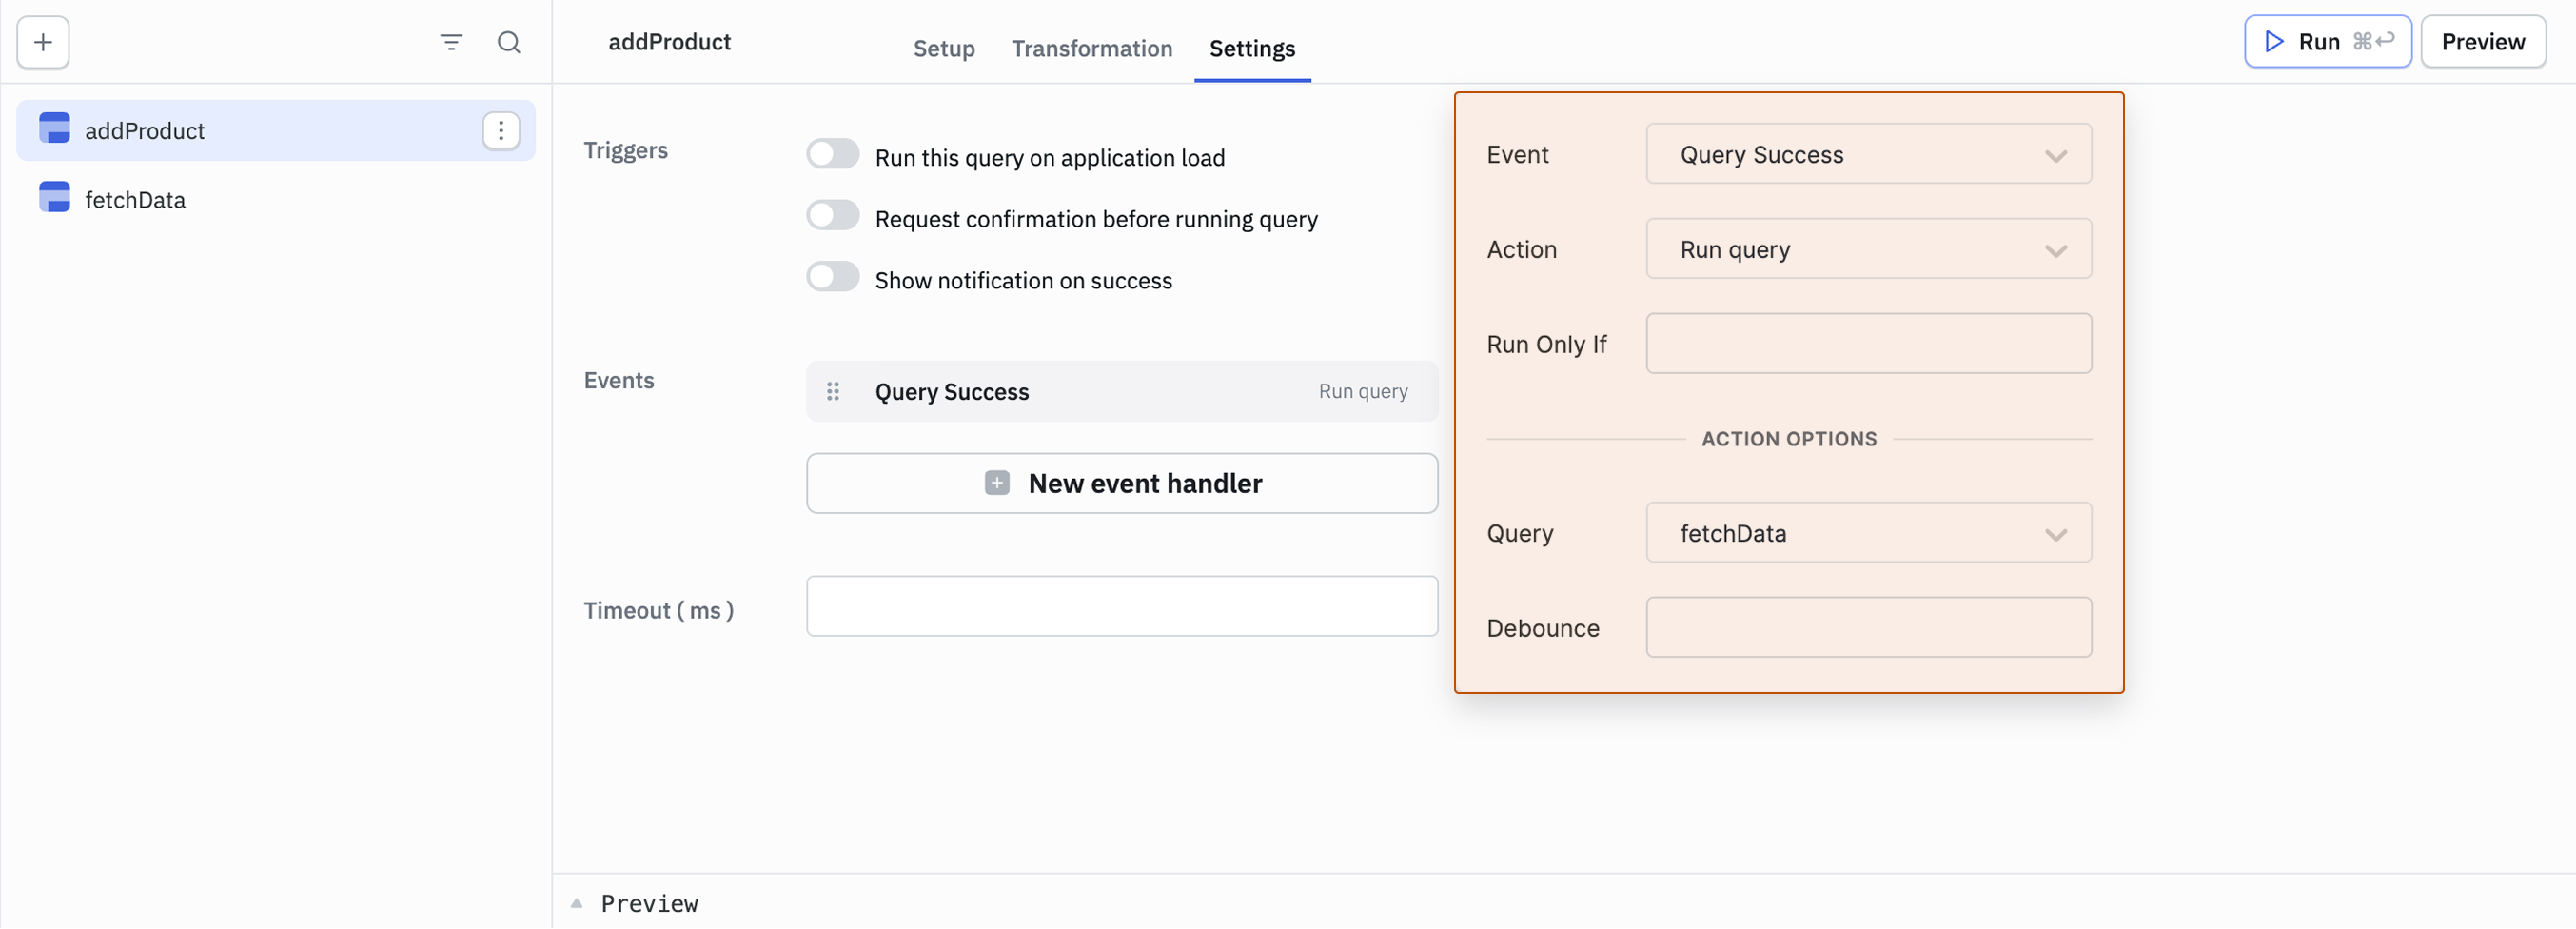
Refresh the Table after a successful insert:
-
Select the addProduct query and go to Settings.
-
Click New event handler and configure:
- Event: Query Success
- Action: Run Query
- Query: fetchData
Run the query when the user clicks Add:
-
Select the Add button in the Modal footer.
-
Click New event handler and configure:
- Event: On click
- Action: Run Query
- Query: addProduct
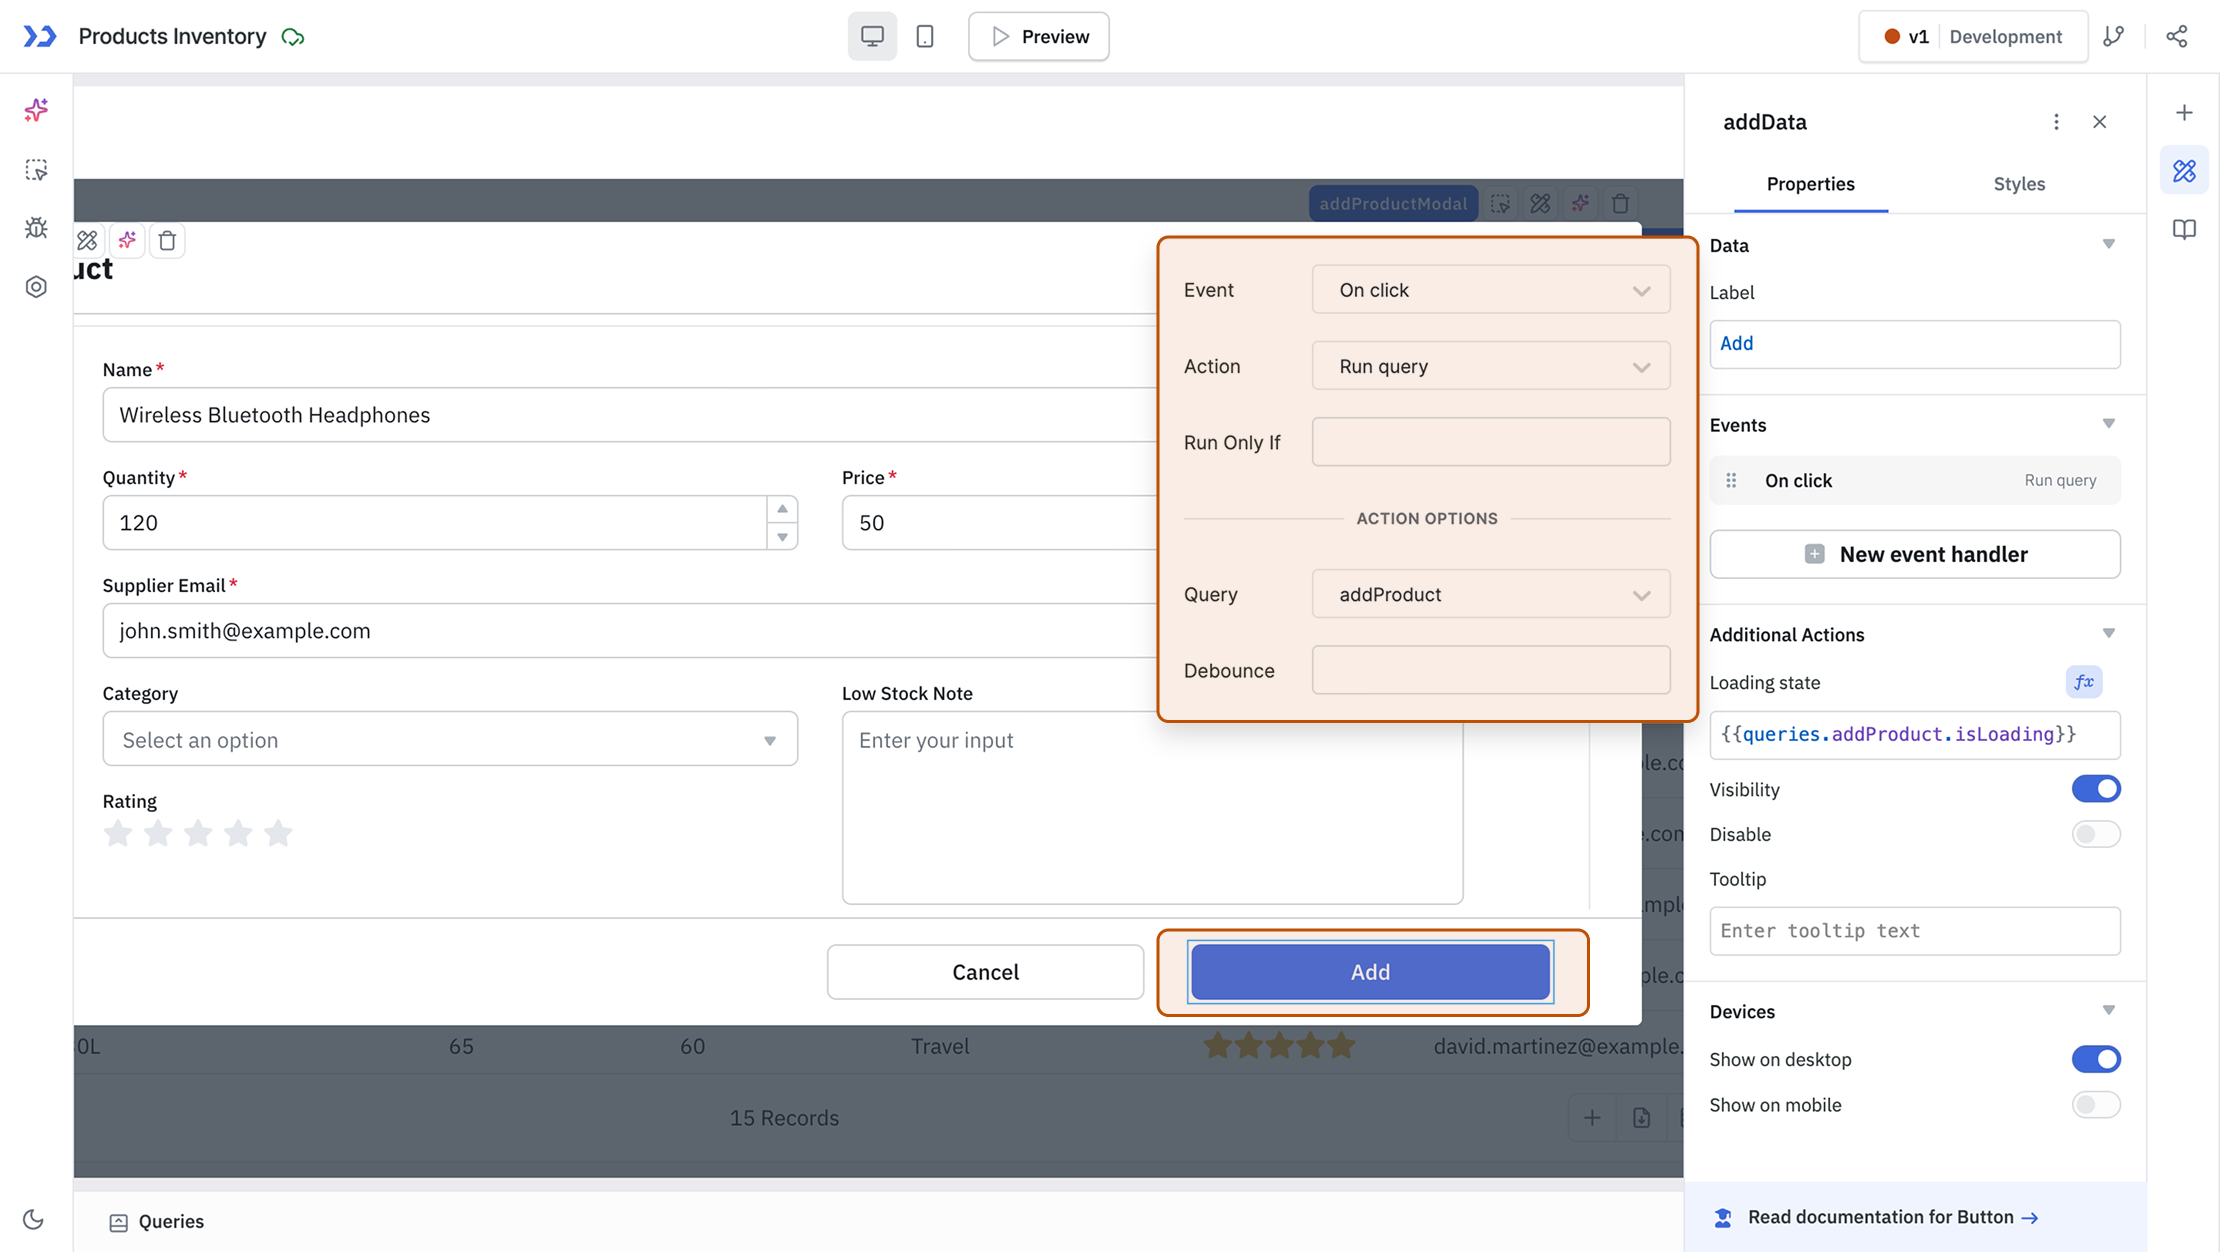
Submitting the form now inserts a new row into the products table and immediately refreshes the Table component with the latest data.
Step 7: Add Validations
-
Make Fields Mandatory Multiple fields are already marked as mandatory from the form generation step. To also make category mandatory, select the category input component and enable the Make this field mandatory toggle. ToolJet displays an error if the user tries to submit the form with any of these fields empty.
-
Validate Email Format Select the supplier_email input component and navigate to its Validation property. Select Regex and enter:
{{/^[a-zA-Z0-9._%+-]+@[a-zA-Z0-9.-]+\.[a-zA-Z]{2,}$/.test(components.form.formData.supplier_email) ? '' : 'Enter a valid email address'}}This regex pattern checks the email format and returns an error message when the input doesn't match.
Step 8: Add Conditional Fields
You can show or hide fields based on user input using the Visibility property. For example, the low_stock_note field is only relevant when the quantity entered is low.
Select the low_stock_note input component, click fx next to its Visibility property, and enter:
{{components.form.formData.quantity < 10;}}
The low_stock_note field now only appears when the quantity is below 10, prompting the user to add a note about the stock status.
Step 9: Disable Submit Until Form Is Valid
Select the Add button in the Modal footer and set its Disable property to:
{{!components.form.isValid;}}
The Form component's isValid property returns true only when all visible child components pass their validations. This keeps the button disabled until mandatory fields are filled and custom validations like the email check pass.