Loop Node
The Loop node allows you to iterate over an array of items and perform actions on each item within your workflow. It is useful when you need to process multiple records, send bulk notifications, or execute repetitive tasks dynamically.
With the Loop node, you can:
- Iterate through arrays returned from APIs or database queries
- Perform actions on each item individually (e.g., send emails, create tasks)
- Combine with other nodes to aggregate results or handle errors per item
- Automate bulk operations efficiently without manual intervention
Loop node has three important components:
-
Loop Array: Refers to the array over which the loop node will iterate. To set the loop array, use:
return <your-array>; -
Looped Function: Defines the action or operation that should be executed for each element in the loop array.
-
Value: Represents the current item being processed during each iteration of the loop. It can be accessed using the
{{value}}keyword. -
Index: Represents the index of the current item being processed during each iteration of the loop. It can be accessed using the
{{index}}keyword.
Example 1 - Bulk Invoice Reminder Workflow
Consider a workflow that automatically sends a mail to the vendors with pending payments.
Step 1 - Get list of vendors.
First, add a ToolJet DB node (or any other data source tou prefer) to fetch a list of vendors who have unpaid invoices. Name this node fetchInvoices.
Here's a sample vendor from the list:
{
    "id":1,
    "vendor_name":"Example Enterprise",
    "vendor_email":"[email protected]",
    "amount":1000,
    "status":"pending"
}
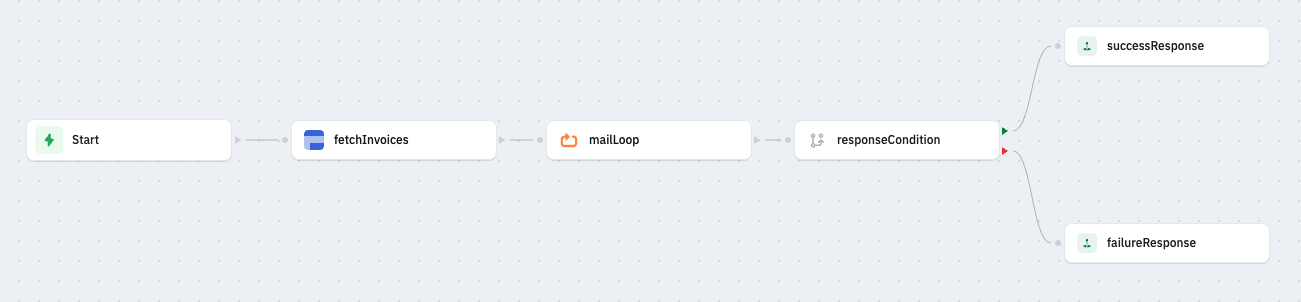
Step 2 - Add a loop node to process the vendors.
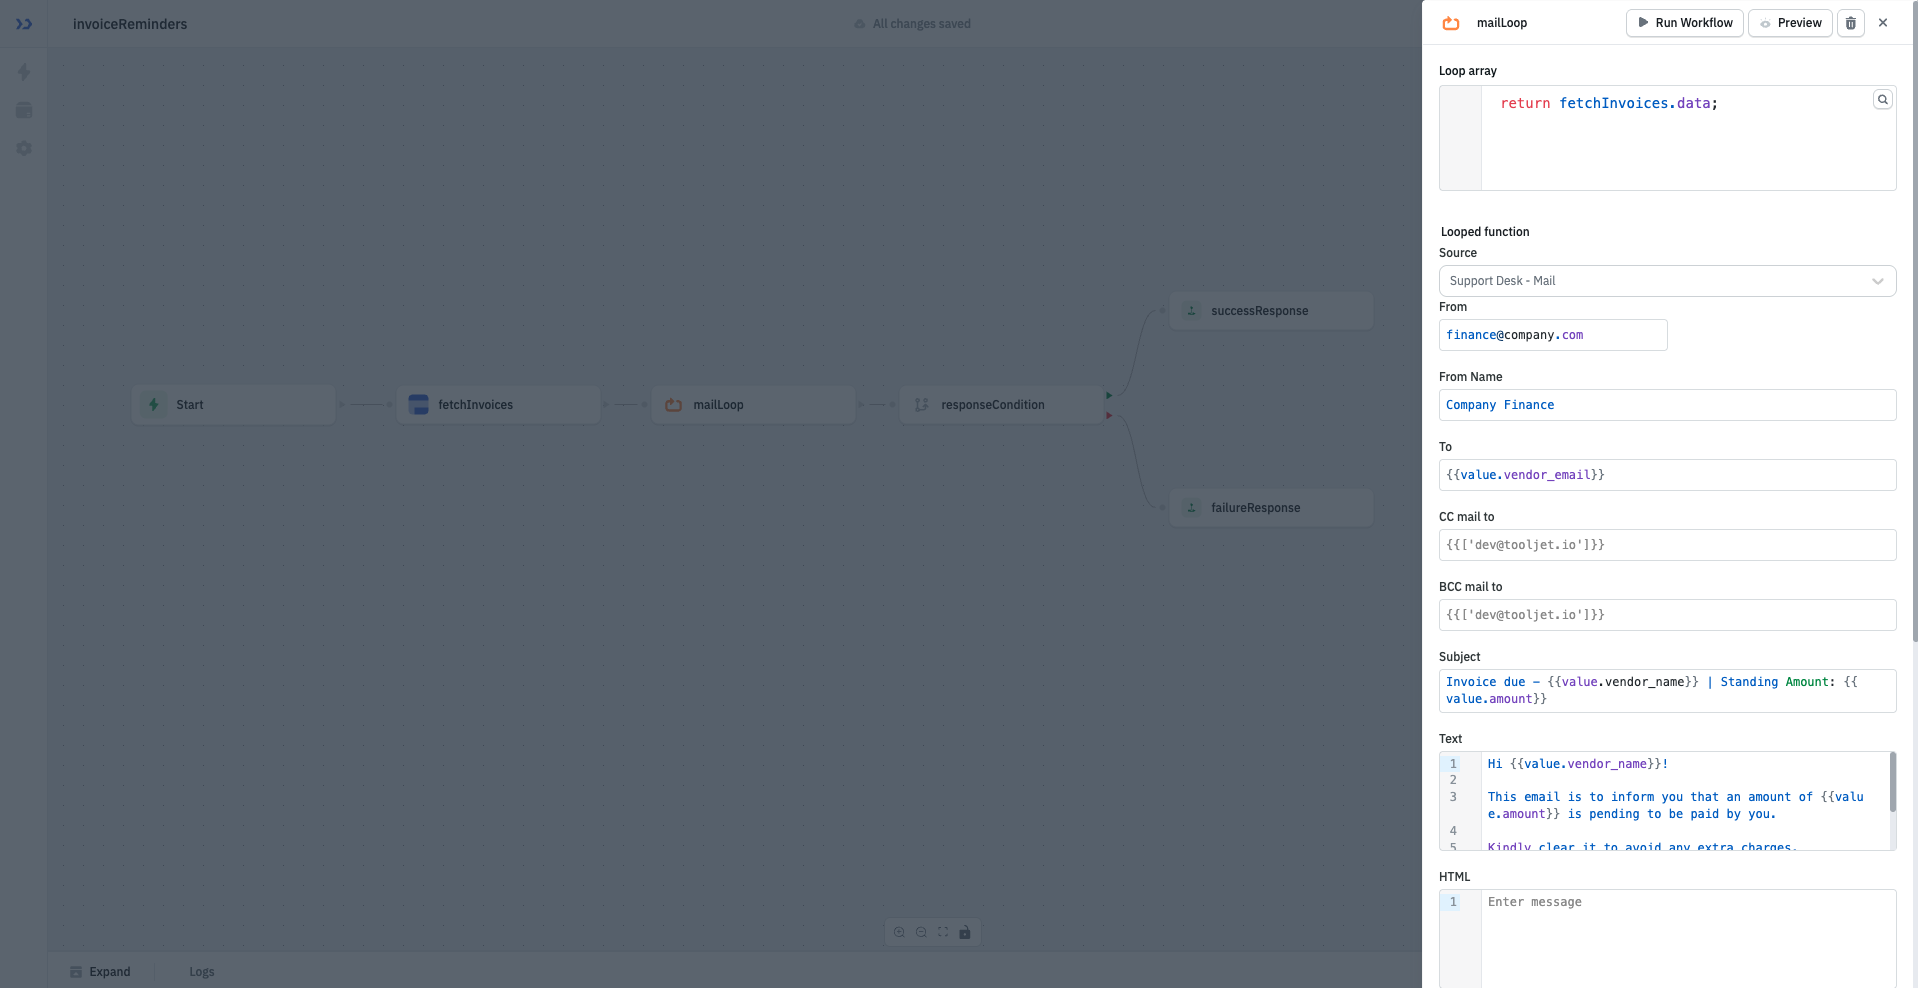
Now connect a loop node after the fetchInvoices node.
In the Loop array input, set the value to:
return fetchInvoices.data; // We created fetchInvoices in step 1.
This tells the Loop node to run once for every vendor in the list.
Inside the Looped function, choose the action what you wish to perform for each vendor. In this example we have configured SMTP to send notification via Email
Example 2 - Bulk User Deactivation Based on Inactivity
Consider a workflow that fetches users inactive for a certain period of time and mark them as inactive.
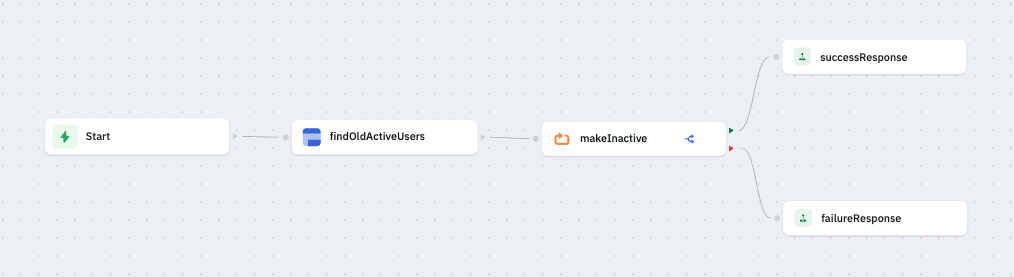
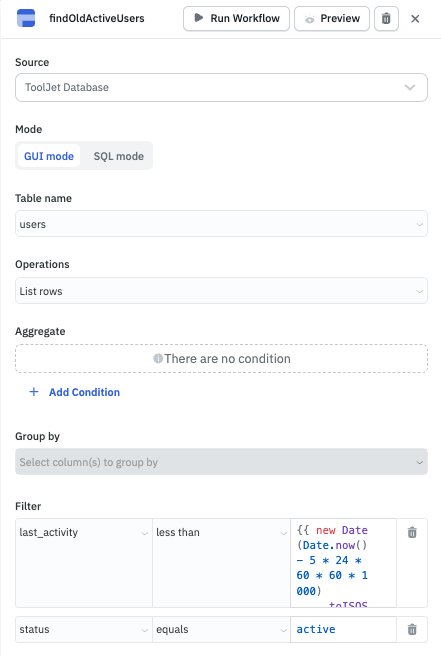
Step 1 - Fetch inactive users
Create a ToolJet database node to fetch users with last_activity older than 5 days and with status as active and name it findOldActiveUsers. Here's a sample user from the list.
{
  "id": 3,
  "username": "test_3",
  "last_activity": "2025-12-01T12:04:00+00:00",
  "status": "active"
}
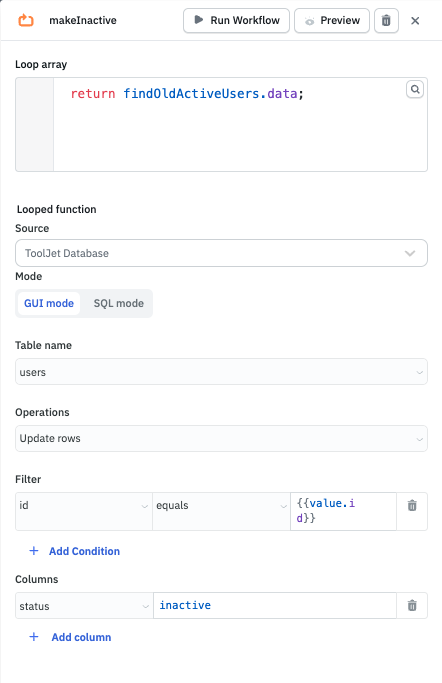
Step 2 - Create a loop node
Create a loop node named makeInactive. This node will loop over the data returned from findOldActiveUsers and mark the status of users to inactive.