OpenID Connect Setup
OpenID Connect (OIDC) is an authentication protocol that helps applications verify users' identities using an identity provider. By configuring OIDC with identity providers like Azure AD, Google or Okta, you can set up easy and safe authentication for your users in ToolJet.
ToolJet also allows you to setup OIDC using non email identifier (for example, an employee ID). To learn more, refer to this section.
Grant Type
Authorization Code
Choose this when configuring SSO for server-side applications where you can securely store the Client Secret. This is ideal for enterprise setups where ToolJet can safely handle the secret and communicate with your identity provider.
Authorization Code with PKCE
Choose this when configuring SSO for public clients like apps running in the browser, mobile apps, or environments where storing a Client Secret securely is not possible. PKCE ensures secure authentication without exposing secrets.
Configuring OIDC
Follow these steps to enable OIDC in your system:
Role Required:
For Instance Level: Super Admin
For Workspace Level: Admin
-
Click on the settings icon (⚙️) on the bottom left of your dashboard.
-
For Instance Level:
Go to Settings > Instance login.
(Example URL -https://app.corp.com/instance-settings/instance-login)For Workspace Level:
Go to Workspace Settings > Workspace login.
(Example URL -https://app.corp.com/nexus/workspace-settings/workspace-login) -
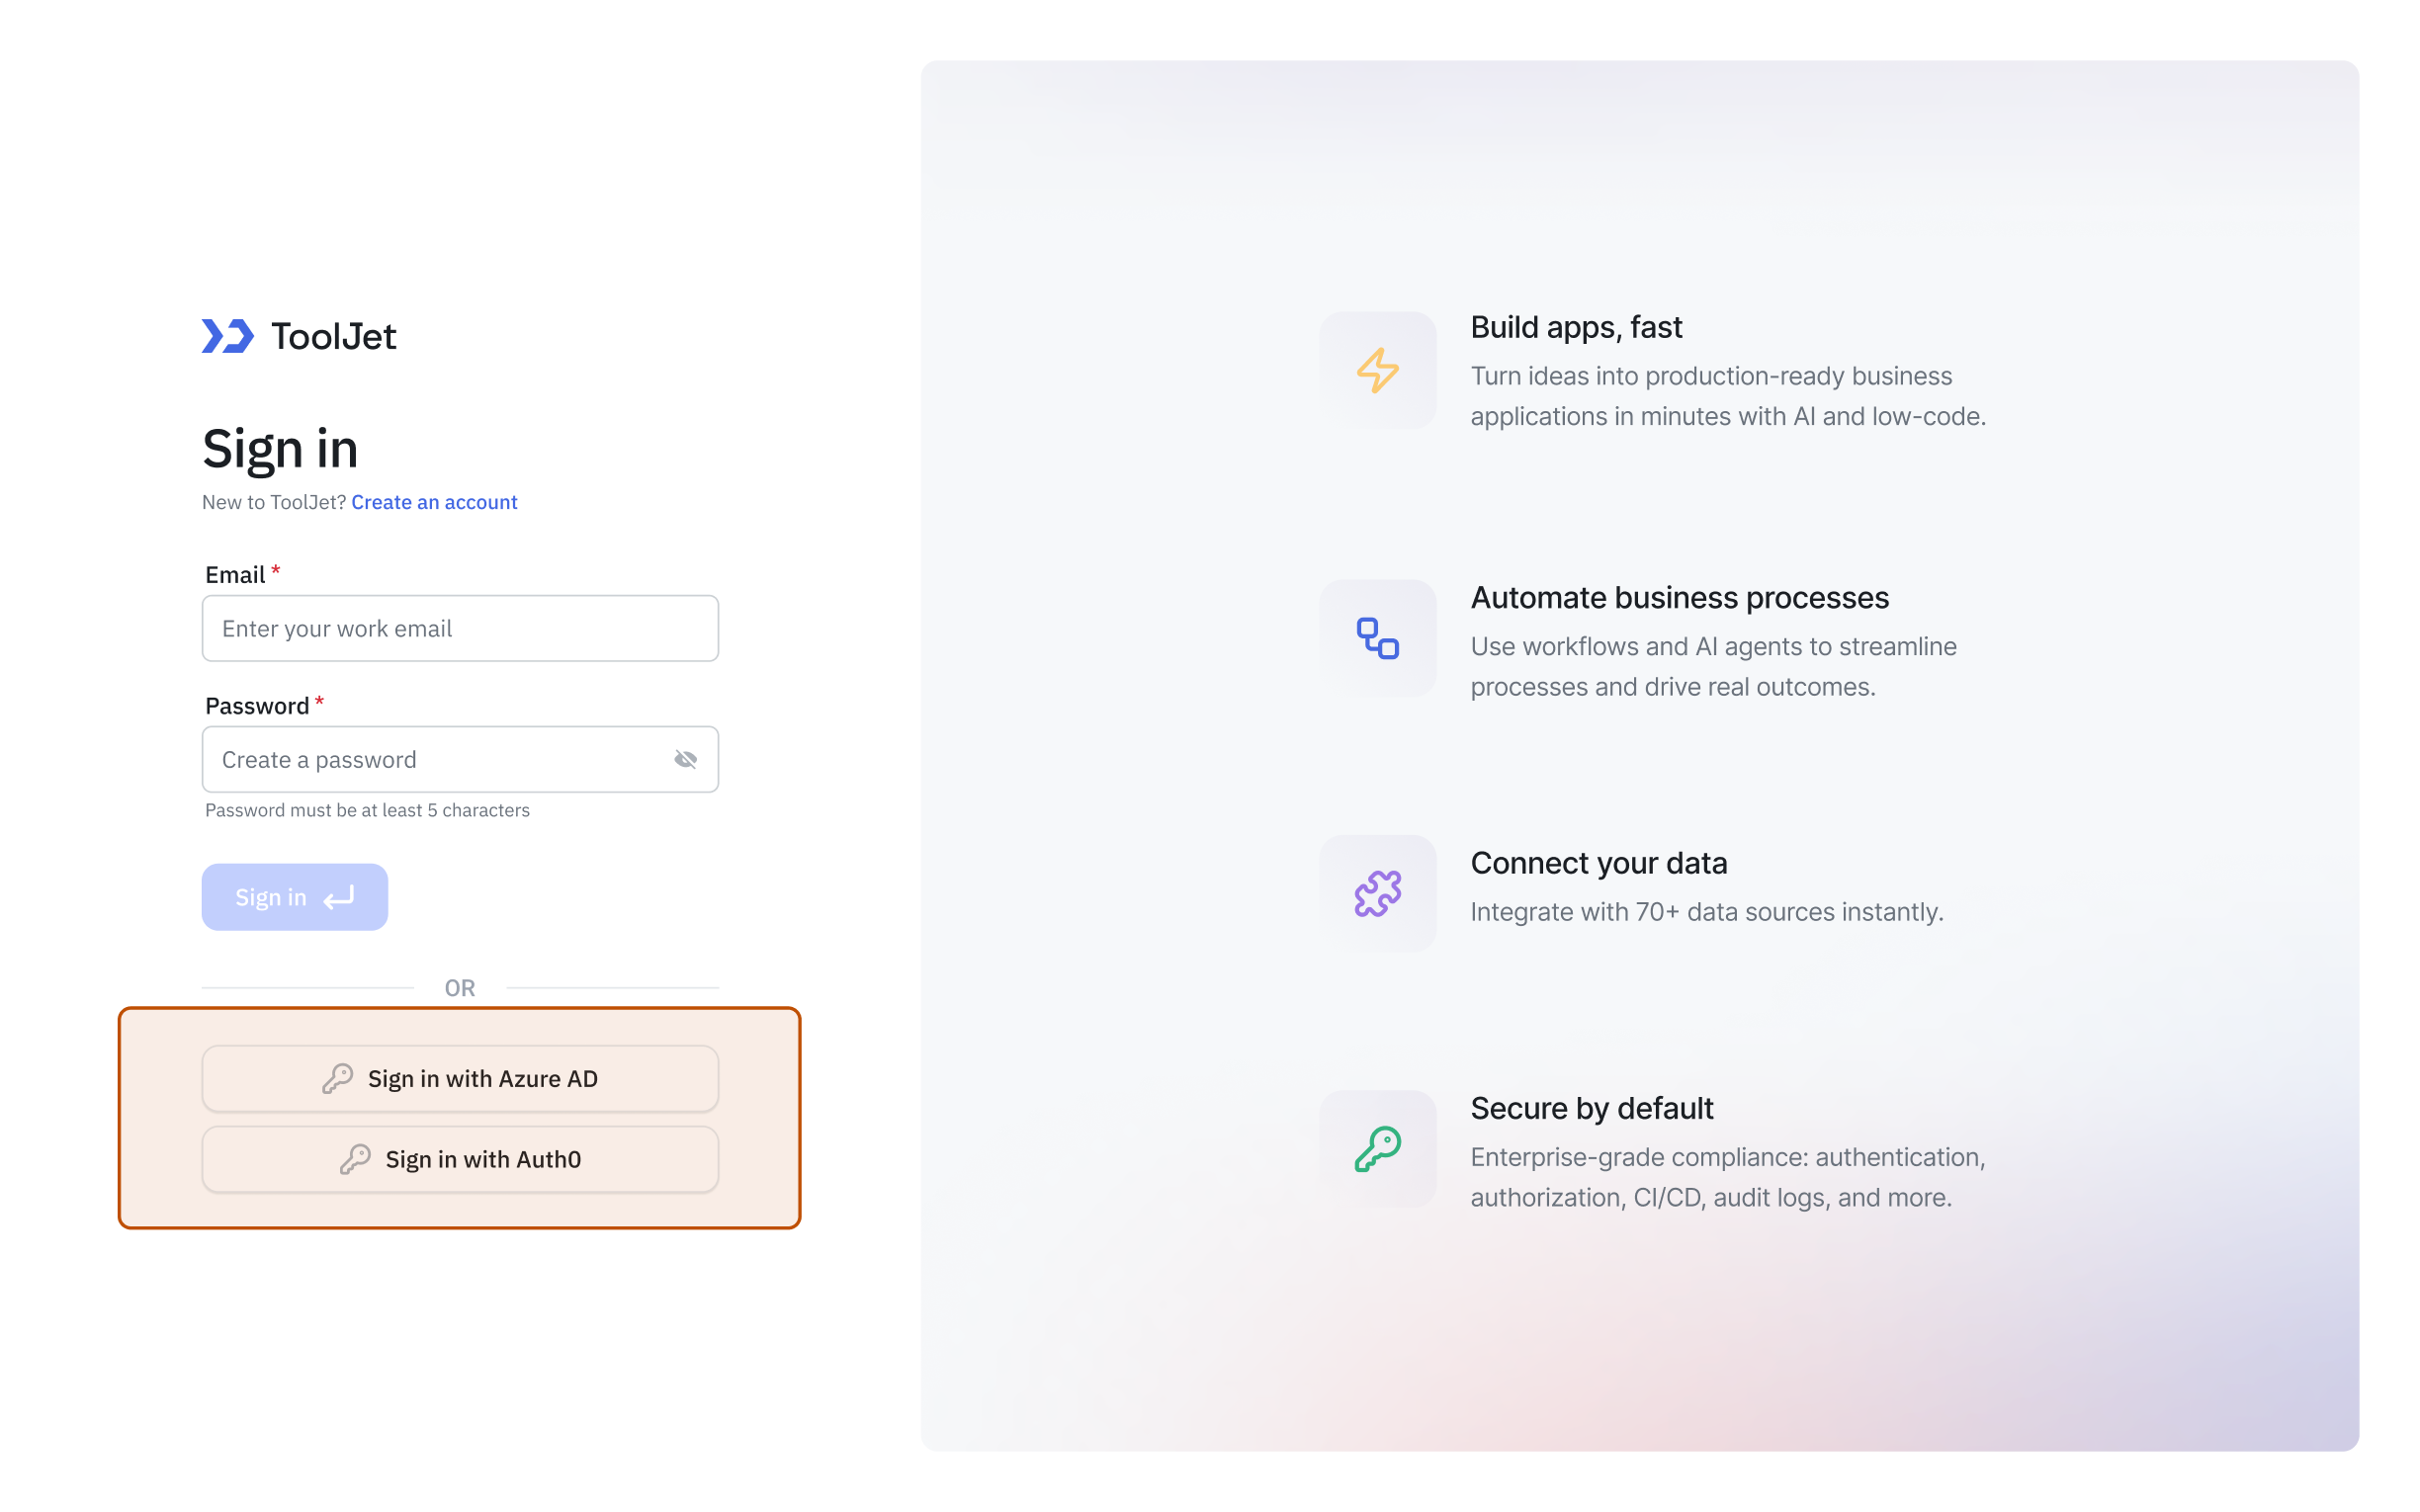
On the right, you'll see toggles to enable SSO via different clients. All the client toggles are disabled by default. Turn on the toggle in front of OpenID Connect.
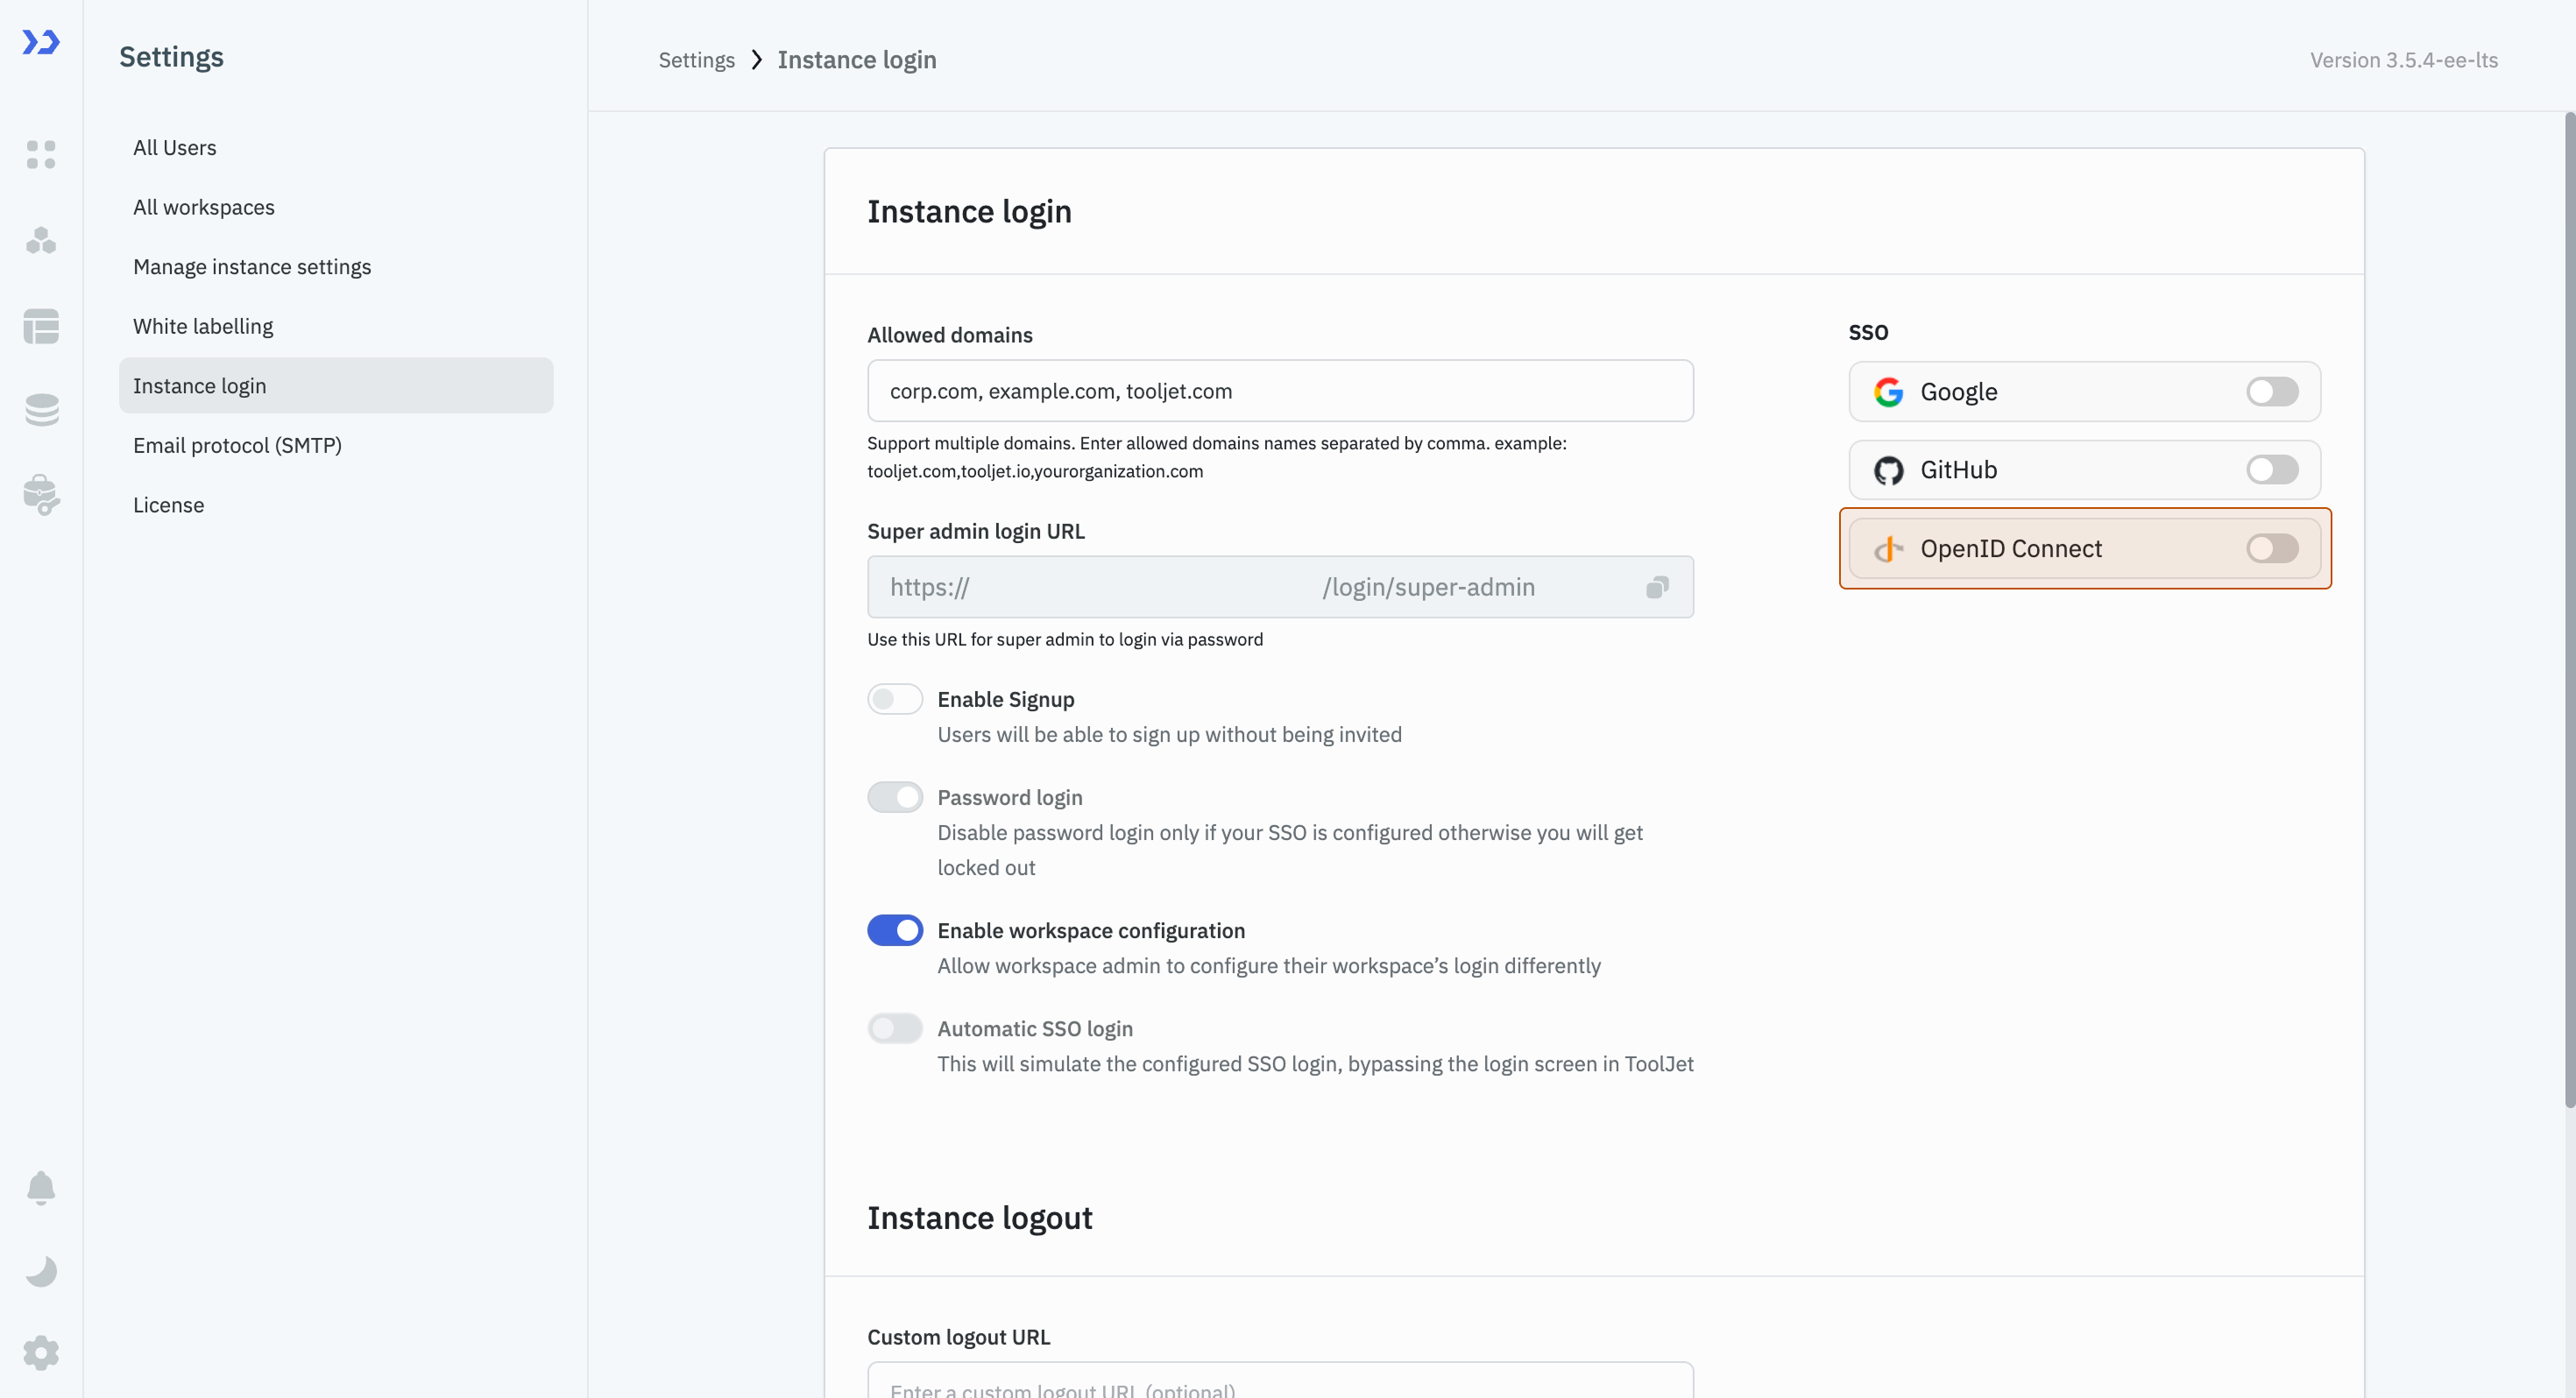
-
After turning it on, a modal will appear. Click on App provider and fill the input fields for parameters such as Name, Client ID, and Well known URL. At the top right of the modal, there is a toggle to enable this provider. Turn it on, and then, without entering any parameters, click on the Save changes button. This will generate a Redirect URL, which you will need to obtain the credentials from the Identity Provider.
-
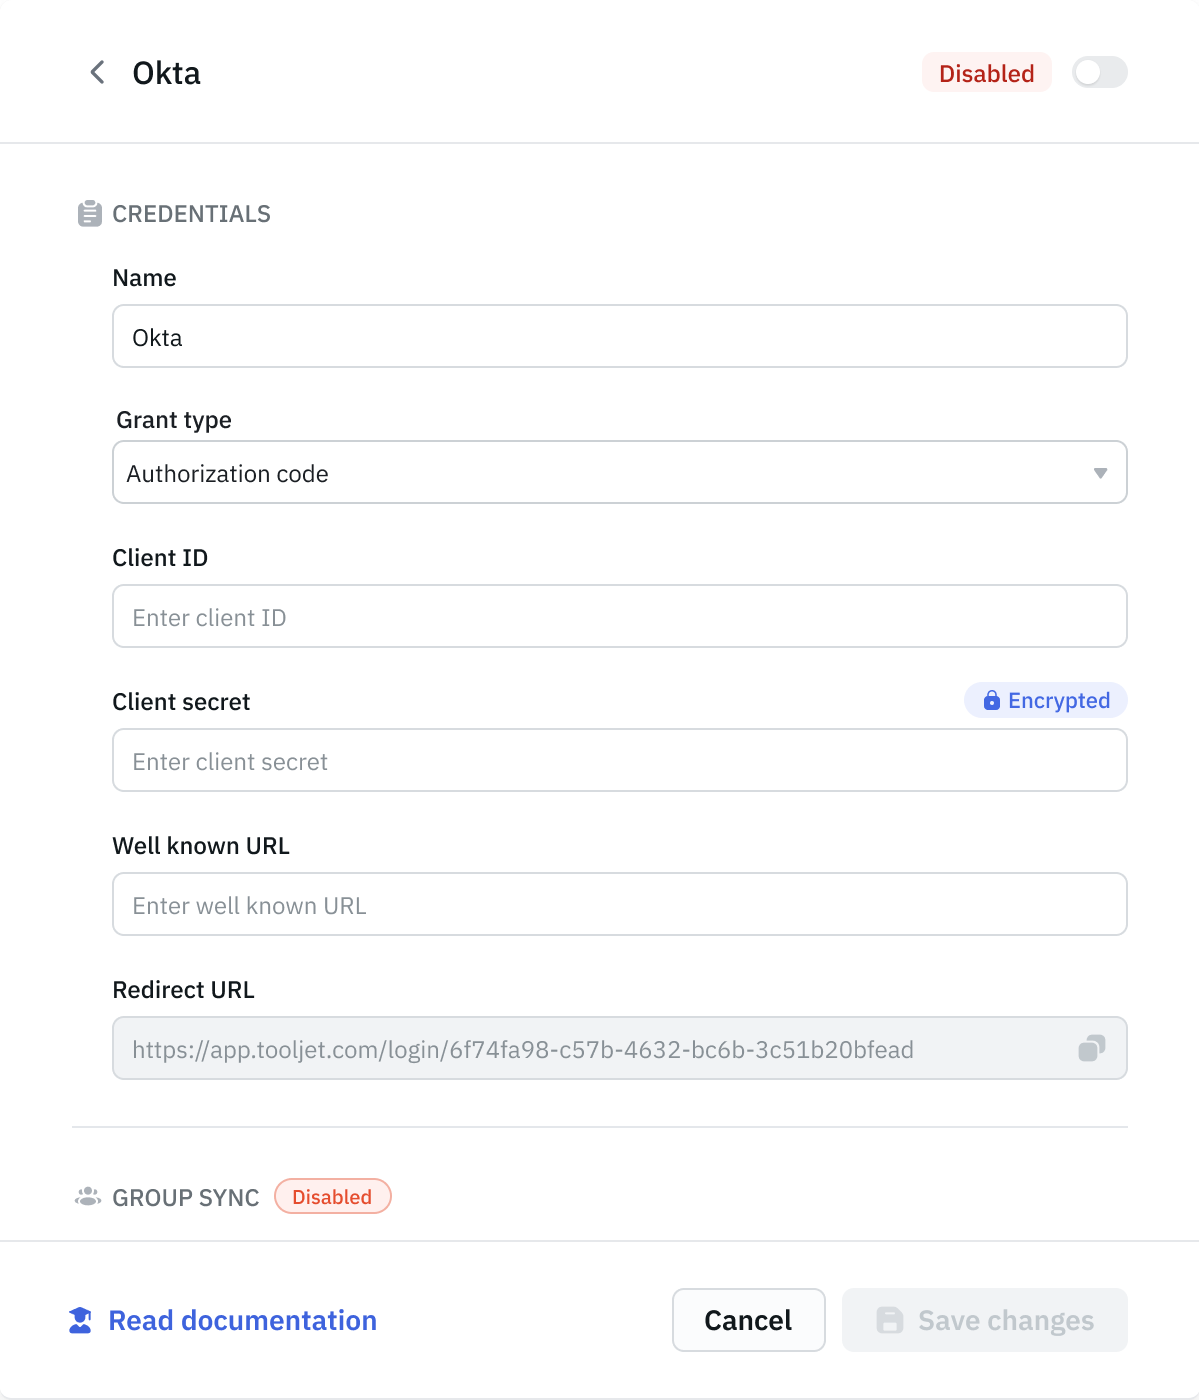
Open the modal again and choose the Grant type. ToolJet supports Authorization Code, which requires a Client ID and Client Secret, and Authorization Code with PKCE, which does not require a Client Secret.
-
After selecting the grant type, provide the Client ID, Client Secret / Code Verifier, and Well-Known URL from your identity provider. Once done, click Save changes at the bottom of the modal.
Upon saving, OIDC SSO will be successfully enabled using your configured Identity Provider, allowing your users to seamlessly authenticate via OpenID Connect for enhanced security and ease of use.
Configuring Multiple OIDC Providers
Enterprise PlanToolJet allows you to configure multiple OpenID Connect (OIDC) configurations simultaneously. This enables you to authenticate users using different identity providers such as Okta, Auth0, Microsoft Entra ID, Google or multiple tenants of the same provider within the same ToolJet workspace.
Each OIDC provider is configured independently and can be enabled or disabled as needed, allowing organizations to support multiple authentication sources for different teams or user groups.
To add a new provider, click Add provider in the bottom-right corner of the OIDC configuration modal.
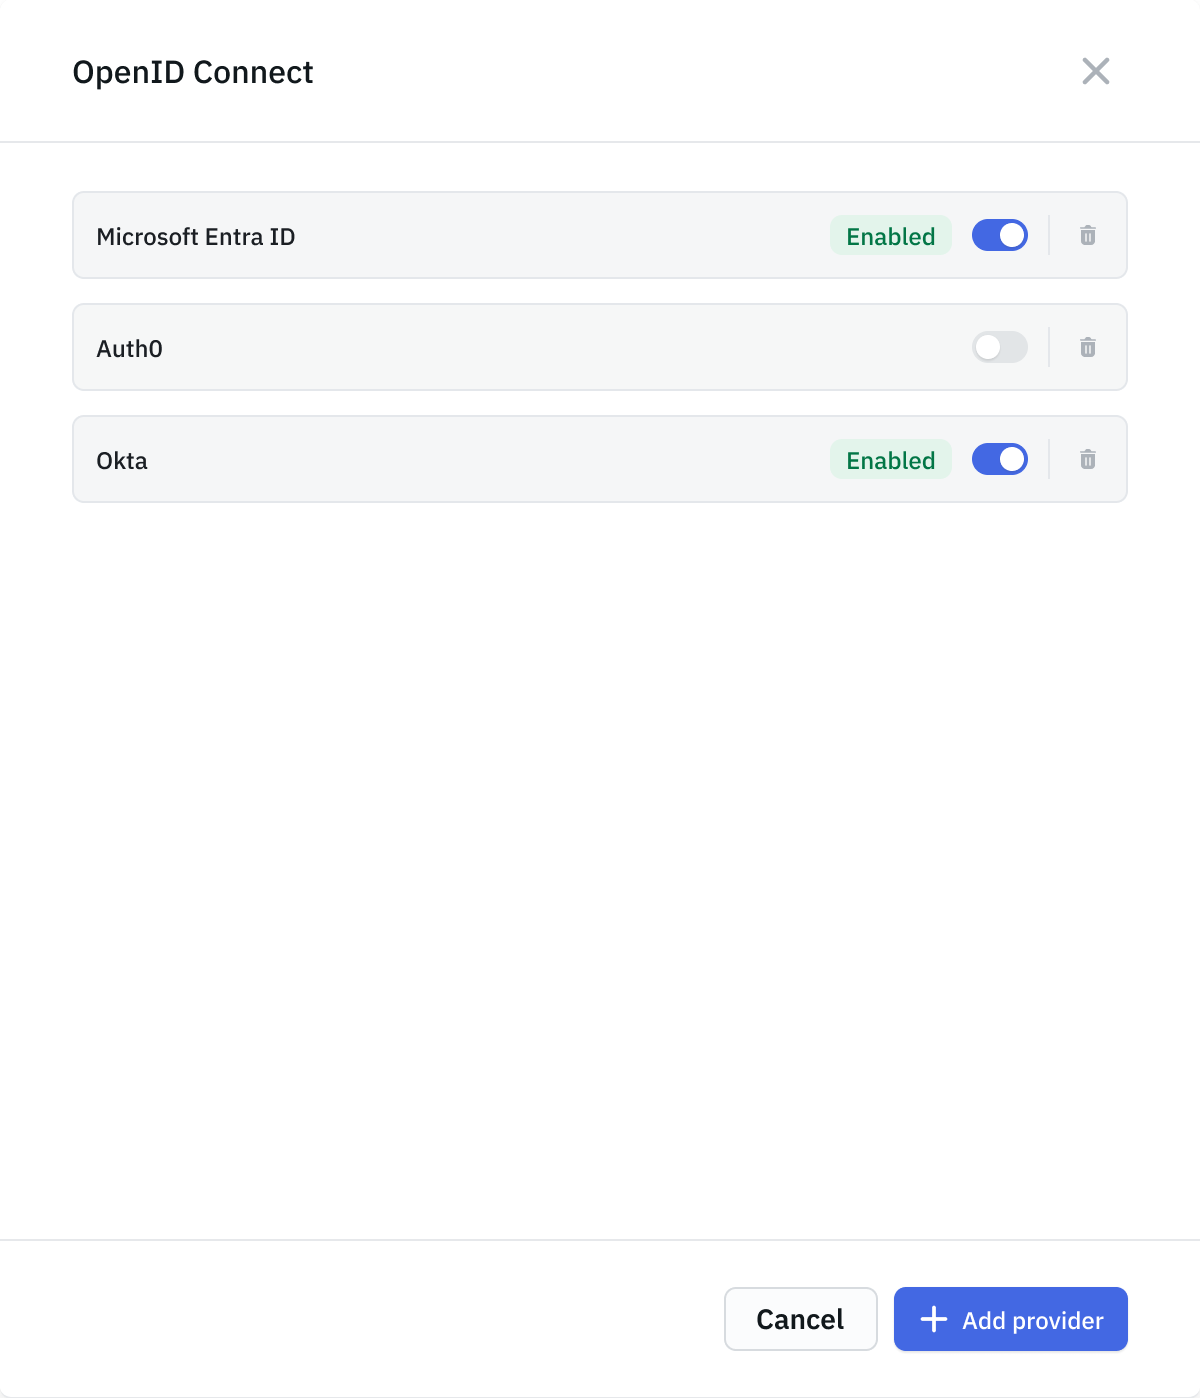
At sign-in, users can choose their preferred OIDC provider, making it easy to support multiple providers within a single ToolJet workspace.
Configuring ToolJet OIDC with Non Email Identifier
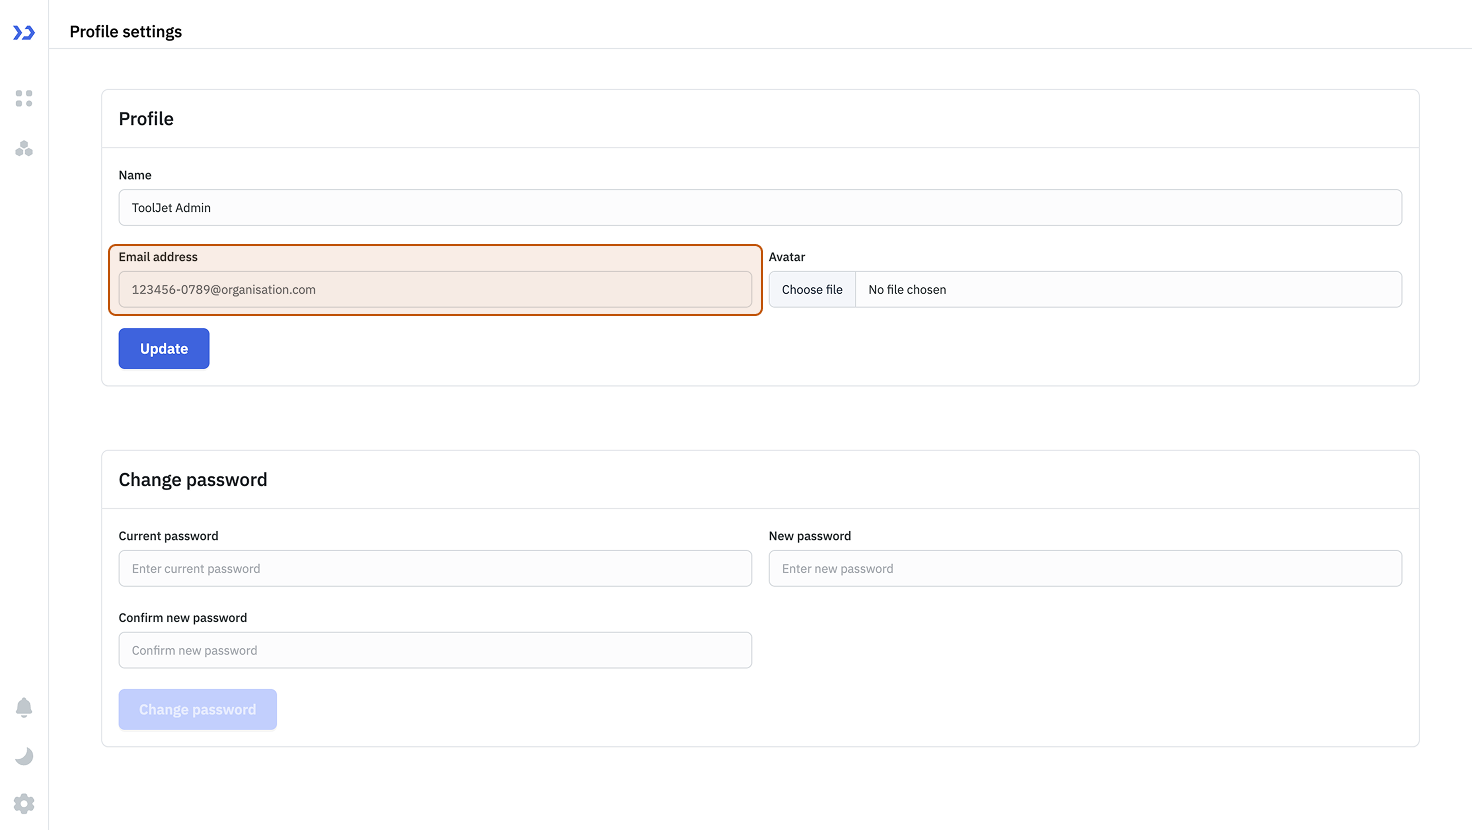
ToolJet supports authenticating users using a non-email identifier. ToolJet generates a dummy email address for the user using the configured domain name and the unique id. For example, if the unique id of a user is 1234 and the domain is set to example.com, the dummy email address created will be [email protected].
Users can continue signing in with their non-email identifier via SSO. This feature allows your team to access ToolJet using any unique identifier instead of an email address, such as Employee ID or Student ID.
Configuring the Environment Variables
To enable this behavior, you need to configure the following environment variables:
SSO_UNIQUE_ID_FIELD
Set this to the name of the unique identifier field received by ToolJet from your Identity Provider (IdP), such as employee_id or student_id.SSO_CUSTOM_EMAIL_DOMAIN
Set this to a domain name. ToolJet uses this domain to generate dummy email addresses for users.
Example: Signing In With Keycloak
In this example, we set up an IdP using Keycloak and configured a ToolJet instance with the following environment variables:
SSO_UNIQUE_ID_FIELD: employee_idSSO_CUSTOM_EMAIL_DOMAIN: organisation.com
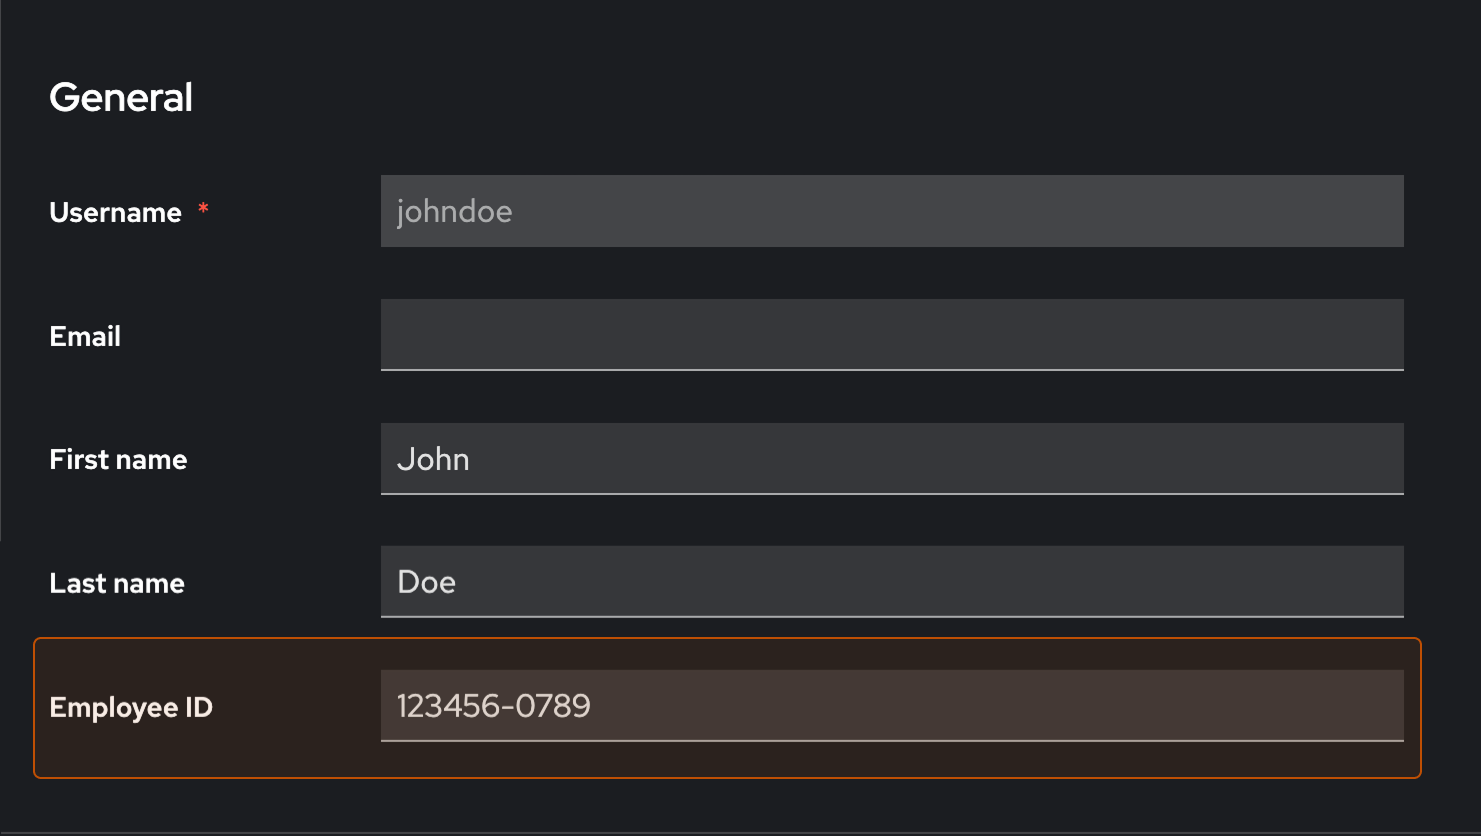
With this setup, employee_id is used as the login identifier for ToolJet. In Keycloak, Employee ID is a custom user attribute.
-
We created a user in our Keycloak server with the following credentials:
-
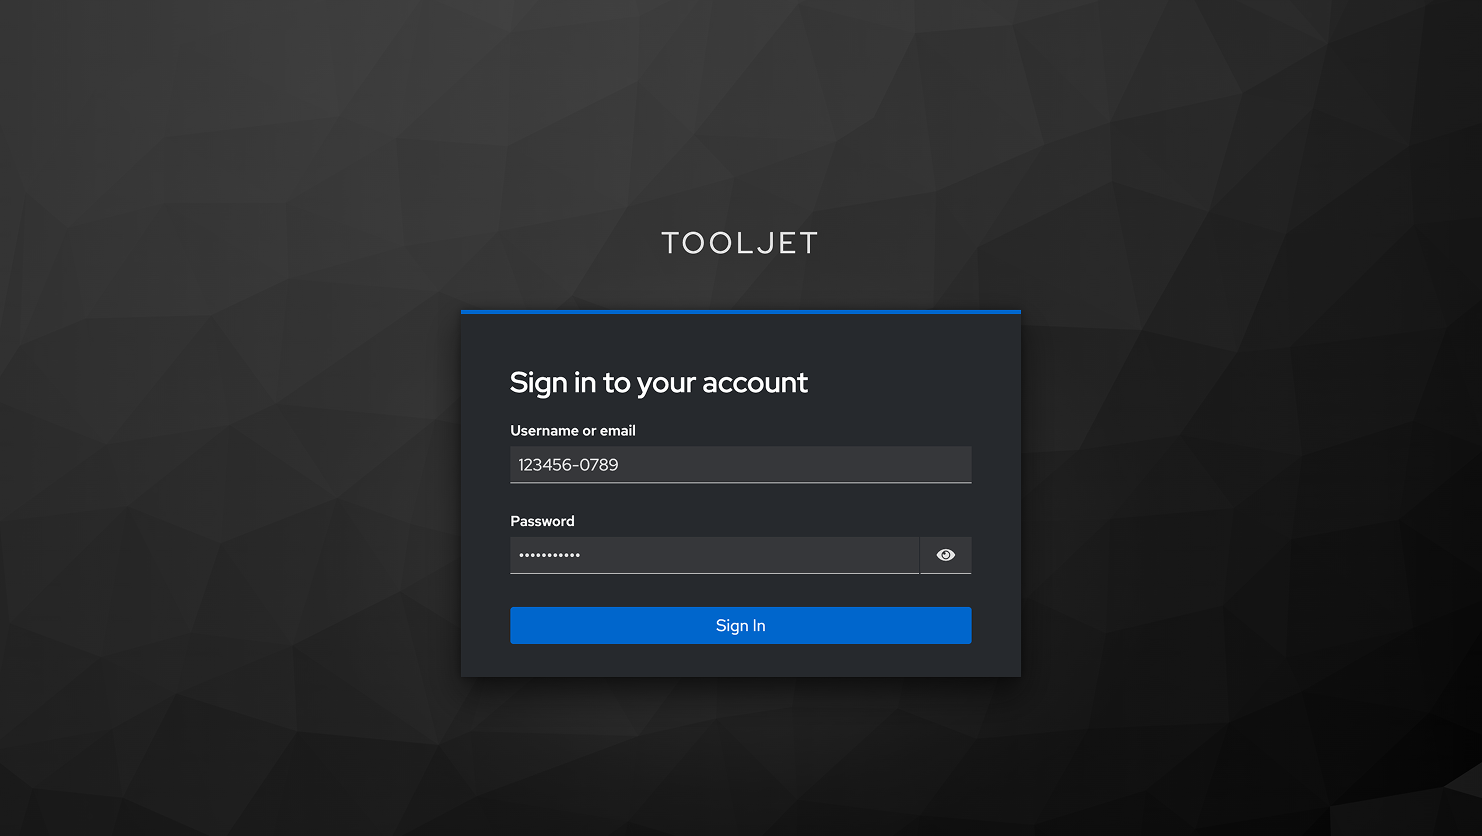
We login to our ToolJet instance using Keycloak and are redirected to the Keycloak login page.

-
On the Keycloak login page, we sign in using the Keycloak credentials. We enter the employee_id instead of email and sign in.
-
After a successful login, you are redirected to your ToolJet workspace. To verify the setup, you can view the generated dummy email address in Profile settings.