OneLogin
OneLogin can be configured as an identity provider (IdP) using OpenID Connect (OIDC), an authentication protocol that securely verifies user identities through a trusted provider. This document explains how to obtain the required credentials from the OneLogin Console. Refer to the OIDC Setup guide to configure OIDC in your application.
Generating Client ID and Client Secret on OneLogin Admin Portal
-
Log in to OneLogin. You'll need a domain for your organisation. You can get one by signing up for a Free trial on the home page.
-
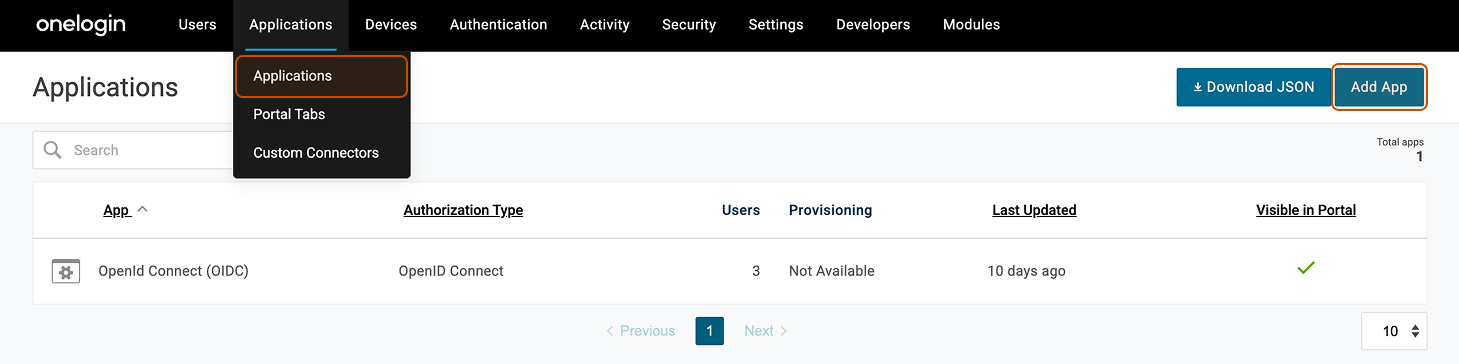
Go to the Administration page, then navigate to Applications > Applications > Add App.
-
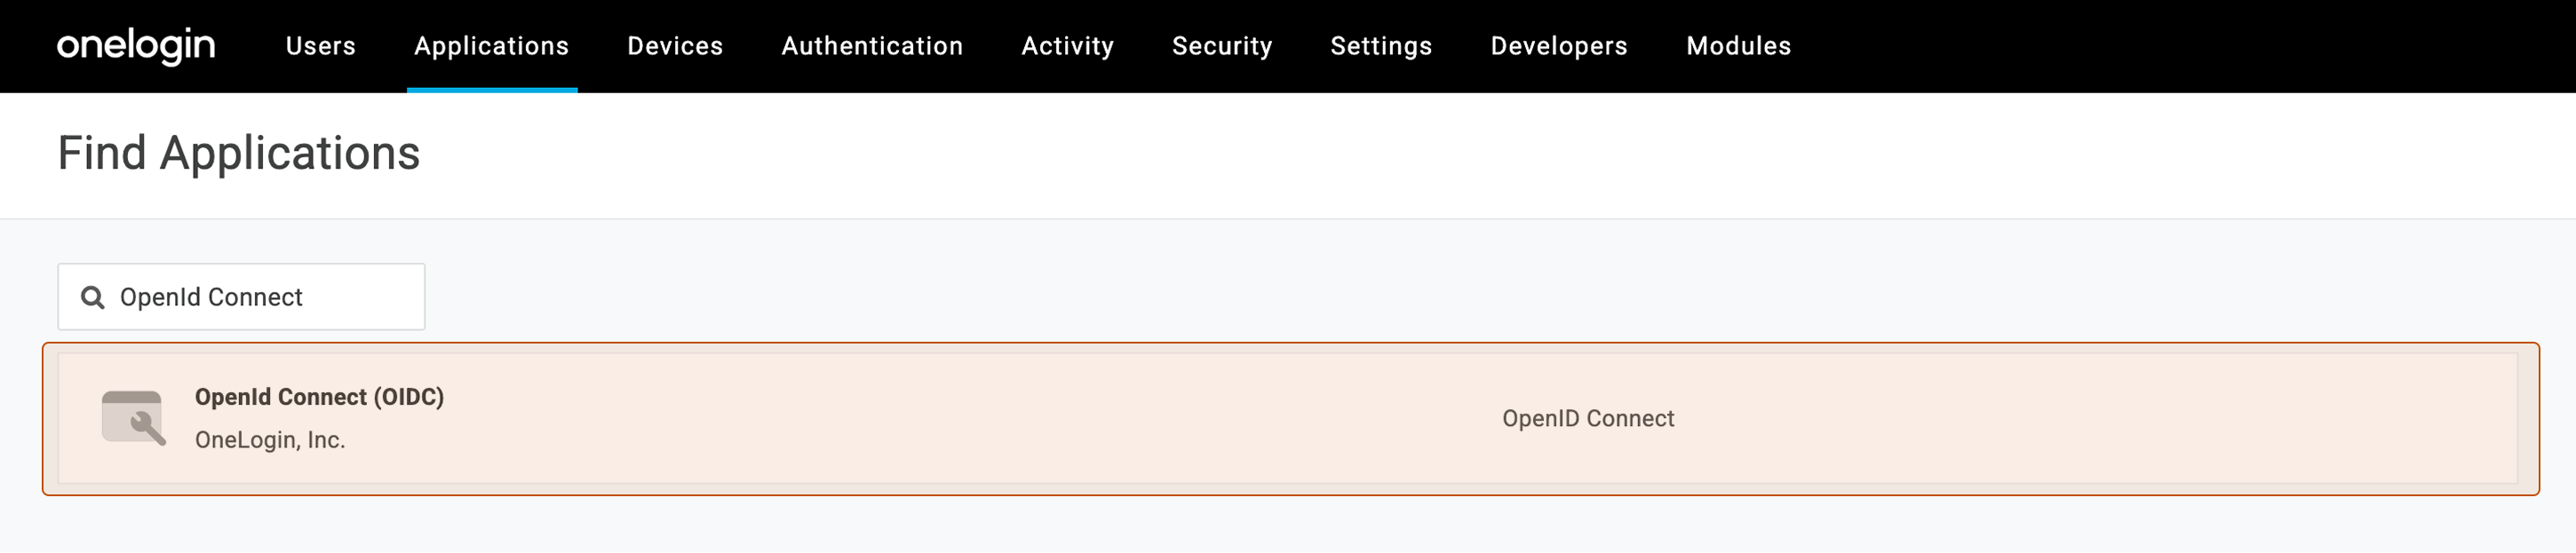
In the Find Applications page, search for OpenID Connect (OIDC) and Select OpenId Connect (OIDC).
-
Enter the Display Name and keep the default configuration and click on Save.
-
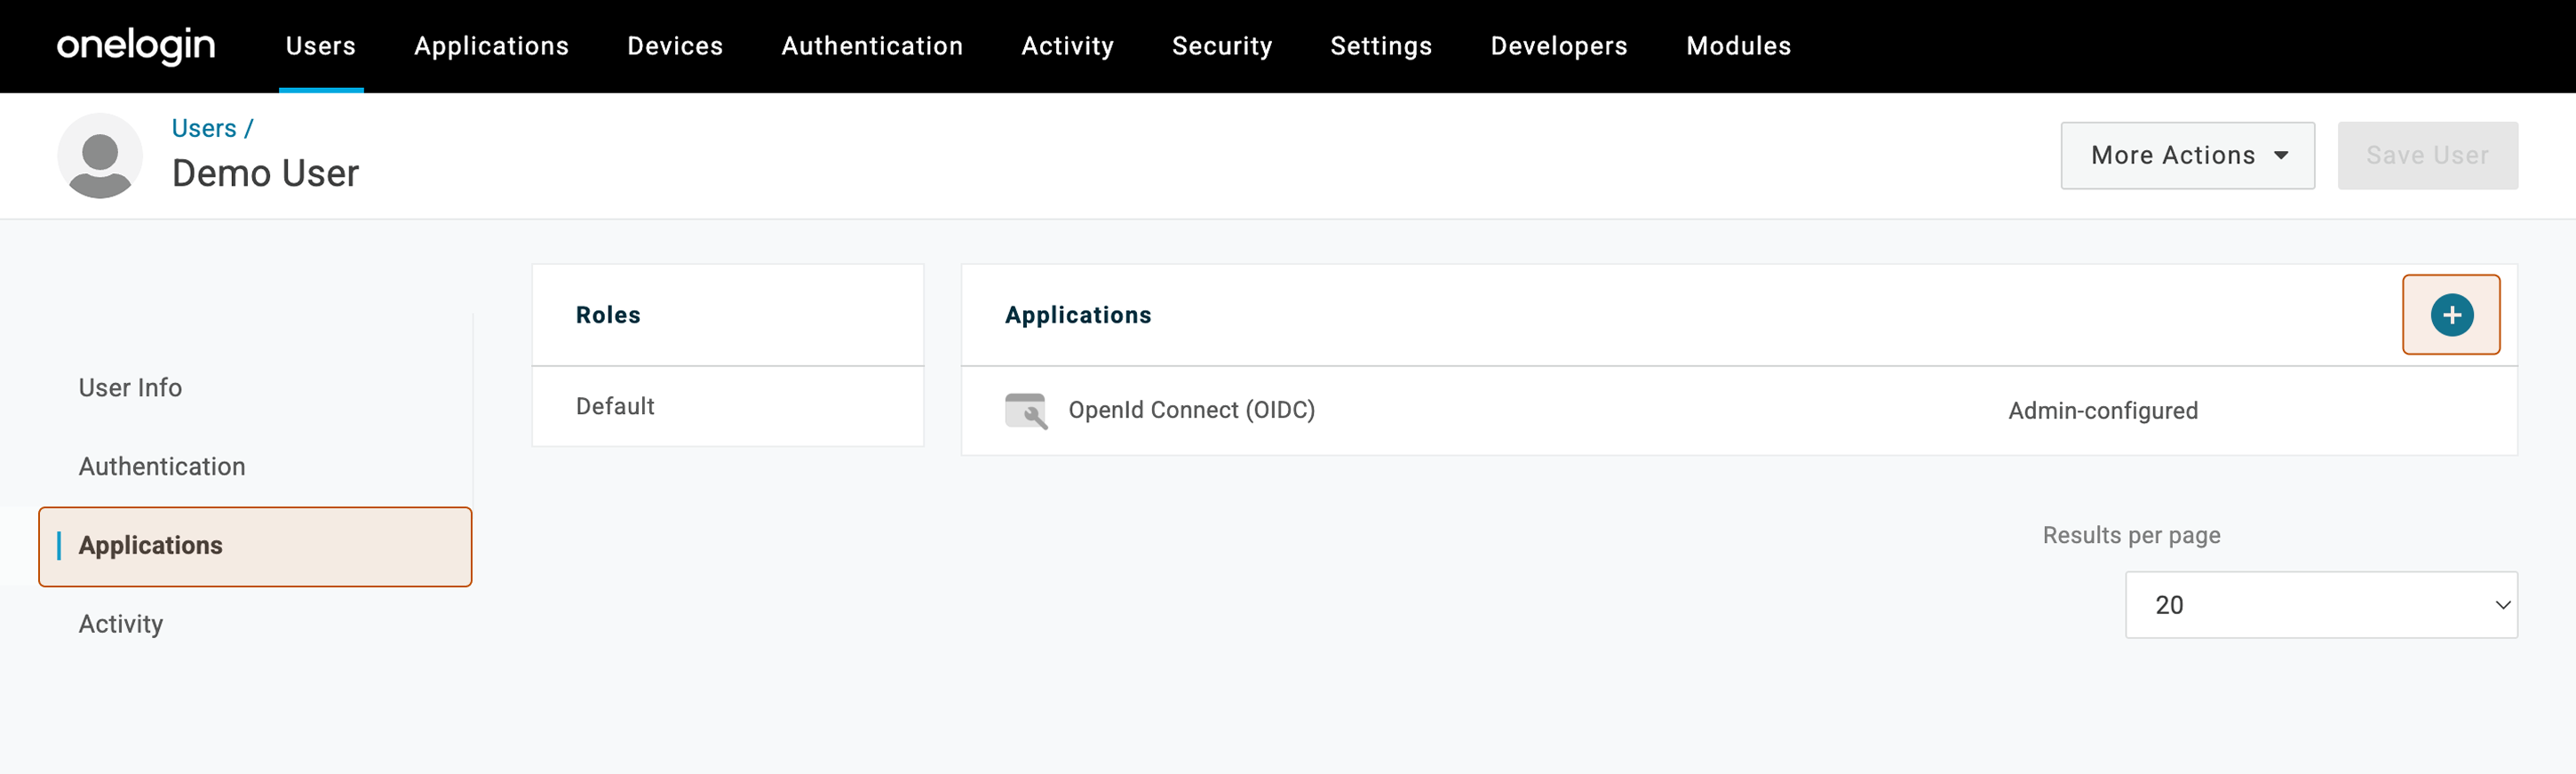
You'll need to create your user and add it to the OneLogin application that you just created. In the Naviagtion bar, go to Users > New User and create a user. After creating the user, open the user profile, go to Applications, and click the + icon to assign the user to the application you just created.
-
Select the application you just created and click Continue. The user will be added to the application.
At this point, the OneLogin application is ready. Next, you’ll collect the OIDC credentials required to configure ToolJet.
-
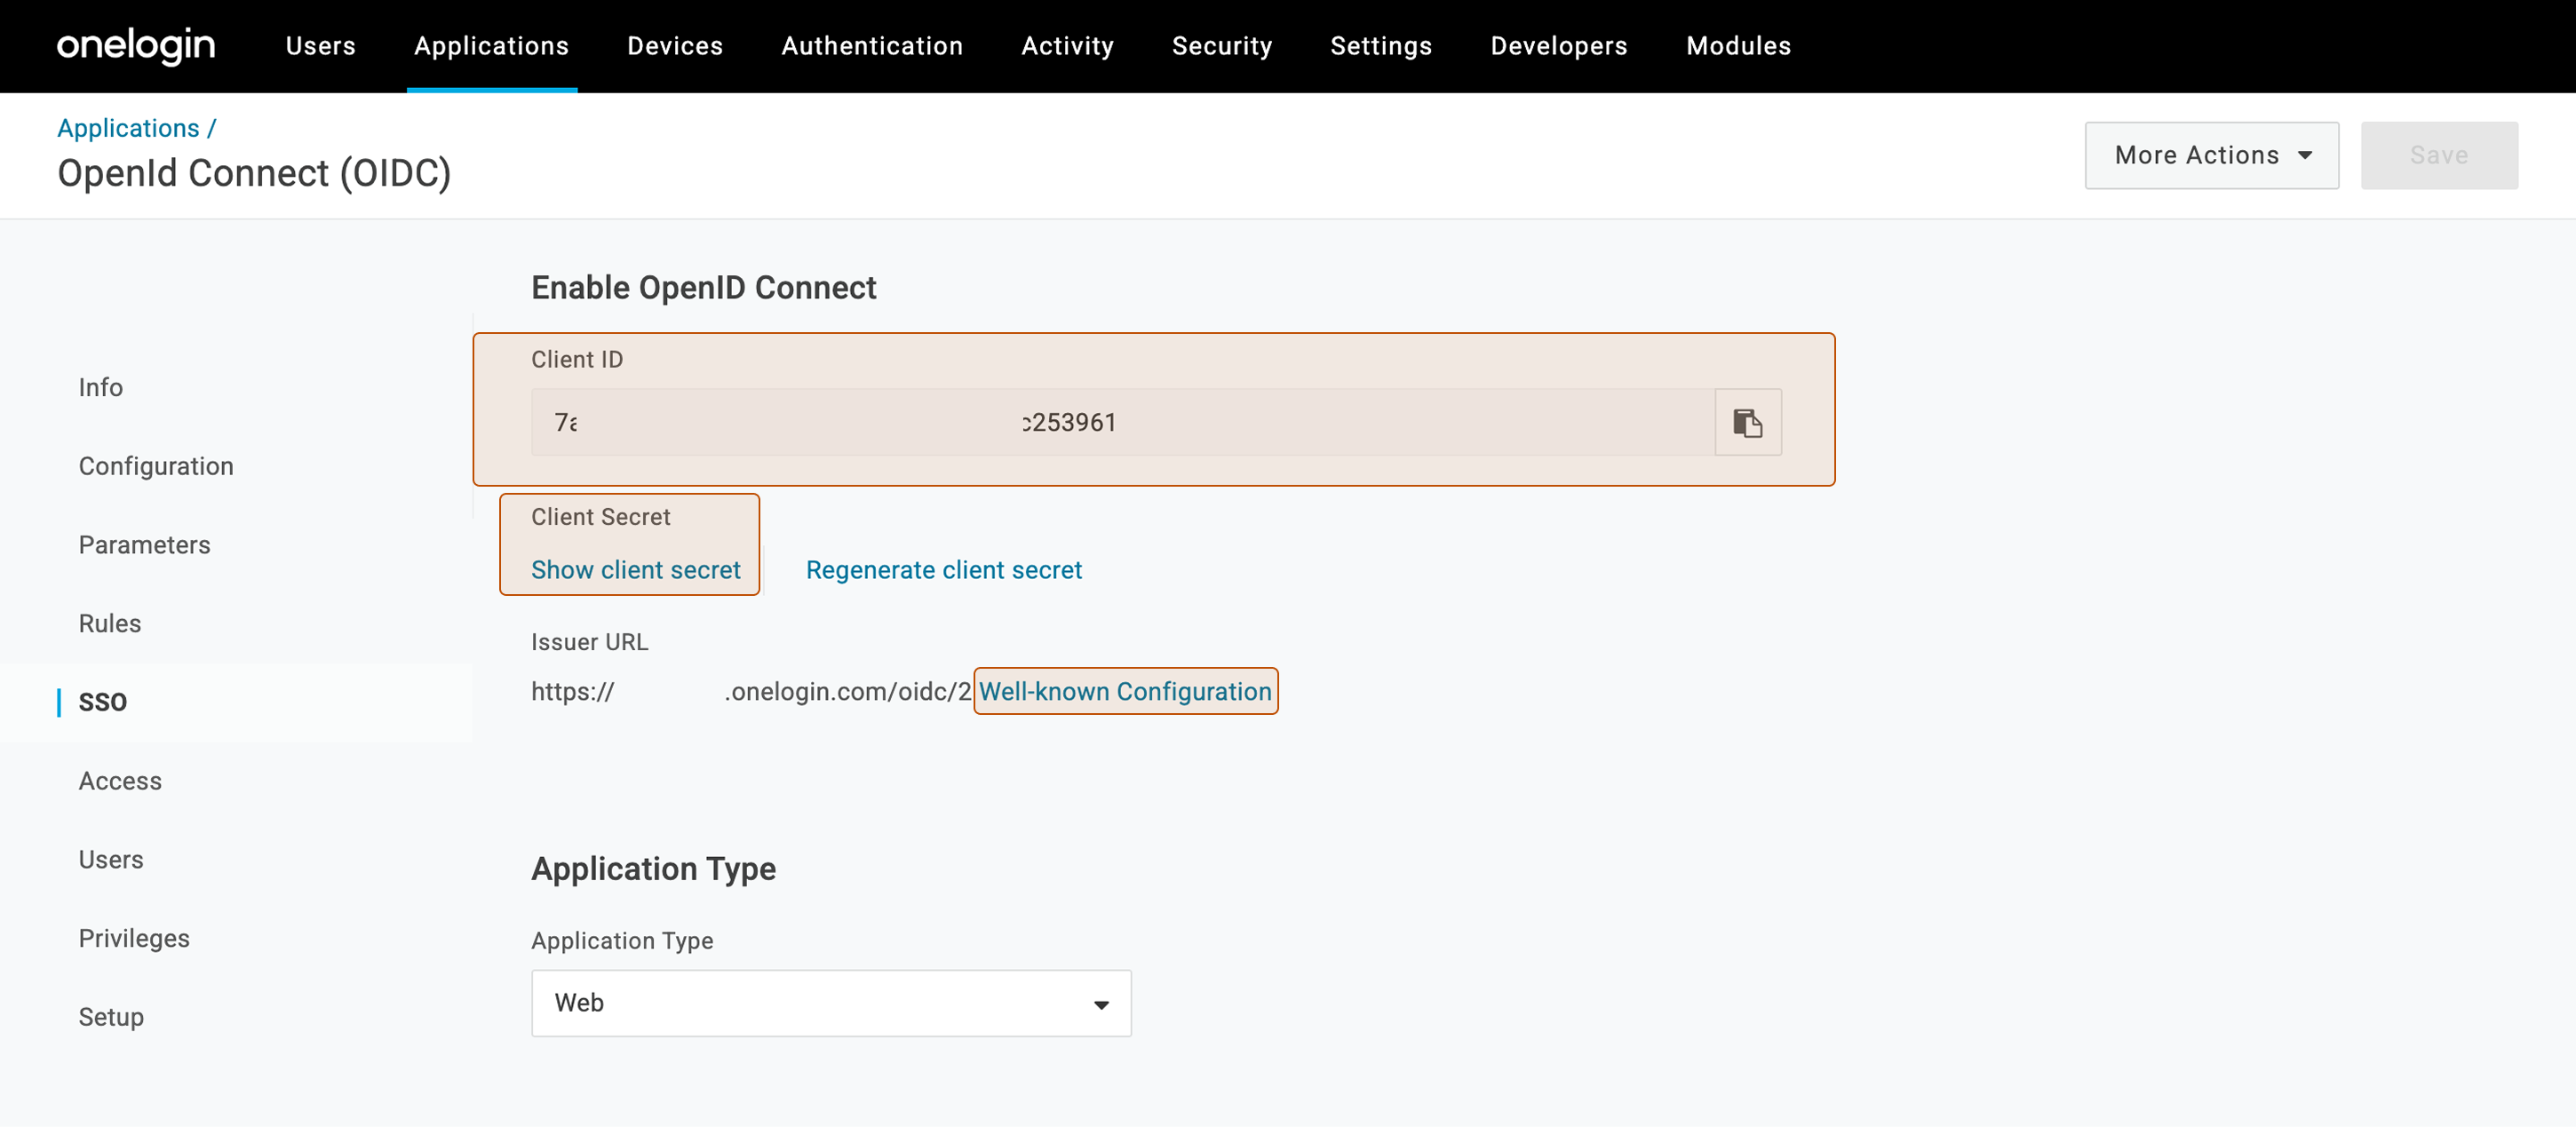
Now go to your Application > SSO and get the Client ID. To get the Client secret, click on Show client secret. To get the Well-known configuration URL, click Well-known Configuration and copy the URL.
-
Go to ToolJet > Workspace settings > Workspace login > OpenID Connect > Add provider. (Example URL - https://app.corp.com/demo-workspace/workspace-settings/workspace-login)
-
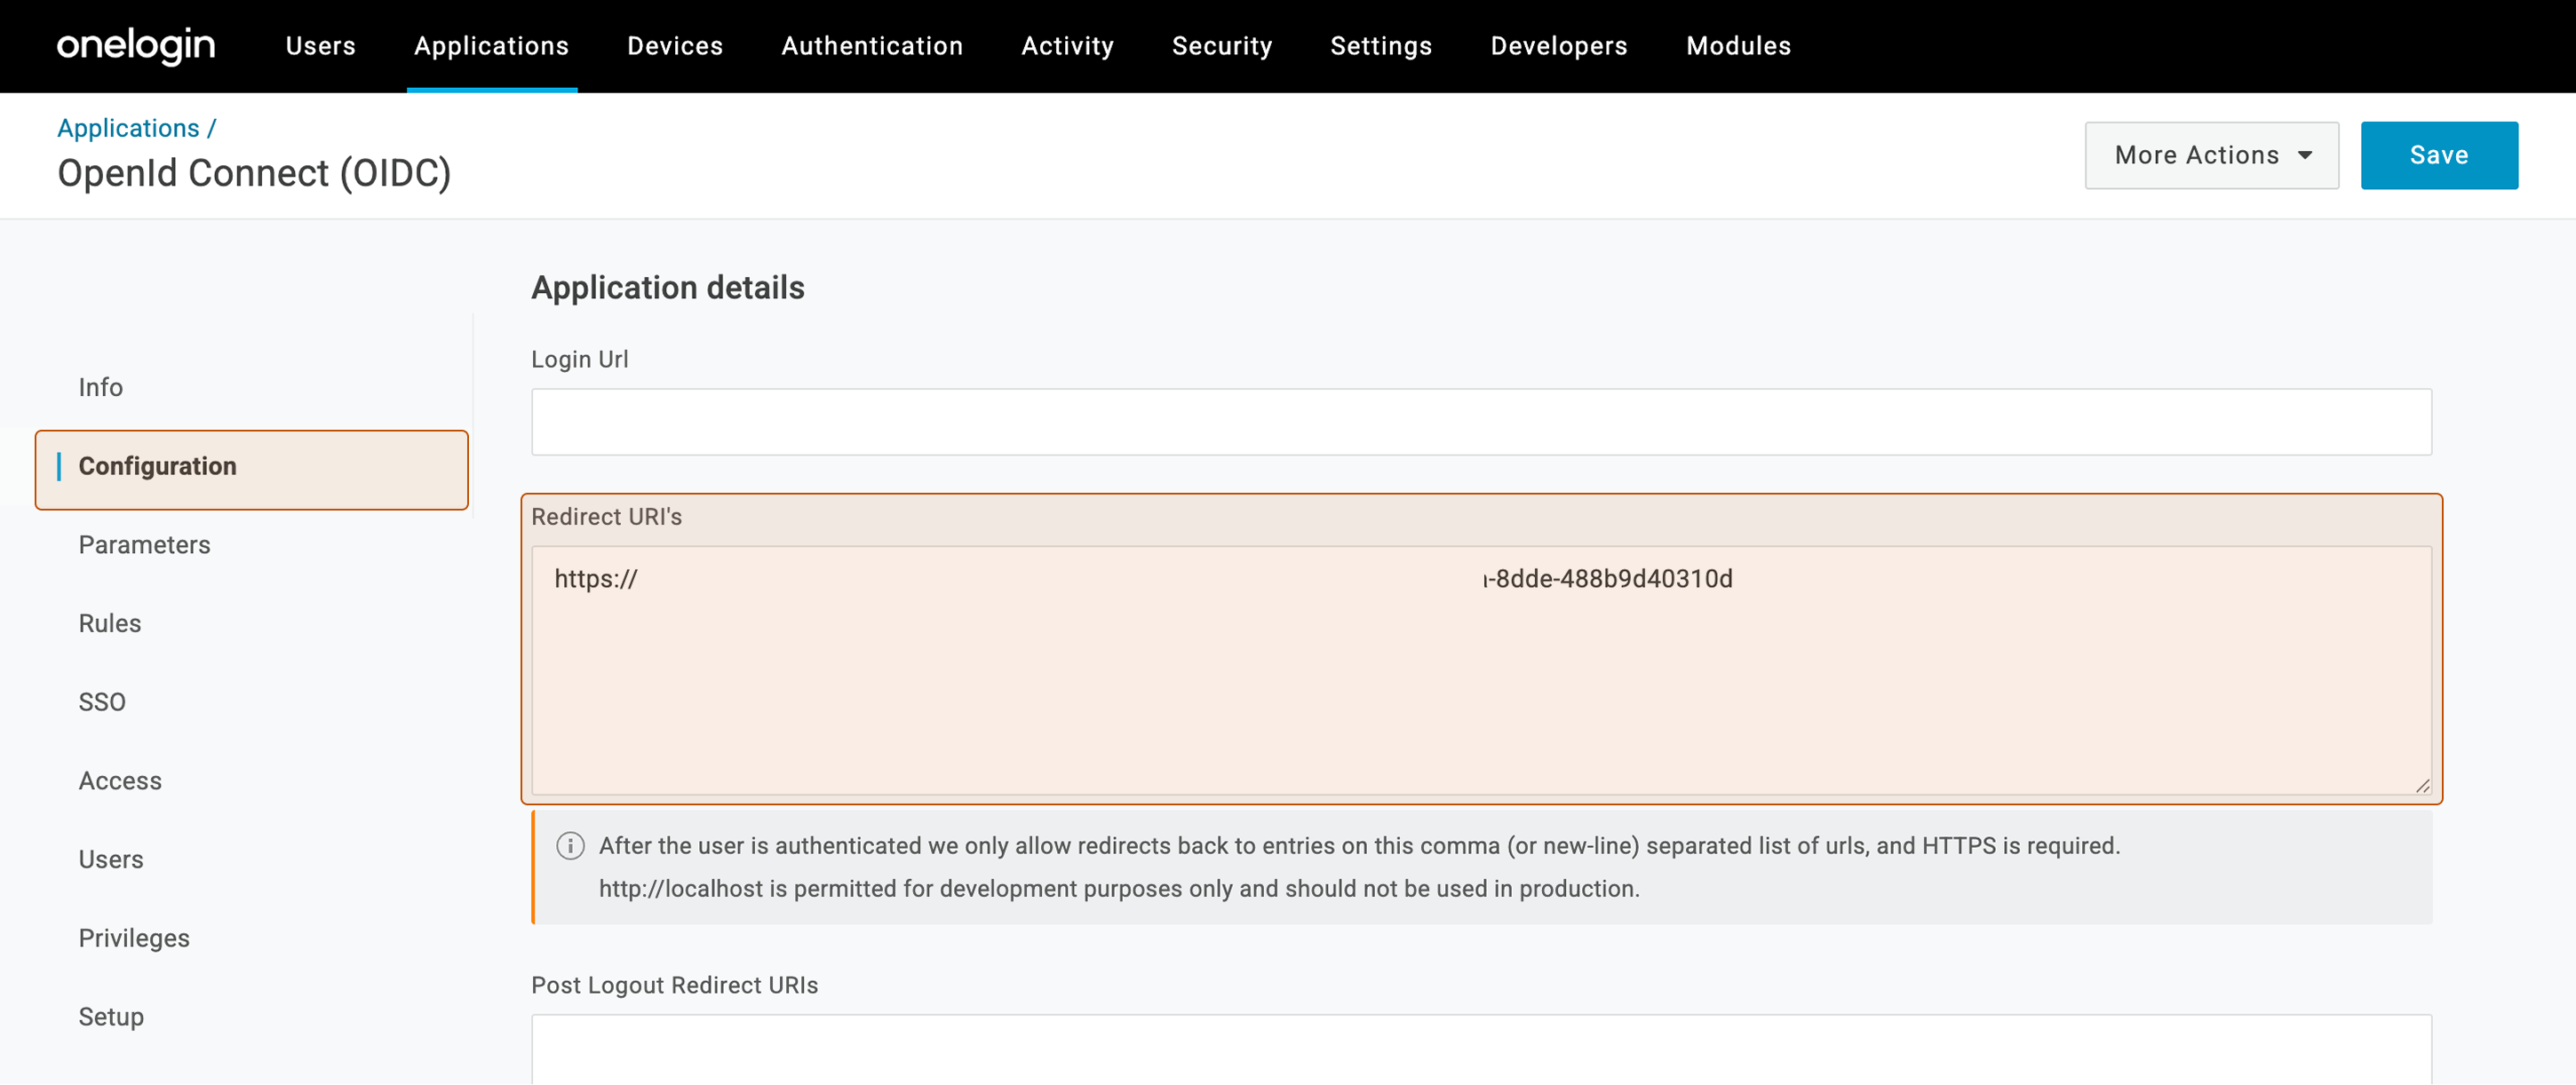
Enter the details from step 7 and click Save changes. Then, copy the Redirect URL shown by ToolJet.
-
Go to your OneLogin Application > Configuration > Paste the Redirect URL into the Redirect URIs section and click Save.
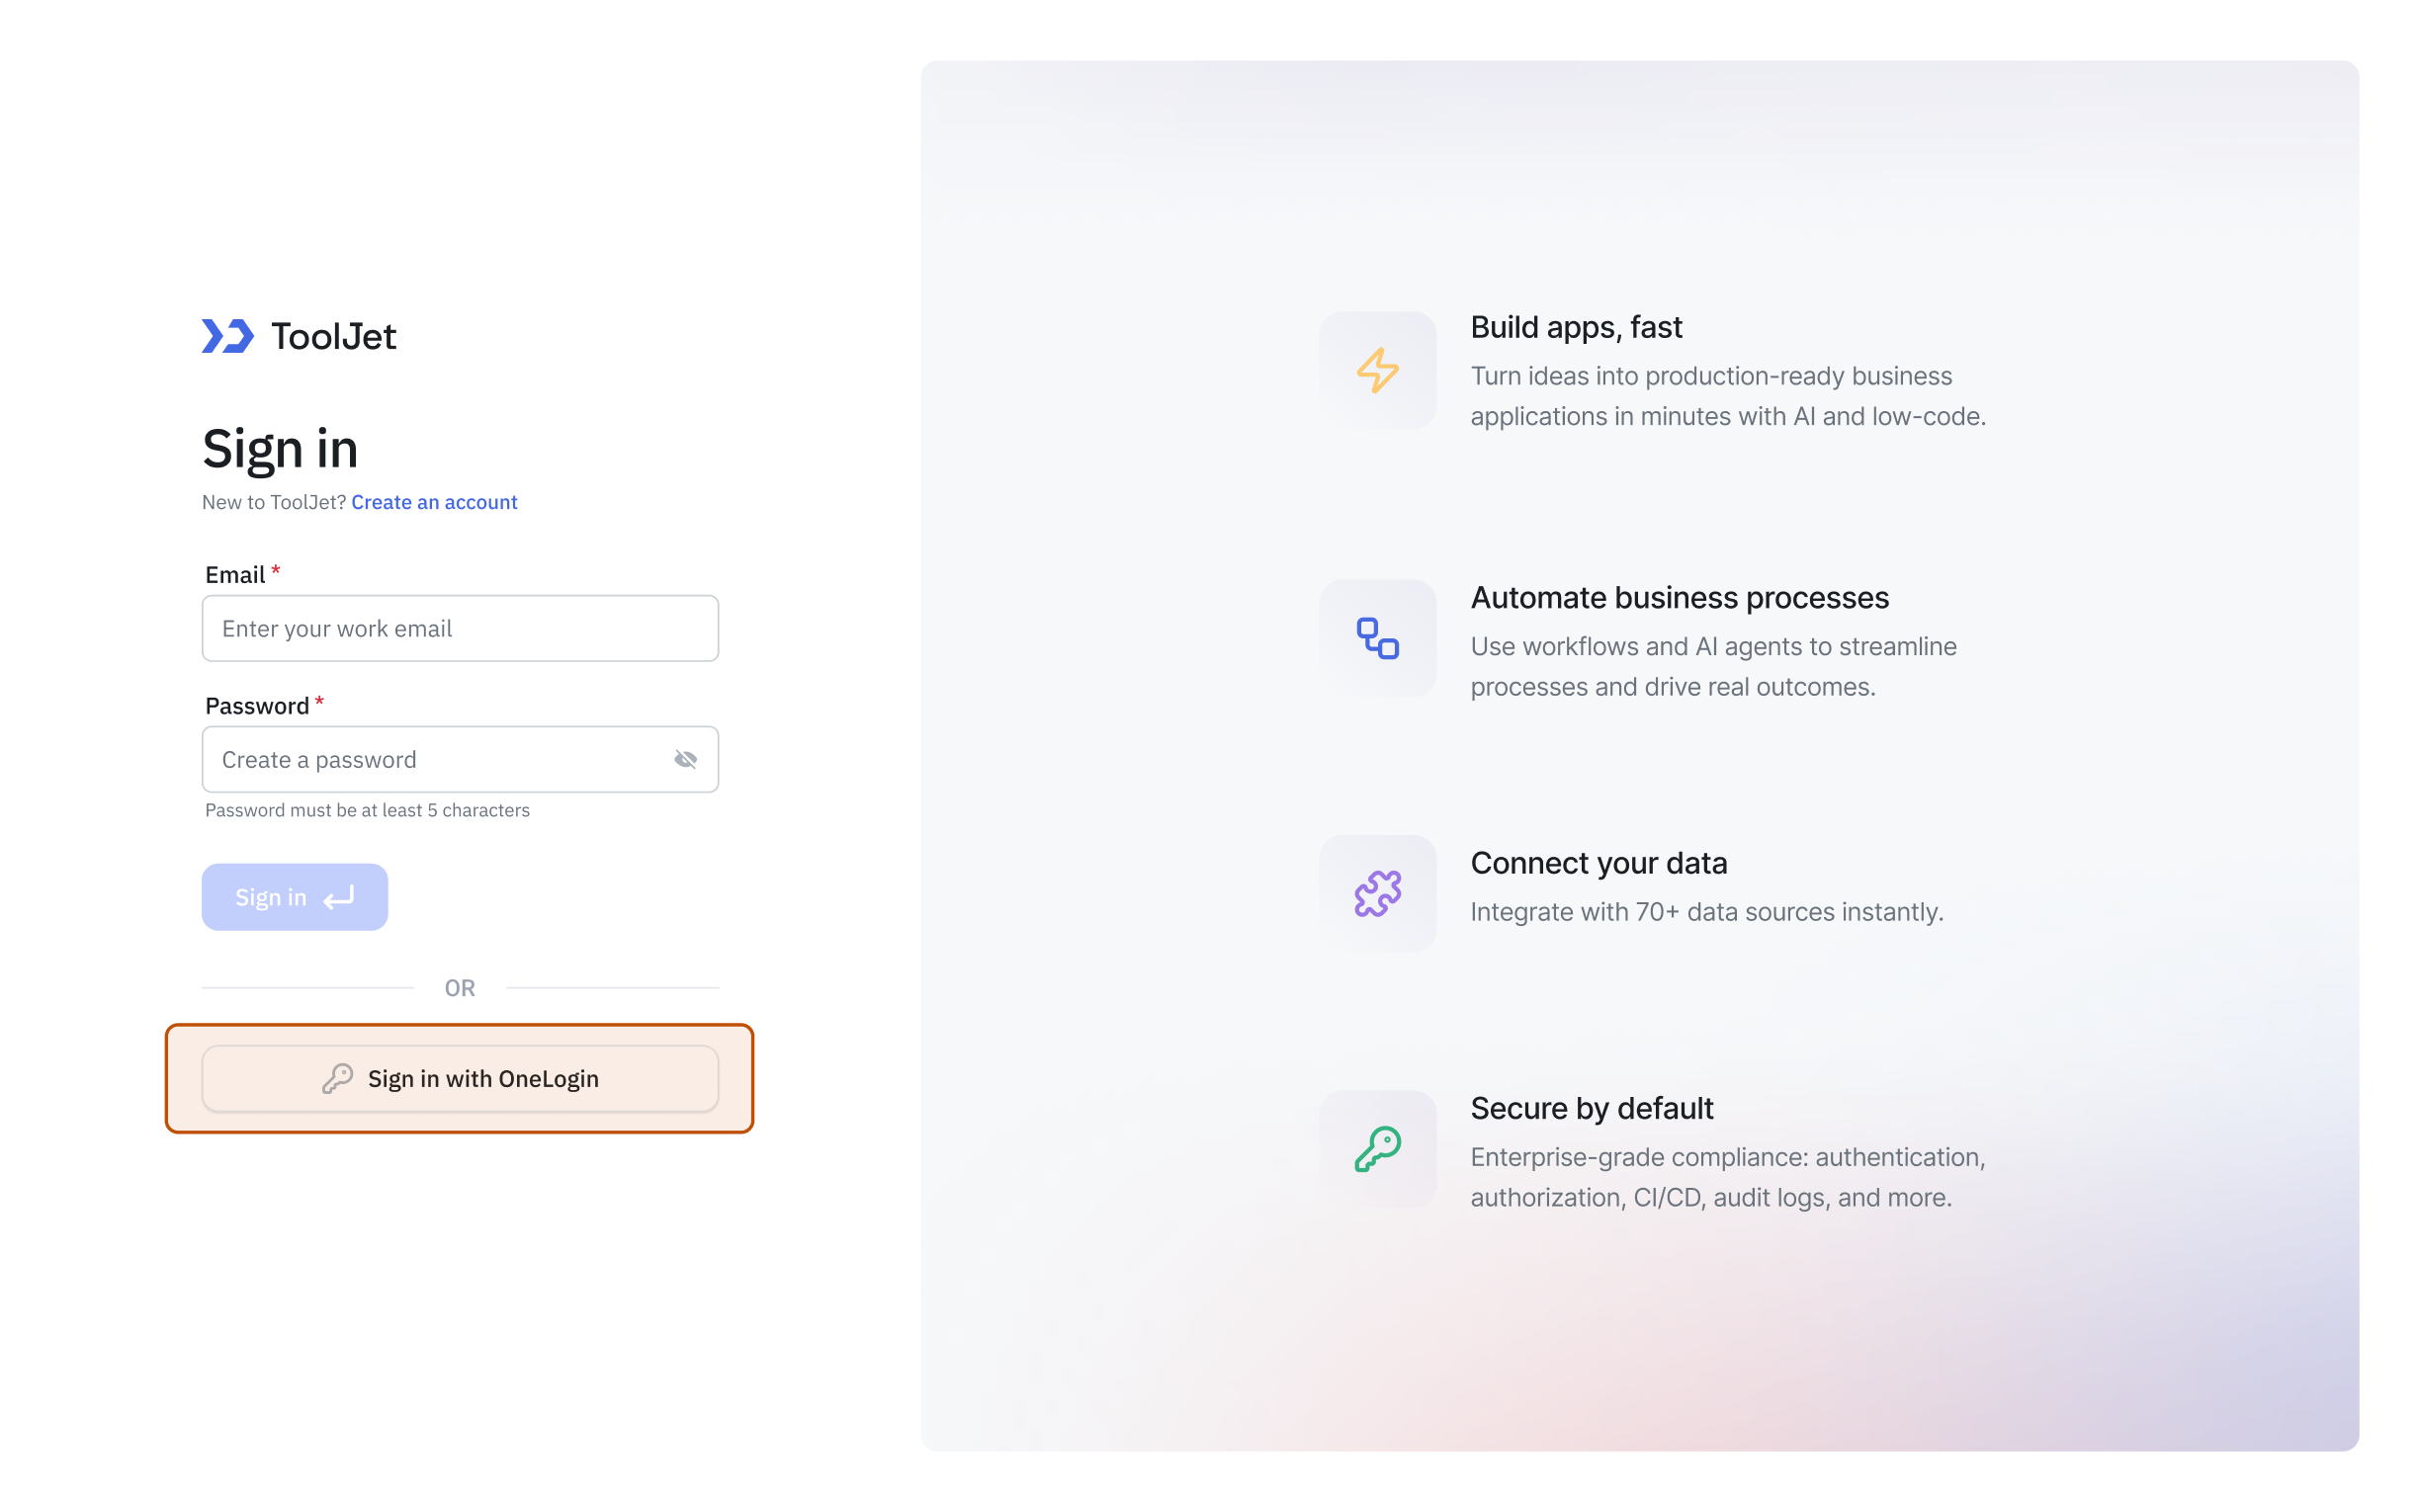
You shall now be able to login to your ToolJet workspace using OneLogin.
Configuring Group Sync with OneLogin
To configure group sync with OneLogin, you need to follow these steps:
-
Go to the OneLogin Admin Portal and navigate to Users → Roles → New Role. Create a role with the same name as the group you want to map. For example, to map the builder role in OneLogin to developer in ToolJet, name the role builder.
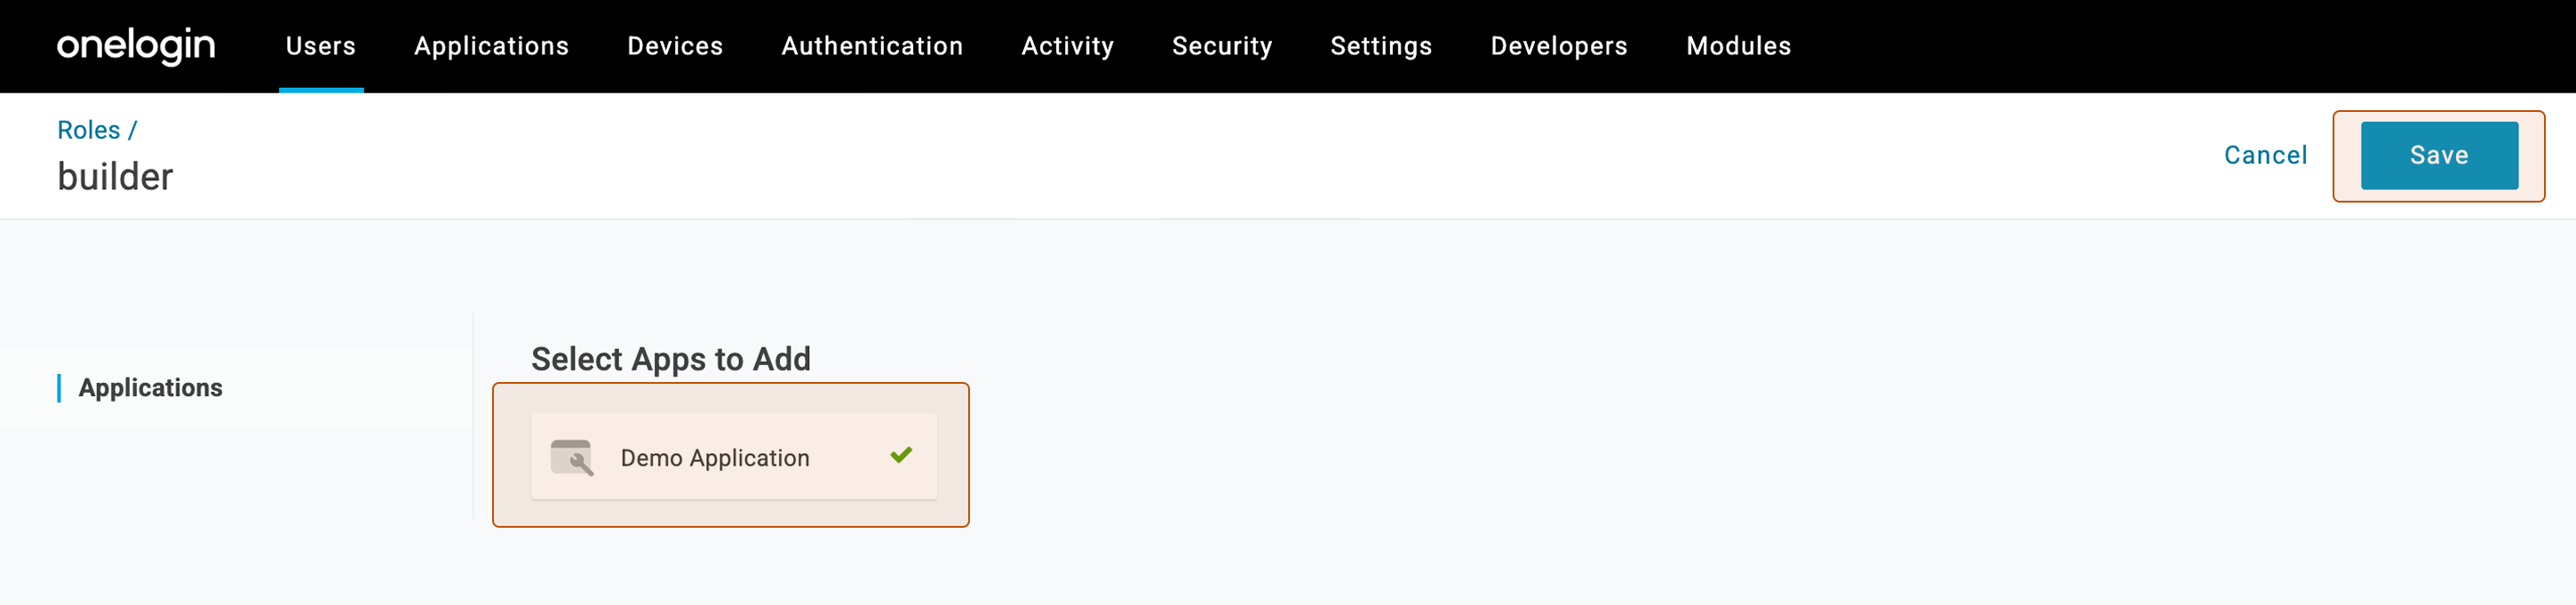
-
Select your app to add to the role and click on Save.
-
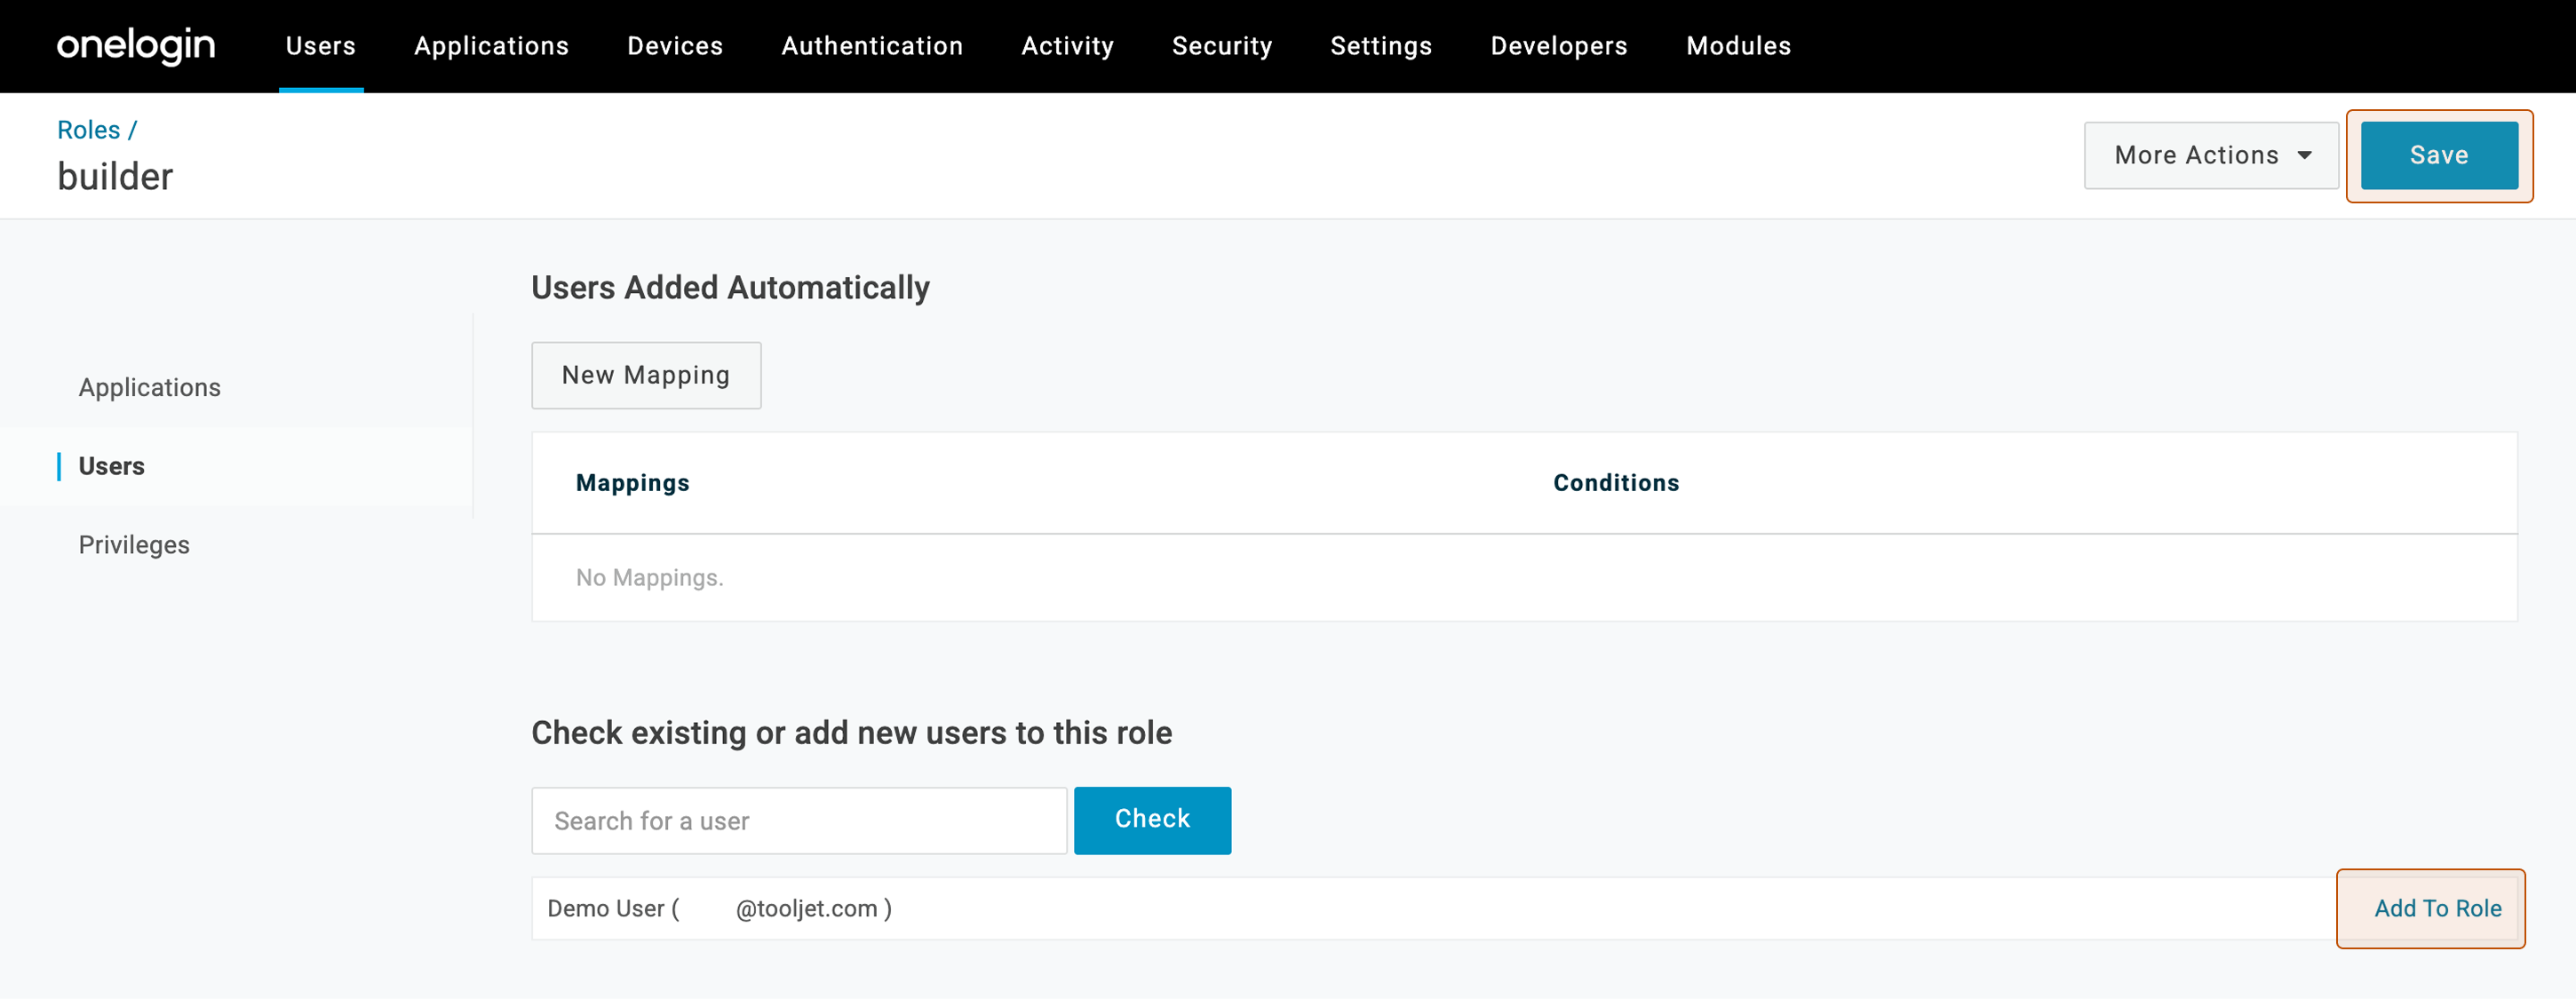
Add the user to the role. Navigate to Users > Roles > The role you created > Users. Now check for the user, click Add to role and Save.
-
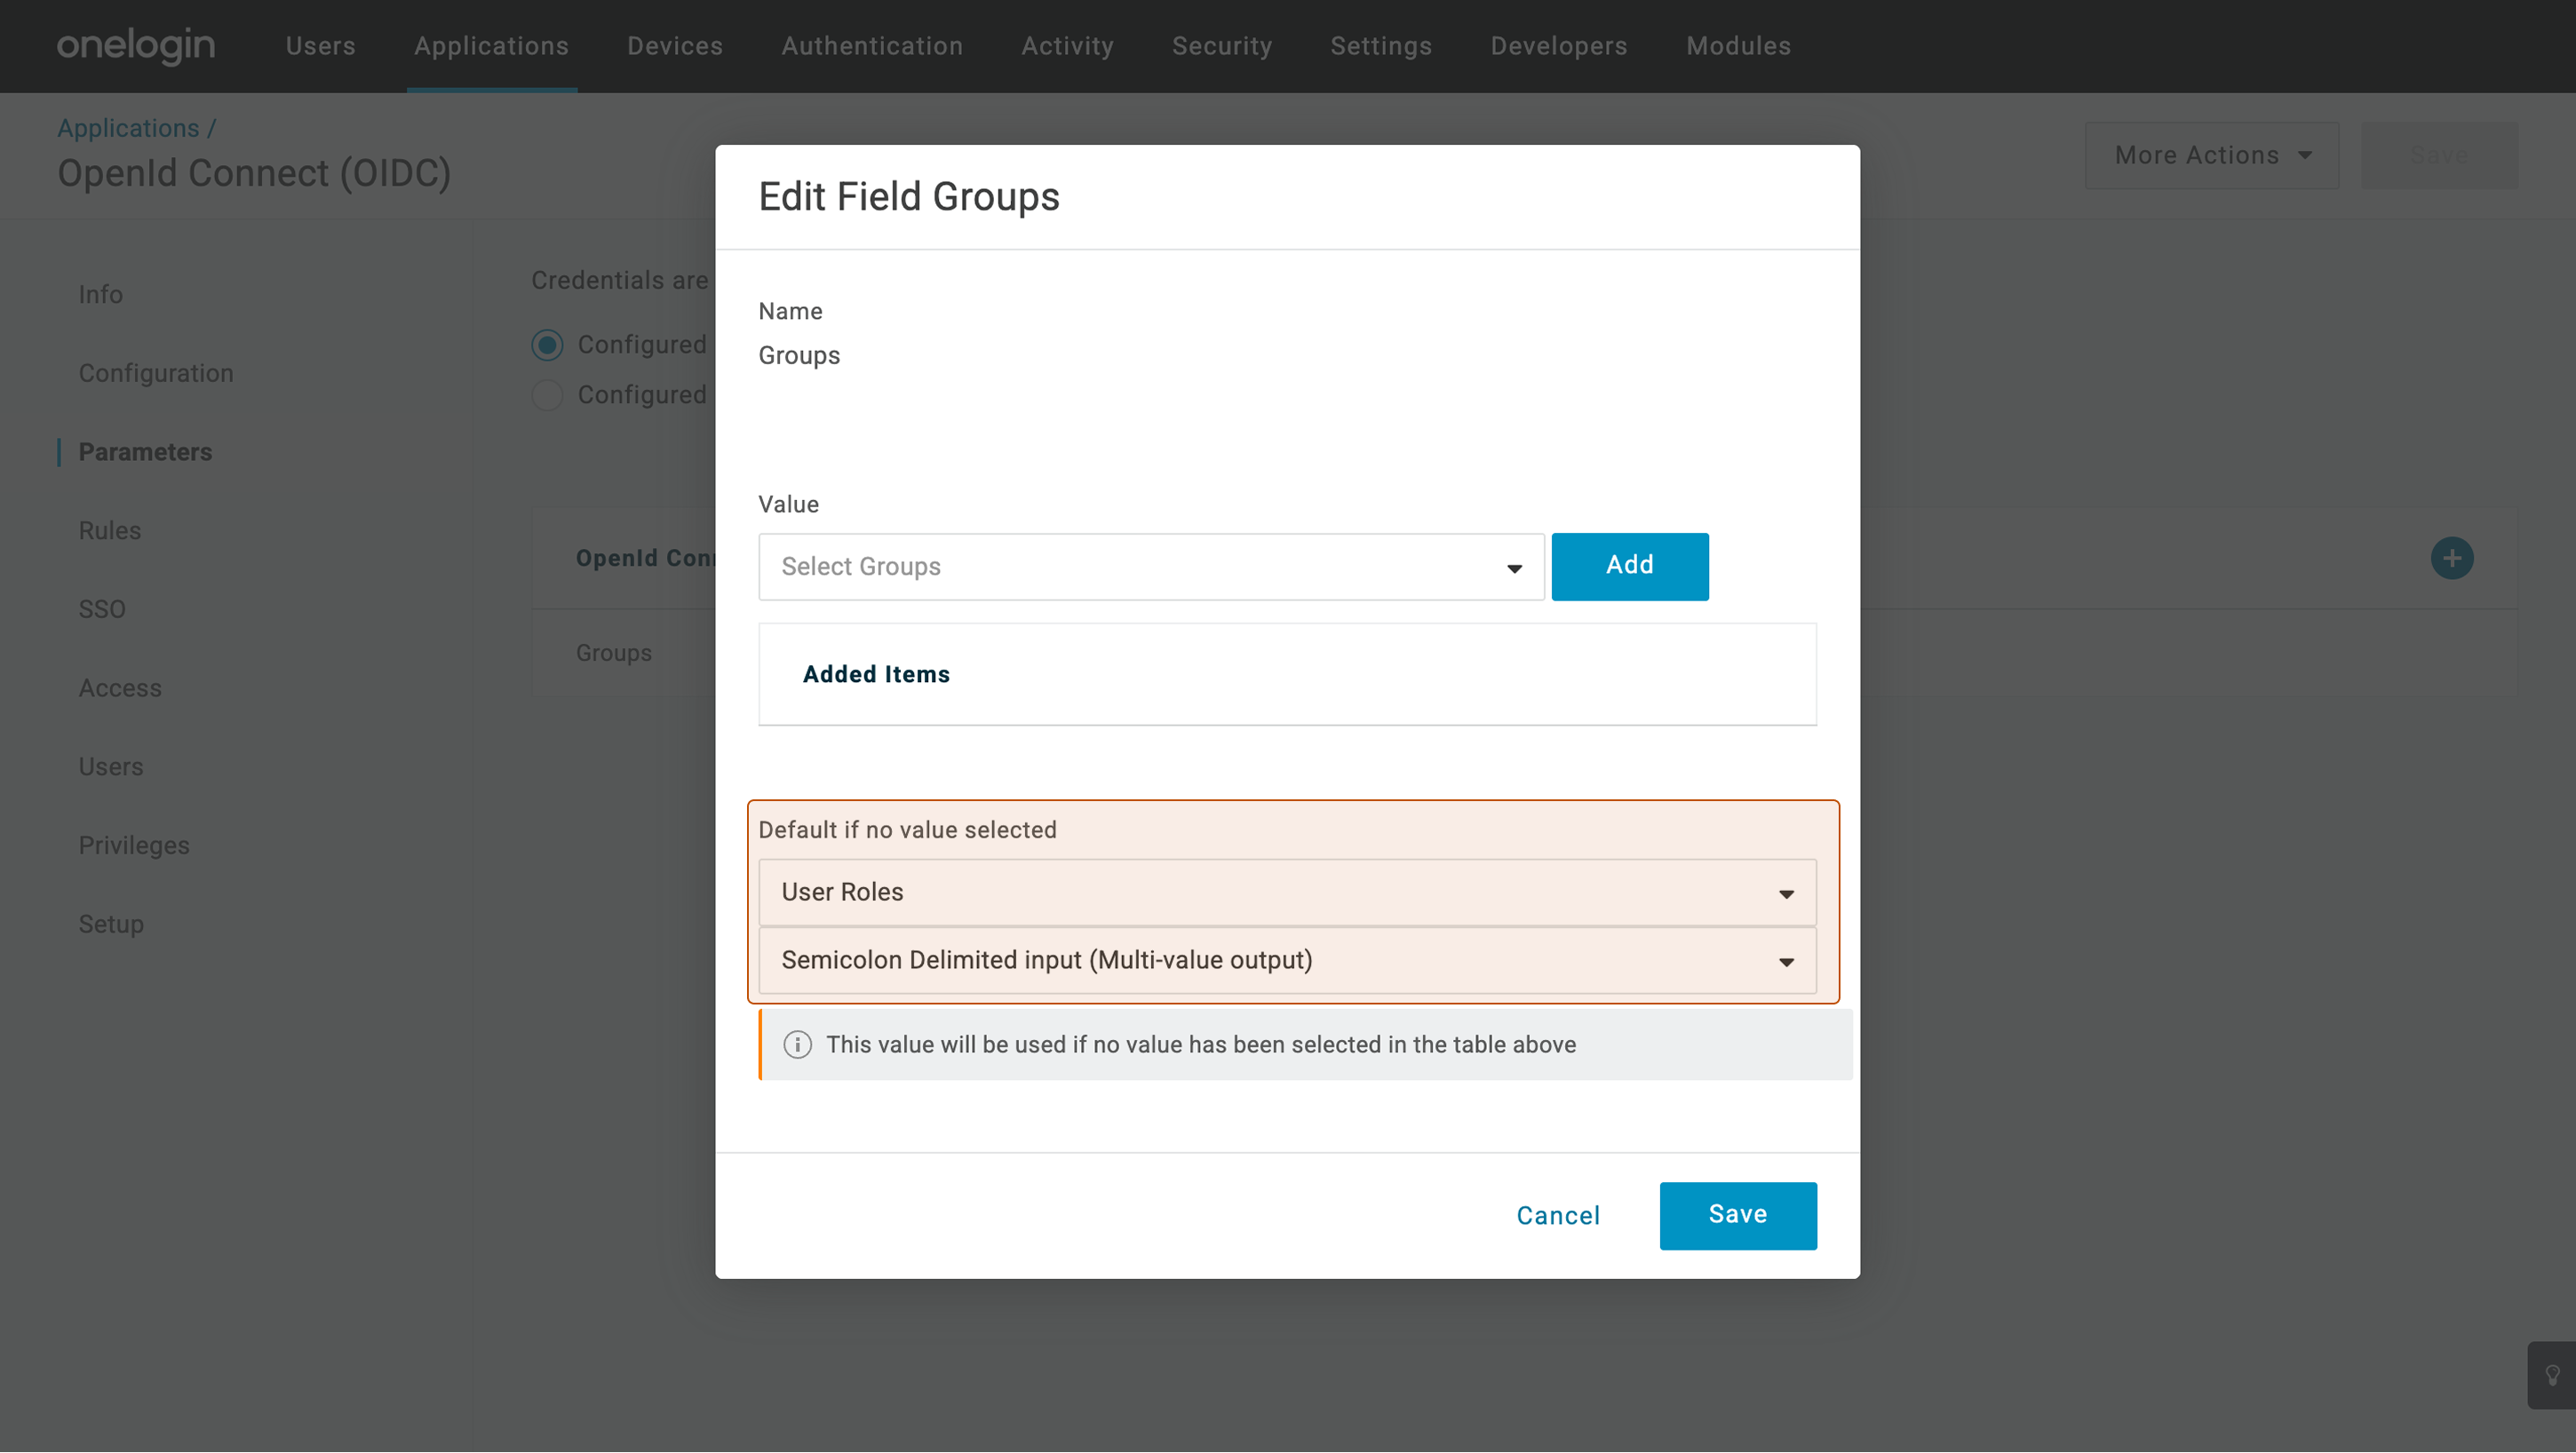
Go to Applications -> Your OneLogin Application -> Parameters. Now edit the Groups configuration as follows:
- User Roles
- Semicolon Delimited input (Multi-value output)
-
Go to Rules > Add Rule. Enter a name of your choice for the rule.. Add a rule with the action:
Set Groups in Application > Map from OneLogin > For each > member_of > with value that matches > .*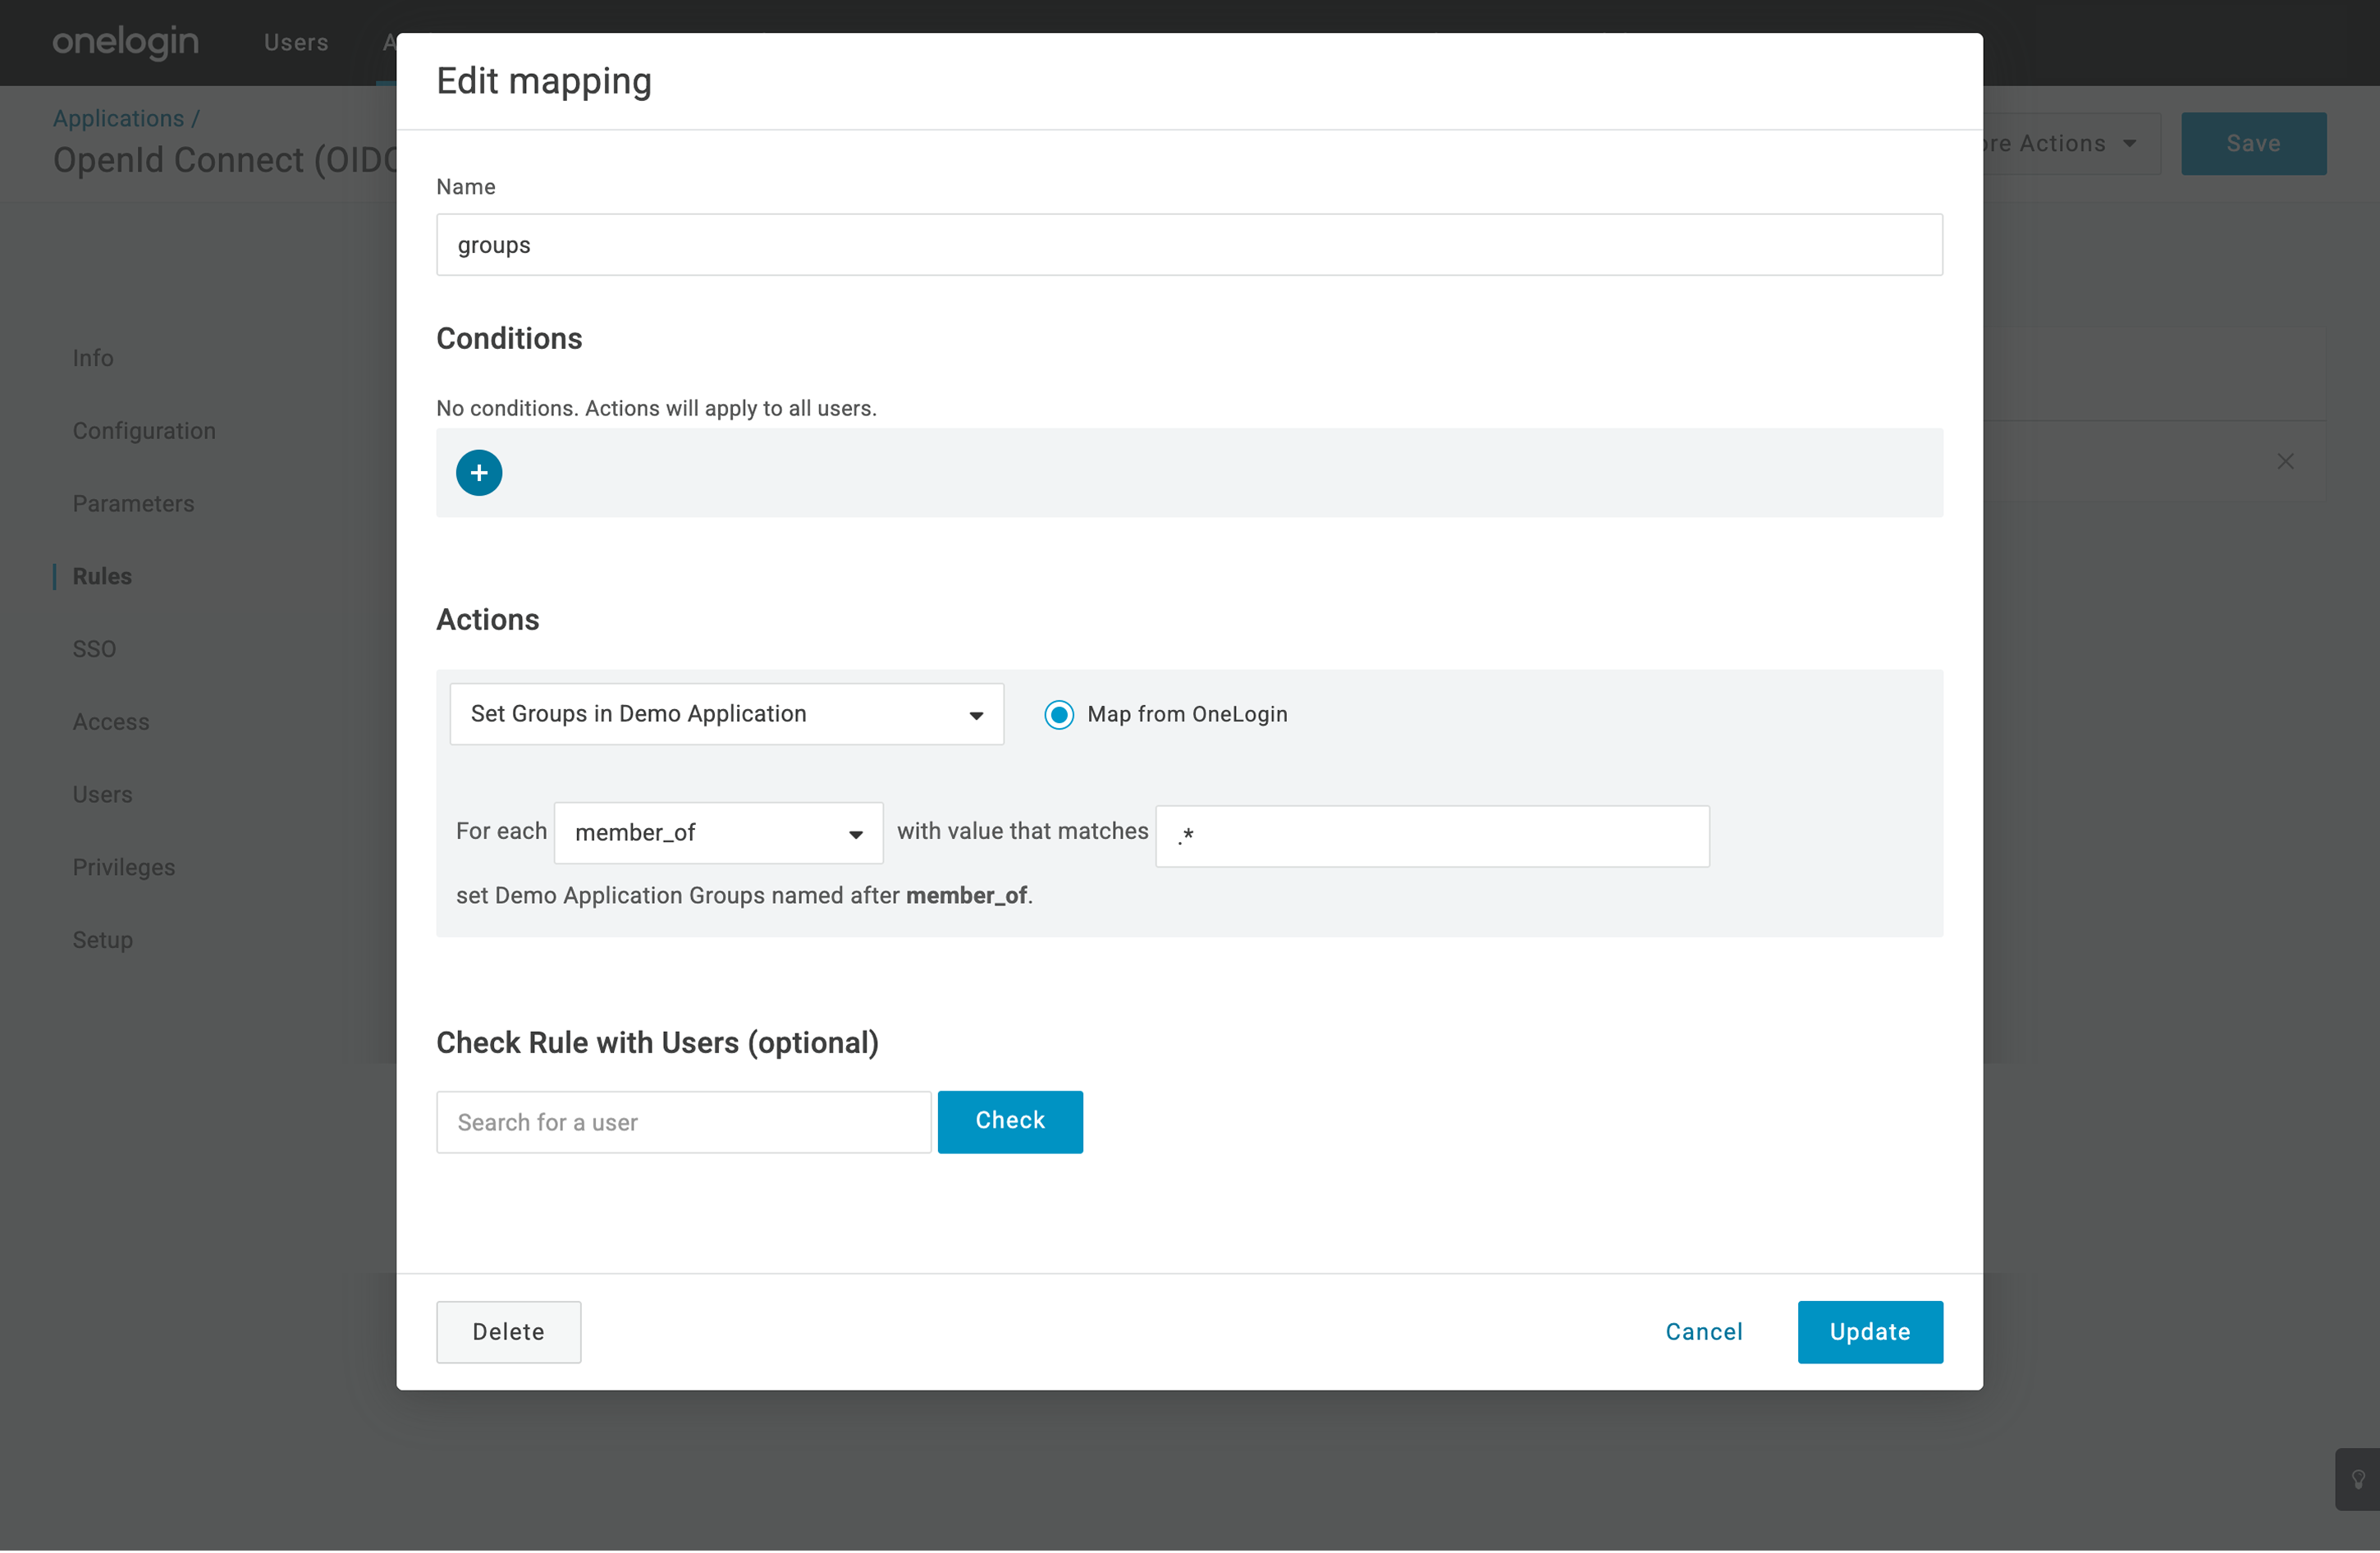
-
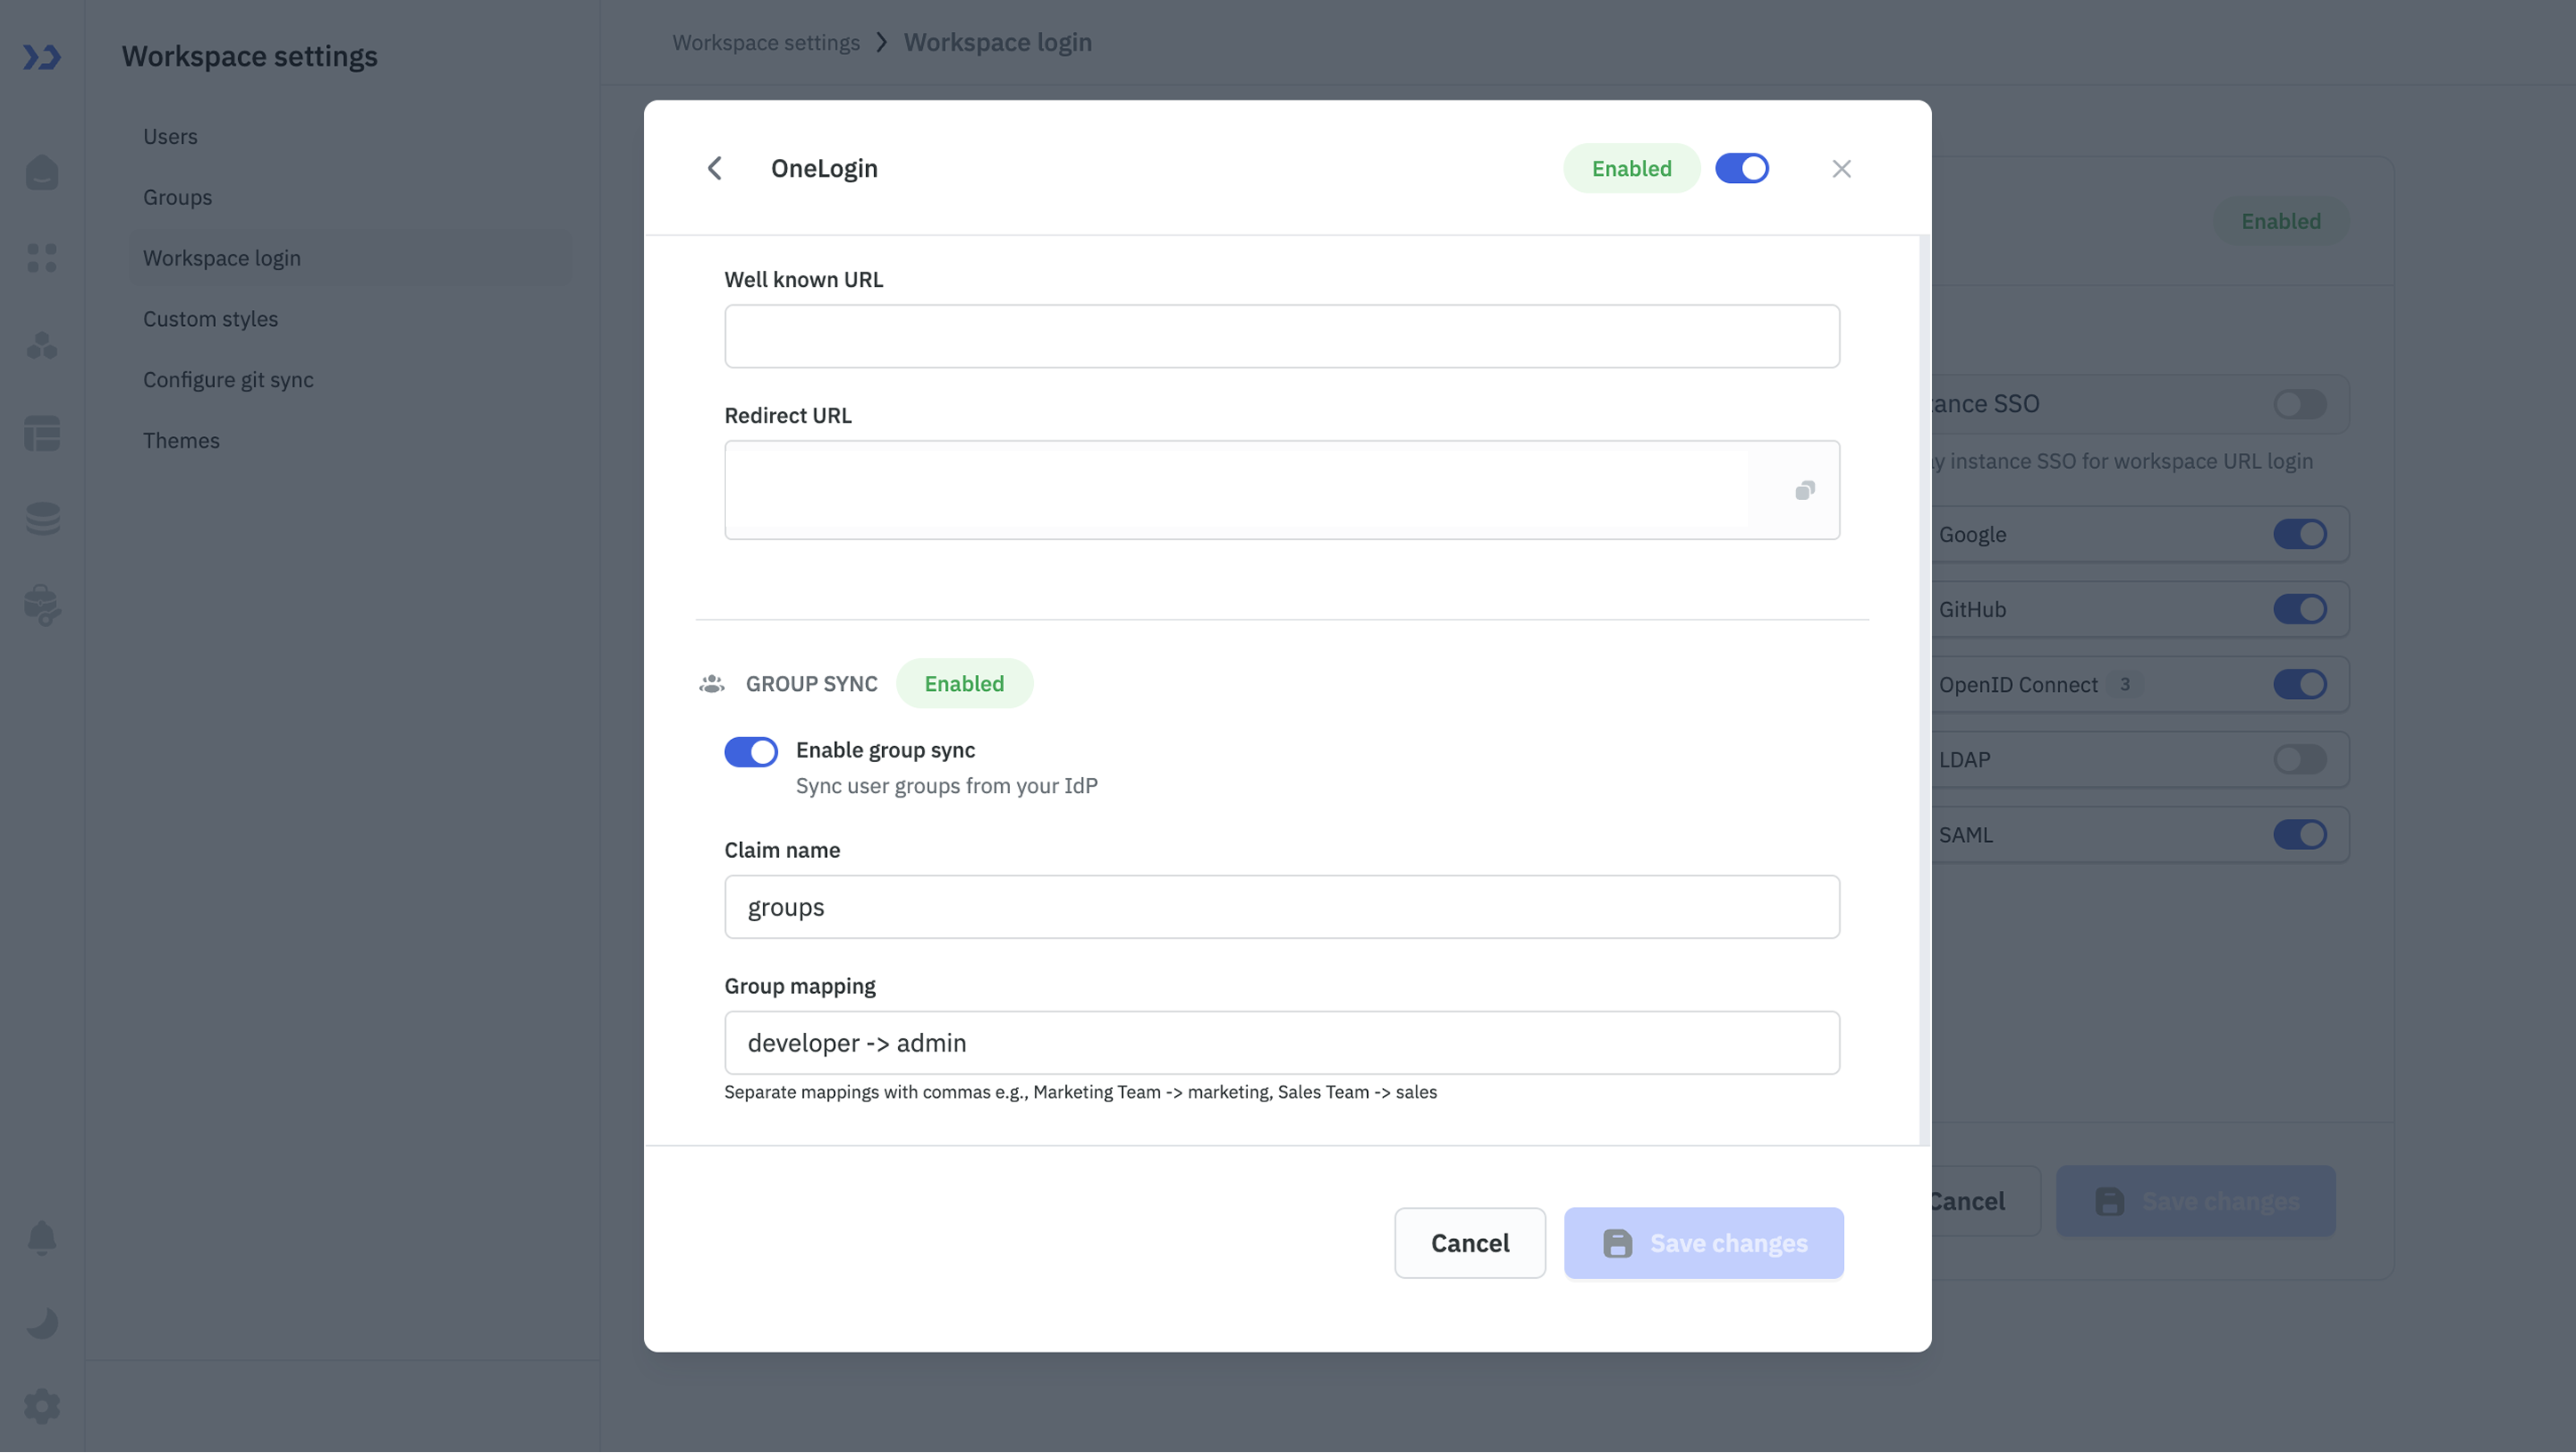
Go to your ToolJet Application. Navigate to Workspace settings > Workspace login > OpenID Connect > Your OneLogin Configuration and Enable group sync.
-
Claim name will be set to
groups. -
Group mapping will be set as :
<your-onelogin-role> -> <tooljet-group-name>For example: If your OneLogin Role is builder and the ToolJet group name is developer, the mapping will be builder -> developer.
Users will now be assigned to ToolJet groups based on their OneLogin roles.