Enable and Manage Branches
GitSync starts in single-branch mode. Branching is enabled per workspace, and only after a repository connection exists. Once it is on, every branch follows the same lifecycle: it is created from the default branch, holds your work until that work is reviewed, and is deleted once the work is merged.
Prerequisites
- GitSync configured with either GitHub or GitLab. See GitHub Configuration or GitLab Configuration to set it up.
- The Admin or Super admin role to turn branching on. Once enabled, builders can create, switch, and manage branches; end users cannot.
- On self-hosted instances: a Redis connection, and at least one instance started with
WORKER=true. Branch creation, pulls, and deletions run as background jobs on this worker. Without one, these actions are queued but never processed.
Enable Branching for a Workspace
- Go to the Workspace settings page and open the Configure git sync tab.
- Confirm a repository connection is configured and finalized. The toggle stays disabled until one exists.
- Turn on the Branching toggle. The change saves immediately.
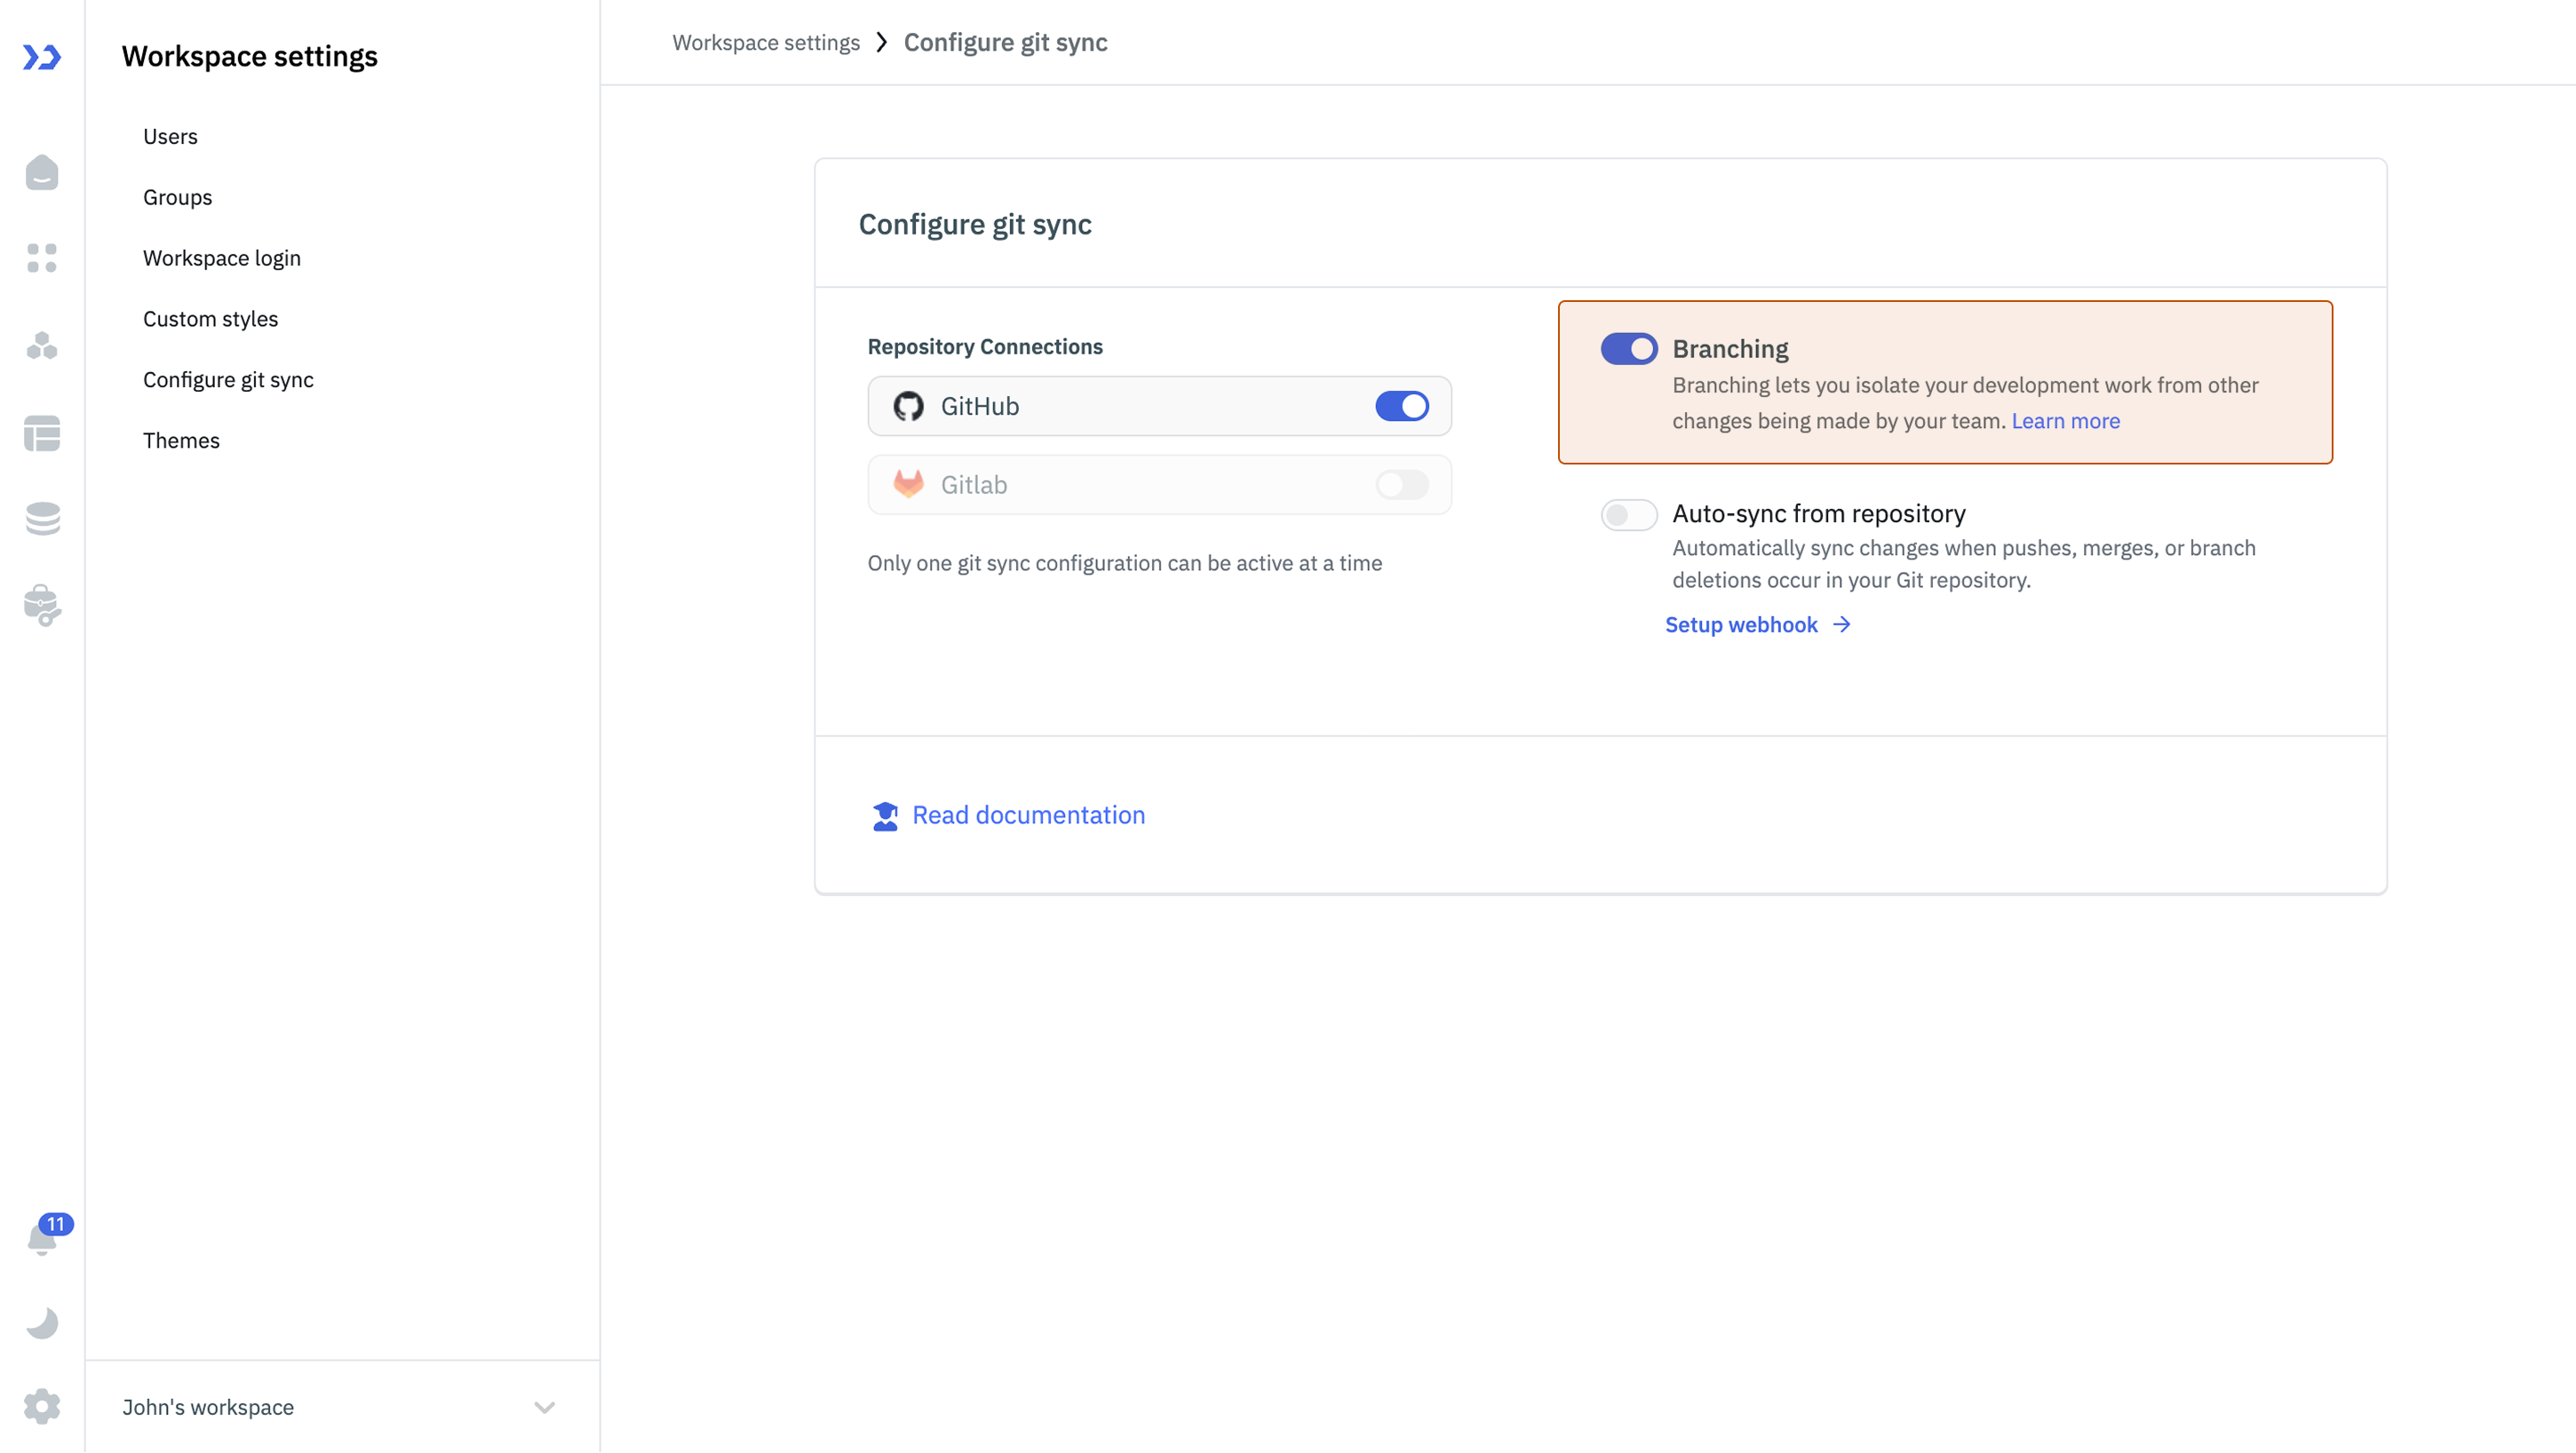
You can also open the branch dropdown in the header and select Enable branching, which takes you to the same page.
Once branching is enabled, the default branch becomes read-only and your team works on feature branches.
Create a Branch
Every branch is cut from the default branch, never from another feature branch. You can start one from the dashboard or from inside an application, and the two differ in one respect: only the in-app dialog lets you choose which point in the default branch's history to start from.
Branches are always created in the Git repository as well, so ToolJet and the repository stay in step. Creation runs in the background, and ToolJet notifies you when the branch is ready and adds it to the branch list automatically.
From the Dashboard
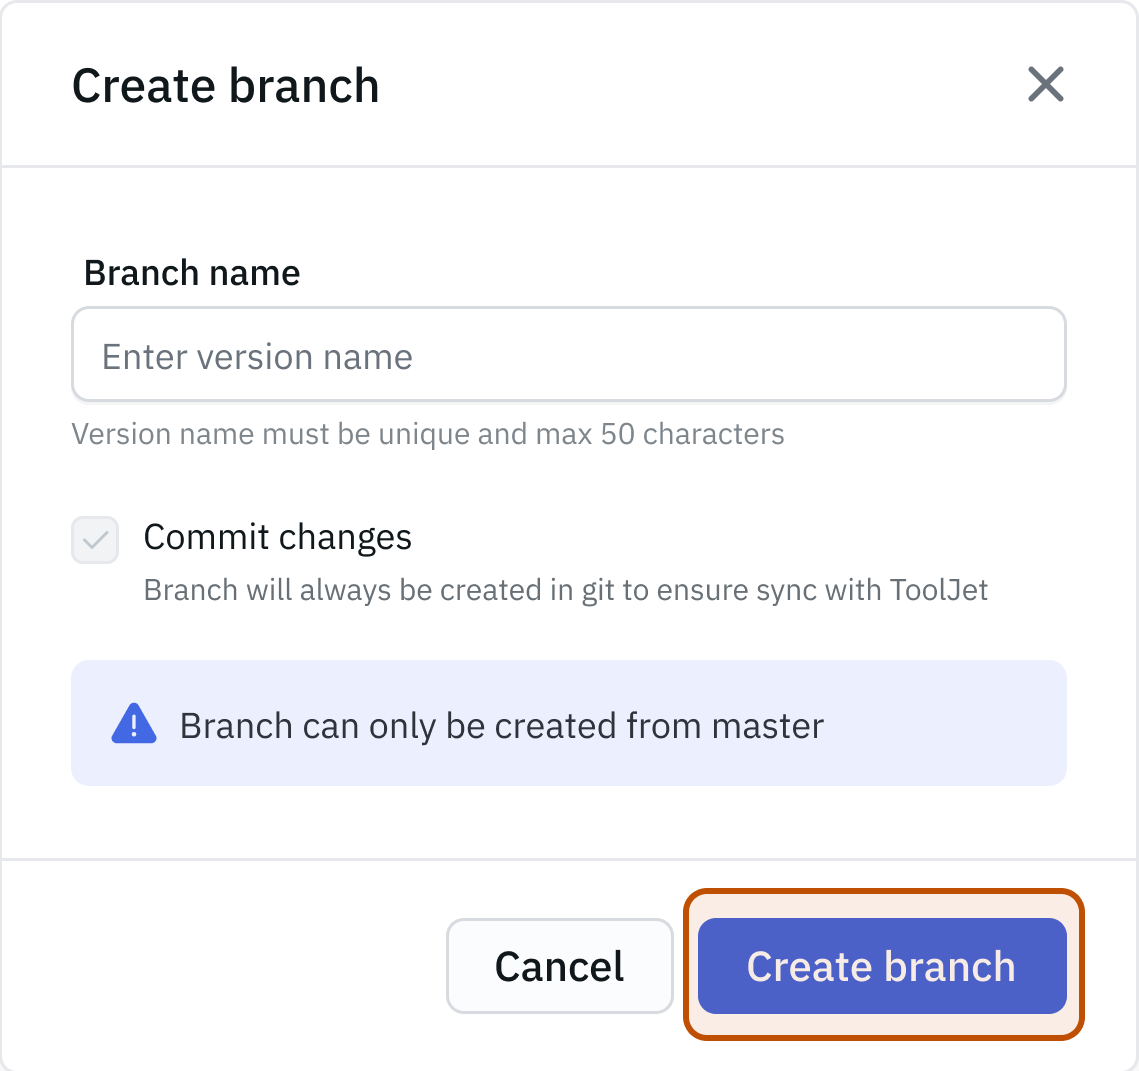
- Open the branch dropdown in the header.
- Select Create new branch.
- Enter a branch name.
- Click Create branch.
The branch starts from the current head of the default branch.
From Inside an Application
Open the application and use the branch dropdown in the App Builder header. This dialog adds a Create from field, which sets the point in the default branch's history the new branch starts at. The branch is still cut from the default branch either way, so this chooses a starting version, not a different source branch.
| Option | Where the branch starts |
|---|---|
Latest (main) | The current head of the default branch. This is the default, and what you want for new work. |
| A saved version | That version's contents, so you can correct an earlier release without building on everything that landed after it. |
| A Git tag | The same, for a version that is in the repository but not in this workspace. |
Two kinds of version cannot be a starting point: a draft, because it is still changing, and a version that was itself saved from a feature branch.
Save or release your current draft before creating a branch. An application is allowed only one draft at a time, so the draft you are holding has to be resolved first.
Branch Naming Rules
| Rule | Detail |
|---|---|
| Allowed characters | Letters, numbers, hyphens, and underscores only |
| Spaces | Not allowed |
| Length | Maximum 50 characters |
| Uniqueness | Must be unique within the workspace, ignoring case |
| Reserved names | main, master, head, and origin cannot be used |
Use descriptive names that identify the builder and the work, for example taylor/inventory-filters.
Import an Existing Git Branch
Branch names are shared with your Git repository, so the name you choose may already belong to a branch created outside ToolJet, by a teammate working in Git directly, or by another instance connected to the same repository.
Rather than reject the name, ToolJet offers to import that branch. Create the branch as usual, and when the name matches one that already exists in Git an Import branch dialog appears. Confirming it brings the existing branch in instead of starting an empty one, and ToolJet notifies you when the contents are ready to use.
Importing is the only way to bring in a branch created outside ToolJet. It will not show up in the branch list on its own.
Switch Branches
- Open the branch dropdown and select Switch branch.
- Search for or select the branch you want.
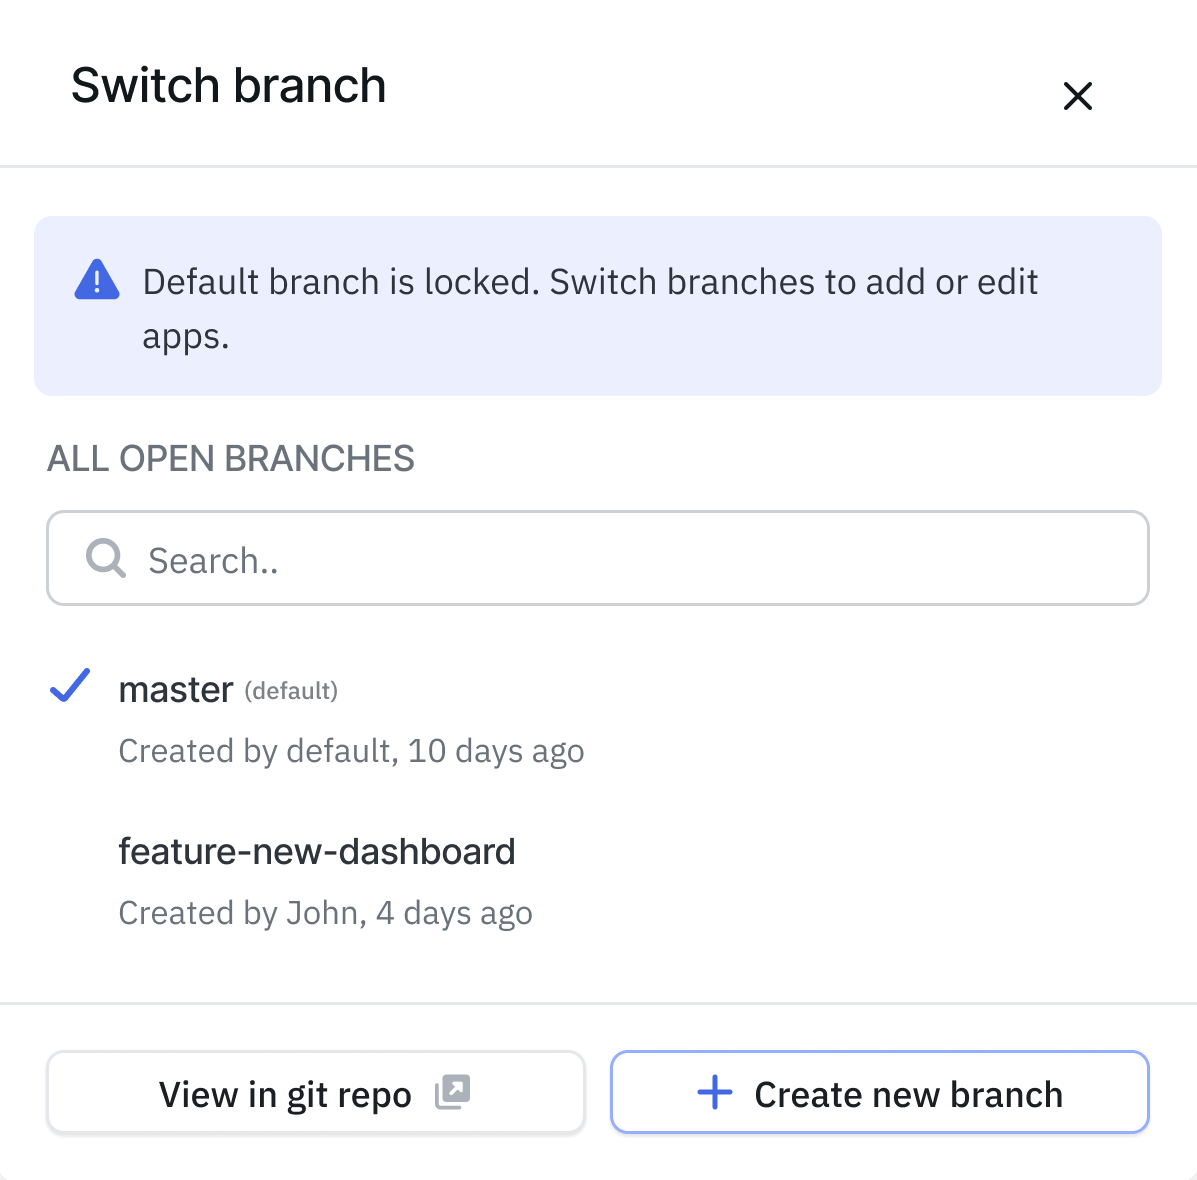
The list shows branches ToolJet already tracks. A branch created directly in Git after your workspace was connected does not appear here until you import it, so use the import step above to bring it in.
ToolJet verifies that the branch still exists in Git before switching. If it has been deleted remotely, the switch is blocked and you need to create a new branch to continue.
Delete a Branch
- Open the branch dropdown and select Switch branch.
- Find the branch and select the delete option.
- Confirm the deletion.
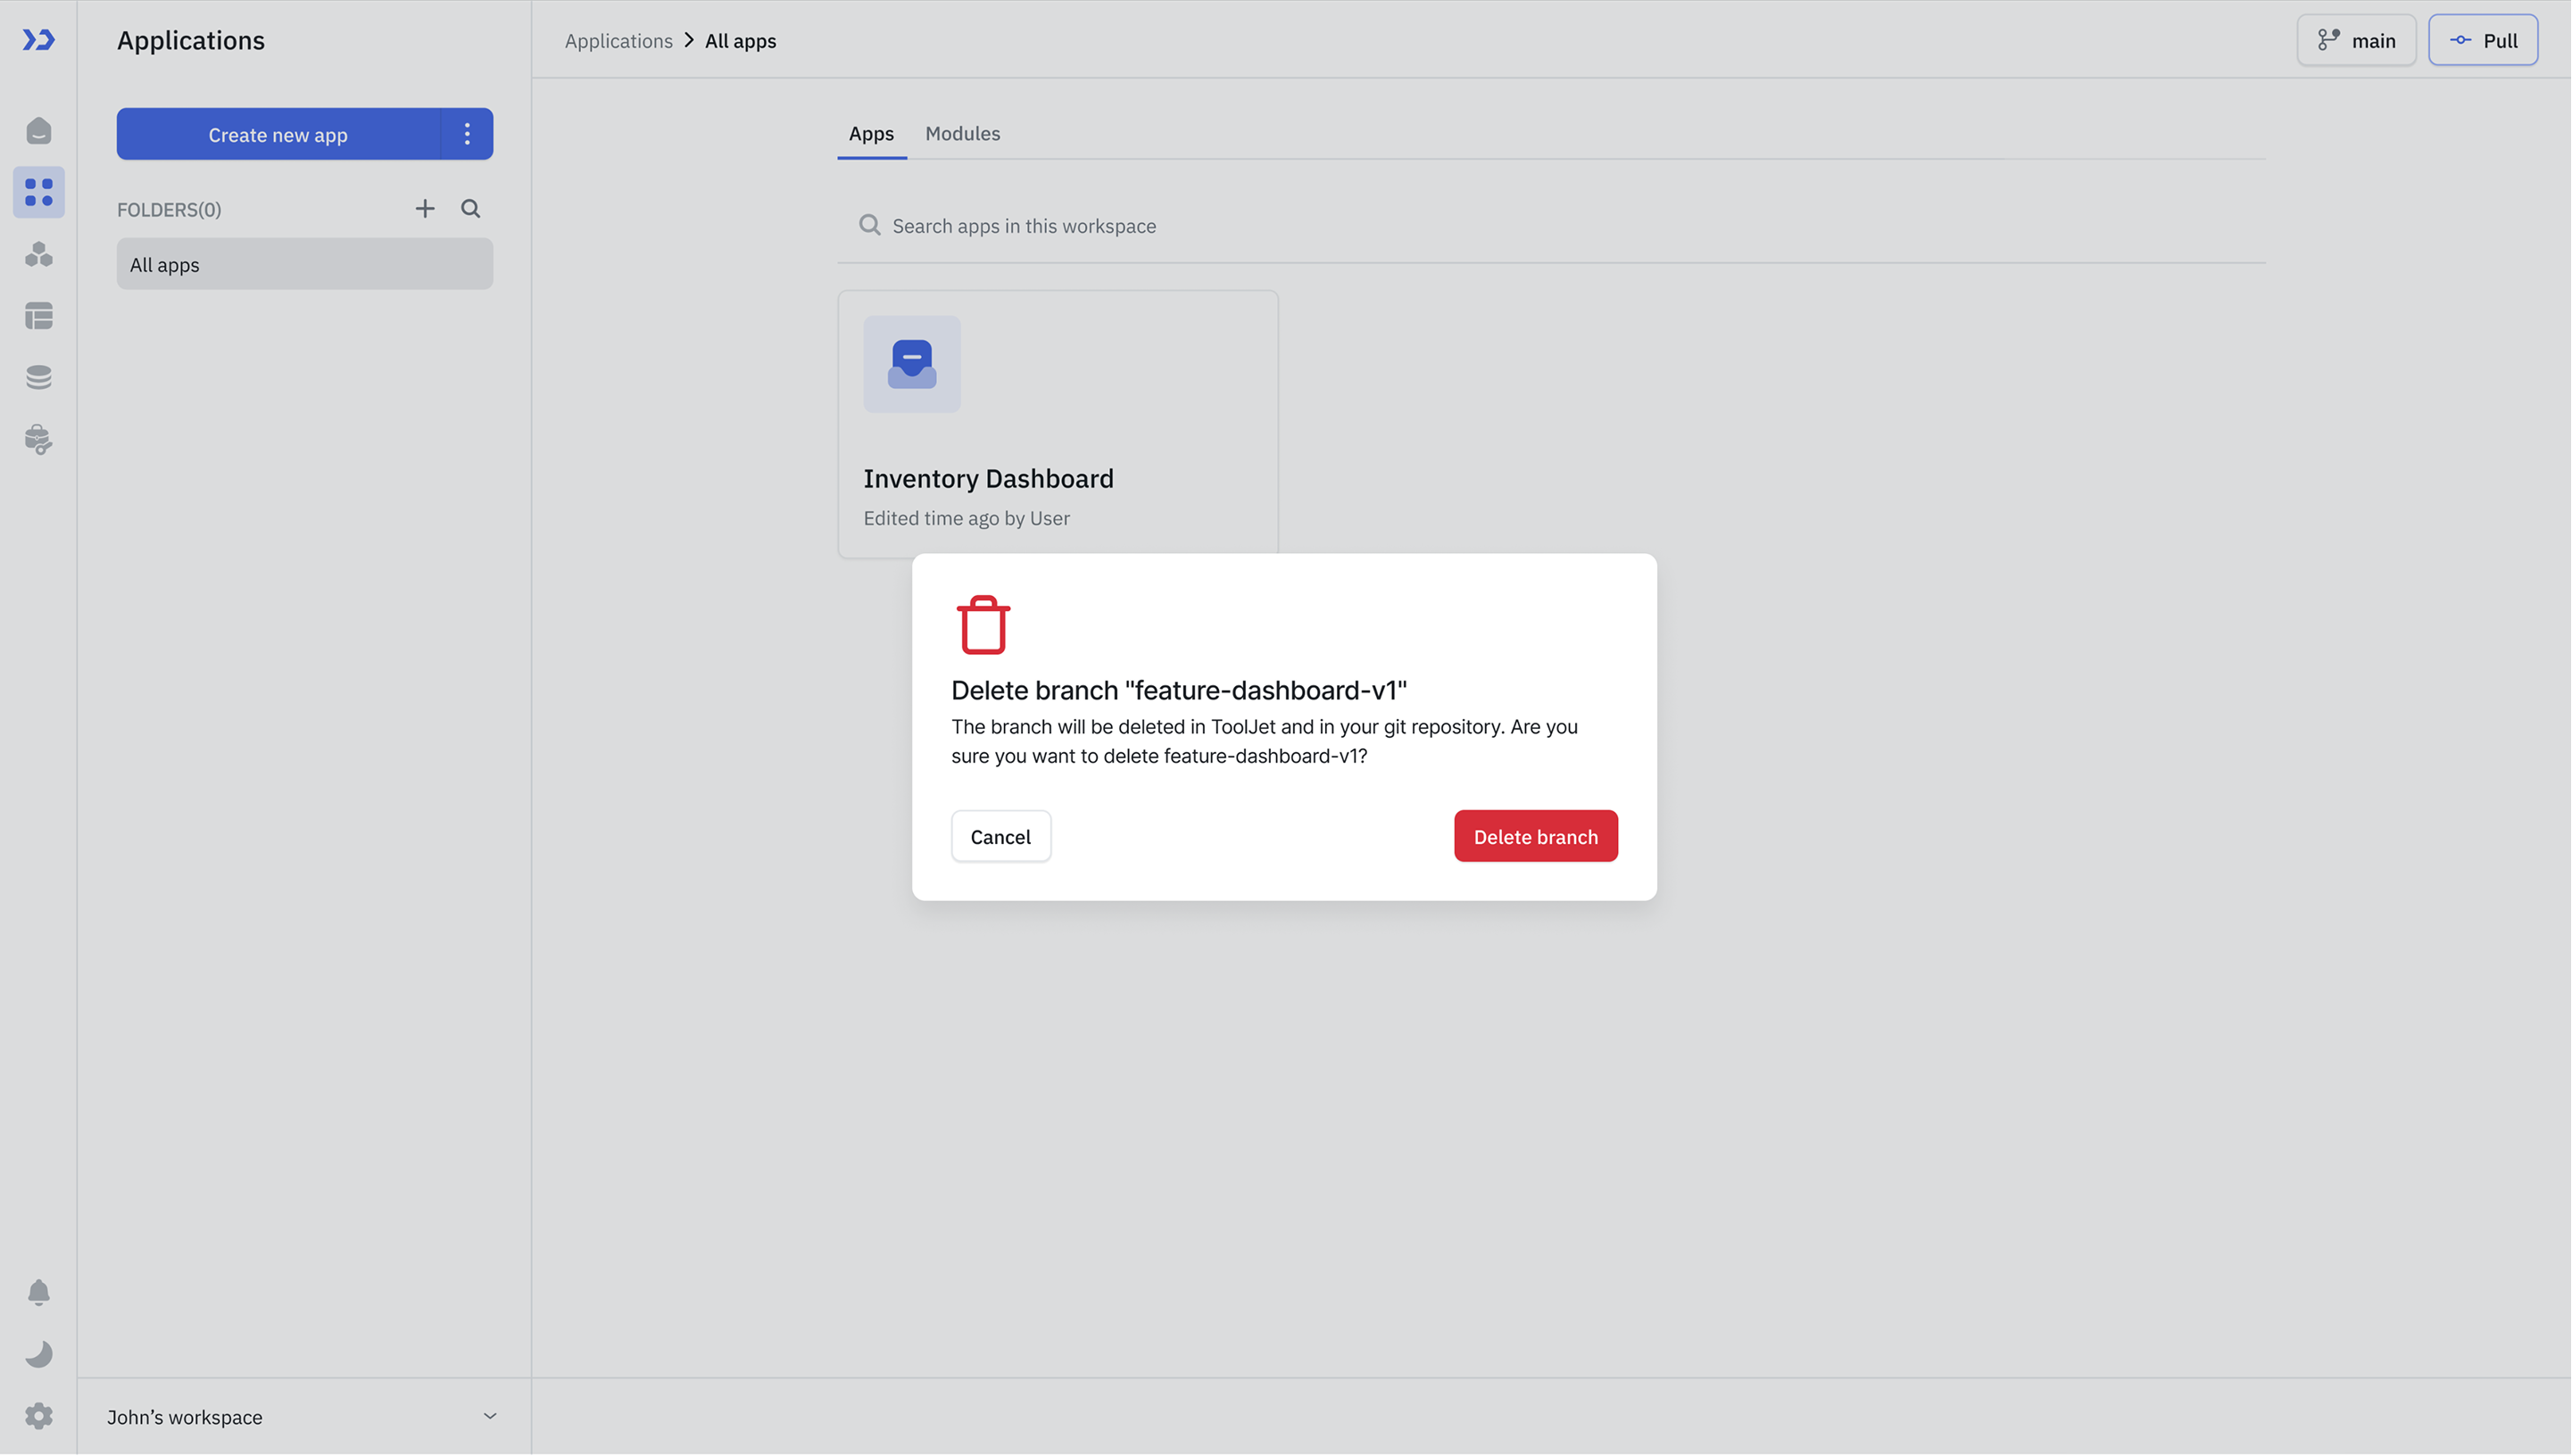
Deleting a branch in ToolJet also deletes the branch in your Git repository. The default branch cannot be deleted.
Branches cannot be renamed. Create a new branch under the wanted name instead.
Branch Permissions
| Action | Default branch | Feature branch |
|---|---|---|
| Create applications, modules, and datasources | No, use a pull request | Yes |
| Edit applications and modules | No, use a pull request | Yes |
| Commit to Git | No | Yes |
| Pull from Git | Yes | Yes |
| Use AI features | No | Yes |
| Delete branch | No | Yes |
| Rename branch | Not supported | Not supported |
Disable Branching
Turn the Branching toggle off to return the workspace to single-branch mode. Applications, modules, and datasources can then be created and edited directly on the default branch again.
Existing feature branches are not deleted when branching is disabled, and the branch list shows only the default branch until branching is turned back on.
License Behavior
If your license expires or stops covering GitSync, branching is not turned off for you and your branches are preserved. Instead, ToolJet freezes the resources it manages: applications, modules, and datasources become read-only, and the App Builder and Module Builder open in a locked state with no editing available.
A banner tells you which case applies, whether the license has expired or is invalid, or the license is valid but no longer covers GitSync.
There are two ways out of the frozen state:
- Apply a valid license. Once a license that includes branching is in place, everything unfreezes and your branches, commits, and versions continue to work exactly as before.
- Turn the toggle off yourself. If you do not plan to renew, turn off Branching to continue on a single branch, or turn off GitSync entirely. Editing resumes on the default branch as soon as you do.
Need Help?
- Reach out via our Slack Community
- Or email us at support@tooljet.com
- Found a bug? Please report it via GitHub Issues