Migrations
Every ToolJet Database table has a separate copy in the development, staging, and production environments. Migrations keep the schema of those copies in step. Schema changes are made in development, tested, and then moved to staging and production when they're ready. To learn how tables and their data work across environments, see ToolJet Database environments.
How Migrations Work
- Schema changes travel as migrations. Every schema change made in development is recorded as a numbered migration in the table's migration history (
0001,0002, and so on). Staging and production pick up a change only when its migration is run there. - Each table has its own migration history. It starts at
0001with the migration that created the table, and its numbers count up independently of other tables. Running one table's migrations in staging doesn't change any other table. - Schema changes are made only in development. In staging and production, schema controls such as Create new table, Edit table, and Add new column are disabled with the message Schema changes can only be made in the Development environment.
- Migrations move schema, not rows. Running migrations never copies rows between environments. A migration that includes data statements or changes a column's type can still change the rows in the environment it runs in.
- Changes move one step at a time. Migrations run from development to staging, and from staging to production. See Run Migrations in Staging and Production.
Record a Migration
Changes made from the table forms, such as adding a column, changing a column's data type, or adding a foreign key, are recorded as migrations when they're confirmed. See Table Operations for the confirmation step.
For changes the table forms can't make, write a SQL migration.
Write a SQL Migration
- Open the table in development.
- Click the Migration history icon next to the environment switcher.
- On the Development tab, click New migration.
- Enter the SQL, and optionally a Title and Description.
- Click Run in development.
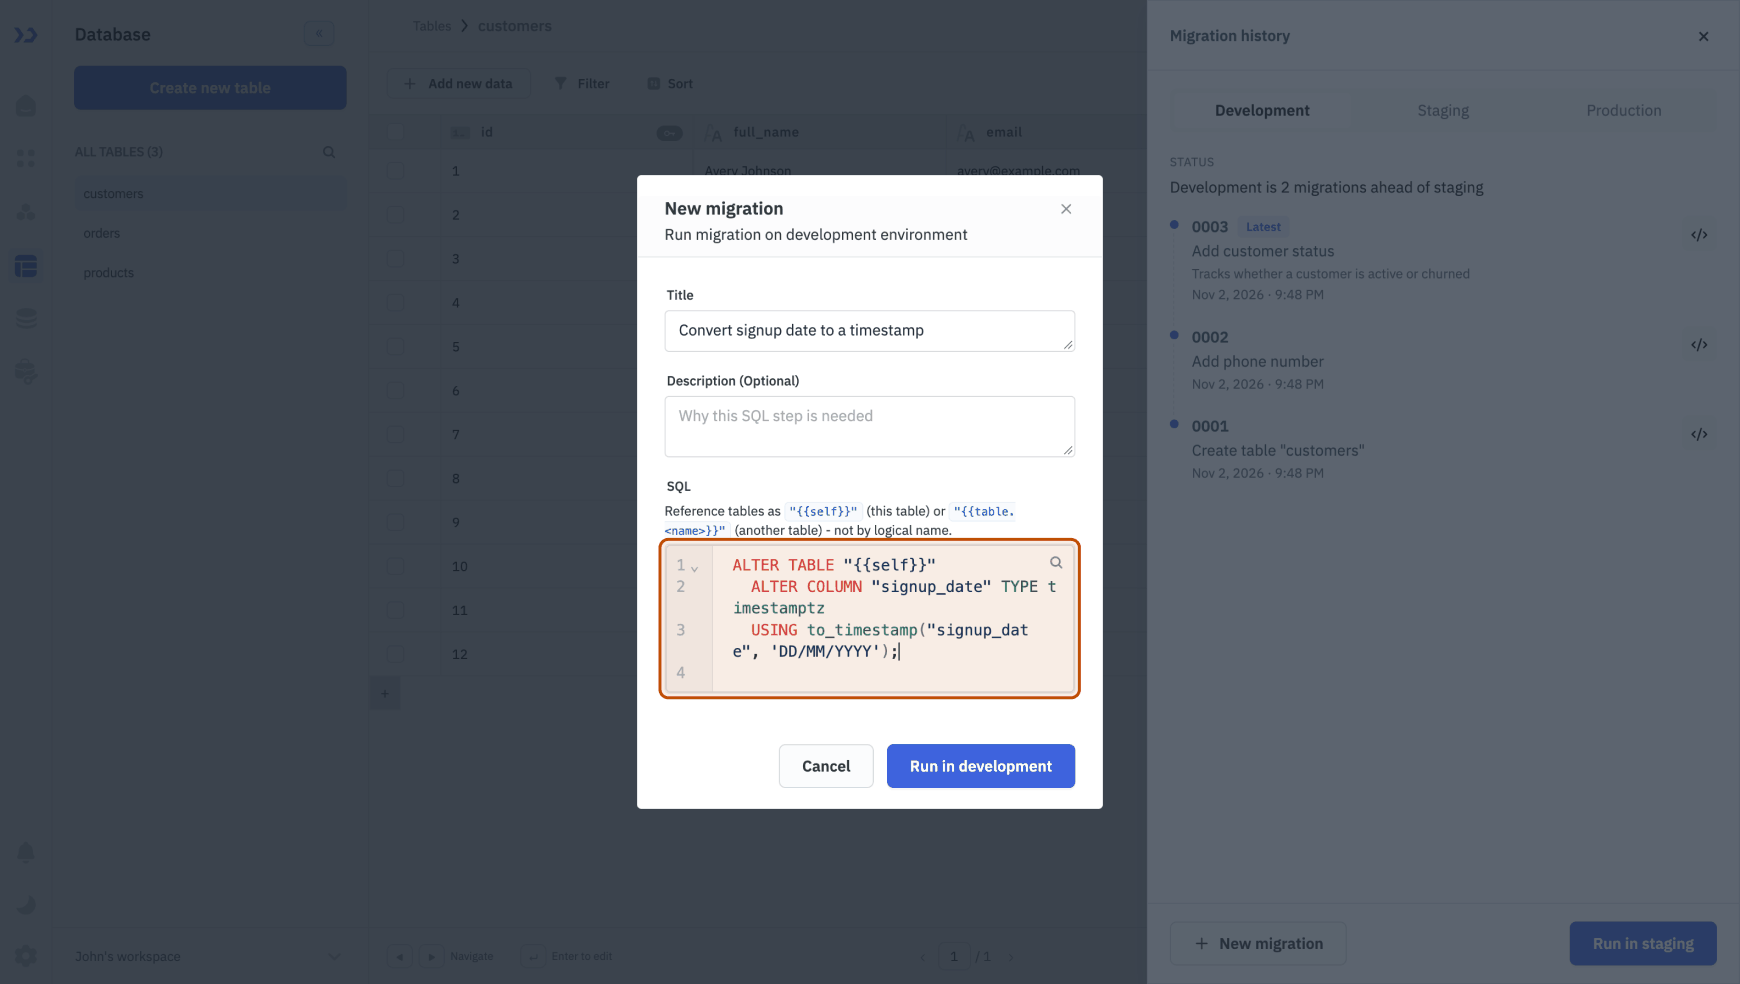
Refer to tables with placeholders instead of their names. Use {{self}} for the current table, and {{table.<name>}} for another table, such as {{table.orders}}.
For example, to convert a varchar column that stores dates as 31/12/2026 into a date with time column:
ALTER TABLE "{{self}}"
  ALTER COLUMN "signup_date" TYPE timestamptz
  USING to_timestamp("signup_date", 'DD/MM/YYYY');
SQL migrations follow these rules:
CREATE TABLE,ALTER TABLE, andDROP TABLEstatements must use a placeholder, not a table name.- Columns must use a supported data type.
- The migration runs as one transaction. If any statement fails, none of it is applied.
- If other queries lock the table for more than 3 seconds, the migration fails. Run it again when the table is less busy.
- Every statement, including data statements such as
UPDATE, runs again in staging and production when the migration is run there.
View Migration History
Click the Migration history icon next to the environment switcher to see every migration of the open table. The migration history has a tab for each environment, showing what has run in development, staging, and production.
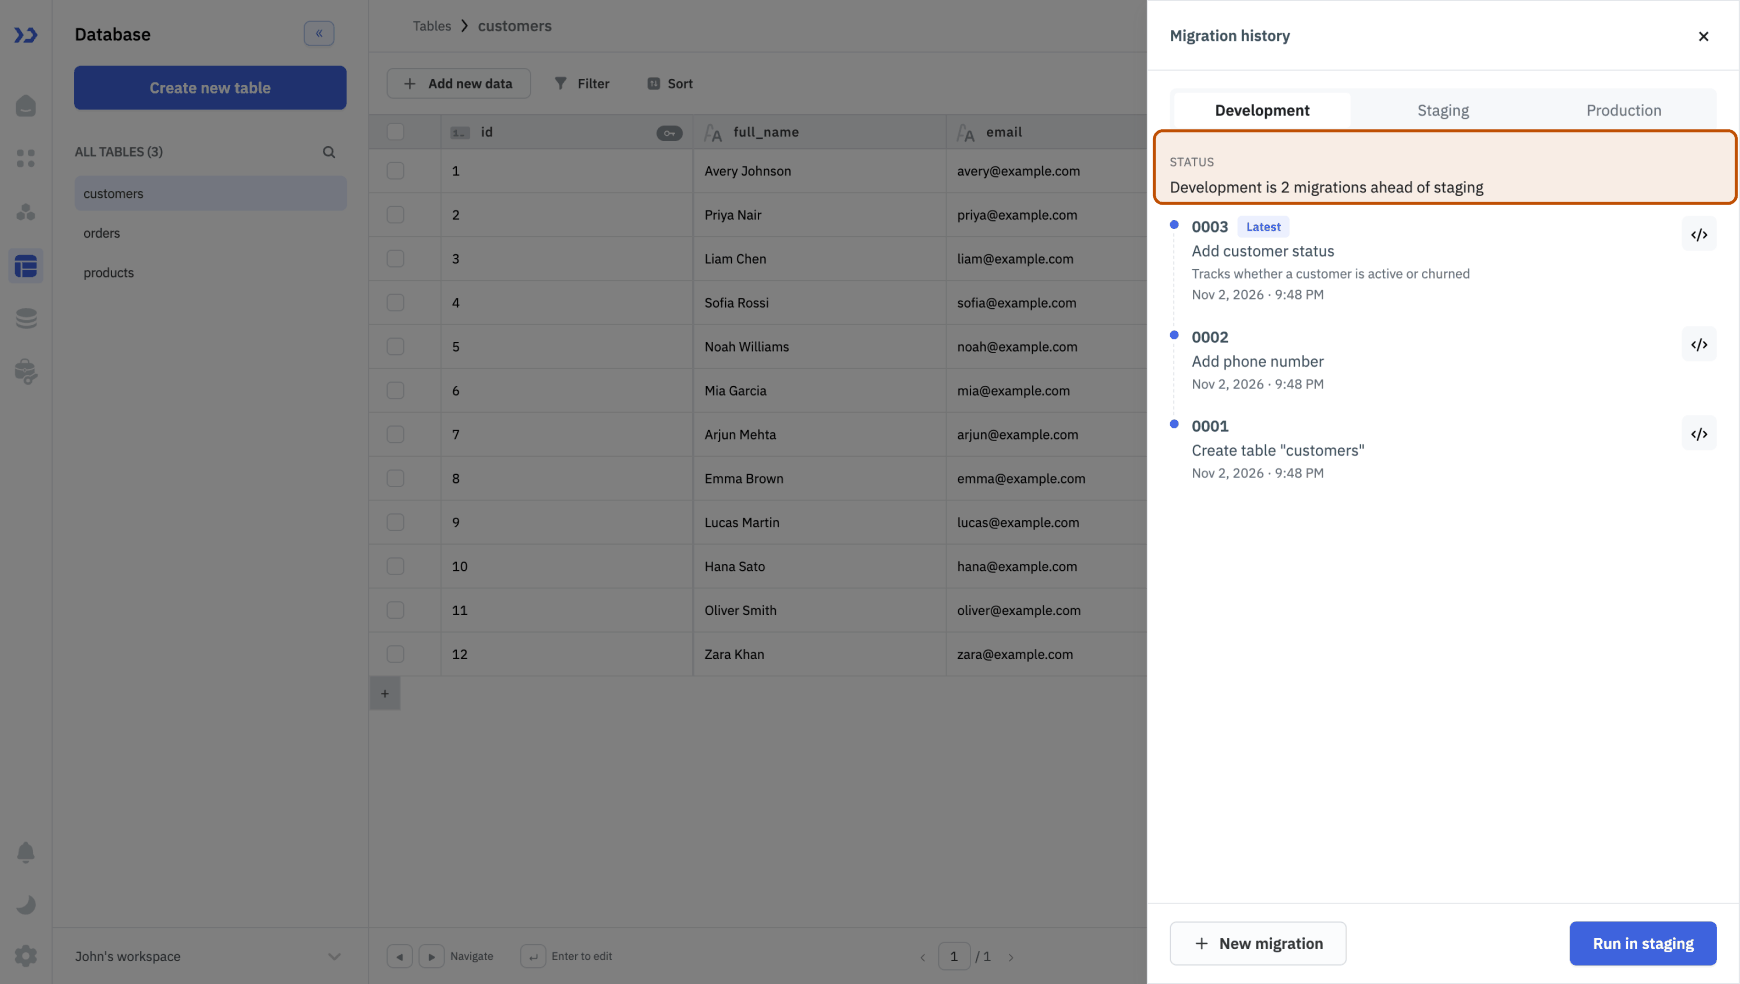
- On the Development and Staging tabs, the status at the top shows how far ahead the environment is of the next one, for example
Development is 2 migrations ahead of staging. - Migrations are listed newest first, with their number, name, and time. Click the code icon on a migration to see its SQL.
- The Latest badge marks the newest migration. When staging or production is behind, a badge such as Staging is here marks the last migration applied there, and migrations that haven't run yet are dimmed.
Migrations can't be edited or deleted. To change what a migration did, write a new one.
Need Help?
- Reach out via our Slack Community
- Or email us at support@tooljet.com
- Found a bug? Please report it via GitHub Issues