Creating UI
ToolJet offers a variety of pre-built components that streamline the development process and allow for rapid prototyping and deployment of internal tools. This guide is focused on building a basic UI for a Support Desk Dashboard application.
Creating the Header
- Drag and drop a Text component on the top left of the canvas.
- Click on the component to open its Properties Panel on the right and add Support Desk Dashboard under its
Dataproperty.
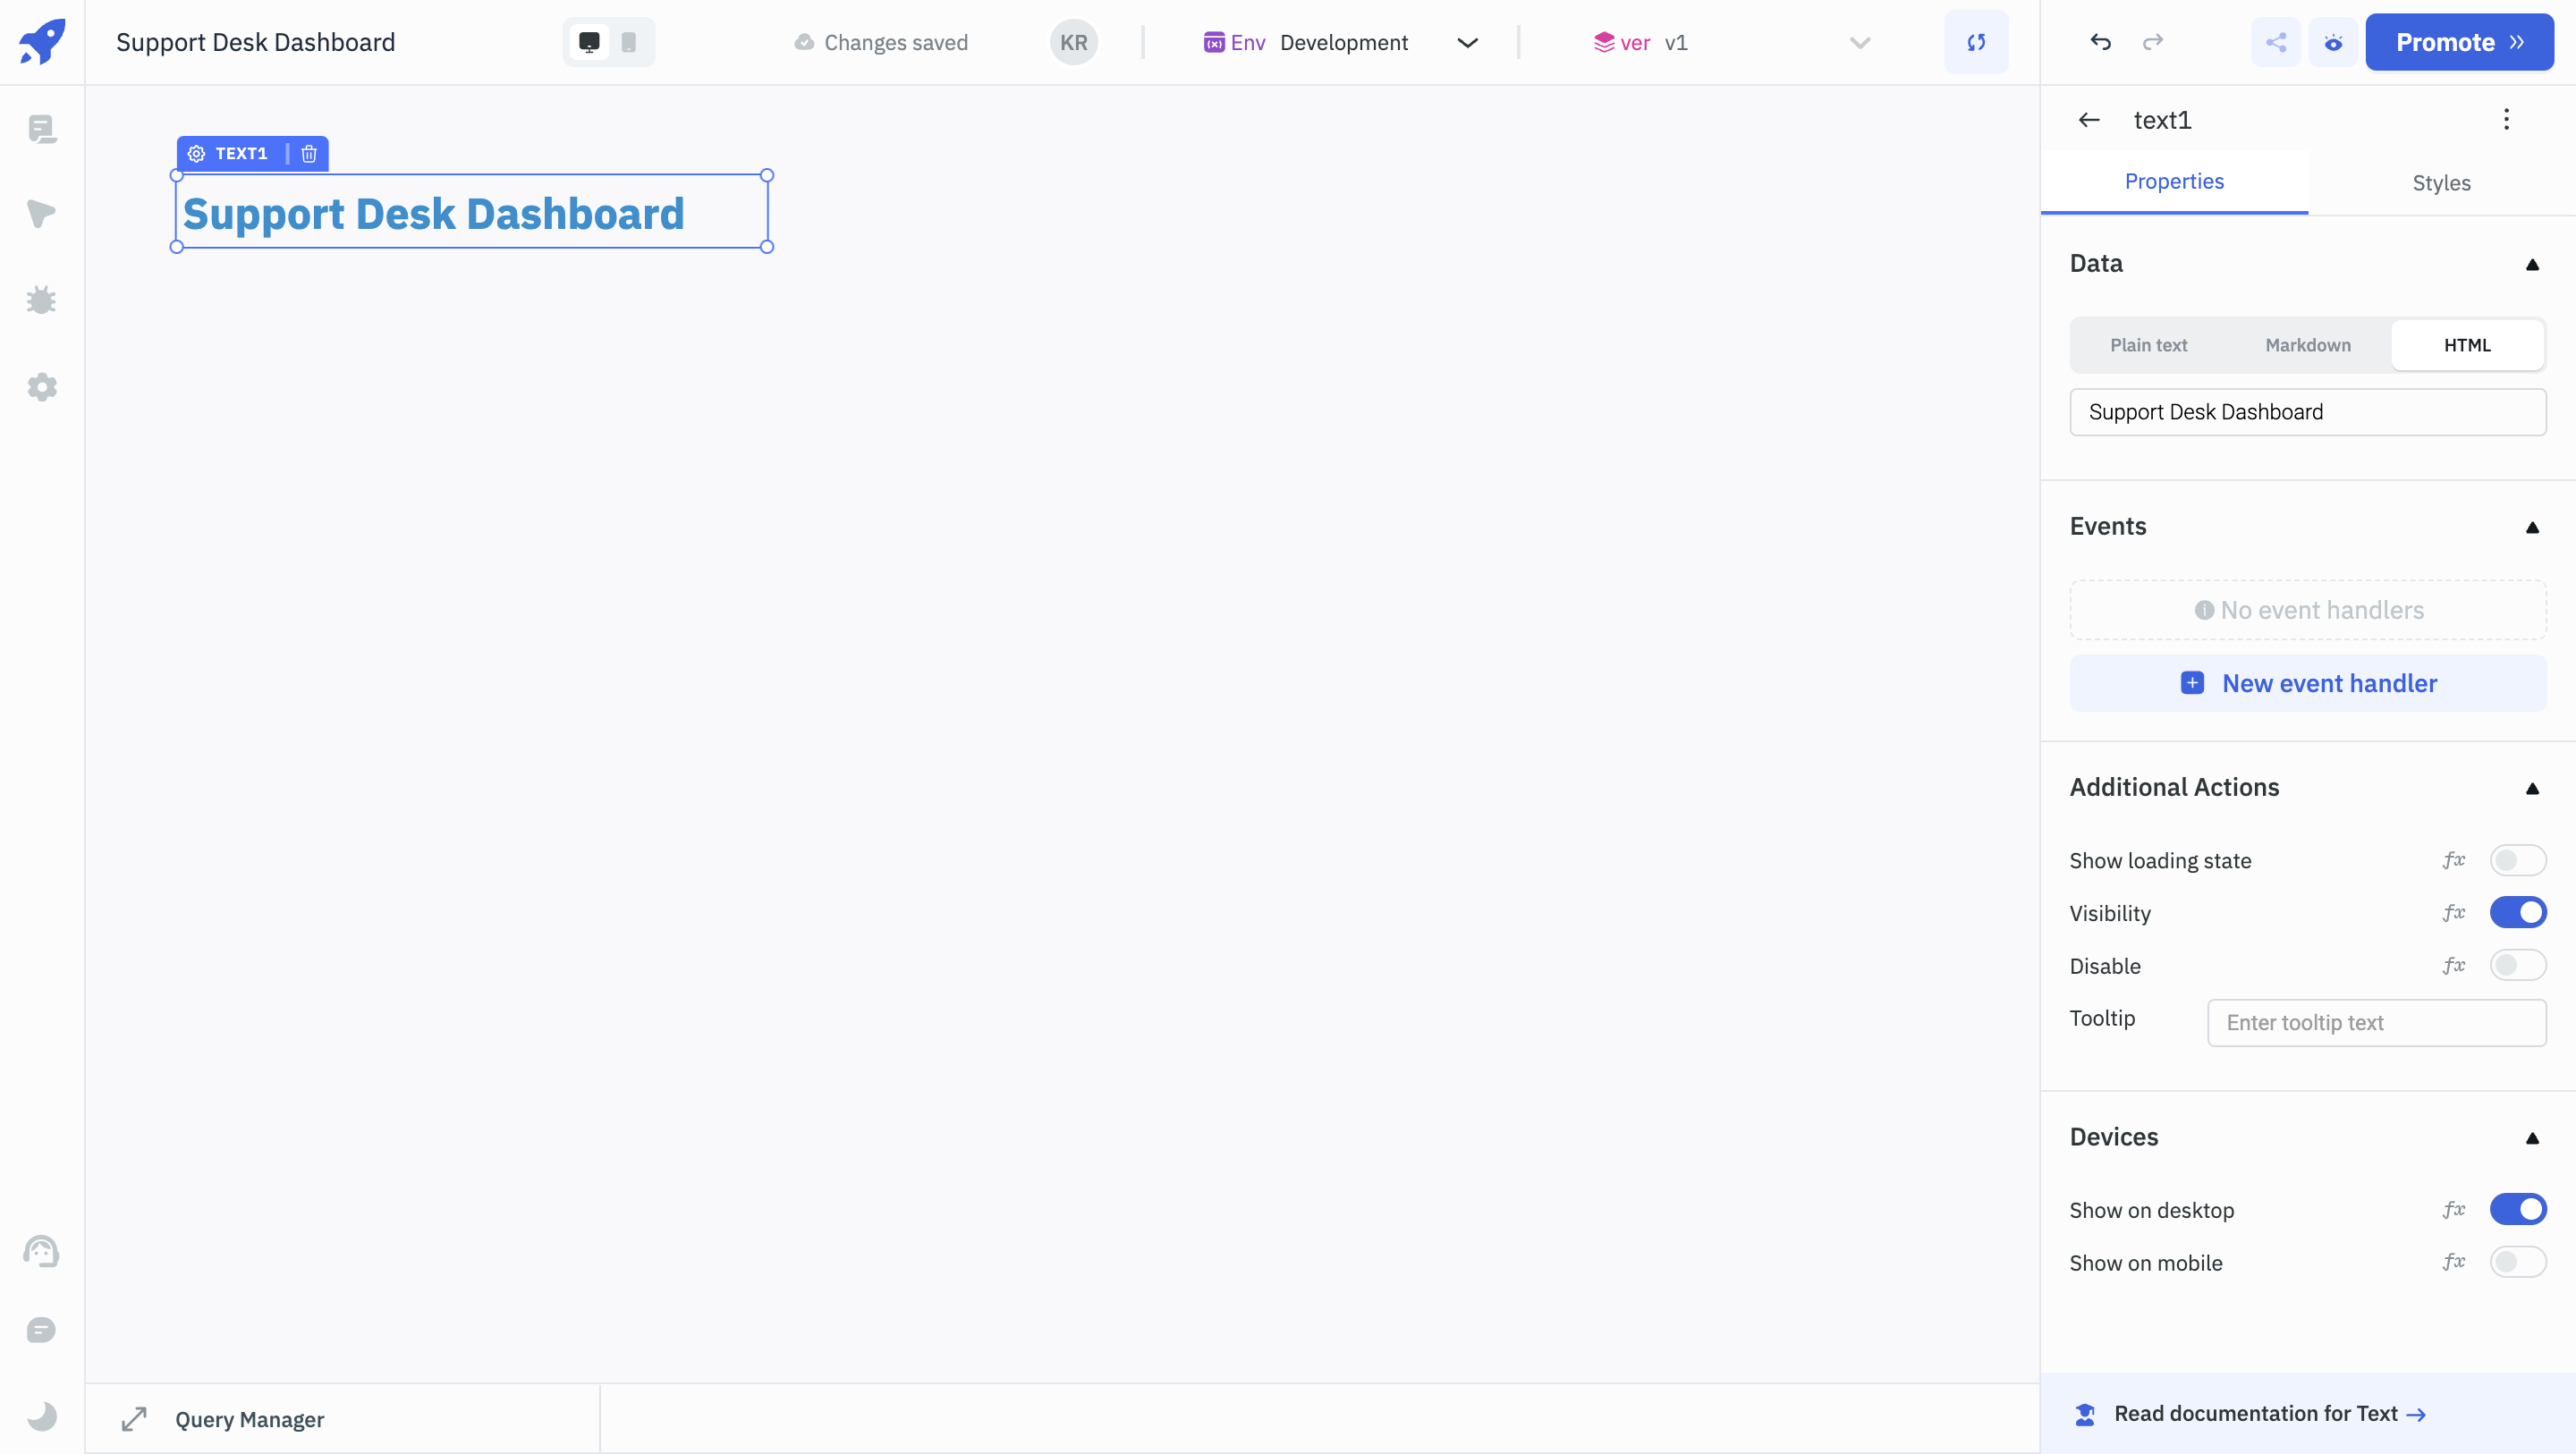
You can see all the available properties of a component in the Properties Panel. You can manage the functionality and styling properties of the component in the Properties Panel.
- Change its font size to 24, font weight to bold and color to blue(hex code -
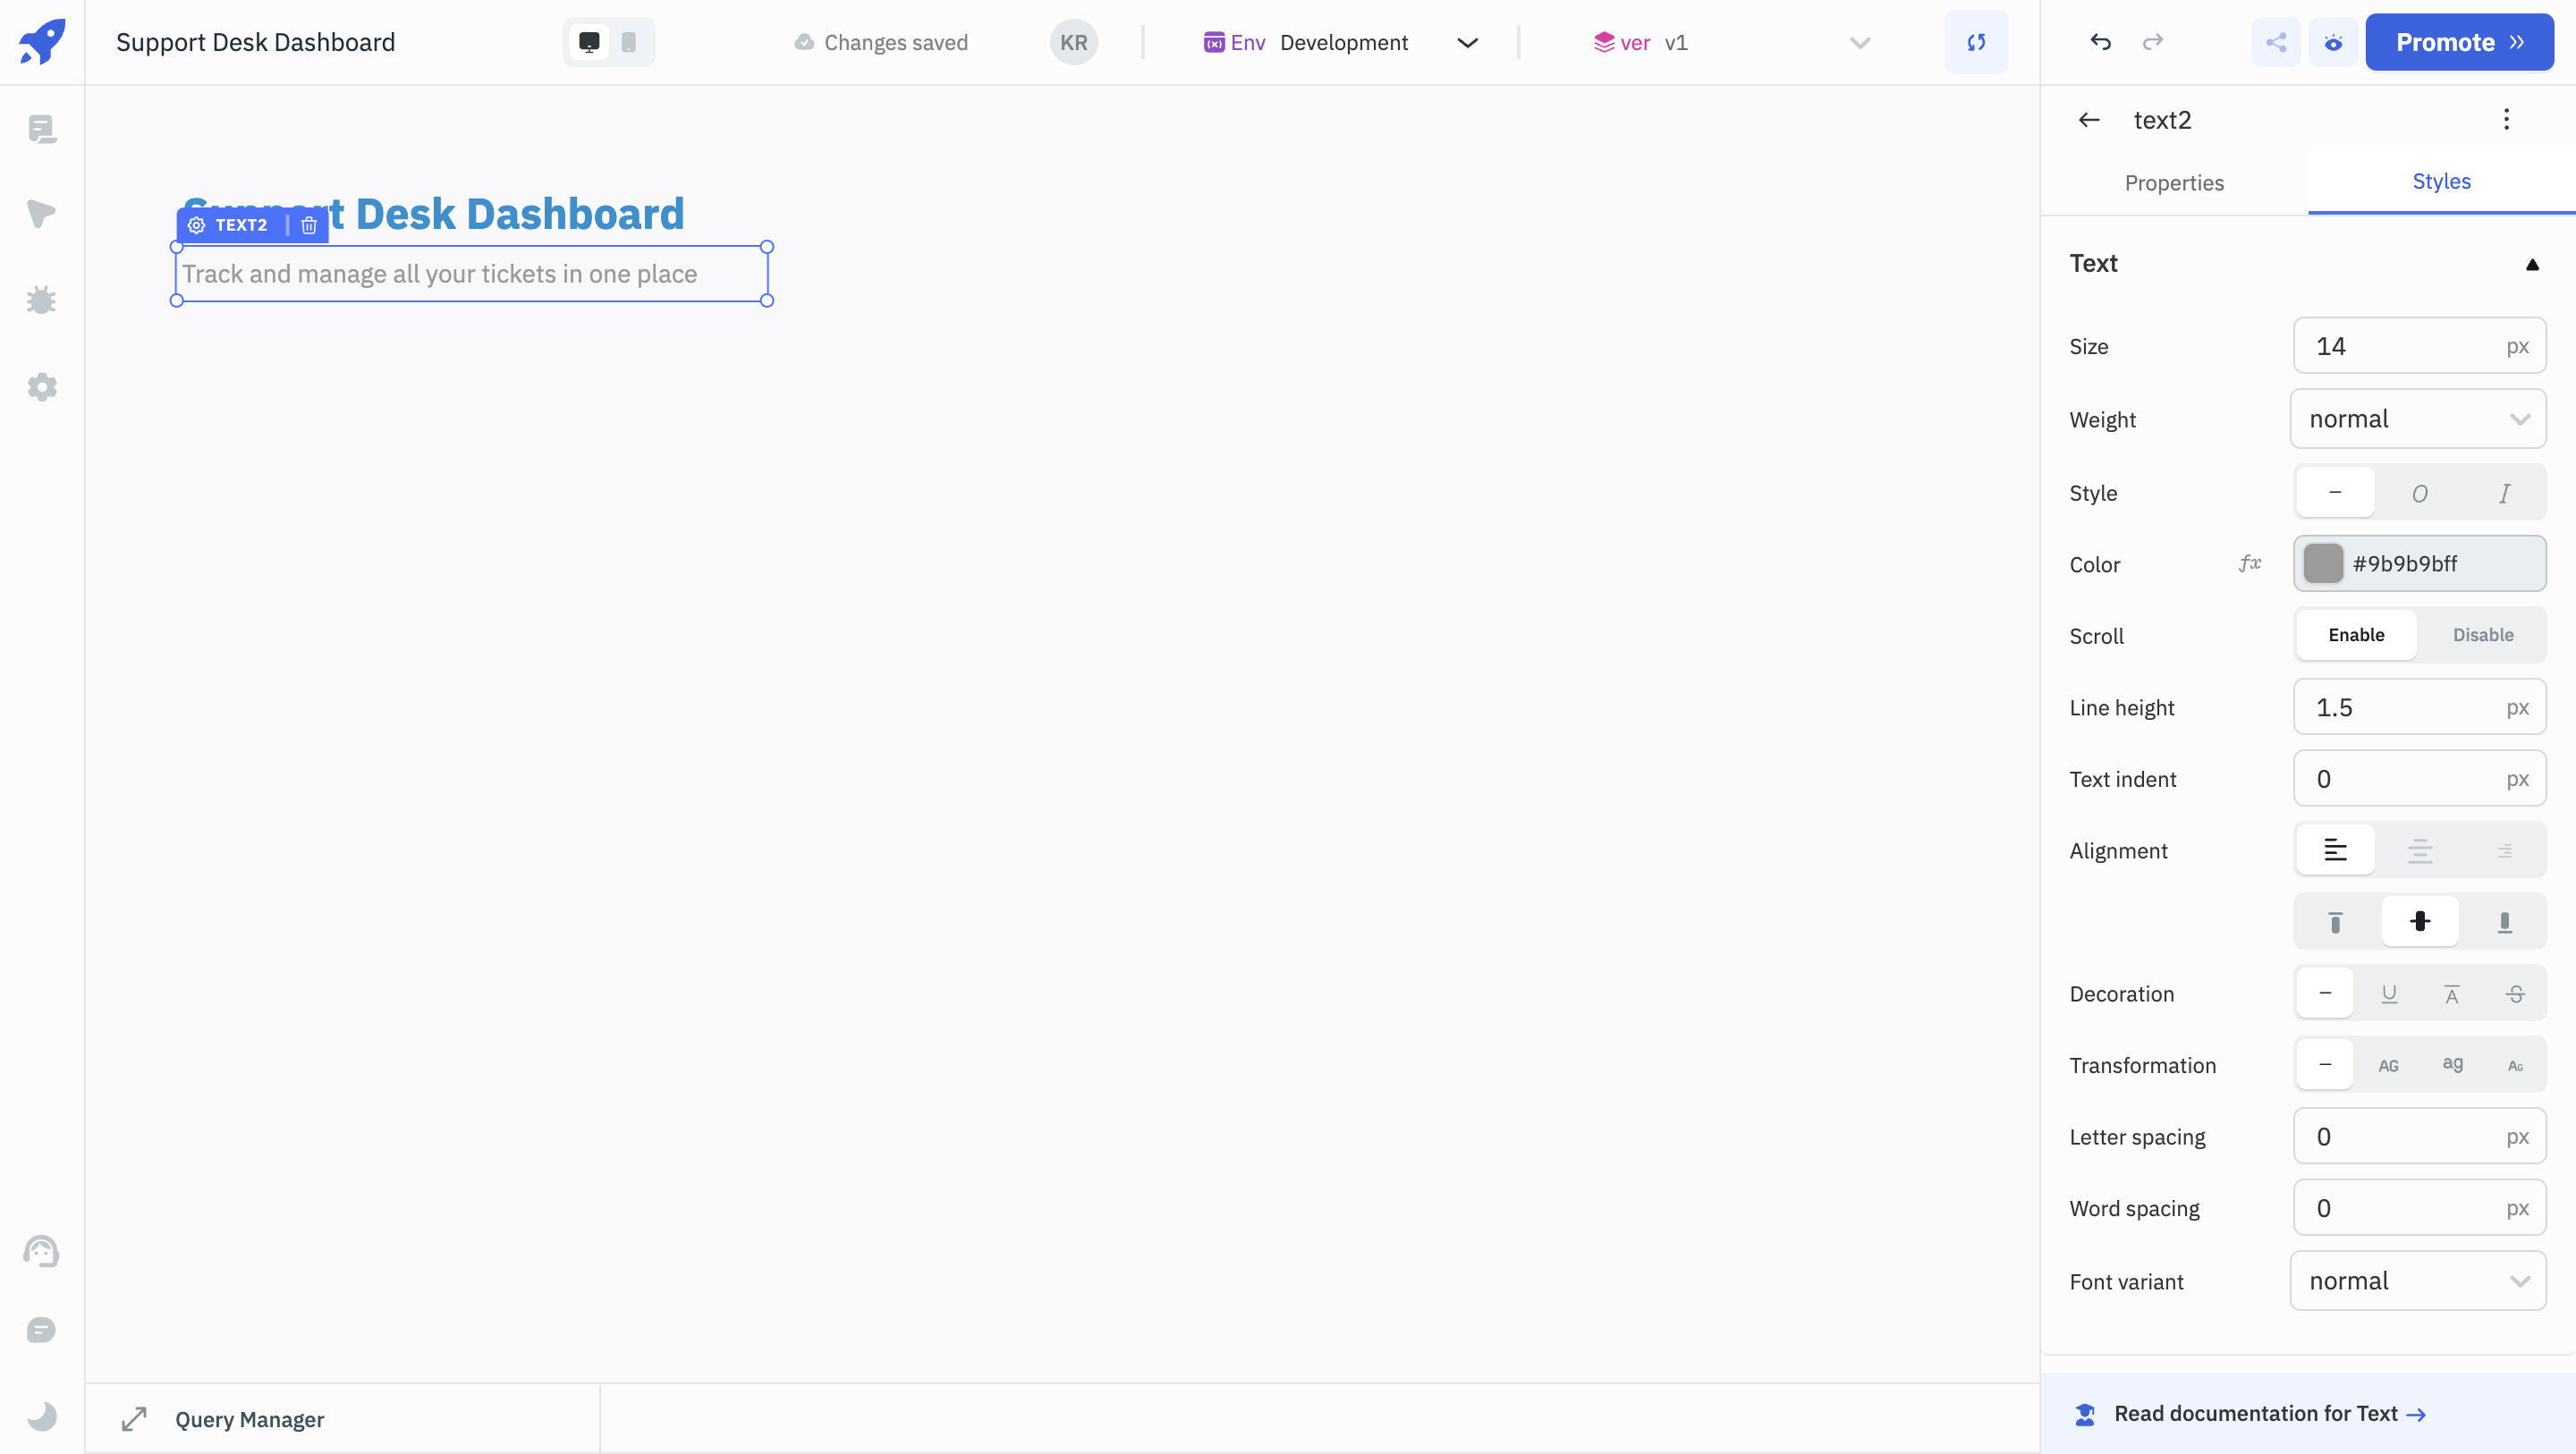
#408FCC). - Add another Text component below it and enter
Track and manage all your tickets in one placeunder itsDataproperty. - Change its font size to 14 and color to grey (hex code -
#9B9B9B).
Support Tickets Counter
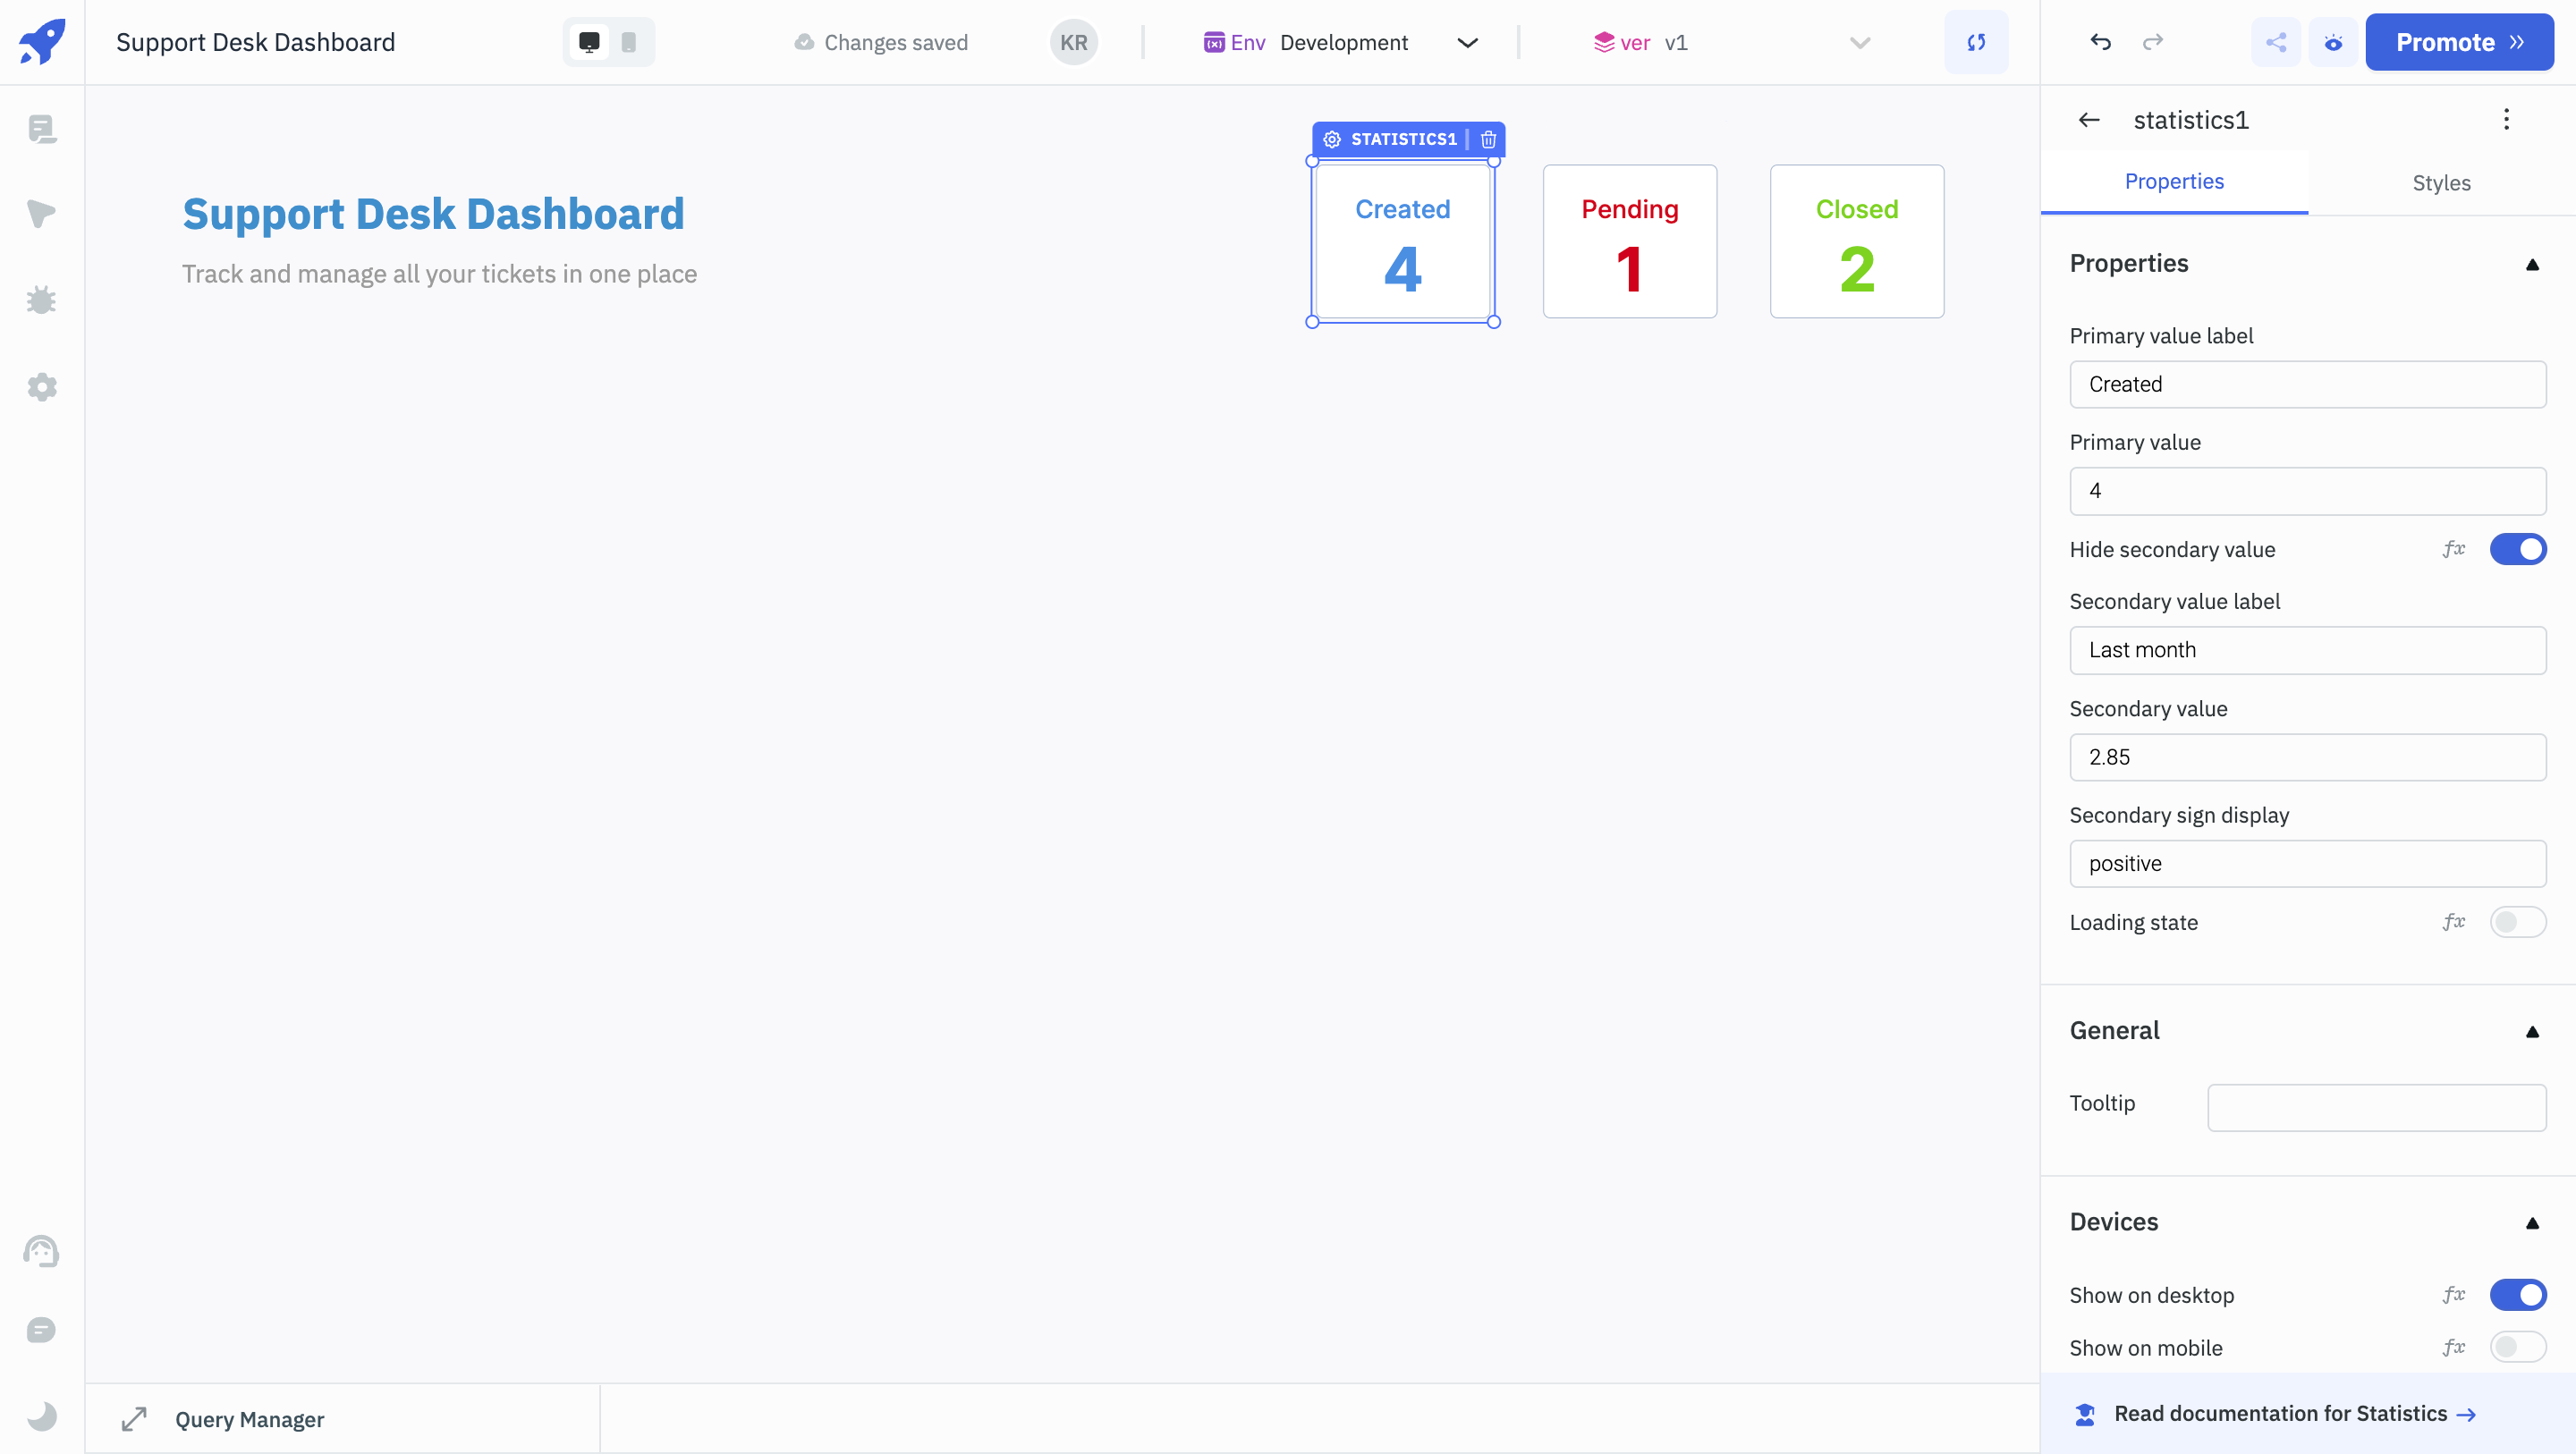
- Drag and drop Statistics component next to it.
- Under its
Primary value label, enterCreatedand enter a number underPrimary value. - Change its Primary label color and Primary text color to blue(
#4A90E2). - Disable
Hide secondary value - Add 2 more Statistics components for Pending and Closed tickets.
Tickets Table
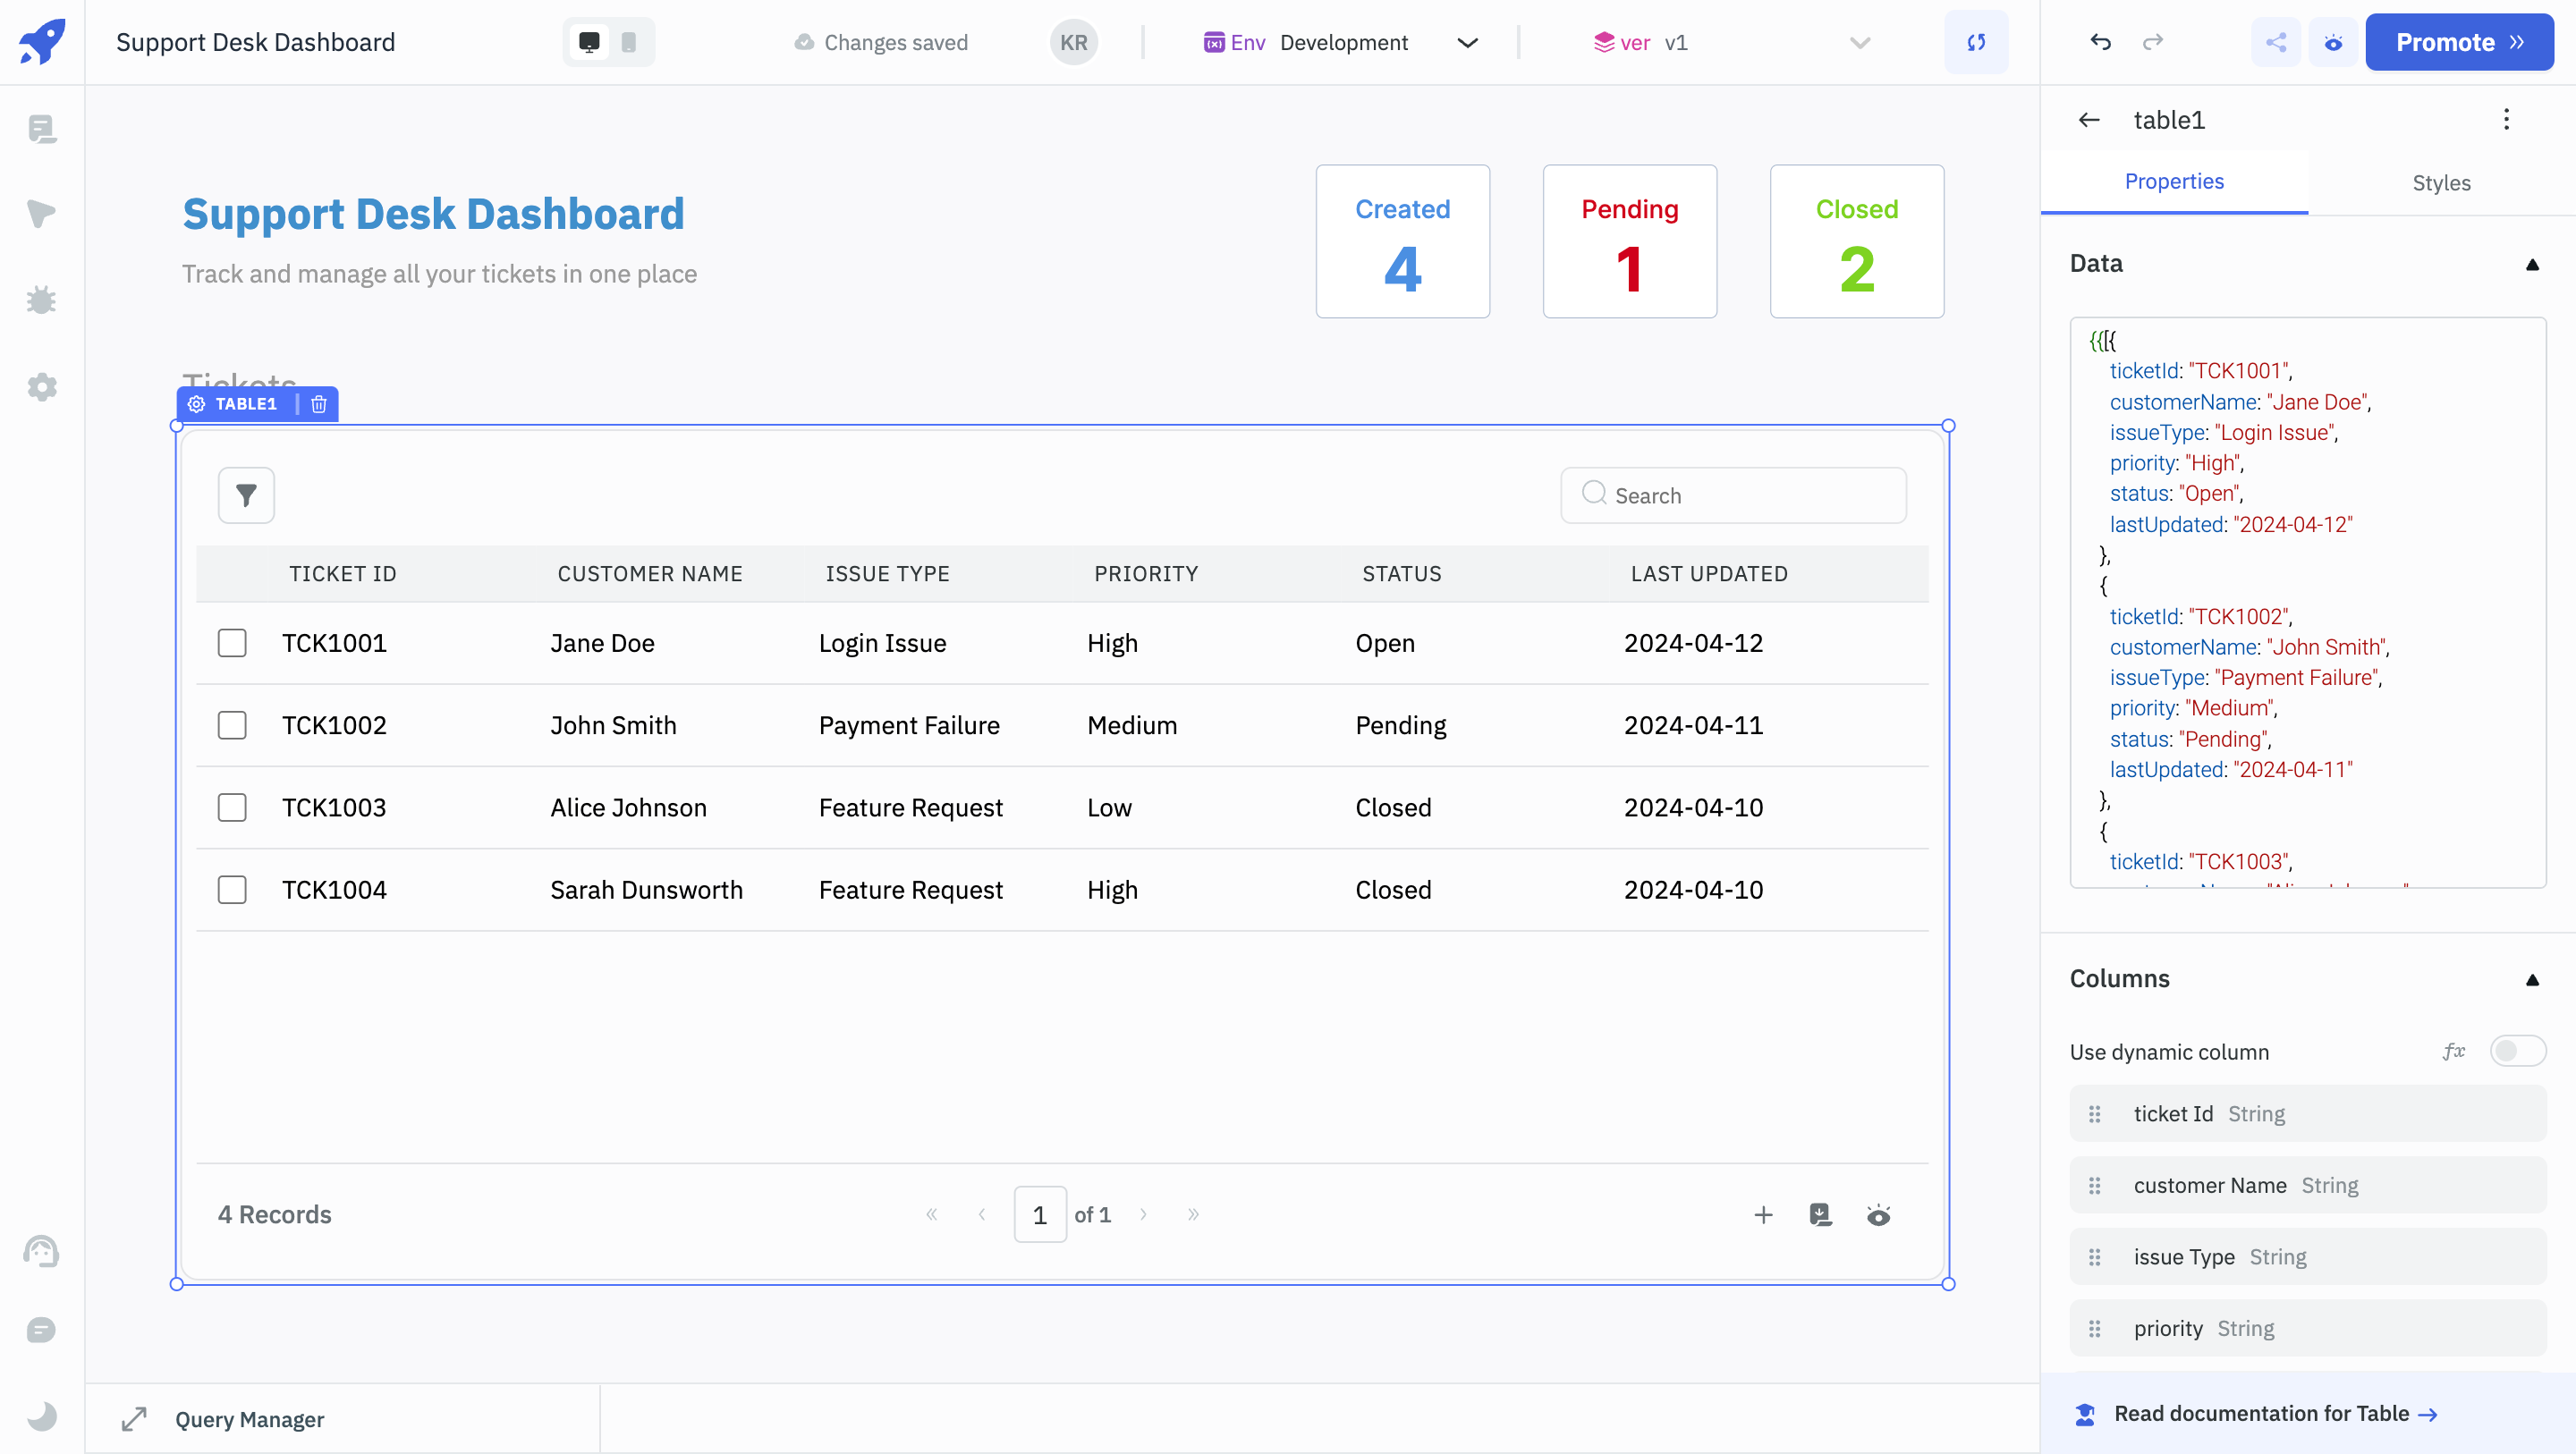
- Add a Table component on the canvas.
- Navigate to its Properties Panel on the right and change its
Border Radiusto 10. - Under its
Dataproperty, add the below dummy data:
{{ [{
    ticketId: "TCK1001",
    customerName: "Jane Doe",
    issueType: "Login Issue",
    priority: "High",
    status: "Open",
    lastUpdated: "2024-04-12"
  },
  {
    ticketId: "TCK1002",
    customerName: "John Smith",
    issueType: "Payment Failure",
    priority: "Medium",
    status: "Pending",
    lastUpdated: "2024-04-11"
  },
  {
    ticketId: "TCK1003",
    customerName: "Alice Johnson",
    issueType: "Feature Request",
    priority: "Low",
    status: "Closed",
    lastUpdated: "2024-04-10"
  },  {
    ticketId: "TCK1004",
    customerName: "Sarah Dunsworth",
    issueType: "Feature Request",
    priority: "High",
    status: "Closed",
    lastUpdated: "2024-04-10"
  },
] }}
- Add a Text component above it and enter Tickets under its
Dataproperty. - Change its font size to 14 and color to grey (hex code -
#9B9B9B). - Under the
Columnssection, click on the columns and change theirColumn nameproperties to update the column name. For instance, change "ticketId" to "ticket ID", "customerName" to "customer name", etc.
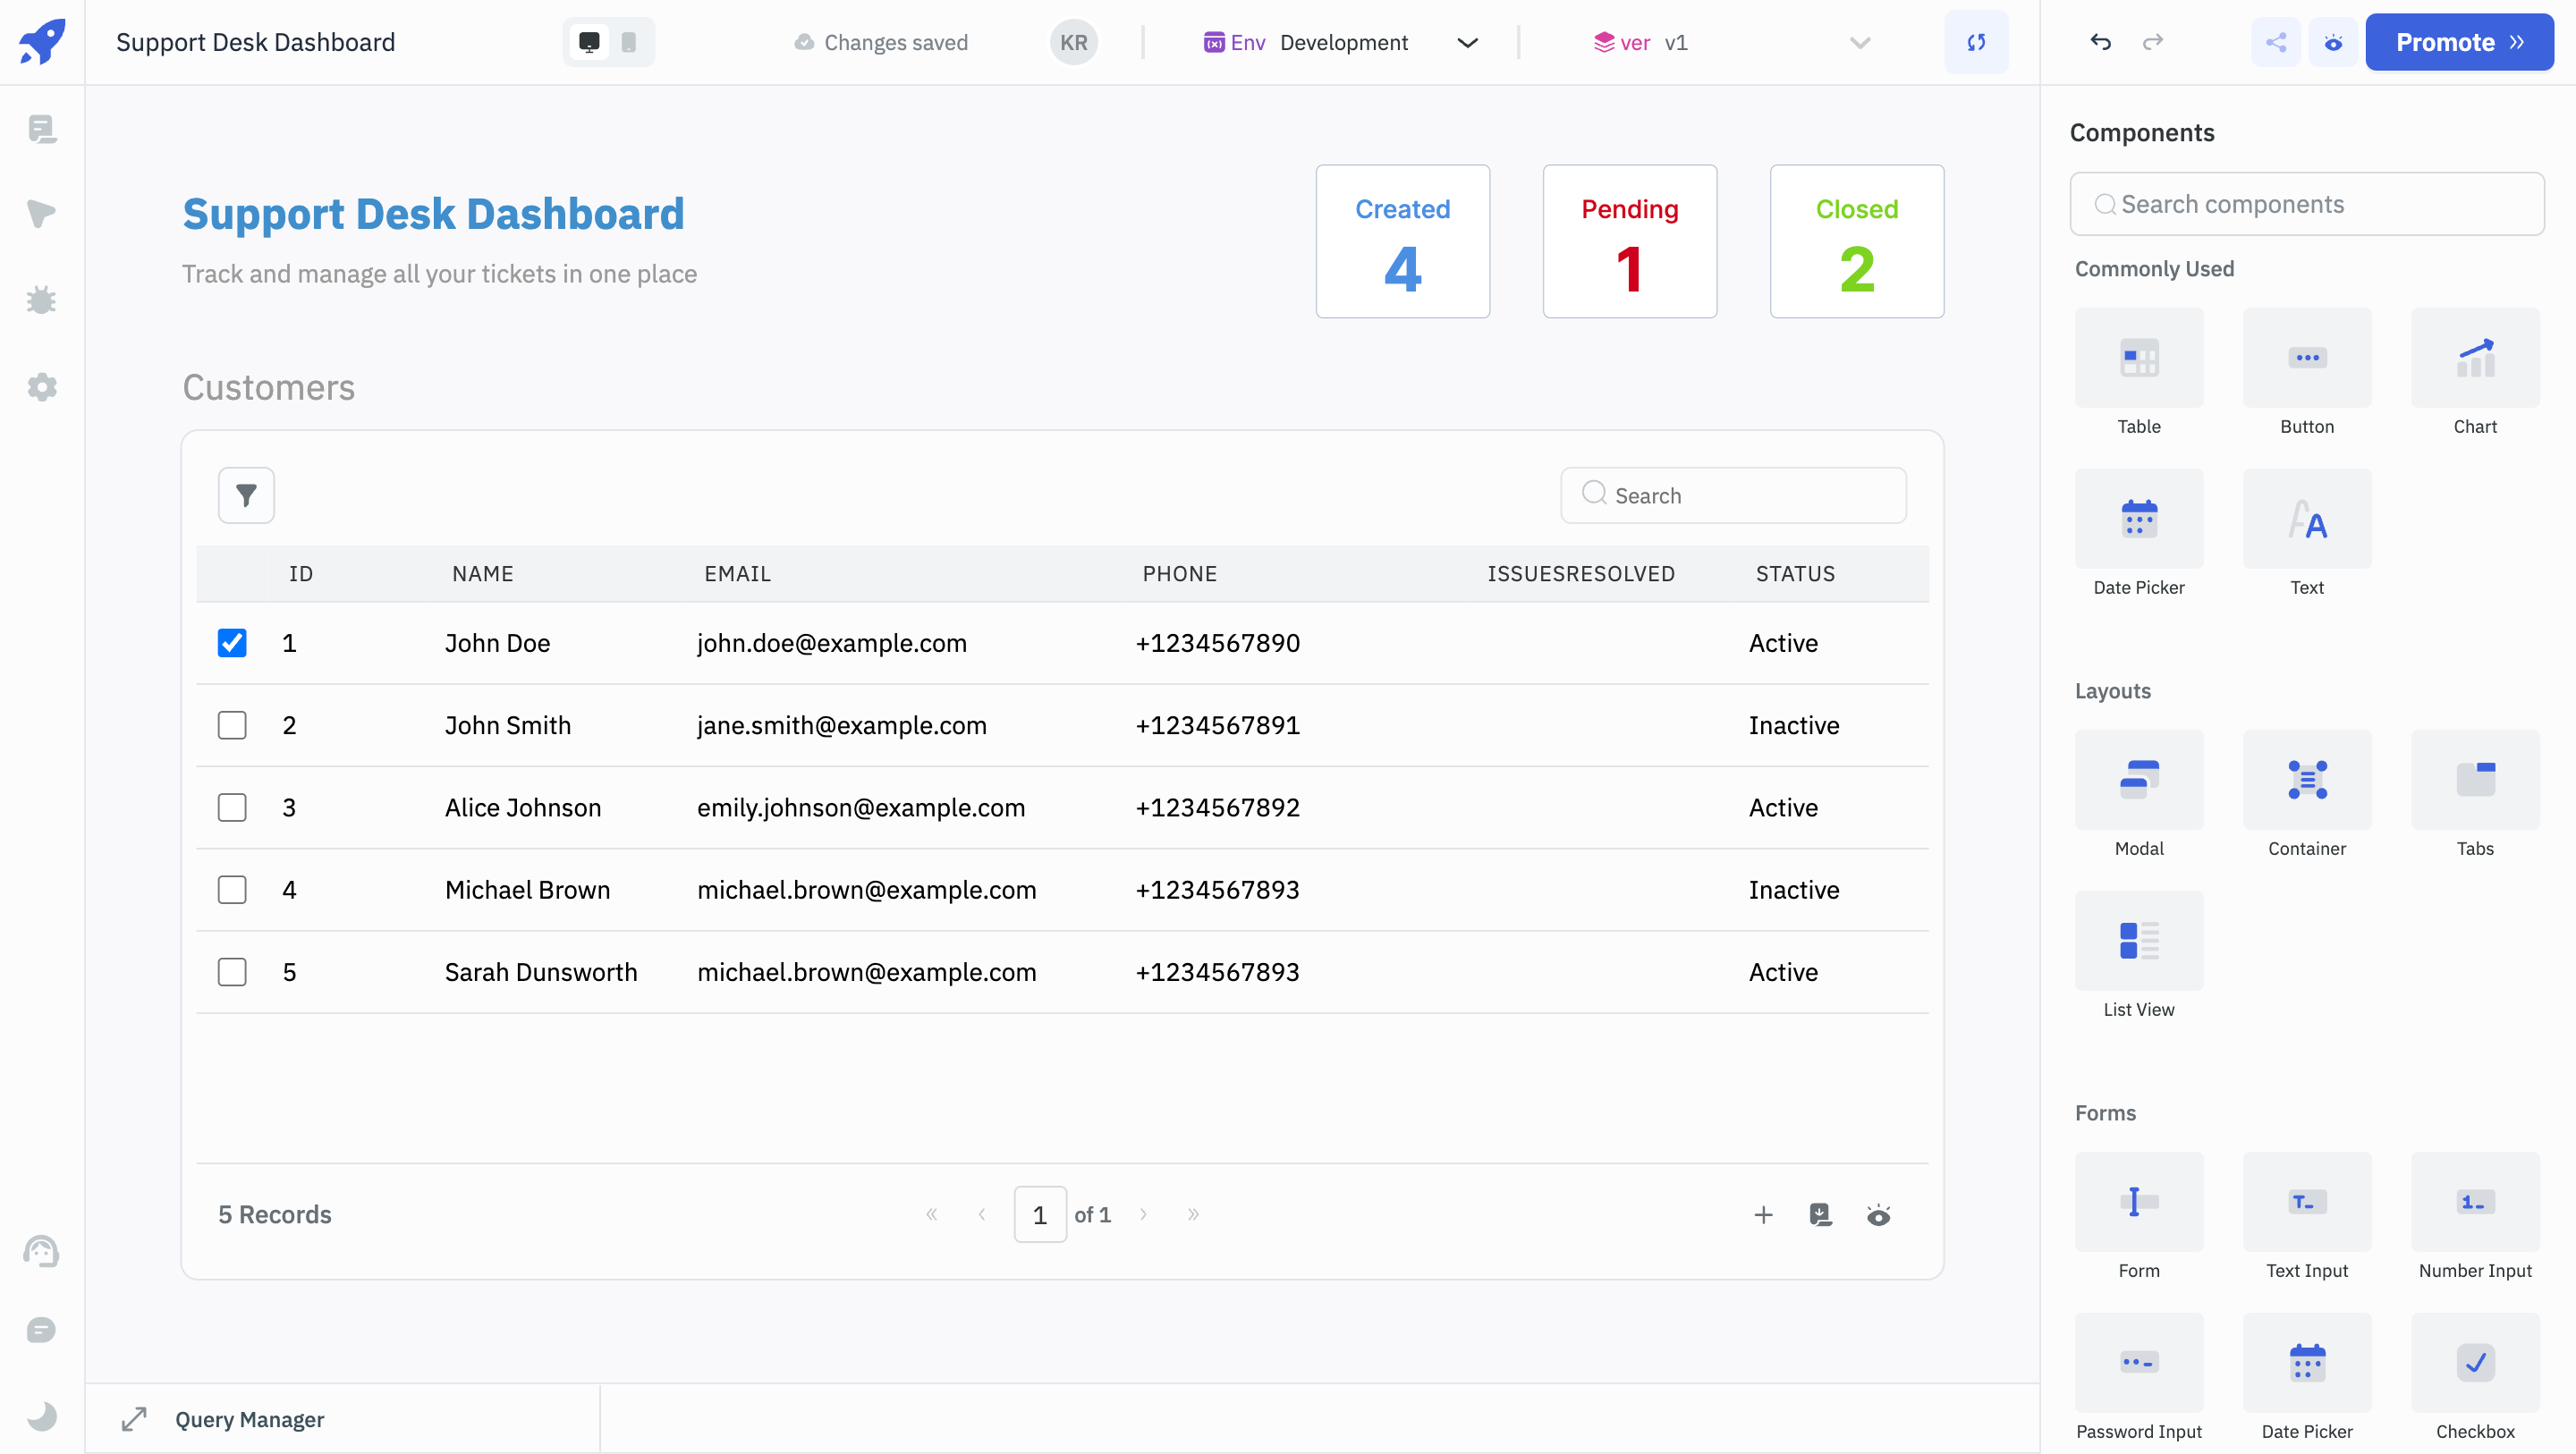
Adding a New Page
- Click on Pages on the left sidebar - there will be a Home page by default. Rename the
- Click on the
+icon to create a new page and rename the new page to Customers.

-
Click and drag to select all components on the Dashboard page, copy them (CMD+C for Mac and Cntrl+C for Windows) and paste (CMD+V for Mac and Cntrl+V on Windows) them in the Customers page.
-
For the Text component for Tickets, change the
Dataproperty to Customers. -
Add the below data under the Table's
Dataproperty.
{{[
    {
        id: 1,
        name: "John Doe",
        email: "[email protected]",
        phone: "+1234567890",
        status: "Active",
        issuesResolved: 0
    },
    {
        id: 2,
        name: "John Smith",
        email: "[email protected]",
        phone: "+1234567891",
        status: "Inactive",
        issuesResolved: 0
    },
    {
        id: 3,
        name: "Alice Johnson",
        email: "[email protected]",
        phone: "+1234567892",
        status: "Active",
        issuesResolved: 1
    },
    {
        id: 4,
        name: "Michael Brown",
        email: "[email protected]",
        phone: "+1234567893",
        status: "Inactive",
        issuesResolved: 4
    },
    {
        id: 5,
        name: "Sarah Dunsworth",
        email: "[email protected]",
        phone: "+1234567893",
        status: "Active",
        issuesResolved: 1
    }
]}}
Changing the Theme
Click on the Settings button on the left sidebar. The App mode property will be set as Auto by default. Switch the App mode property to dark. Now when you preview the app, you can see that the app has a dark color scheme.
When you keep the App mode as auto, it will follow the color scheme of the browser.
This guide has outlined the steps to create a Support Desk Dashboard UI using ToolJet's components. You now have a visually appealing interface that will help manage and track support tickets efficiently. Continue to explore ToolJet to learn about adding functionality to the UI.