Welcome to ToolJet Docs
What is ToolJet
ToolJet is an open-source low-code framework to build and deploy custom internal tools.
ToolJet ships with its built-in database called ToolJet DB (built on top of PostgreSQL). You can also connect to the external data sources such as databases ( PostgreSQL, MongoDB, MS SQL Server, Snowflake, , BigQuery, etc ), API/GraphQL endpoints, SaaS tools ( Airtable, Stripe, Google Sheets, etc ) and cloud object storage services ( AWS S3, Google Cloud Storage and Minio ).
Once the data sources are connected, ToolJet can run queries on these data sources to fetch and update data. The data fetched from data sources can be visualised and modified using the UI widgets such as tables, charts, forms, etc. You can also use Javascript or Python queries for writing business logic or interacting with the user interface of the application.
How ToolJet works
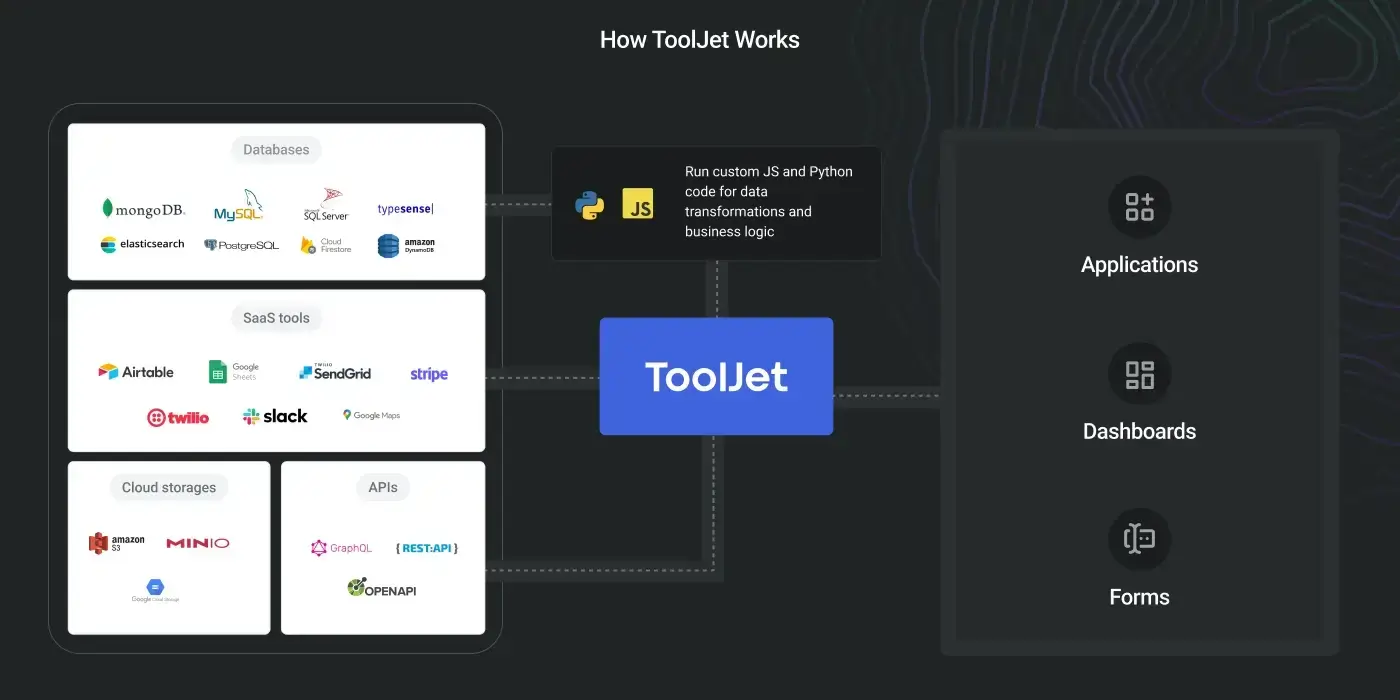
With ToolJet, you can build apps in 3 simple steps:
-
Connect to datasources: Connect to the ToolJet's built-in database ToolJet DB (built on top of PostgreSQL) or your existing data sources such as PostgreSQL, MySQL, Firestore, Stripe, Google Sheets, API endpoints, etc.
-
Build queries: ToolJet comes with query builders for all supported data sources. You can also write Javascript or Python queries or use Transformations to transform the query response.
-
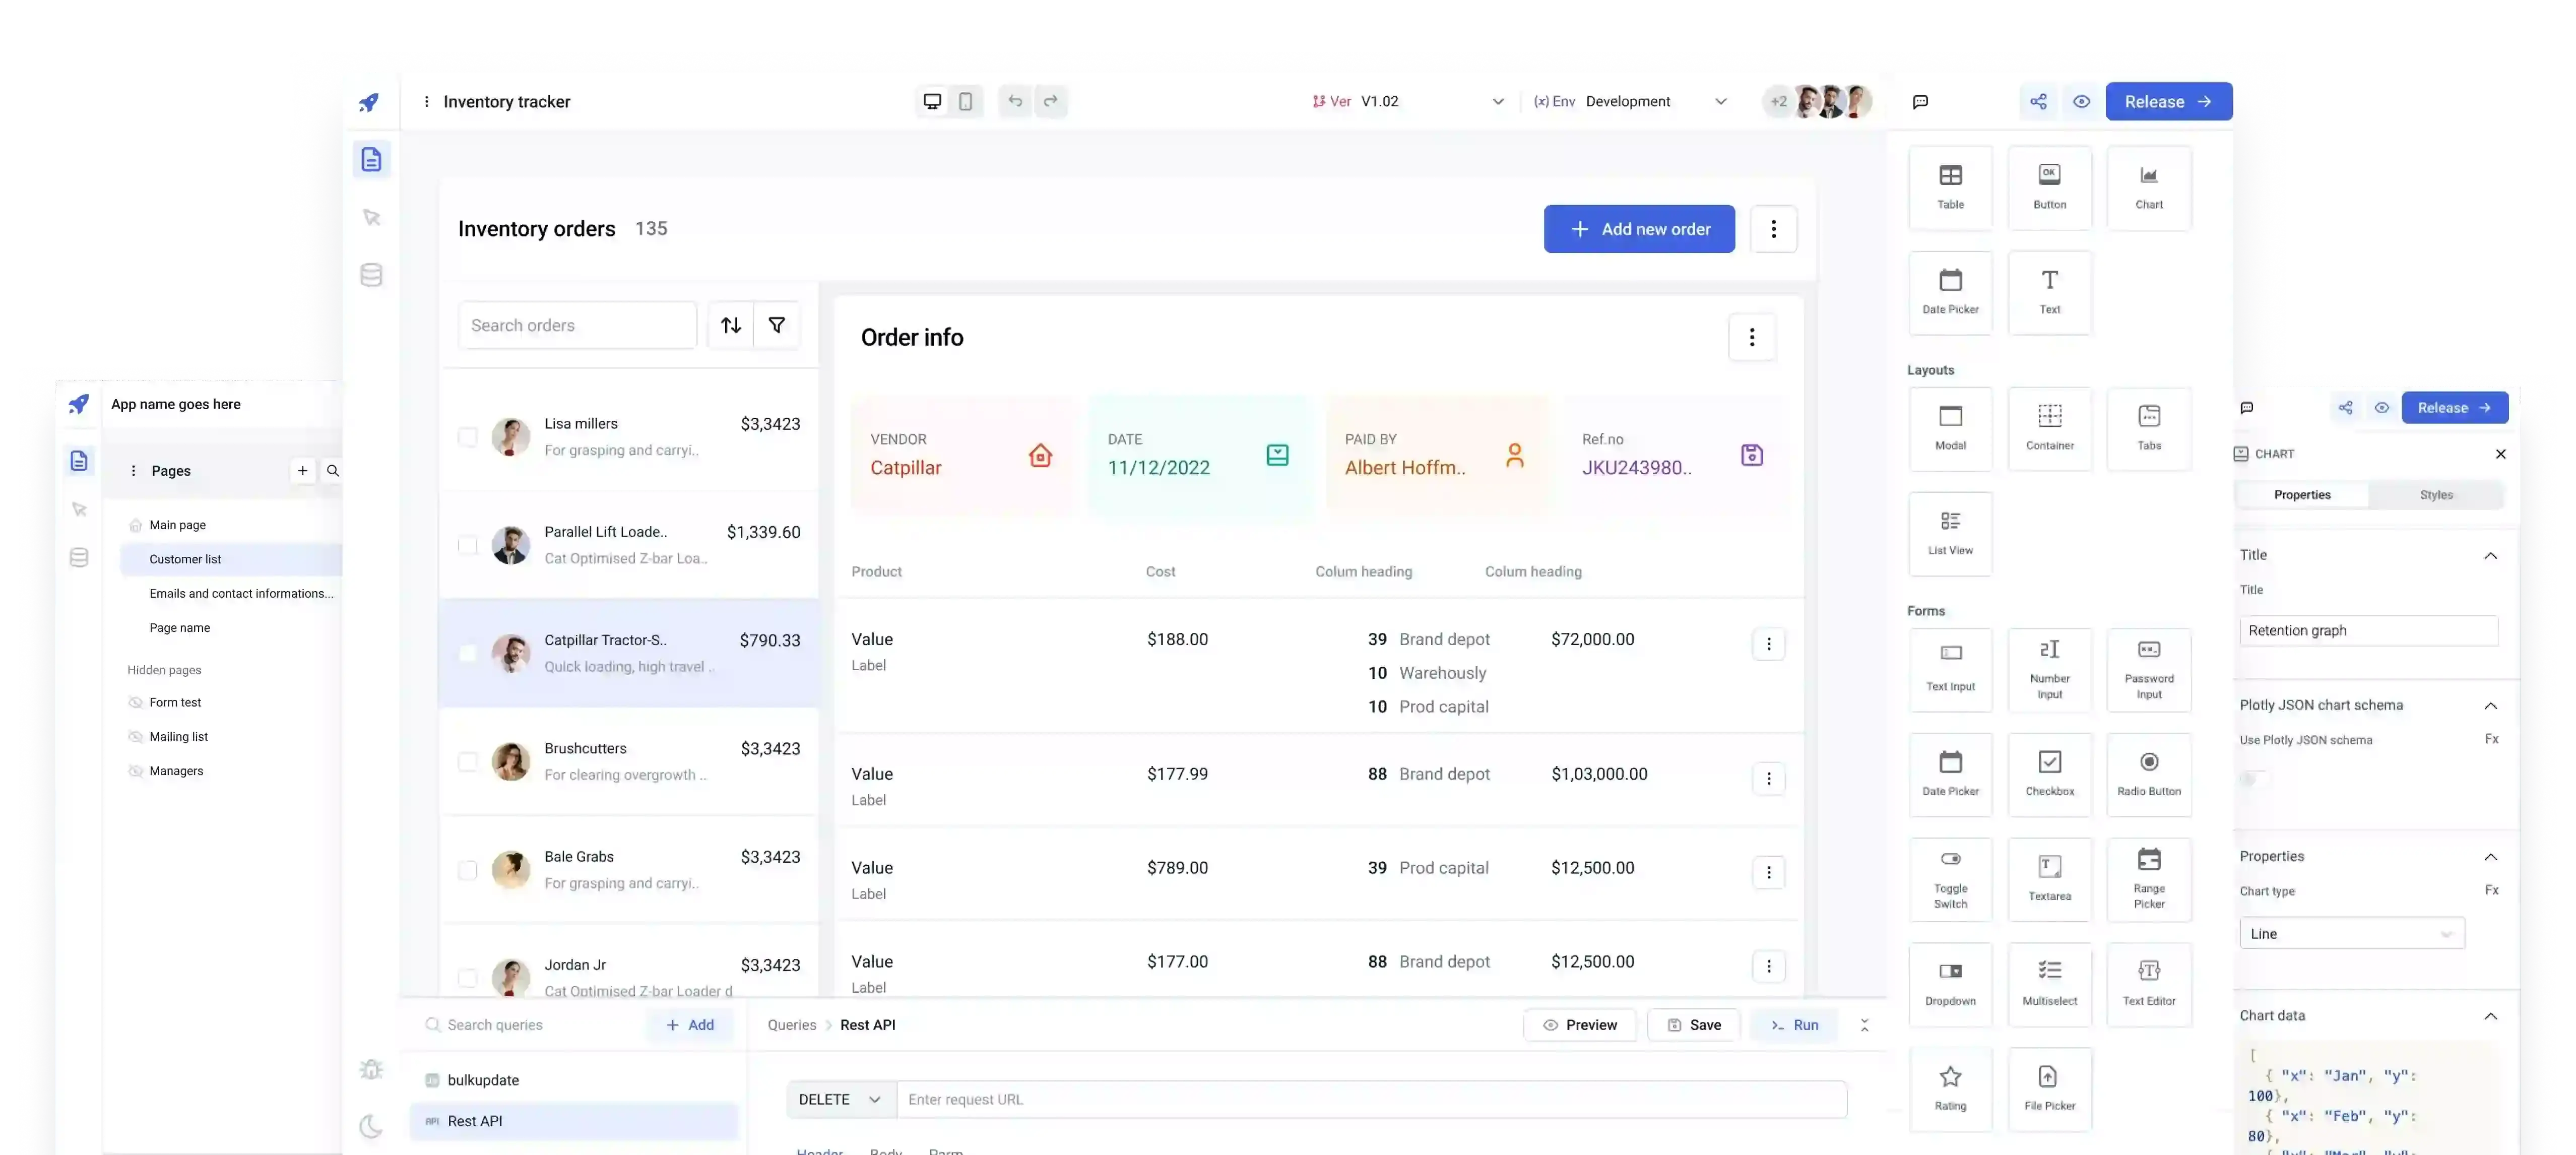
Build User Interface: ToolJet's visual App Builder allows you to drag and drop components ( Eg: tables, charts, forms, etc ) to quickly build the user-interface of the apps. Components have events such as
on click,on row selected,on page changed, etc. ToolJet apps can be used in light and dark mode.tipToolJet binds together the datasources, queries and components to convert business logic into custom applications. You can also secure your ToolJet apps with Group & Permissions and Audit Logging.
Choose your ToolJet
There are a few different ways to set up ToolJet depending on how you intend to use it:
- ToolJet Cloud: hosted solution, just sign-up for free and start building apps in seconds.
- Deploy on premise: recommended method for production or customized use cases. You'll find Server setup guides for popular platforms (AWS, GCP, Kubernetes etc) and one-click deployment guides (Heroku, DigitalOcean etc).
- Try ToolJet on local machine: the fastest way to try out ToolJet on your computer using docker.
- Data security is top priority at ToolJet, read about our data security here.
The very quick quickstart
Let's say you're an eCommerce company and your Customer Support/Operations team need a Support Tool/Admin panel for managing the orders, updating inventory, and track revenue and metrics. This quickstart will guide you through building your first custom internal tool in less than 5 minutes.
You will:
- Create a database
- Create a new application
- Build the UI
- Build queries and bind data to UI
- Preview, Release and Share app
Before getting into the quickstart, Sign up and create your account on ToolJet.
Create a database
-
Navigate to ToolJet DB Editor from the left sidebar on the dashboard
-
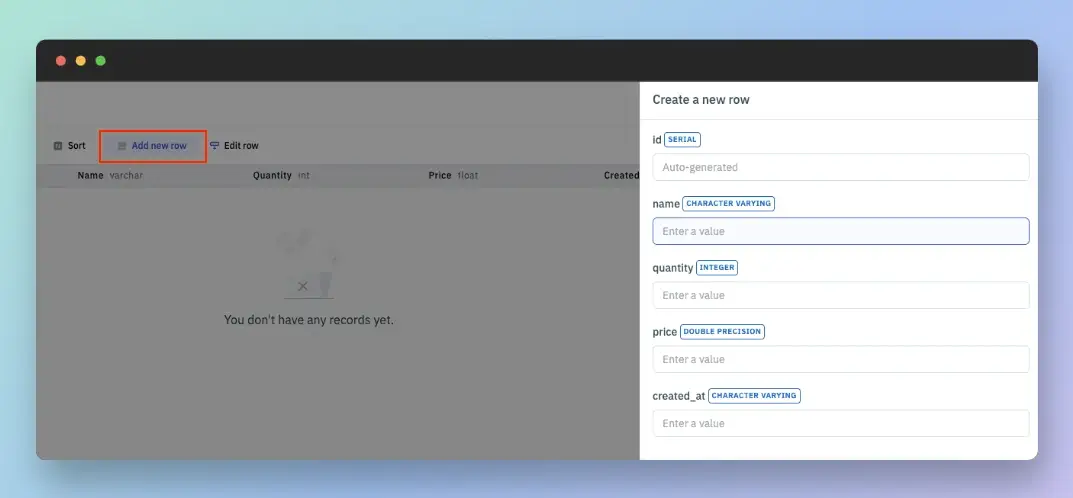
Click on Create New Table button, enter Table name and Add columns from the drawer that slides from the right. Click on Create to add the table.

-
Once the table is created, click on the Add new row button to add the data to the table and click Create.
Learn more about the ToolJet Database here
Create a new application
-
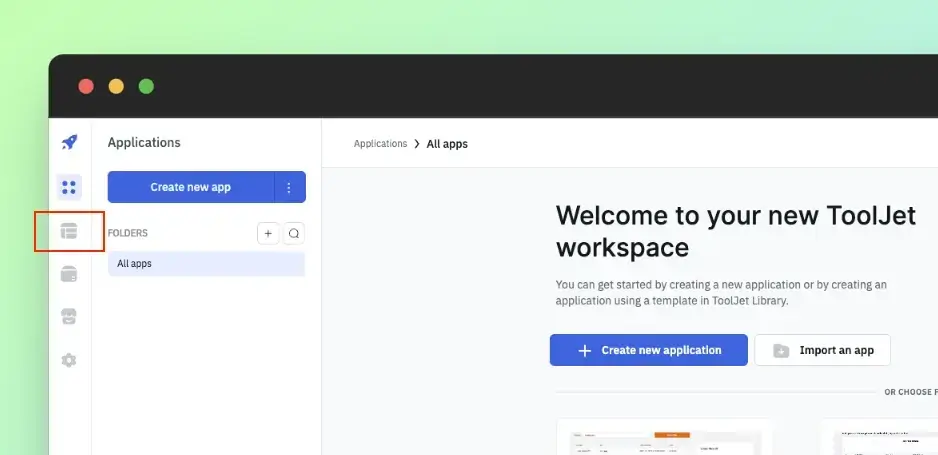
To create a new ToolJet application, go to the Dashboard -> Create new application.
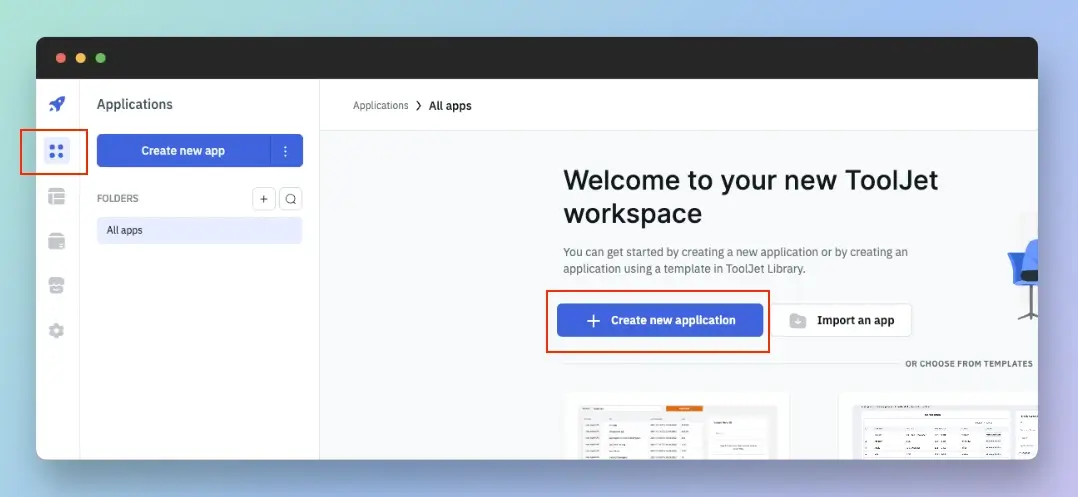 info
infoYou can also use the existing UI templates for your application or import an application to your workspace.
-
When you click on create new app the App-builder will open up. You can rename your application from
untitledto Support Tool from the top left of app-builder.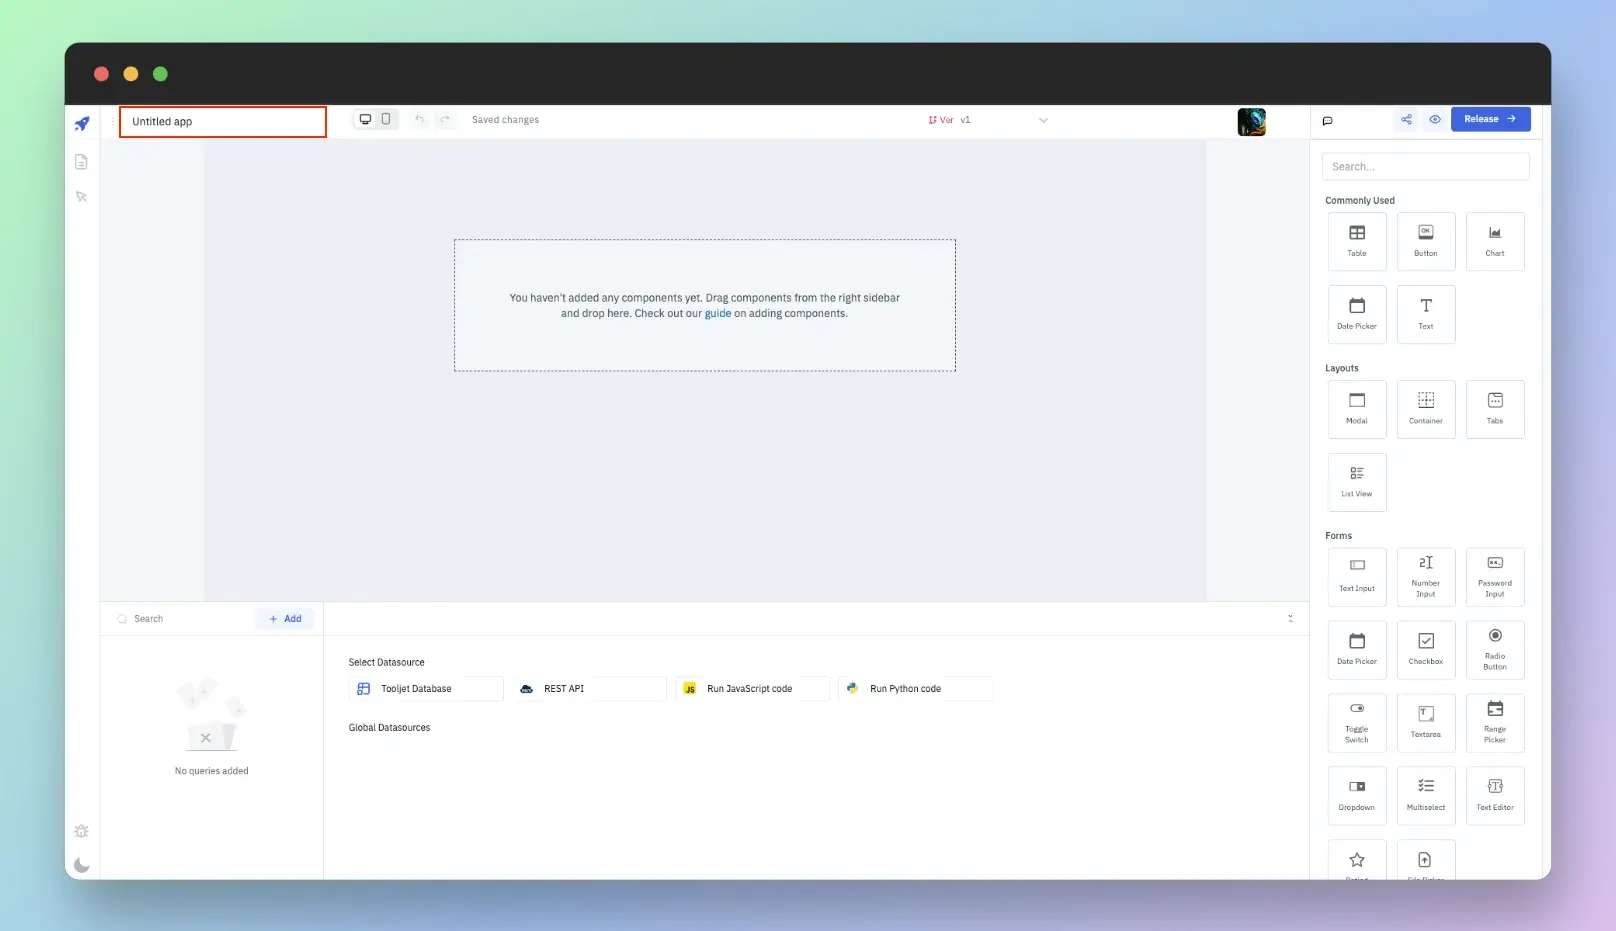
Build the UI
-
Let's build the UI of the application by dragging and dropping the components on the canvas.
-
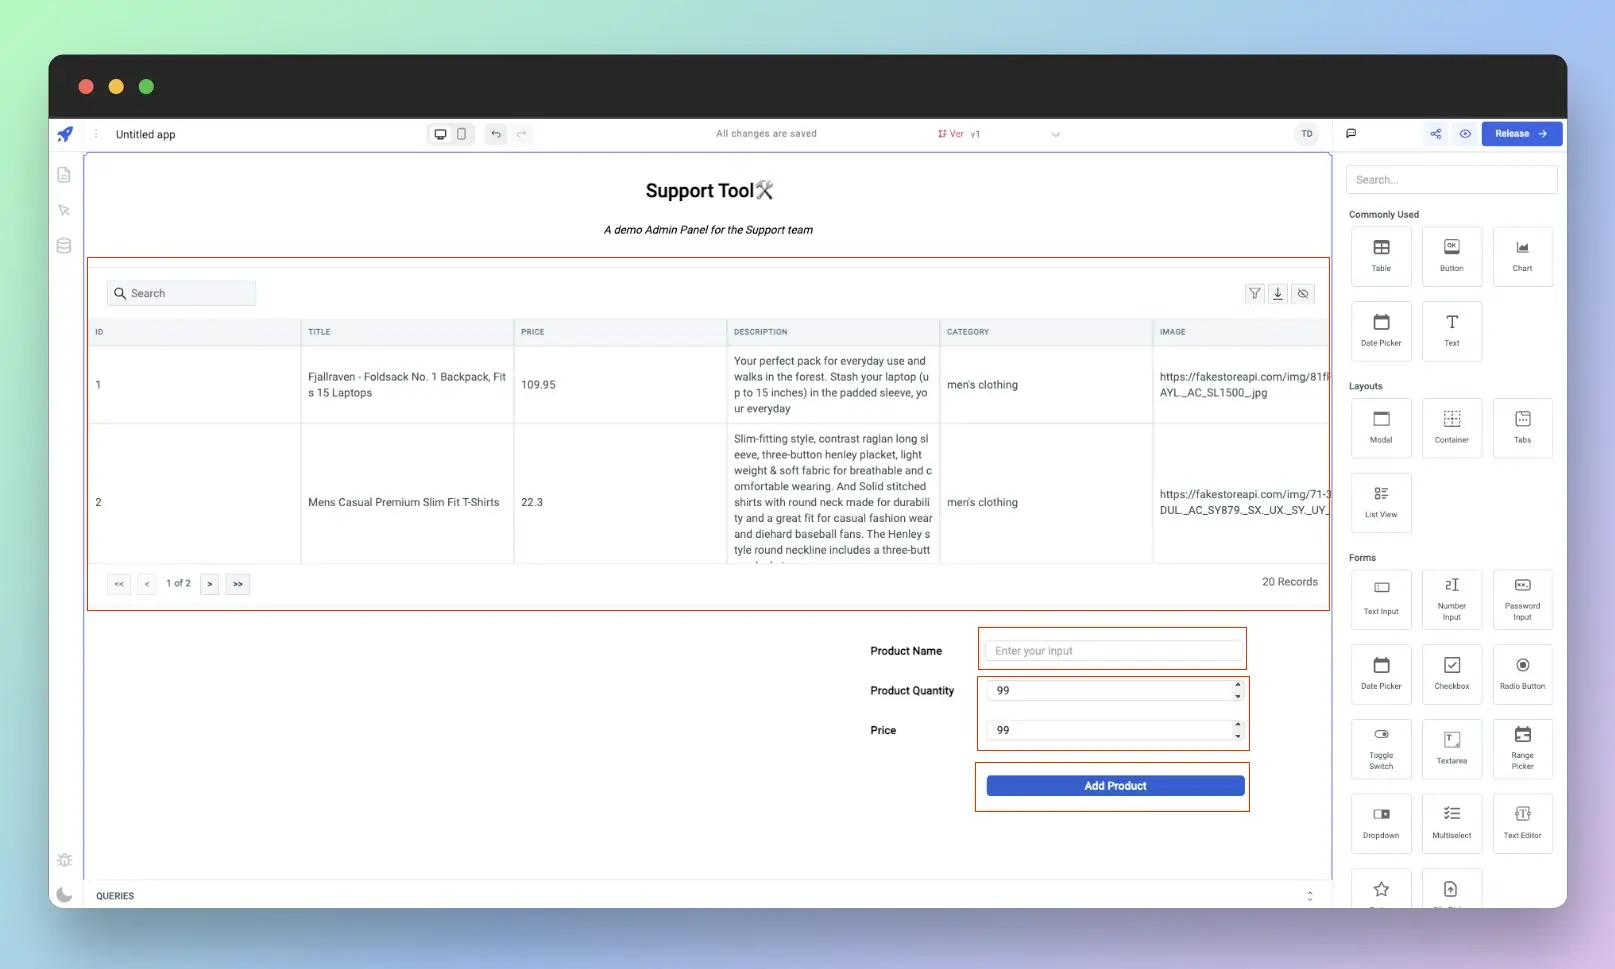
To build the UI, we will use:
- Table for displaying the customers data
- Text components for the Title and description of the app as the header
- Text Input component for getting product name input from the user
- Number Input component for getting product quantity and price input from the user
- Button component that will be used to trigger the query for inserting a row in the database using the button's OnClick event handler
ToolJet application's User interface is constructed using Components like Tables, Forms, Charts, or Buttons etc. Check Components Catalog to learn more.
Build queries and bind data to UI
-
We can add a new datasource from the Global datasources page from the dashboard but since we are using ToolJet Database we don't need to add any external datasource. Go to the Query Panel and select ToolJet Database
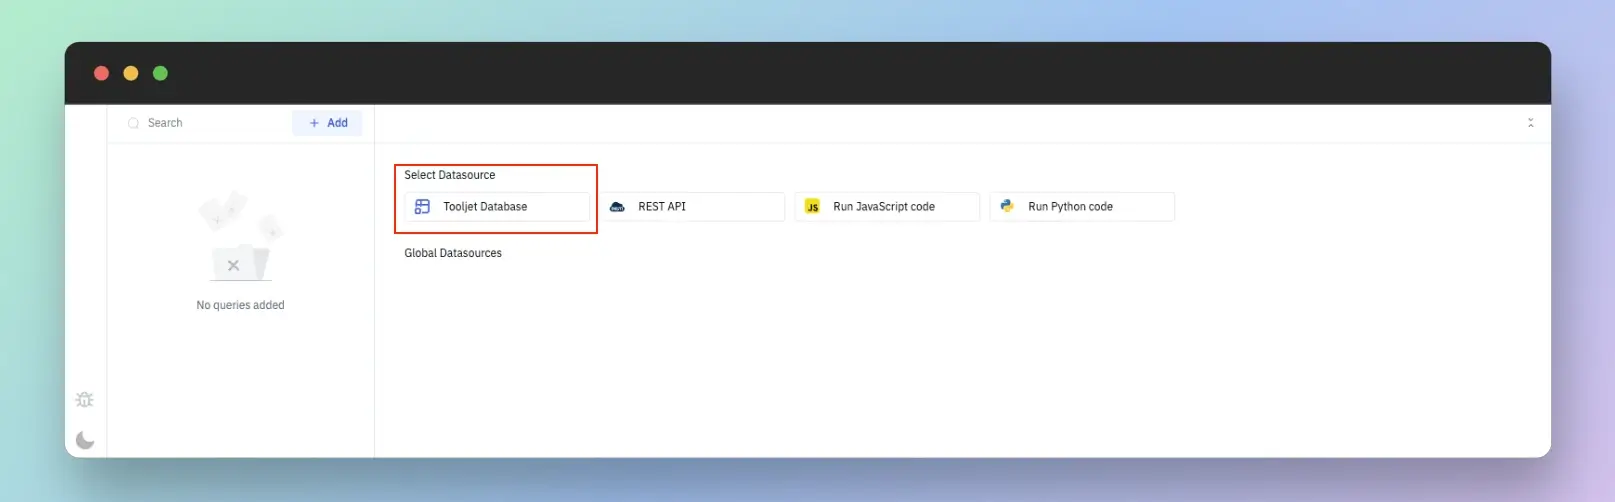 info
infoToolJet can connect to several databases, APIs and external services to fetch and modify data. Check Datasource Catalog to learn more.
-
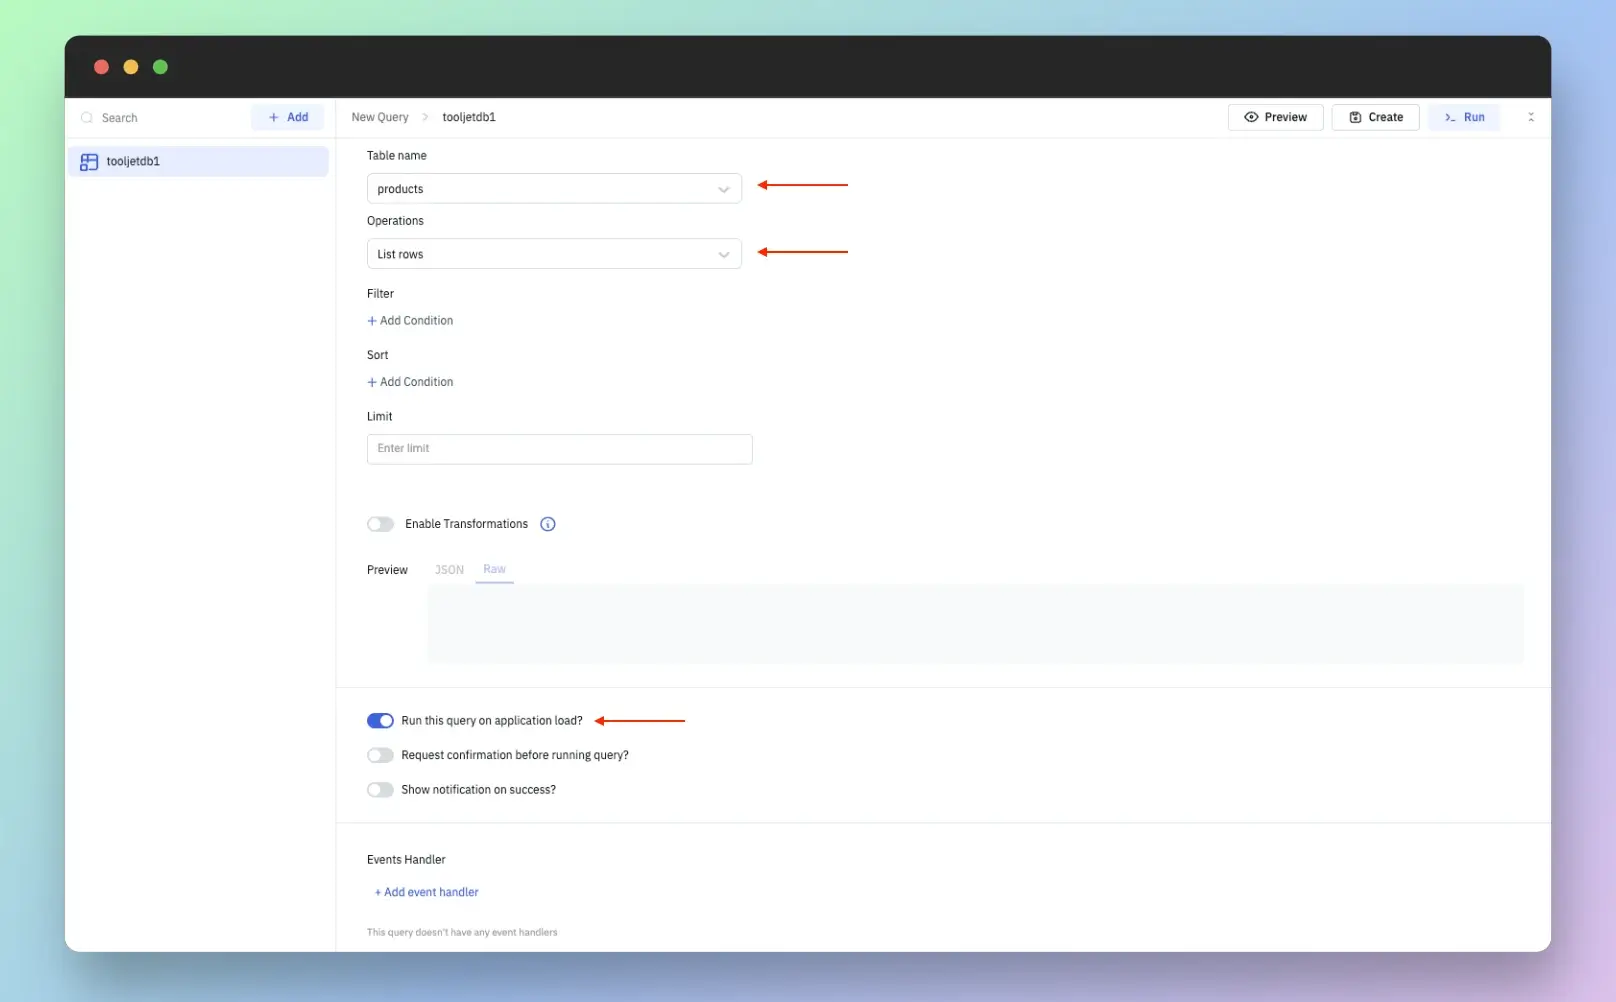
Choose a Table from the dropdown, Select the List rows option from the Operation dropdown, You can leave other query parameters. Scroll down and enable Run this query on application load - this will trigger the query when the app is loaded.
-
Click on Create to create the query and then click Run to trigger the query and get response. You can also check the query response by clicking Preview button without firing the query.
-
Go to the Table properties by clicking on the component handle and bind the data returned by the query in the Table data property. When building apps in ToolJet anything inside
{{}}is JavaScript and we javascript dot notation to get the data from query and populate the table using{{queries.tooljetdb1.data}}. The table will be auto-populated once the table data is entered.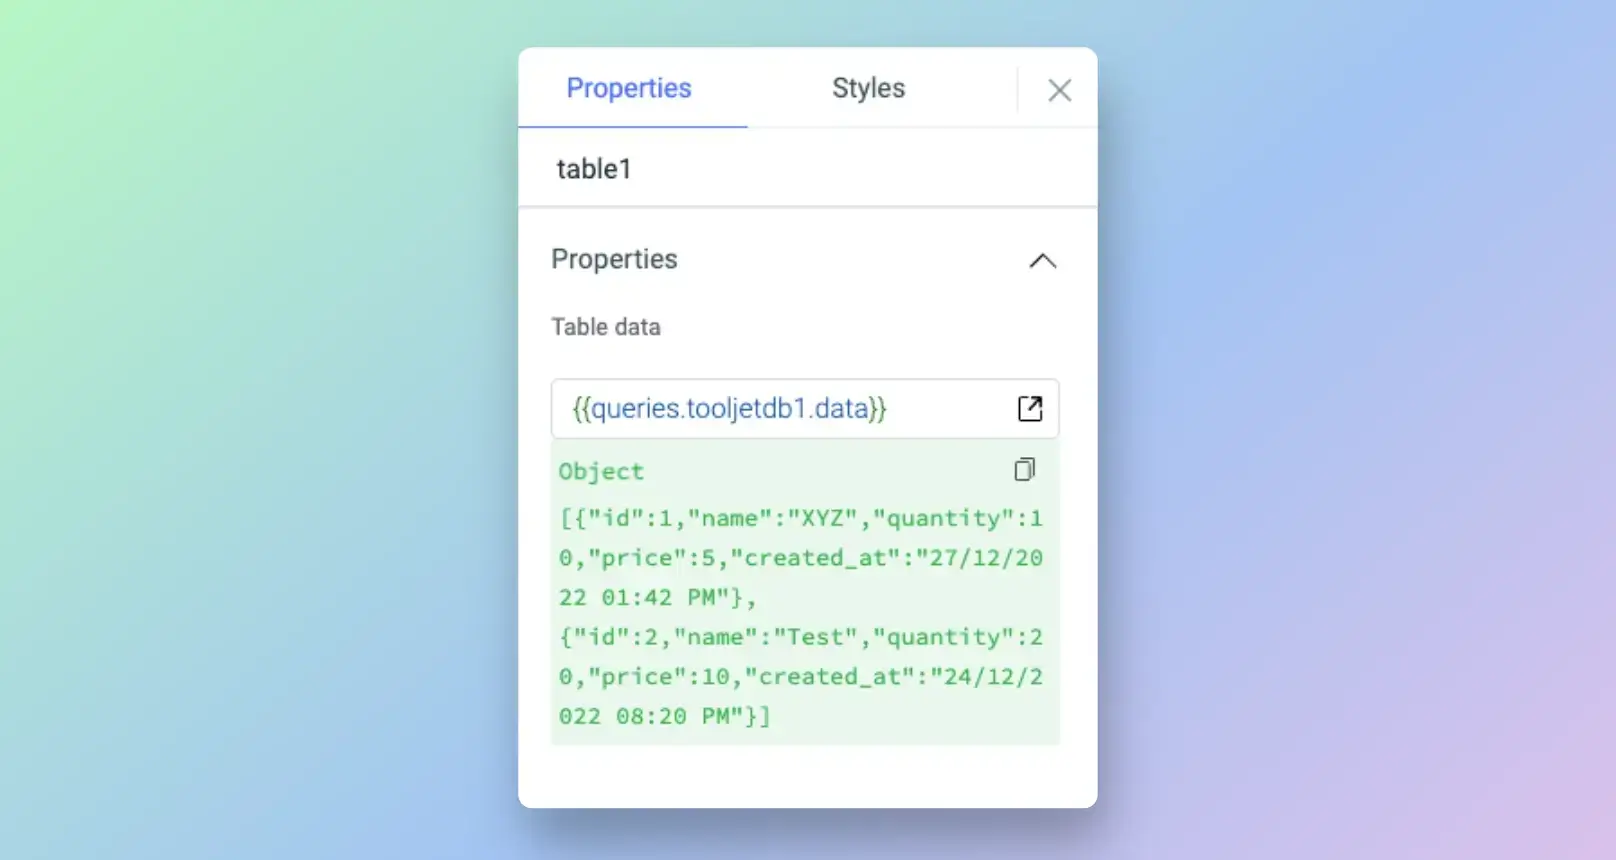
-
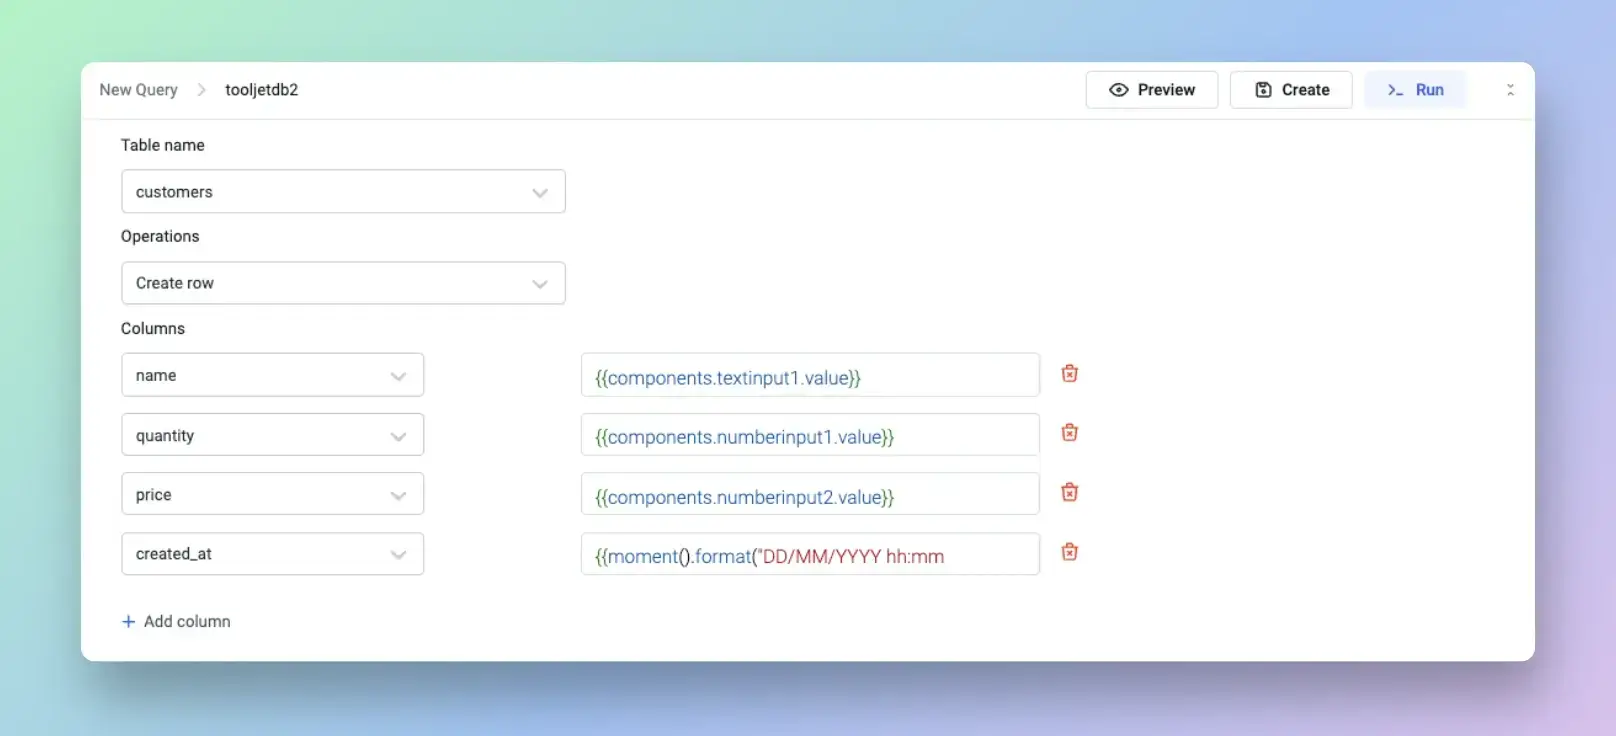
Let's create another query that will get the data from the input fields and will add a new row in the tooljet database. Create New Query -> Select Table (Customers) -> Select Operation (Create row) -> add the following columns with the respective value:
- id -
{{components.textinput1.value}} - quantity -
{{components.numberinput1.value}} - price -
{{components.numberinput2.value}} - created_at -
{{moment().format("DD/MM/YYYY hh:mm A")}}(We are using momentjs library to get the current date from the system rather than getting input by the user )
 tip
tipYou can also add event handler to this query for On Success event to run the
tooljetdb1query that populates the table, so that whenever this is successful the table is refreshed. - id -
-
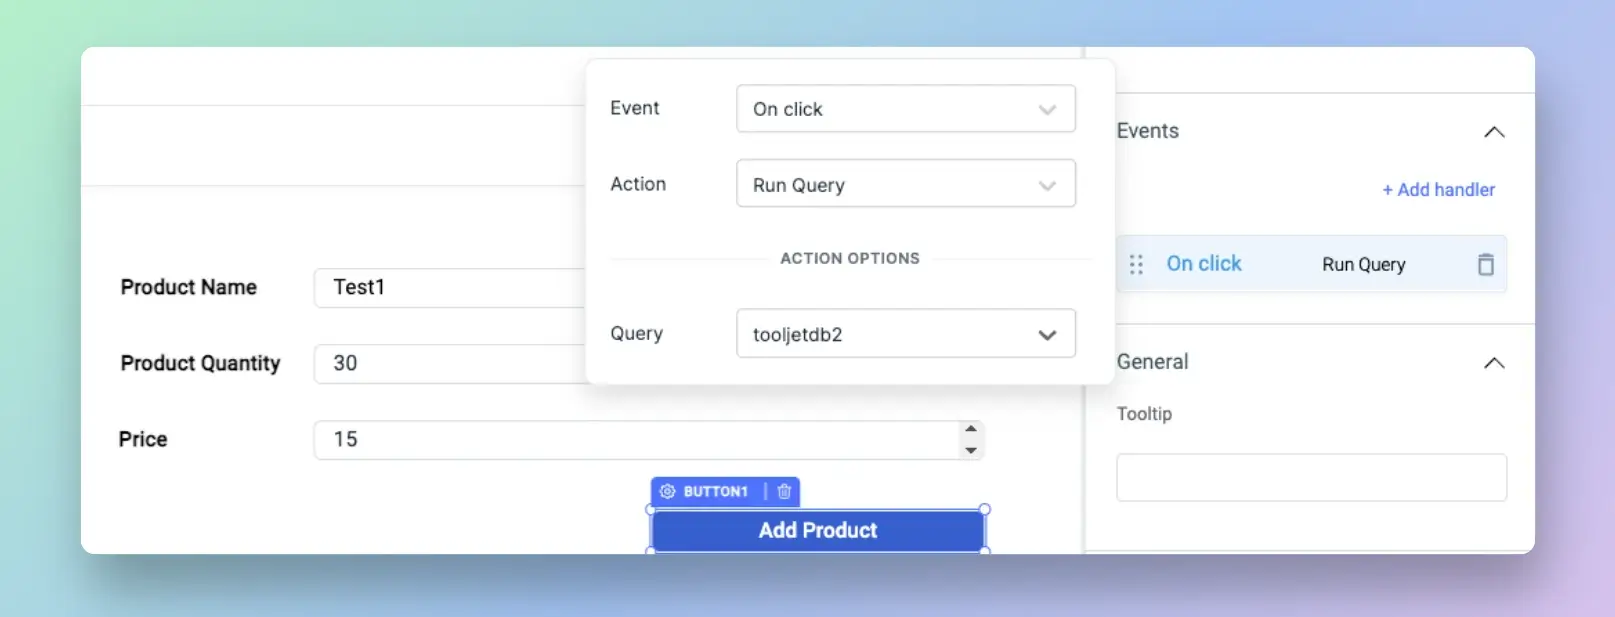
Now, let's bind this query to the Add Product button. Click on the button handle to open its properties, Add an handler -> Select Event (On Click) -> Select Action (Run Query) -> Select Query (tooljetdb2).
- You can manipulate the data returned by the queries using Transformations
- You can also Run JavaScript code or Run Python code to perform custom behavior inside ToolJet
Preview, Release and Share app
- Click on the Preview on the top-right of app builder to immediately check the currently opened version of the app in production.
- Click on the Release button to publish the currently opened version of the app and push the changes to production.
- Share option allows you to share the released version of the application with other users or you can also make the app public and anyone with the URL will be able to use the app.
You can control how much access to users have to your ToolJet apps and resources using Org Management.
What Can I Do With ToolJet
If you are building internal tool for your organization, here are few tutorials of sample use-cases for you to get started:
- Build a Feature Request Management App
- Build a Ticket Triaging App with Baserow and ToolJet
- Building a MinIO file explorer app
- Building a Google Cloud Storage (GCS) file explorer app
- Build an AWS S3 file explorer app
- Build Stripe Refund App
- Build a WhatsApp CRM
- Build a cryptocurrency dashboard
- Build a Redis GUI
Find more Tutorials on our Blog.
For ToolJet Contributors
To contribute to ToolJet code, plugins, and documentation, refer to our Contributing Guide.


Help and Support
- We have extensively documented the features of ToolJet, but in case you are stuck, please feel free to e-mail us at [email protected]
- If you are using ToolJet cloud, click on the chat icon at the bottom-left corner for instant help.
- If you have found a bug, please create a GitHub issue for the same.
- Feel free to join our highly active Slack Community.