Welcome to ToolJet Docs
What is ToolJet
ToolJet is an open-source low-code framework to build and deploy custom internal tools.
ToolJet ships with its built-in database called ToolJet DB (built on top of PostgreSQL). You can also connect to the external data sources such as databases ( PostgreSQL, MongoDB, MS SQL Server, Snowflake, , BigQuery, etc ), API/GraphQL endpoints, SaaS tools ( Airtable, Stripe, Google Sheets, etc ) and cloud object storage services ( AWS S3, Google Cloud Storage and Minio ).
Once the data sources are connected, ToolJet can run queries on these data sources to fetch and update data. The data fetched from data sources can be visualised and modified using the UI widgets such as tables, charts, forms, etc. You can also use Javascript or Python queries for writing business logic or interacting with the user interface of the application.
How ToolJet works
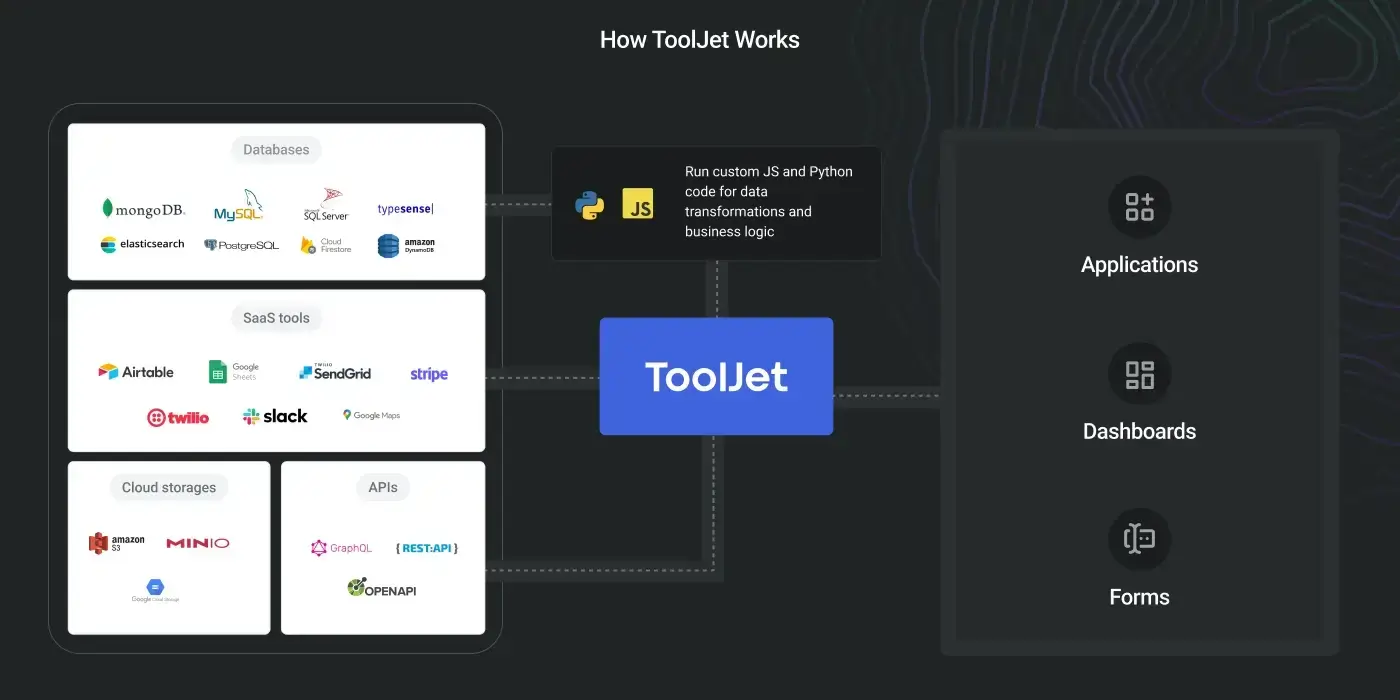
With ToolJet, you can build apps in 3 simple steps:
-
Connect to datasources: Connect to the ToolJet's built-in database ToolJet DB (built on top of PostgreSQL) or your existing data sources such as PostgreSQL, MySQL, Firestore, Stripe, Google Sheets, API endpoints, etc.
-
Build queries: ToolJet comes with query builders for all supported data sources. You can also write Javascript or Python queries or use Transformations to transform the query response.
-
Build User Interface: ToolJet's visual App Builder allows you to drag and drop components ( Eg: tables, charts, forms, etc ) to quickly build the user-interface of the apps. Components have events such as
on click,on row selected,on page changed, etc. ToolJet apps can be used in light and dark mode.tipToolJet binds together the datasources, queries and components to convert business logic into custom applications. You can also secure your ToolJet apps with Group & Permissions and Audit Logging.
Choose your ToolJet
There are a few different ways to set up ToolJet depending on how you intend to use it:
- ToolJet Cloud: hosted solution, just sign-up for free and start building apps in seconds.
- Deploy on premise: recommended method for production or customized use cases. You'll find Server setup guides for popular platforms (AWS, GCP, Kubernetes etc) and one-click deployment guides (Heroku, DigitalOcean etc).
- Try ToolJet on local machine: the fastest way to try out ToolJet on your computer using docker.
- Data security is top priority at ToolJet, read about our data security here.
Quickstart Guide
In this quickstart guide, we'll cover the fundamentals of ToolJet by building a Time Tracking Application that will allow end-users to record their daily working hours with supporting details.
If you don't already have a ToolJet account, head over to tooljet.com to sign up for free. Existing users can simply log in.
Create Database Table
We'll first create a table in ToolJet's built-in database.
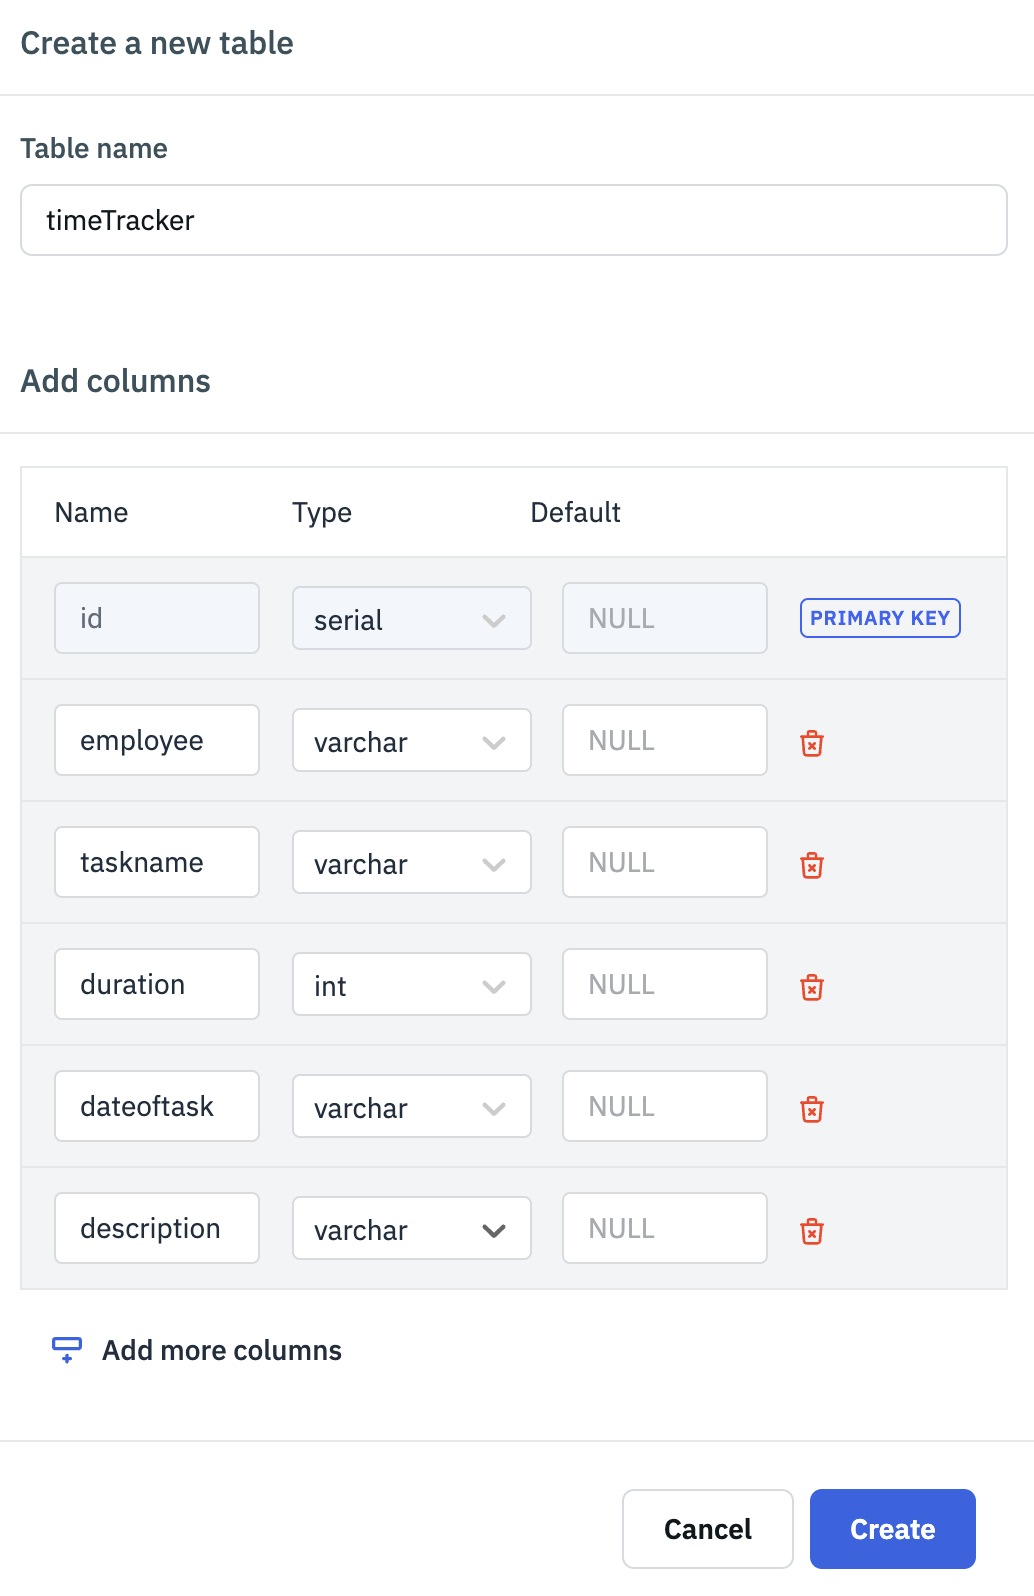
Navigate to the Database tab from the left sidebar. Click on the Create new table button on the top-left. A dialog box will slide from the right to configure the database table properties.
In the Table name field, enter timeTracker.
The id field will be present by default to create a unique identifier for each record in our database table.
Click on the Add more columns button and enter employee in the Name field and select varchar as the Type.
Similarly, add four more columns:
- Name: taskname | Type: varchar
- Name: duration | Type: integer
- Name: dateoftask | Type: varchar
- Name: description | Type: varchar
Click on the Create button on the bottom right to create the table.
For every column, you can choose from four data types - varchar for text, integer for numbers, float for decimal or fractional numbers and boolean for true or false values. The Default field allows you to enter a default value that will be used if no value is received from the frontend.
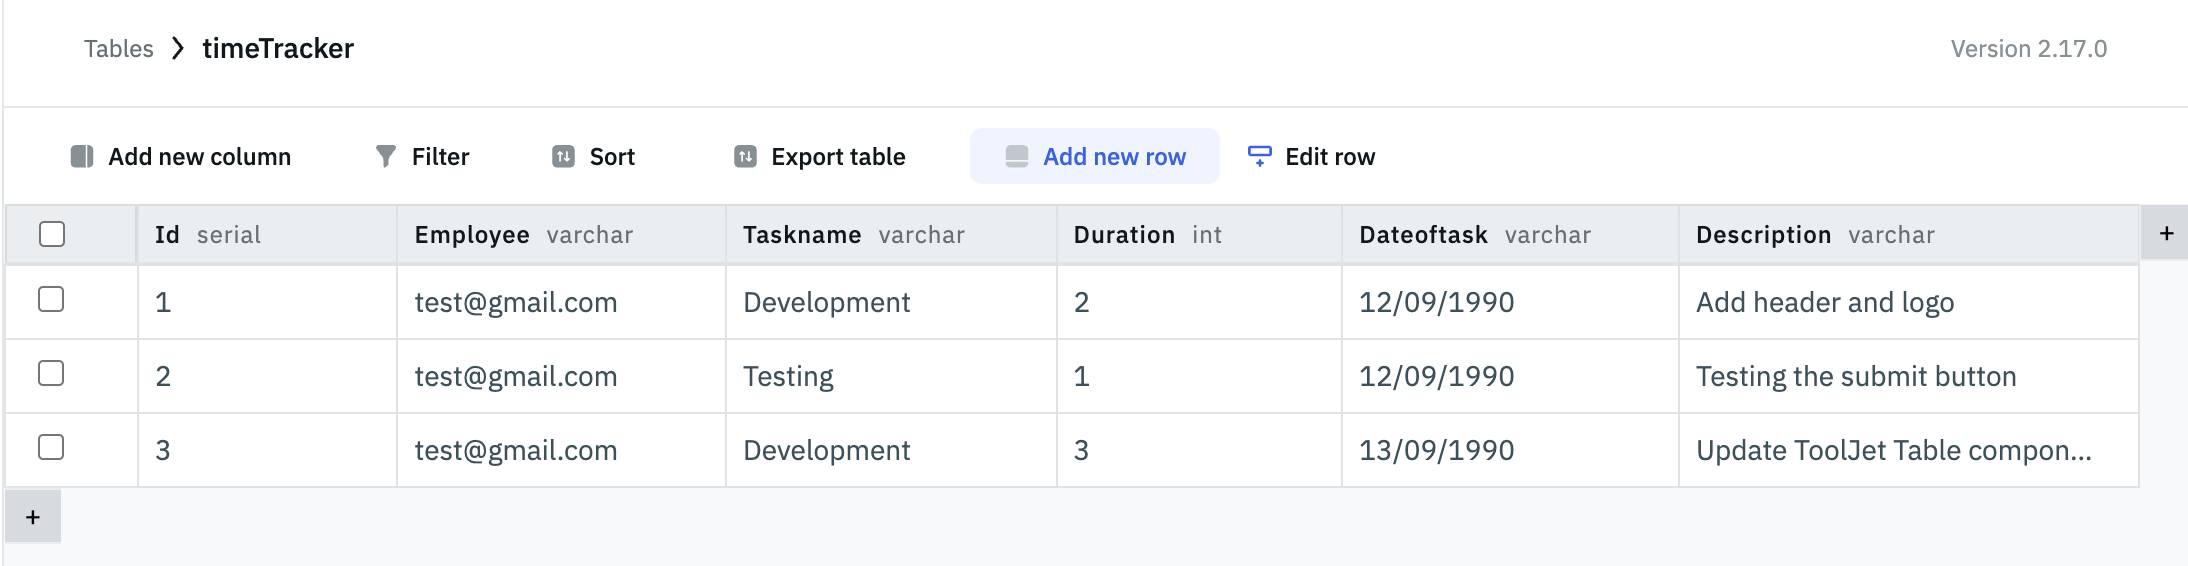
Add three rows of dummy data by clicking on the Add New Row button and entering the required values. We are entering email IDs for the employee column. Later, we'll use this employee column to display data specific to the logged-in user.
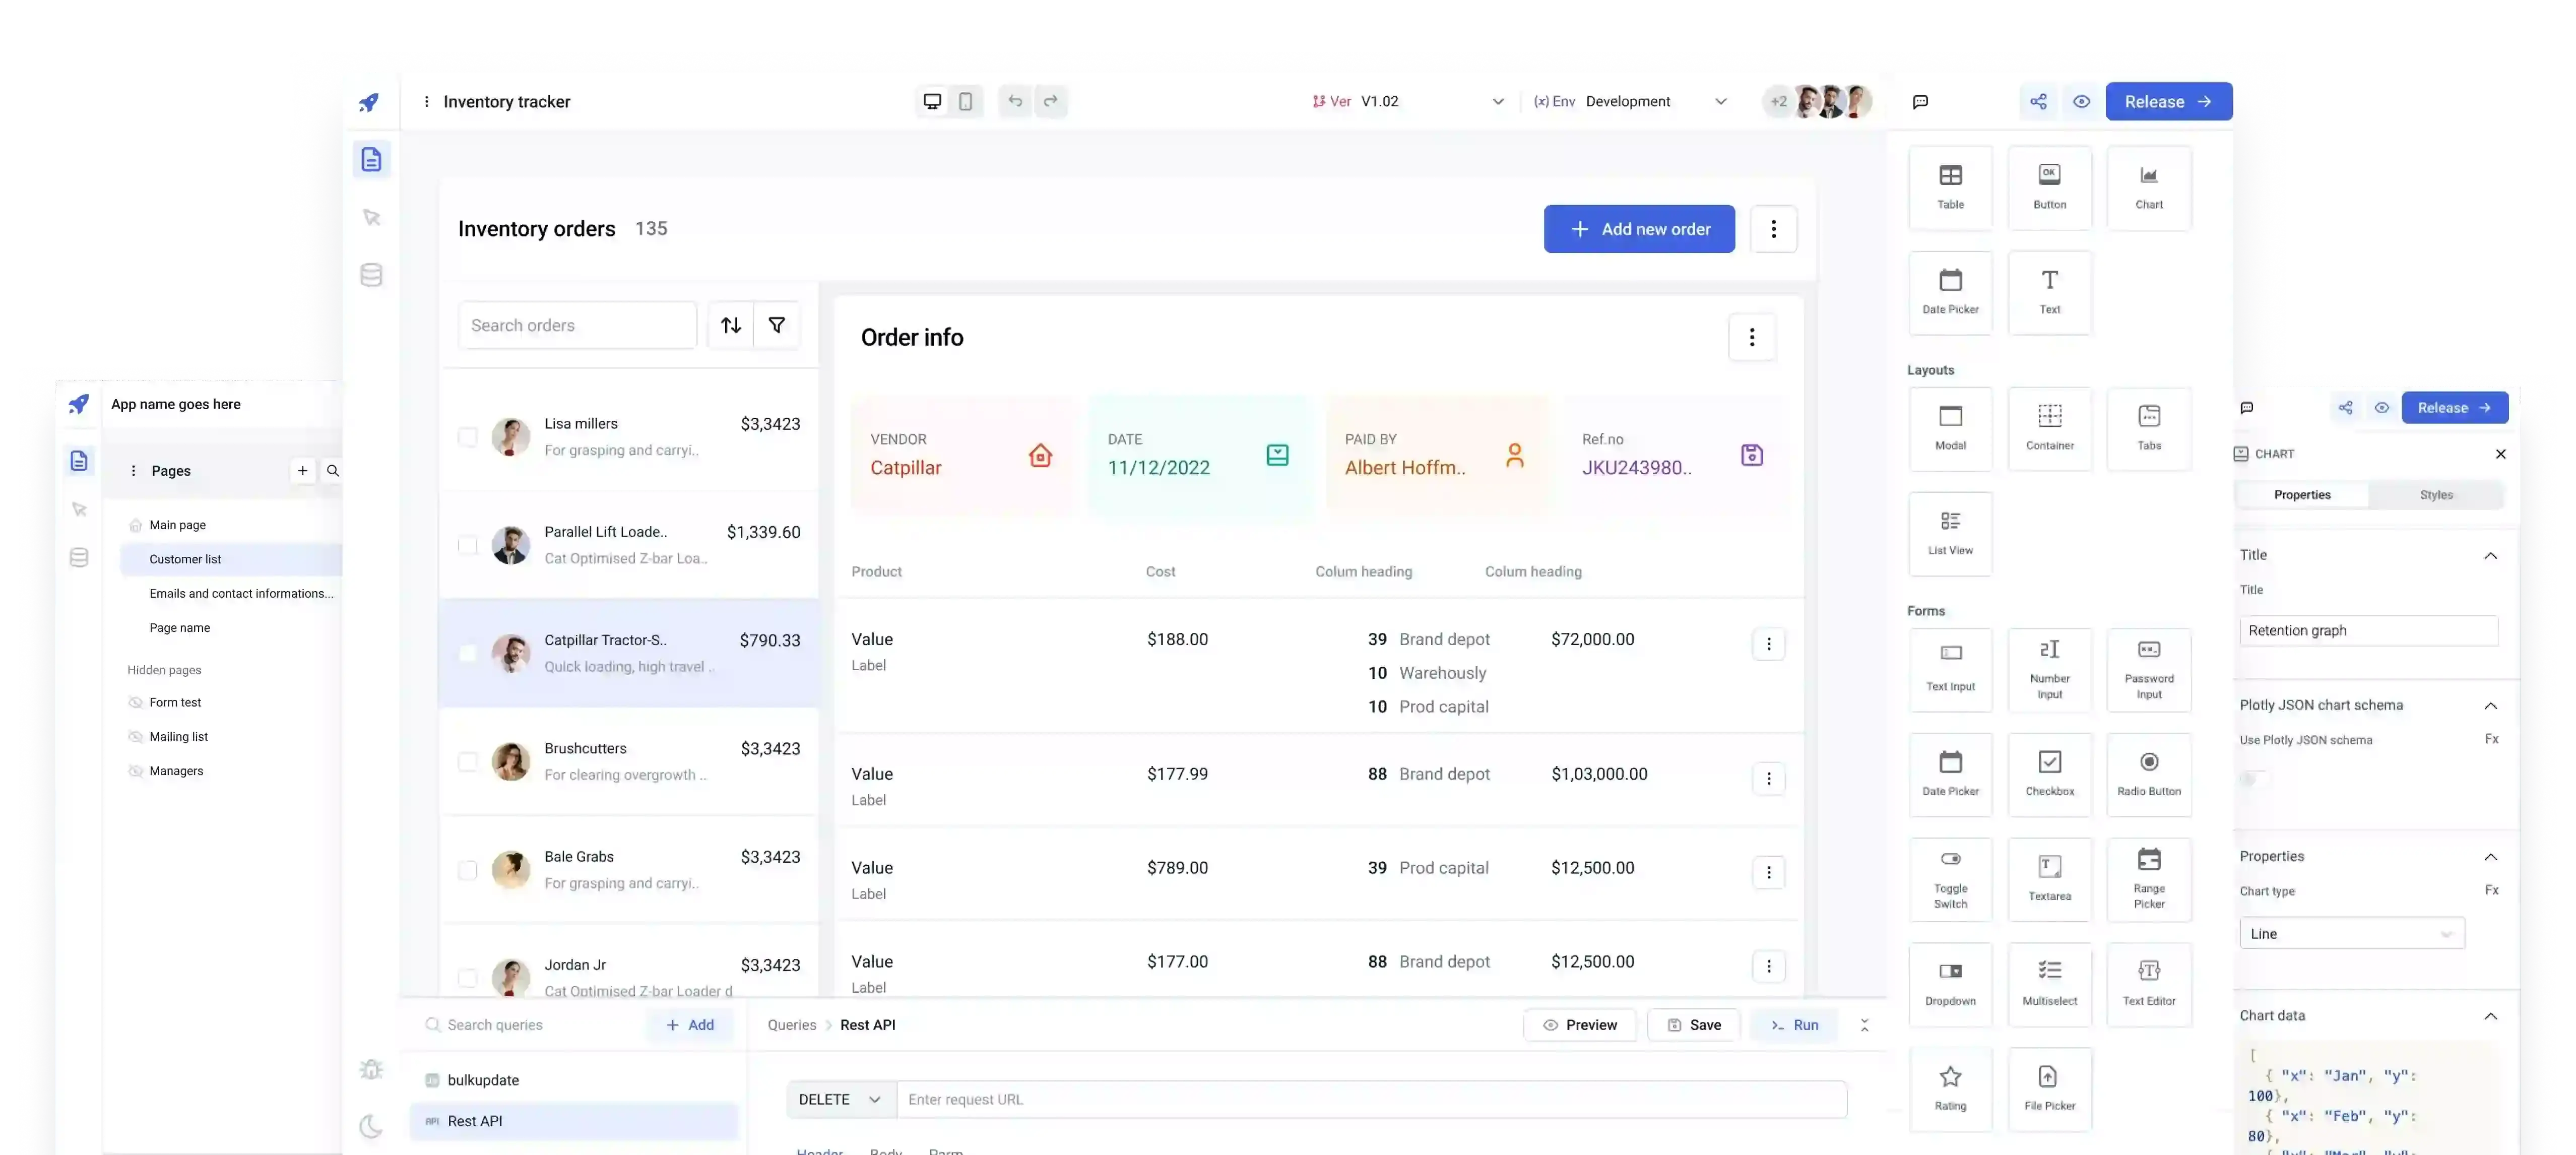
Create UI For Home Page Using ToolJet App-Builder
We'll now go ahead and build the Home page of our application using the ToolJet App-Builder.
Click on the Dashboard button on the sidebar and click on the Create new app button. A new application will be created with an empty canvas.
We can see the Component Library on the right, we can drag and drop pre-built components from the Component Library on the canvas to create the UI. The Query Panel at the bottom can be used to create and manage queries to interact with the database.
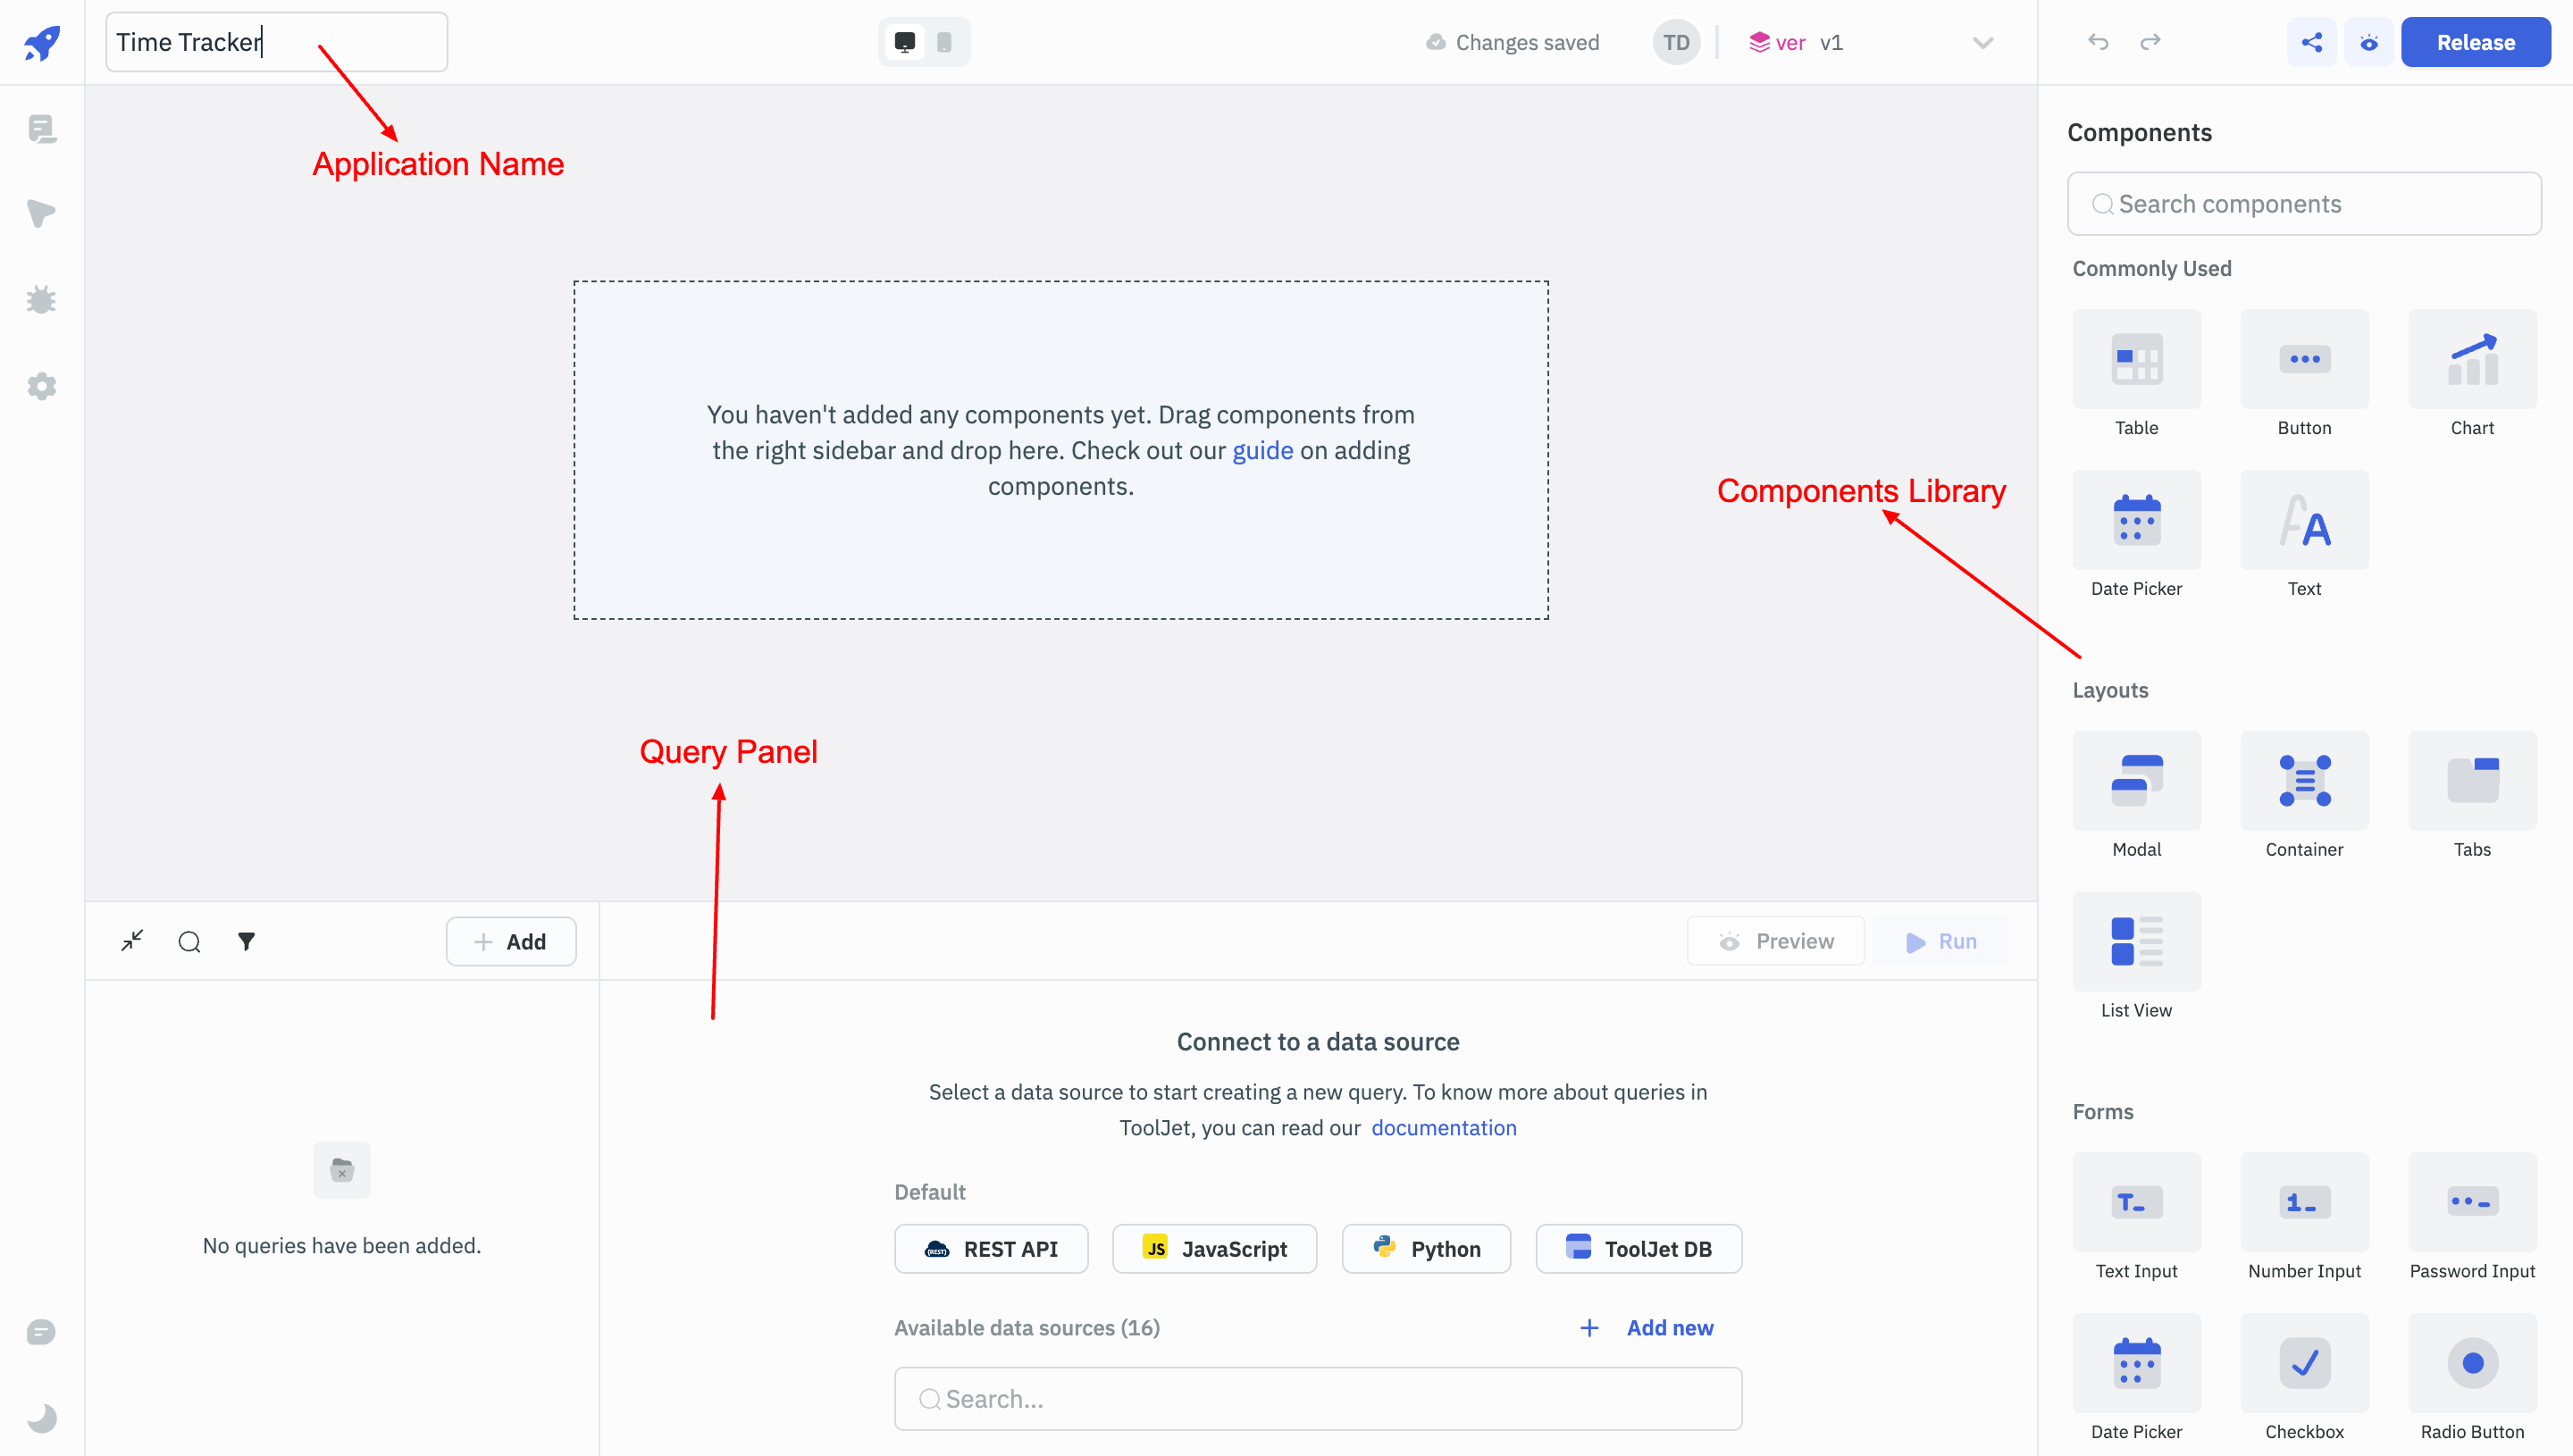
Rename the application to Time Tracker. Minimize the Query Panel by clicking on the Hide Query Panel button on its top-left.
Click and drag a Container component to the canvas. Adjust the borders of the Container and expand it till it covers the visible portion of the canvas.
Each time you click and select the Container or any other component on the canvas, configuration related to the component will appear on the right.
Each component will show a different configuration based on its overall functionality.
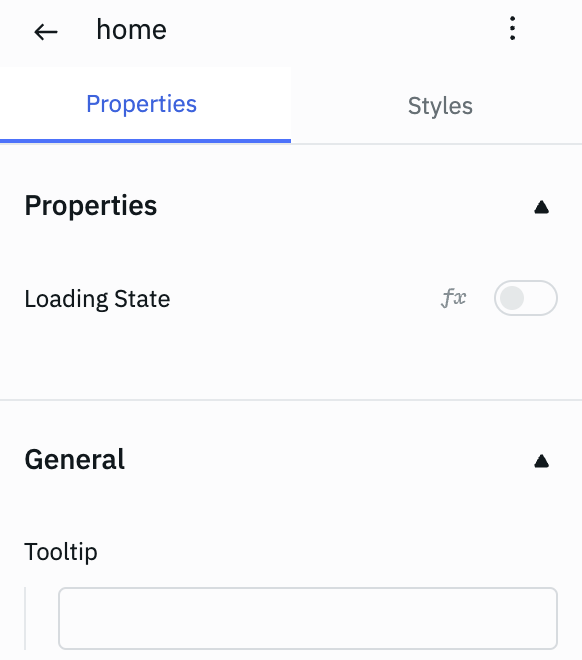
Right at the top is an input field that lets us name the component. We'll click on it and rename the container to home.
Below we have the Properties and Styles tab.
Properties tab lets us configure the functional behaviour of a component.
Style tab allows us to add custom styling to the components.
We'll give each component in this application a name that reflects its function. This naming strategy will become increasingly beneficial as the application expands and we need to identify specific components.
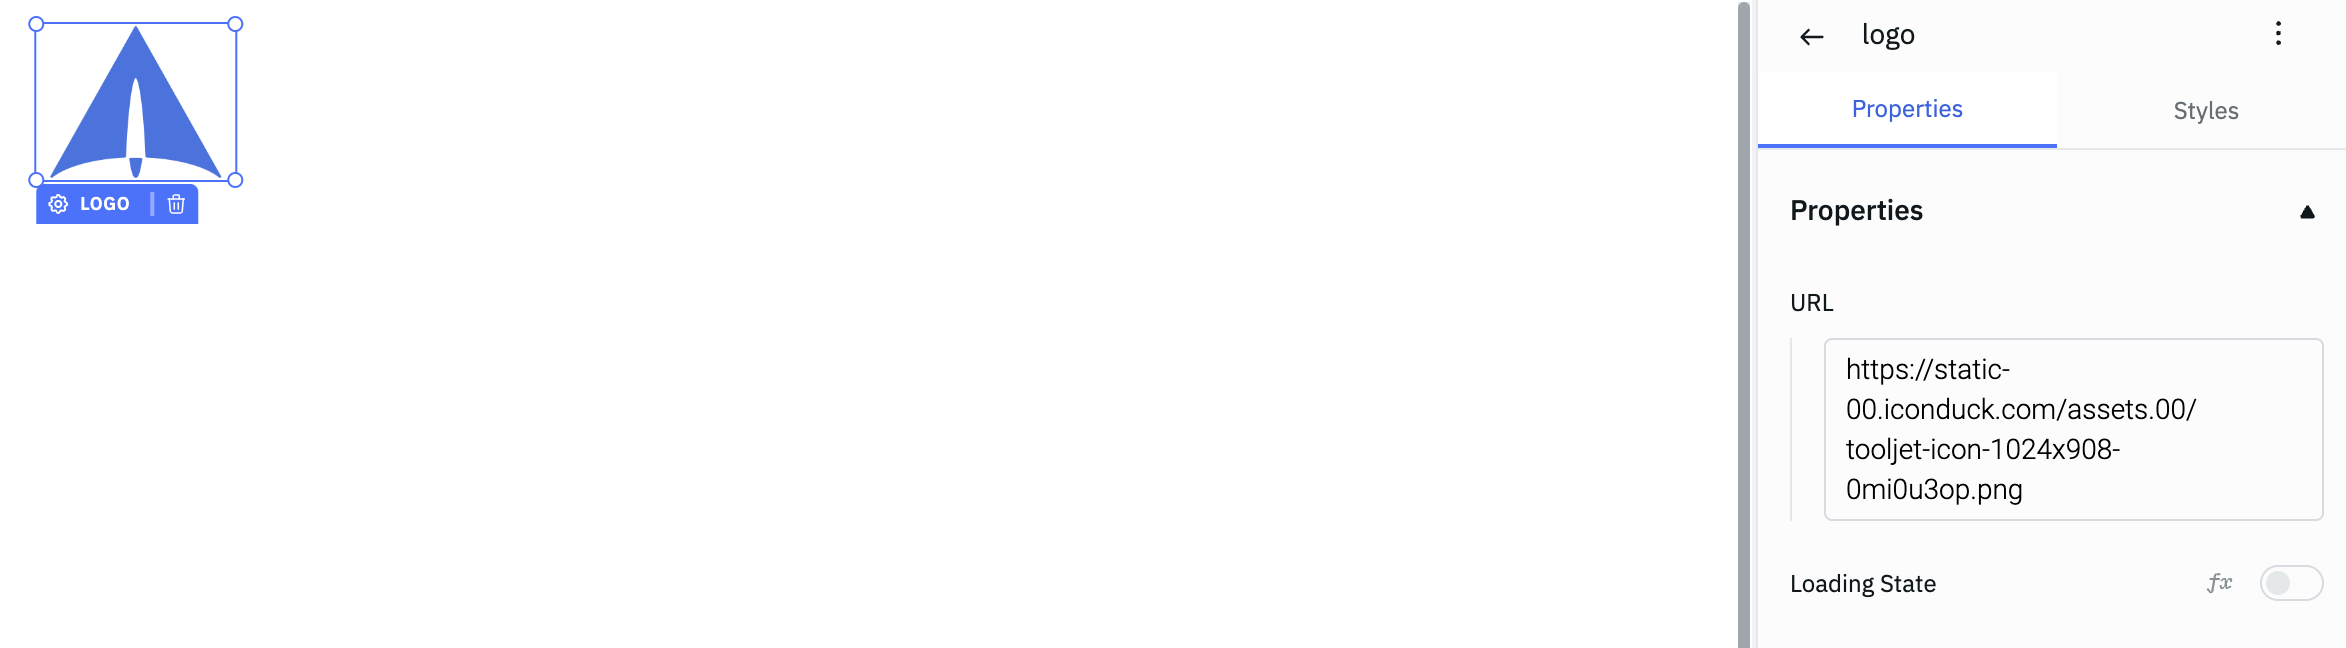
Let's build the header of our application. Click and drag an Image component to the canvas from the library and rename it to Logo. Select the Image component, you'll see its configuration on the right. Enter the below value as URL:
https://static-00.iconduck.com/assets.00/tooljet-icon-1024x908-0mi0u3op.png
Place a Text component next to it and rename the component to headerText. Paste following value under Text property:
Time Tracker Application⏳
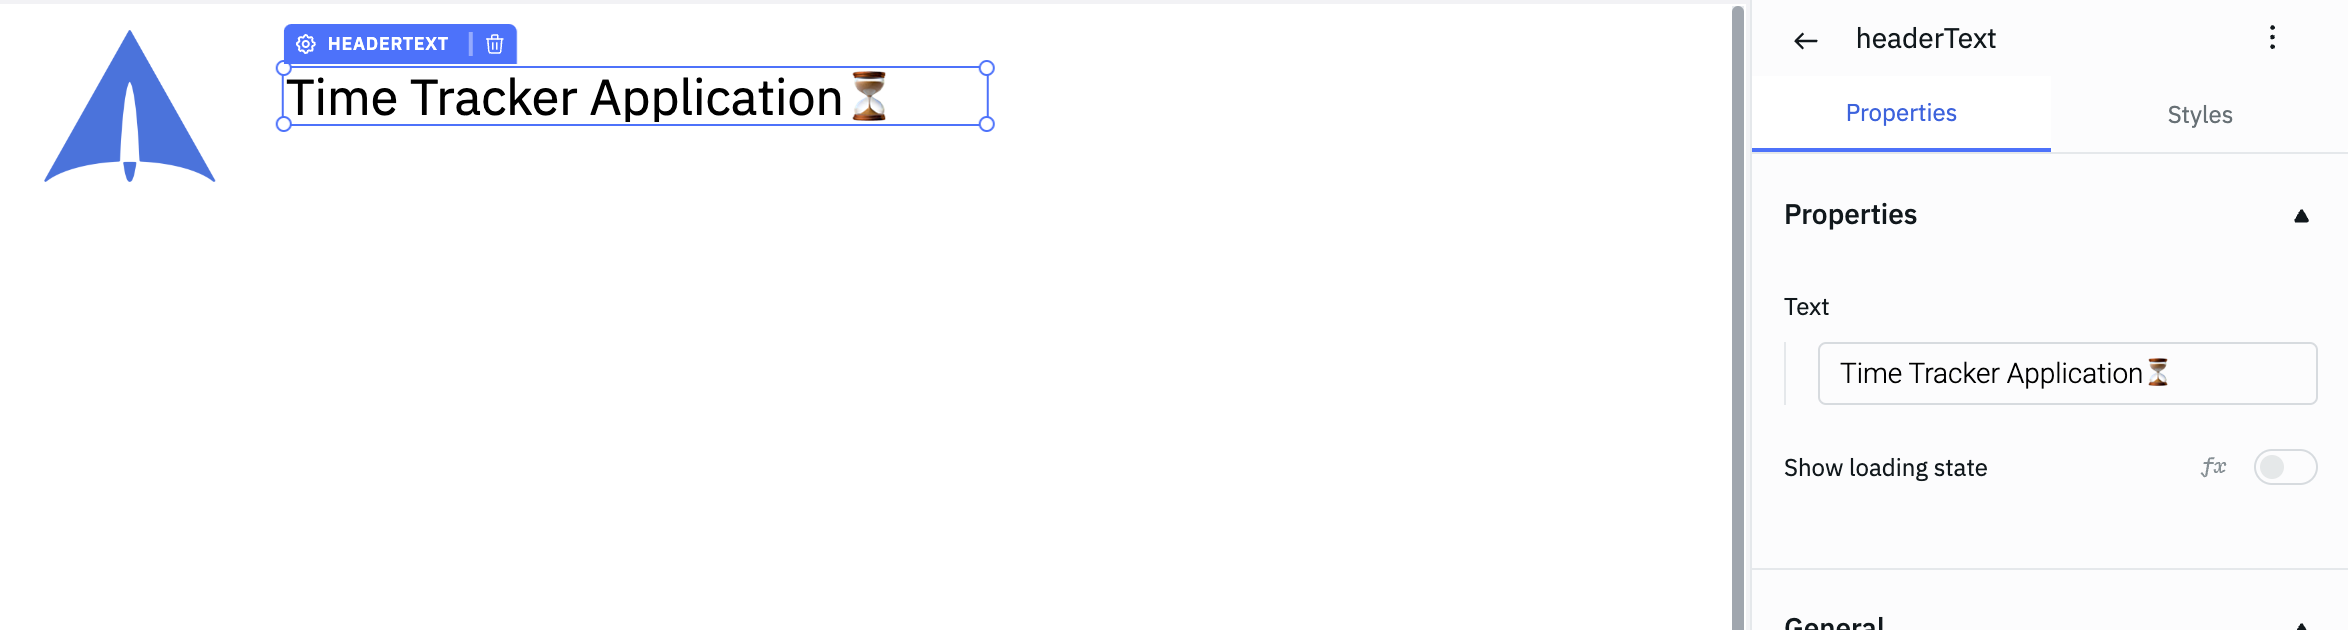
Under Styles, change the Text Size to 25. We are now ready with the Header of the application.
Next we'll use a Table component to display all the time tracker logs. The Table component offers a simple and intuitive way to display and interact with data.
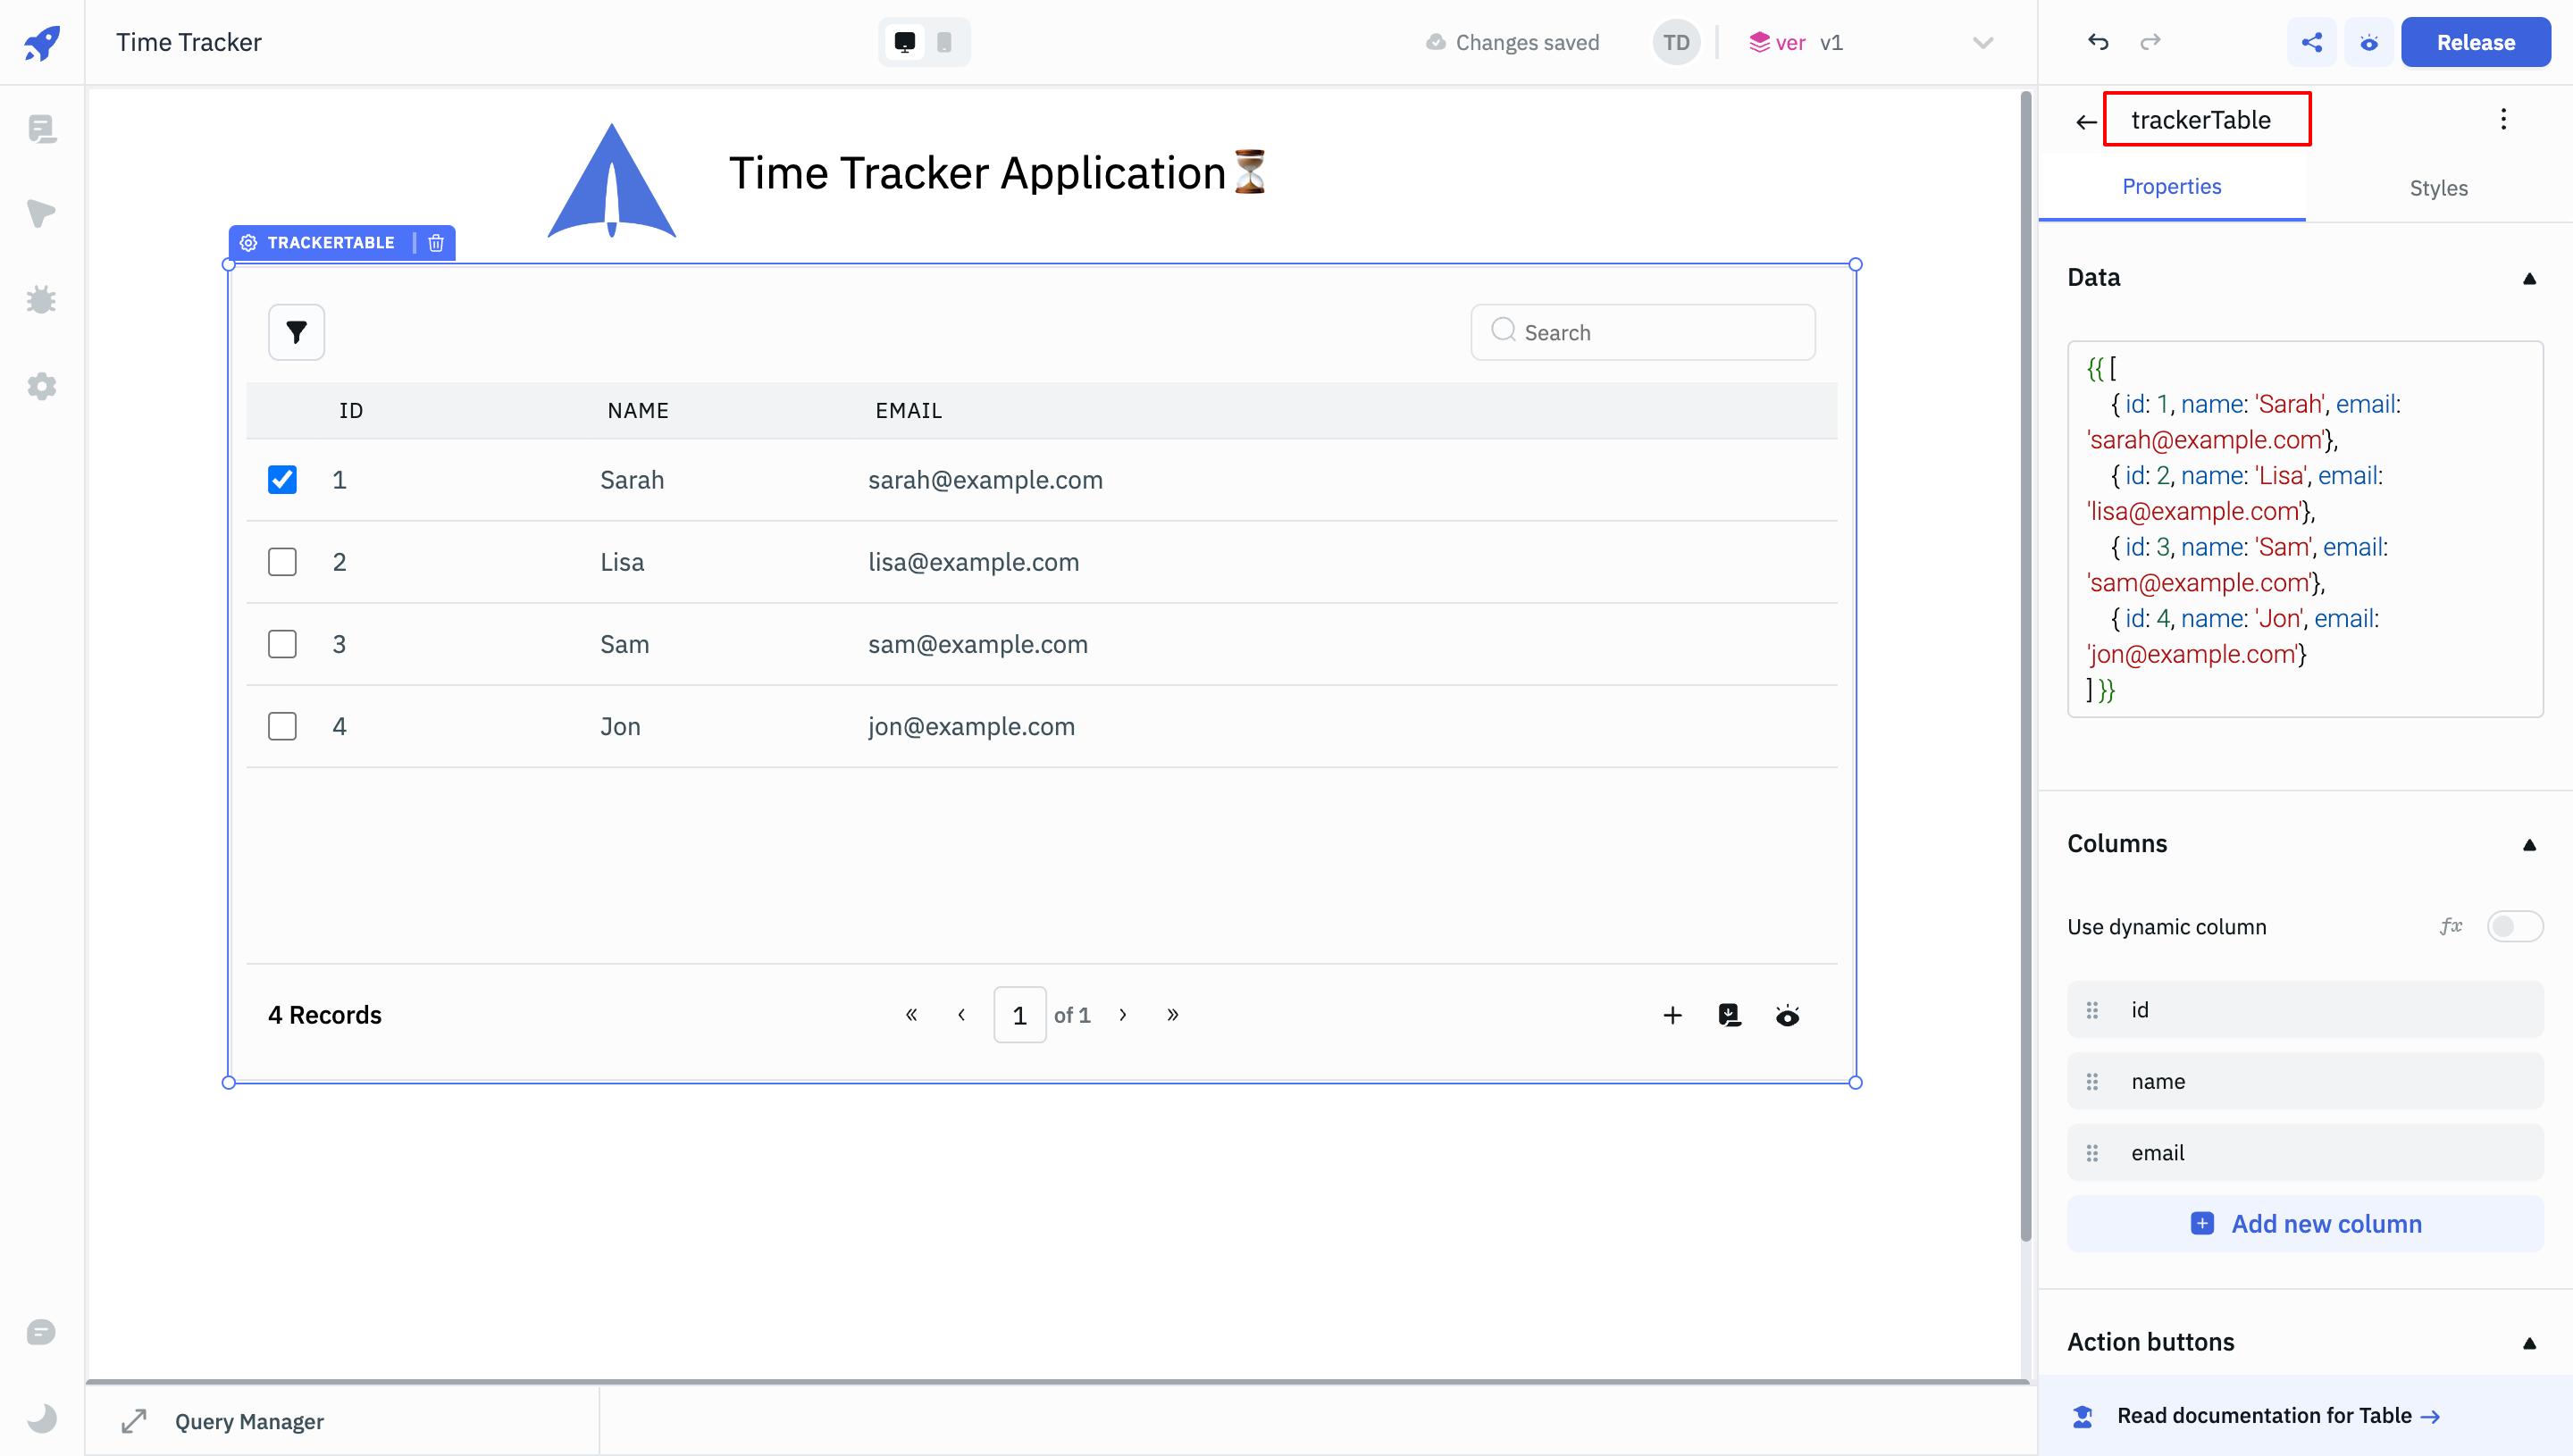
Drag and drop a table component on the canvas. Adjust the width and make it slightly wider than the header. The default name of the table will be table1, rename it to trackerTable. We already have some dummy data in the Table component. We'll replace it with actual data later on.
Create Your First Query In ToolJet
It's time to add some real data to our application.
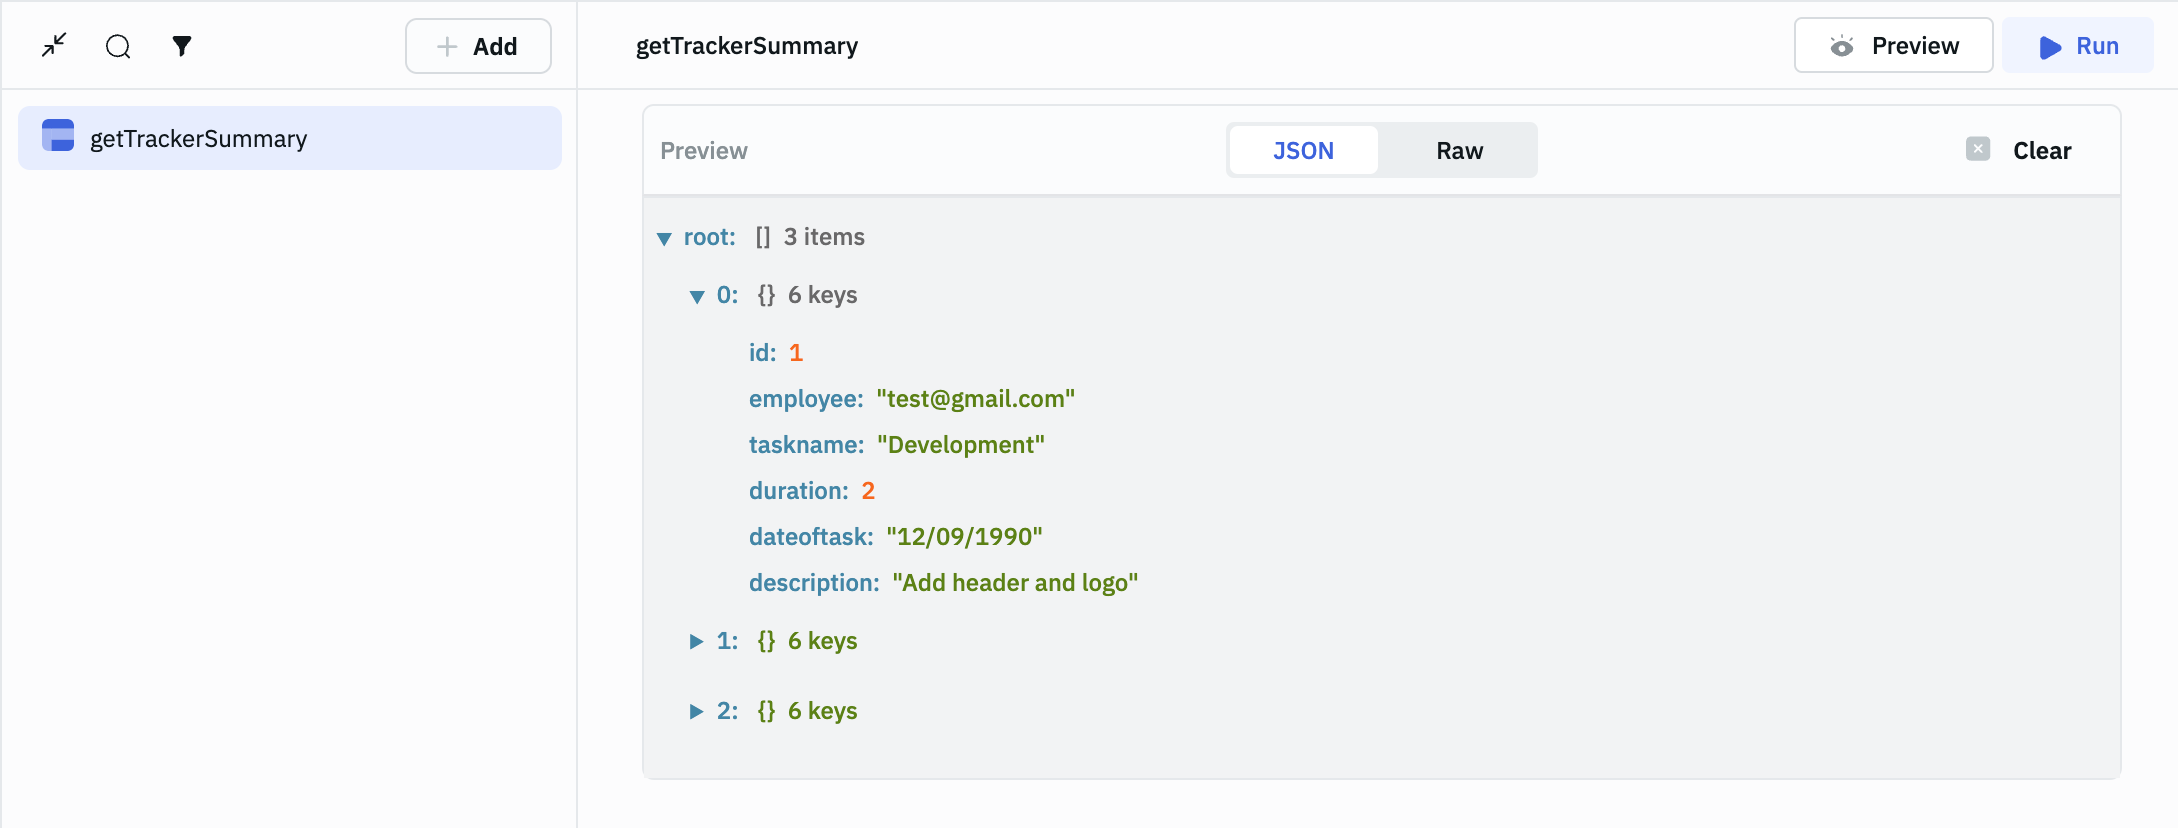
Click on the Show Query Panel button on the top-left of the Query Panel to expand it. Click on the +Add and select ToolJet Database - a new query will be created. Rename the query to getTrackerSummary. Select timeTracker (the database table that we had created at the start) as the Table name and List Rows as Operations.
Enable Run this query on load? toggle, this will ensure that the query runs every time the application loads. We'll generally use this setting for queries that are used to fetch data. Click on the Run button to run the query.
To see the preview of the returned data, press on the Preview button in the Query Panel.
Adding Queried Data To The Table
We need to use double curly braces {{}} to write custom JavaScript code or access values such as query results, component variables and other variables available in the ToolJet App-Builder.
The general format to access queries is:
{{queries.queryName.data}}
A quick way to look at available queries (and other accessible values) would be to click on the Inspector button in the left side-bar and expand the queries dropdown.
We can use the queried data in our components. Let's insert the data returned by the getTrackerSummary query in our table. Hide the query panel and click on the Table component. Under the Data property, paste the below code:
{{queries.getTrackerSummary.data}}
We've now replaced the static data with dynamic data that we are fetching from the database. The table now displays data fetched using the getTrackerSummary query.

Let's make some more changes in the Table configuration. Disable all the properties under Search sort and filter and Additional Actions. We don't need them for our use-case.
Creating Form To Submit Data
The Modal component can be used to create a pop-up form to submit data.
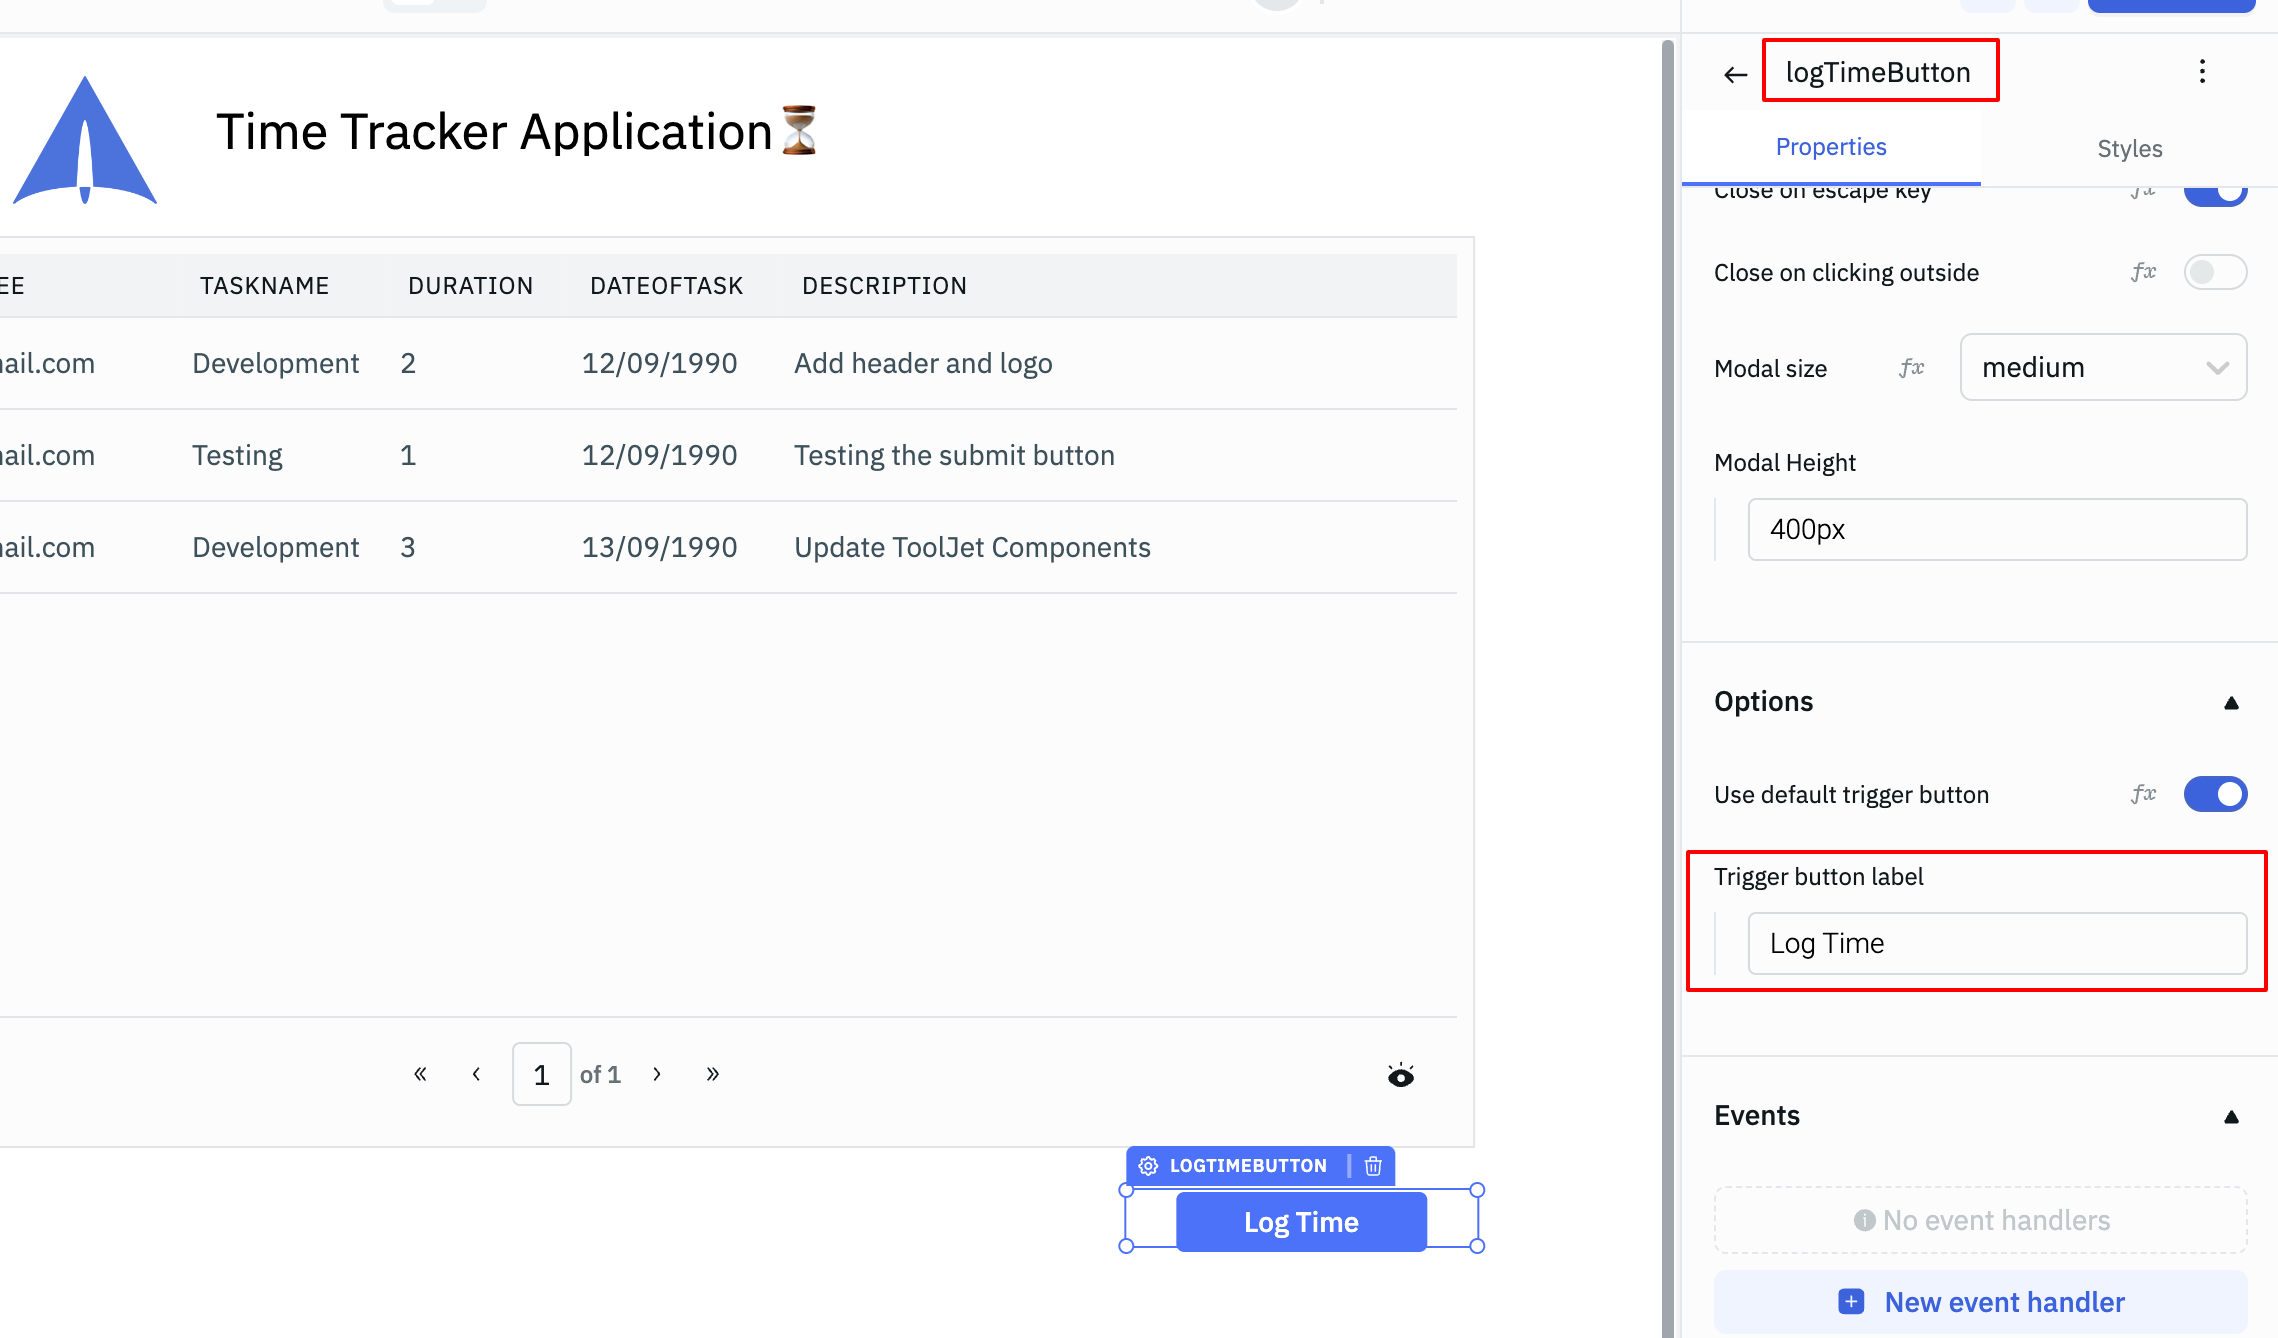
Drag a Modal component from the components library and place it at the bottom-right of the table - you will notice that only a button with the label Launch Modal shows up on the canvas. We'll first change the name of the button to logTimeButton and Trigger Button label property to Log Time.
To edit the modal, click on the Log Time button(named Launch Modal earlier) - a modal will open up on your canvas. The modal will stay open till you click on the X button/close button on the top-right. You can edit the modal and place other components over it while it is open. We'll place components on our modal to create a form layout to submit the time tracker details.
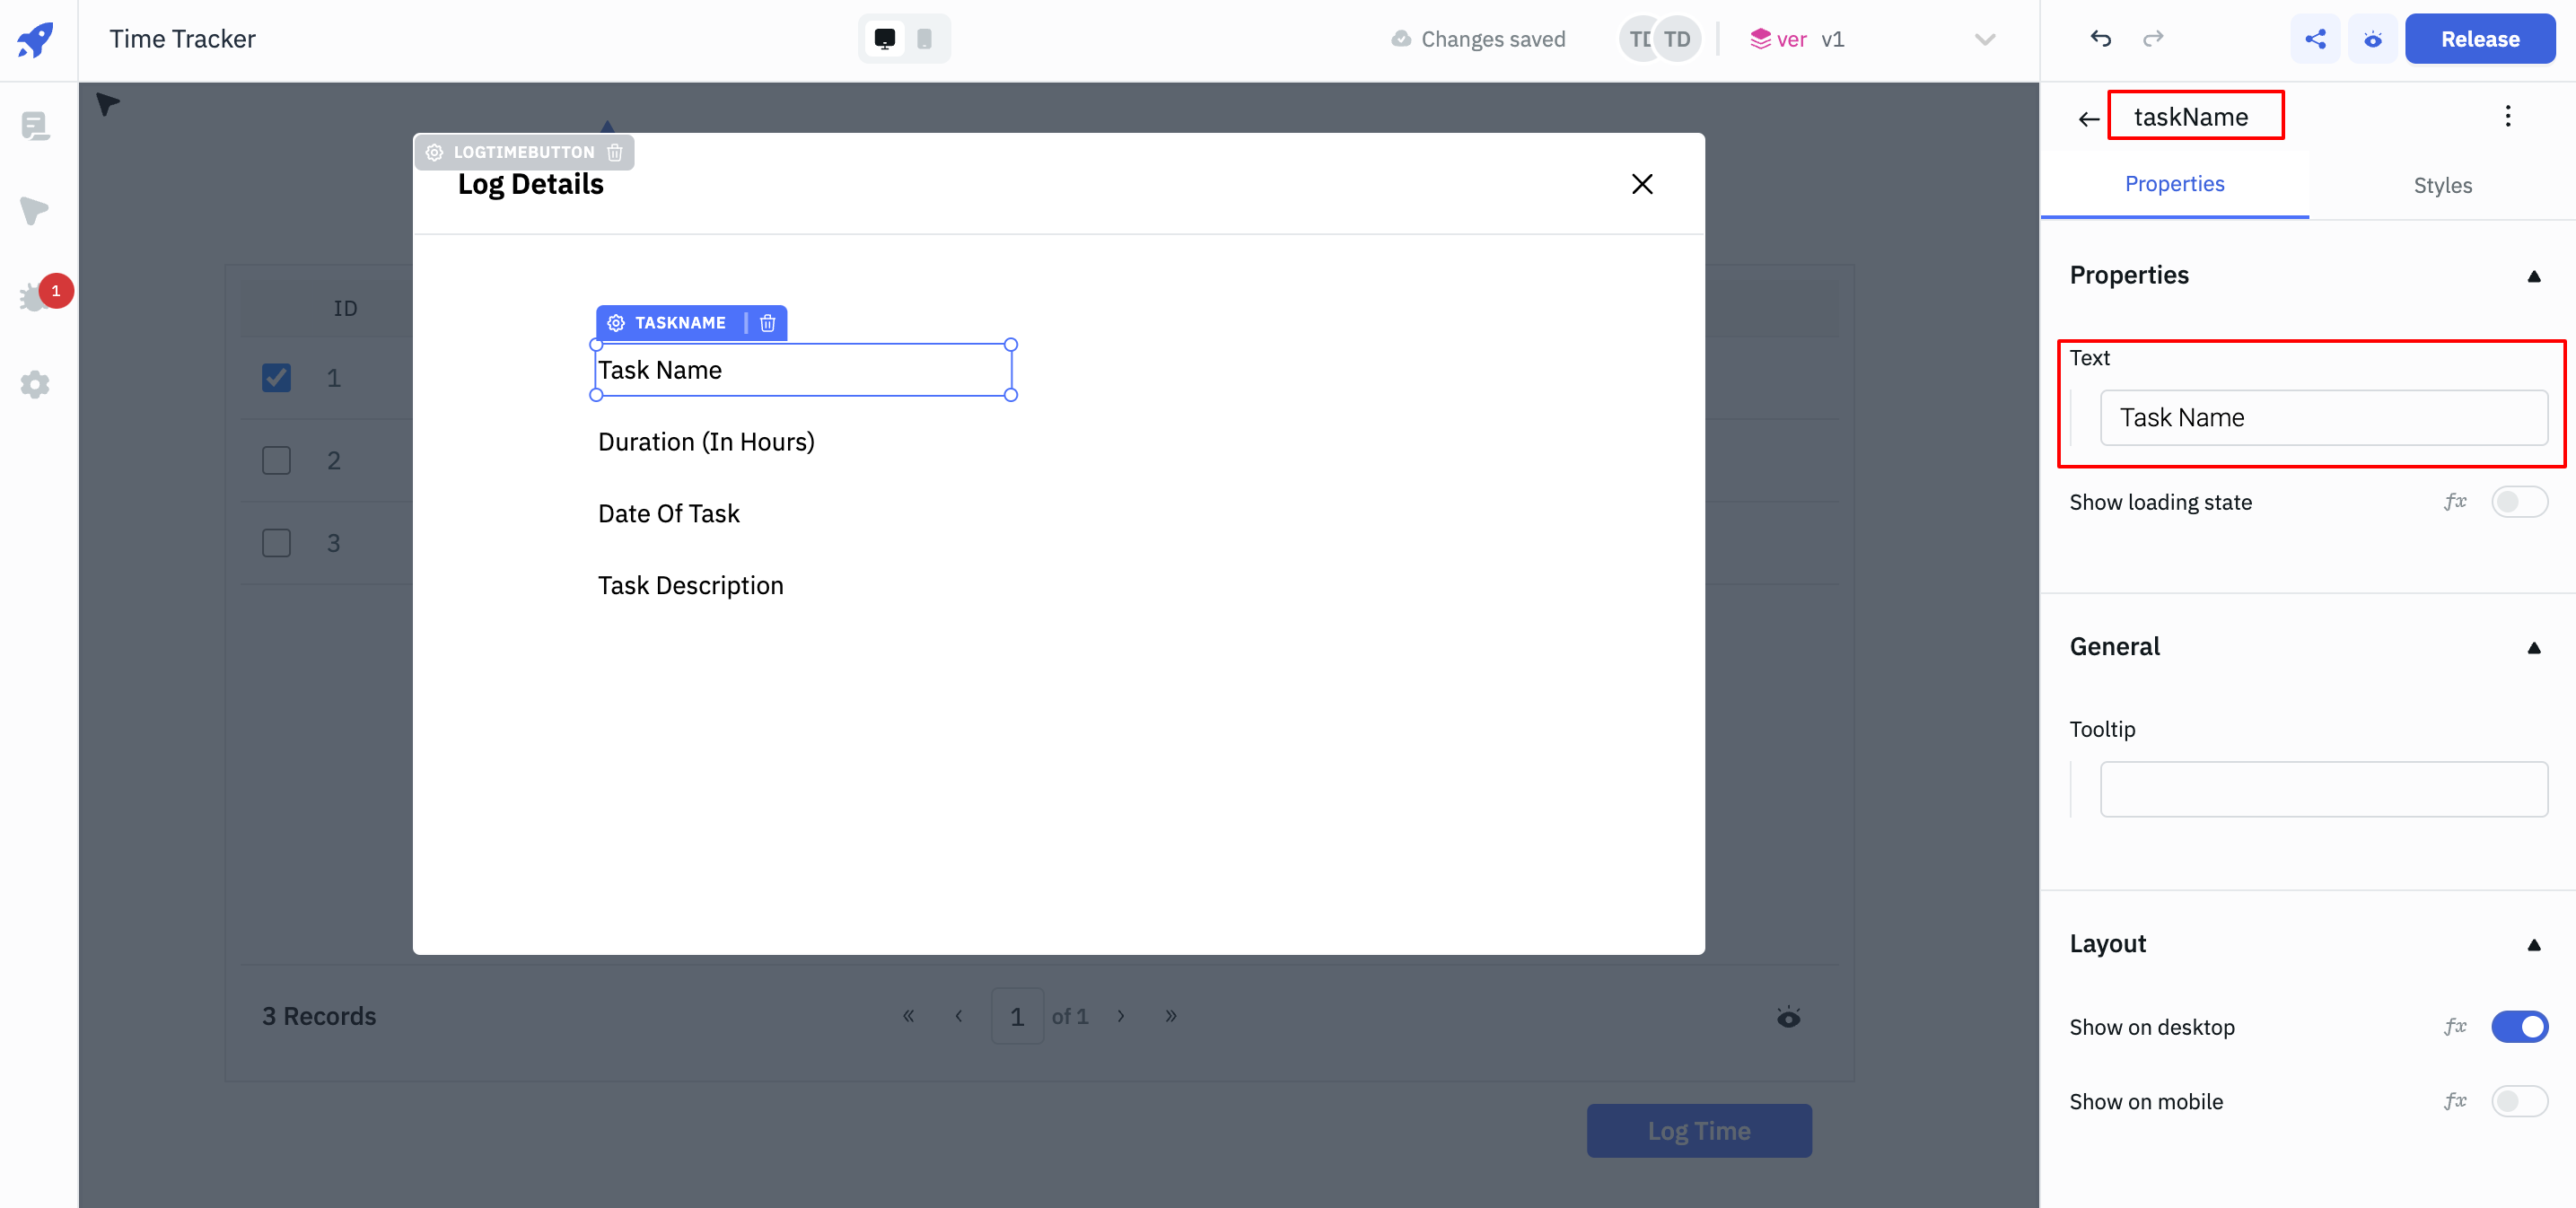
Let's change the Title property of the modal to Log Details. Click on the back button/← on the top-left of Modal component's configuration and go back to the components library.
Drag four Text components on the modal and align them vertically. We'll rename the components and their labels according to the table below:
| Component | Component Name | Text property |
|---|---|---|
| Text | taskName | Task Name |
| Text | duration | Duration (In Hours) |
| Text | dateOfTask | Date Of Task |
| Text | taskDescription | Task Description |
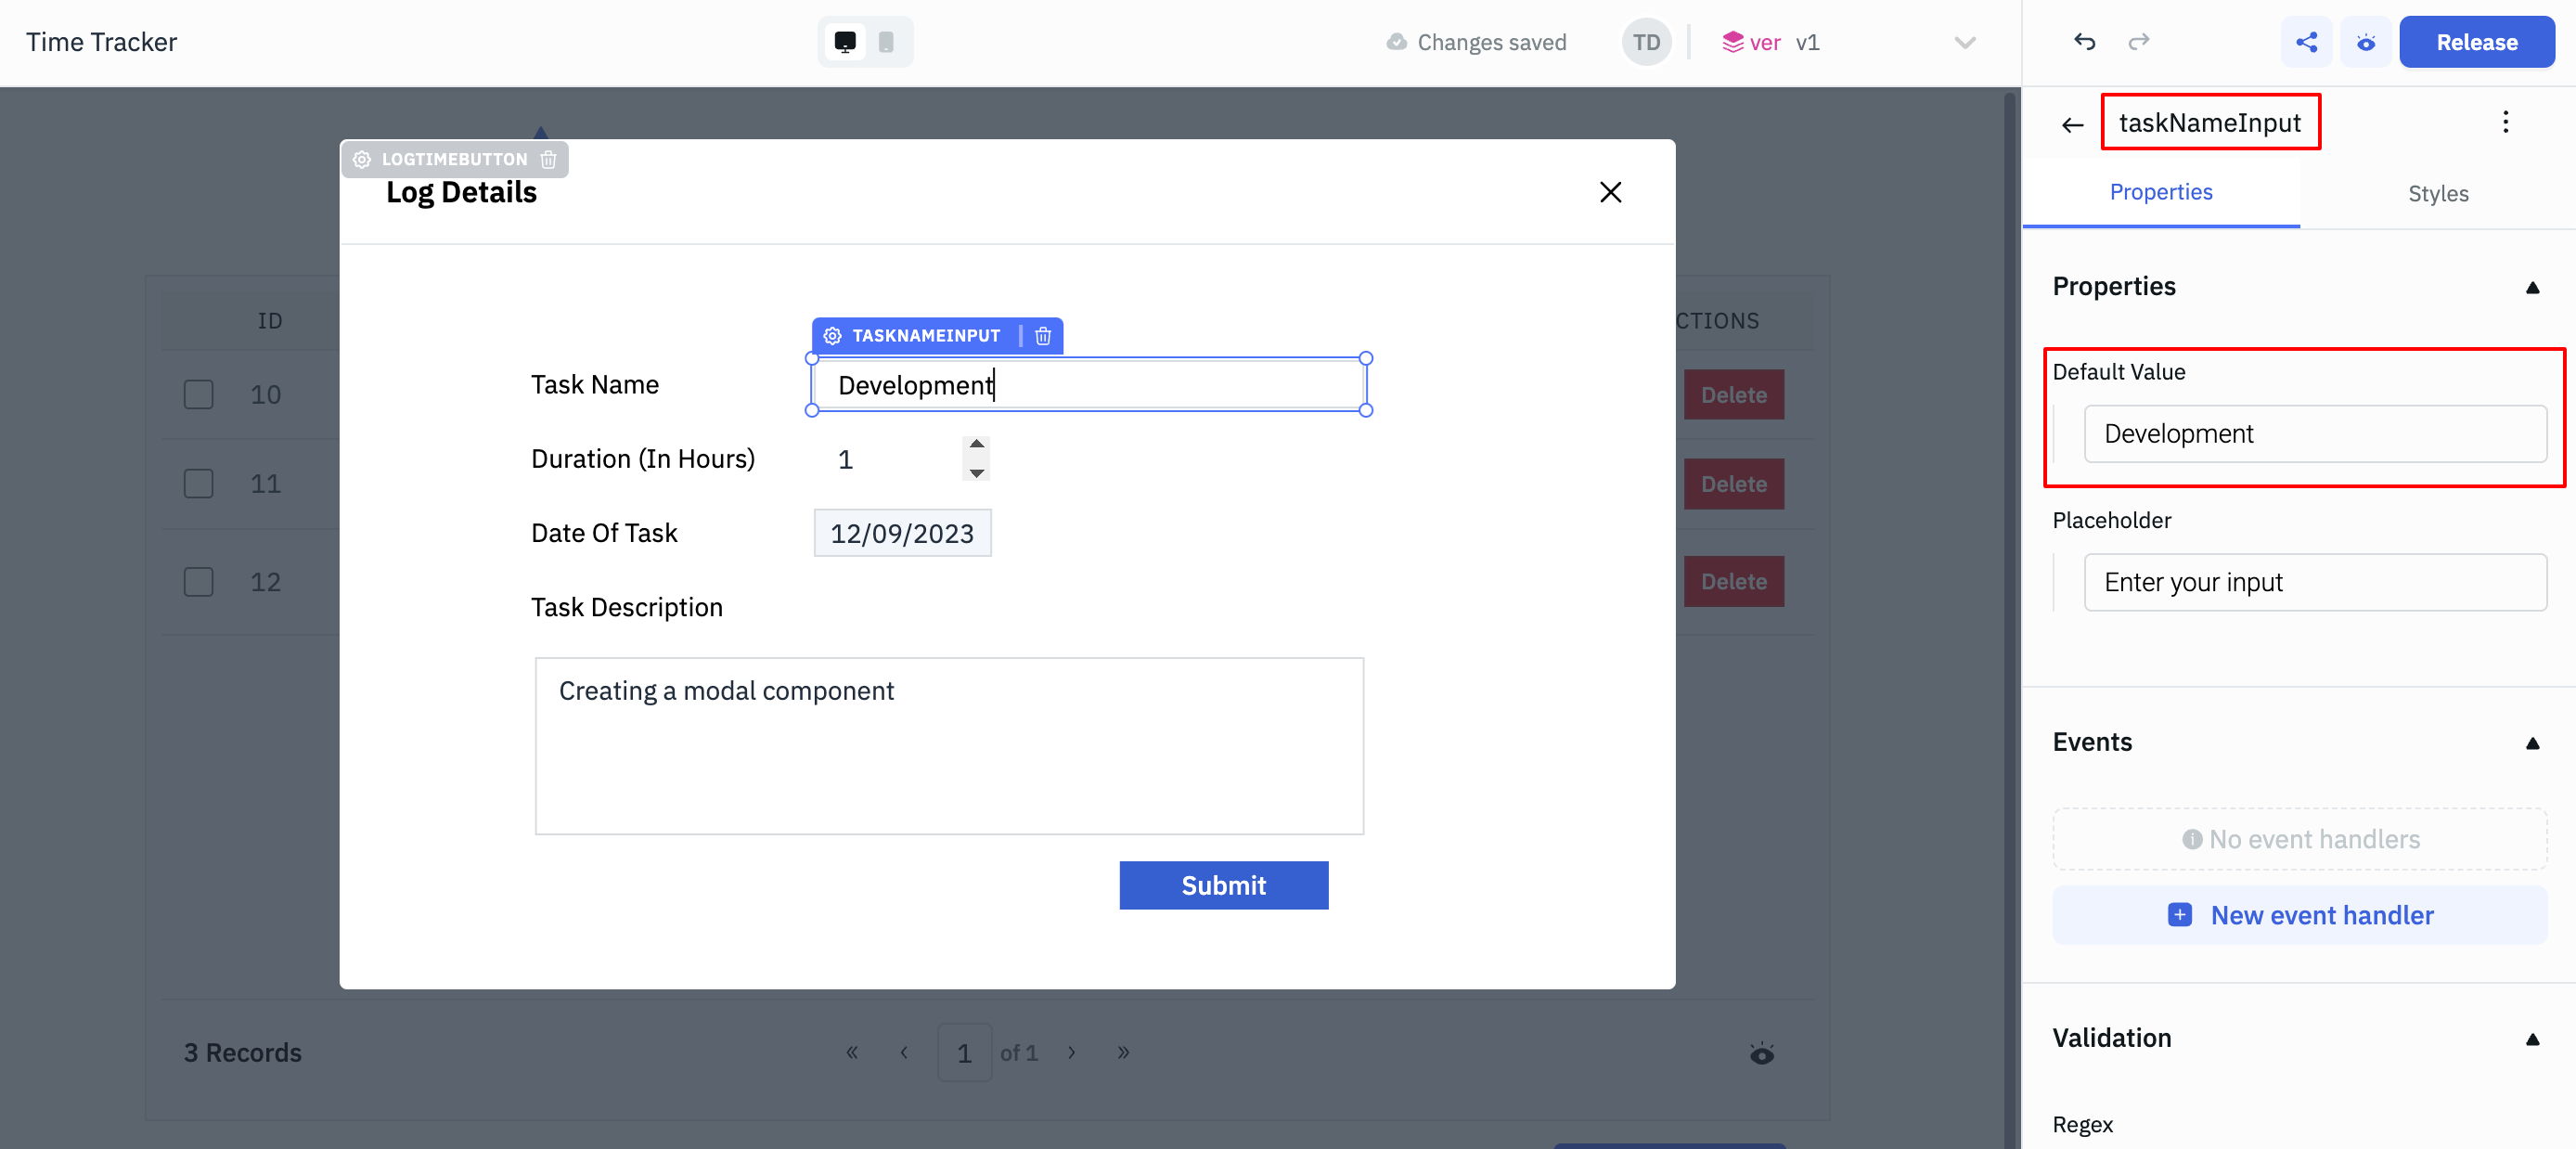
We are ready with the labels, let's place the input components next to the labels. Drag Text Input, Number Input, Date Picker and Textarea components and arrange them next to the labels. You'll find all the input fields under the Form section of the component library. We'll also add a Submit button below the input fields. Refer to the below table to rename the component name and default values:
| Component | Component Name | Default Value |
|---|---|---|
| Text Input | taskNameInput | Development |
| Number Input | taskDurationInput | 1 |
| Date Picker | taskDateInput | {{moment().format("DD/MM/YYYY")}} |
| Textarea | taskDescriptionInput | Creating a modal component |
For the Date Picker field, we are using double curly braces to pass JavaScript code. Using the Moment.js library, we are getting today's date in the dd/mm/yyyy format. ToolJet comes with Moment.js, Lodash and Axios libraries to make it more convenient for you to work with custom JavaScript code.
We'll close the modal by clicking on the X/close button on the top-right.
Creating Query To Write Data
We are ready with the form. Now we need to create a query that will help us add new entries to the timeTracker table in the database. Click on the + Add button in the Query Panel. Select ToolJet Database from the list of available sources.
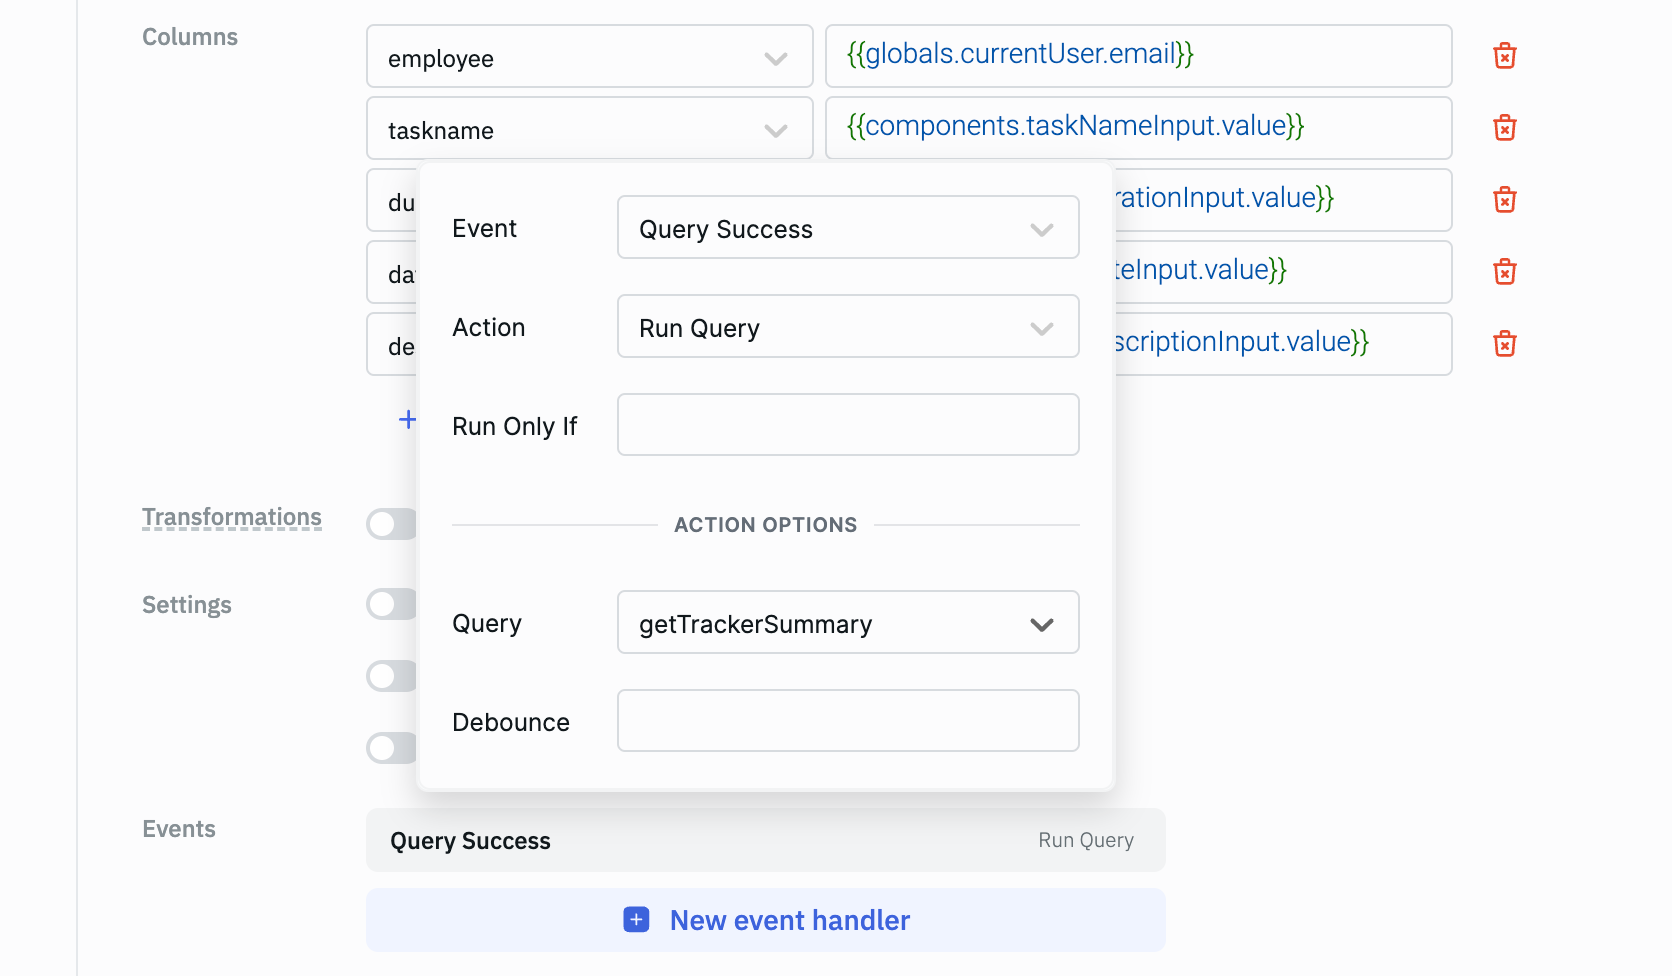
Rename the query to addLog, select Create row as Operations and use the below configuration for the columns. We'll see how we can use custom code and use different keys to access the data available in the app-builder in the below table.
| Column Name | Keys |
|---|---|
| employee | {{globals.currentUser.email}} |
| taskname | {{components.taskNameInput.value}} |
| duration | {{components.taskDurationInput.value}} |
| dateoftask | {{components.taskDateInput.value}} |
| taskdescription | {{components.taskDescriptionInput.value}} |

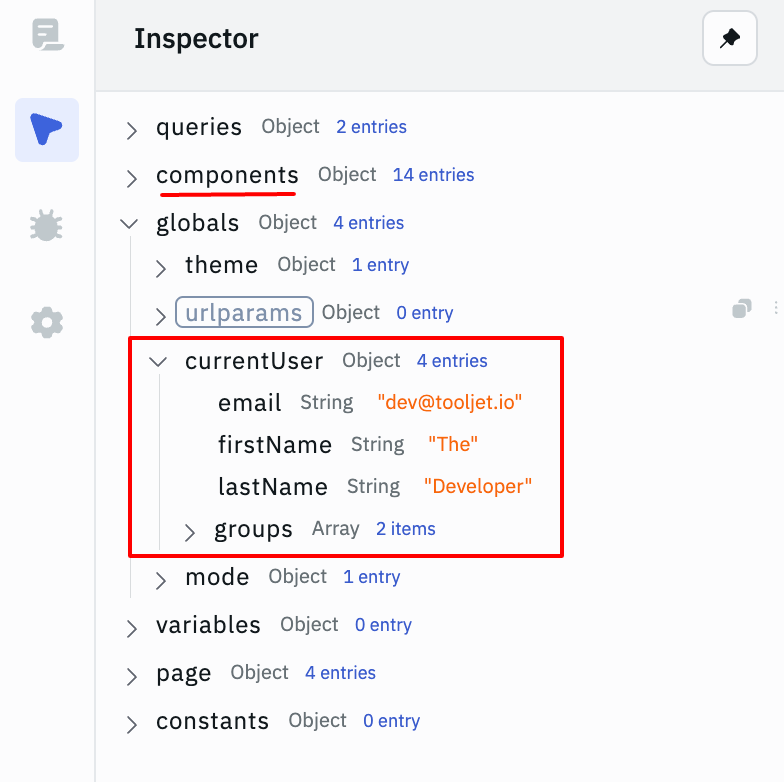
Click on the Inspector on the left-sidebar to look at the available values under globals and components.
The currentUser object holds all the values related to logged-in user.
You can refer to the logged-in user's firstName, lastName, email and groups using the currentUser object.
Similarly, the components object holds all the values related to the components in our application.
Now every time the addLog query runs, the values present in the referred keys will be written to the database.
Later, we'll plug this query to the Submit button on logTimeModal.
Using Events
Events allow us to run queries and other application functions based on button clicks, query completion and an array of other triggers.
The addLog query will add data to the the timeTracker table in the database when it runs. But we would want our Table component to be reloaded with the new data every time we add or delete the entries. Since the data in the Table component is coming from the getTrackerSummary query, we'll trigger the getTrackerSummary query after running the addLog query.
Click on the + New Event Handler button in the addLog query - a new event will be added. Click on the event and select Run Query as Action and getTrackerSummary as Query.
Now the getTrackerSummary will run every time the addLog query is successfully executed, the Table component will also get updated with the new data since it displays the data returned by the getTrackerSummary.
It's time to add the addLog query to the modal and see it in action. Open the modal by clicking on logTimeButton and select the submit button that we've placed inside the modal.
Under Events configuration of the submit button, click on + Add Handler, leave the Event as On Click, select the Action as Run Query and select addLog as the query.
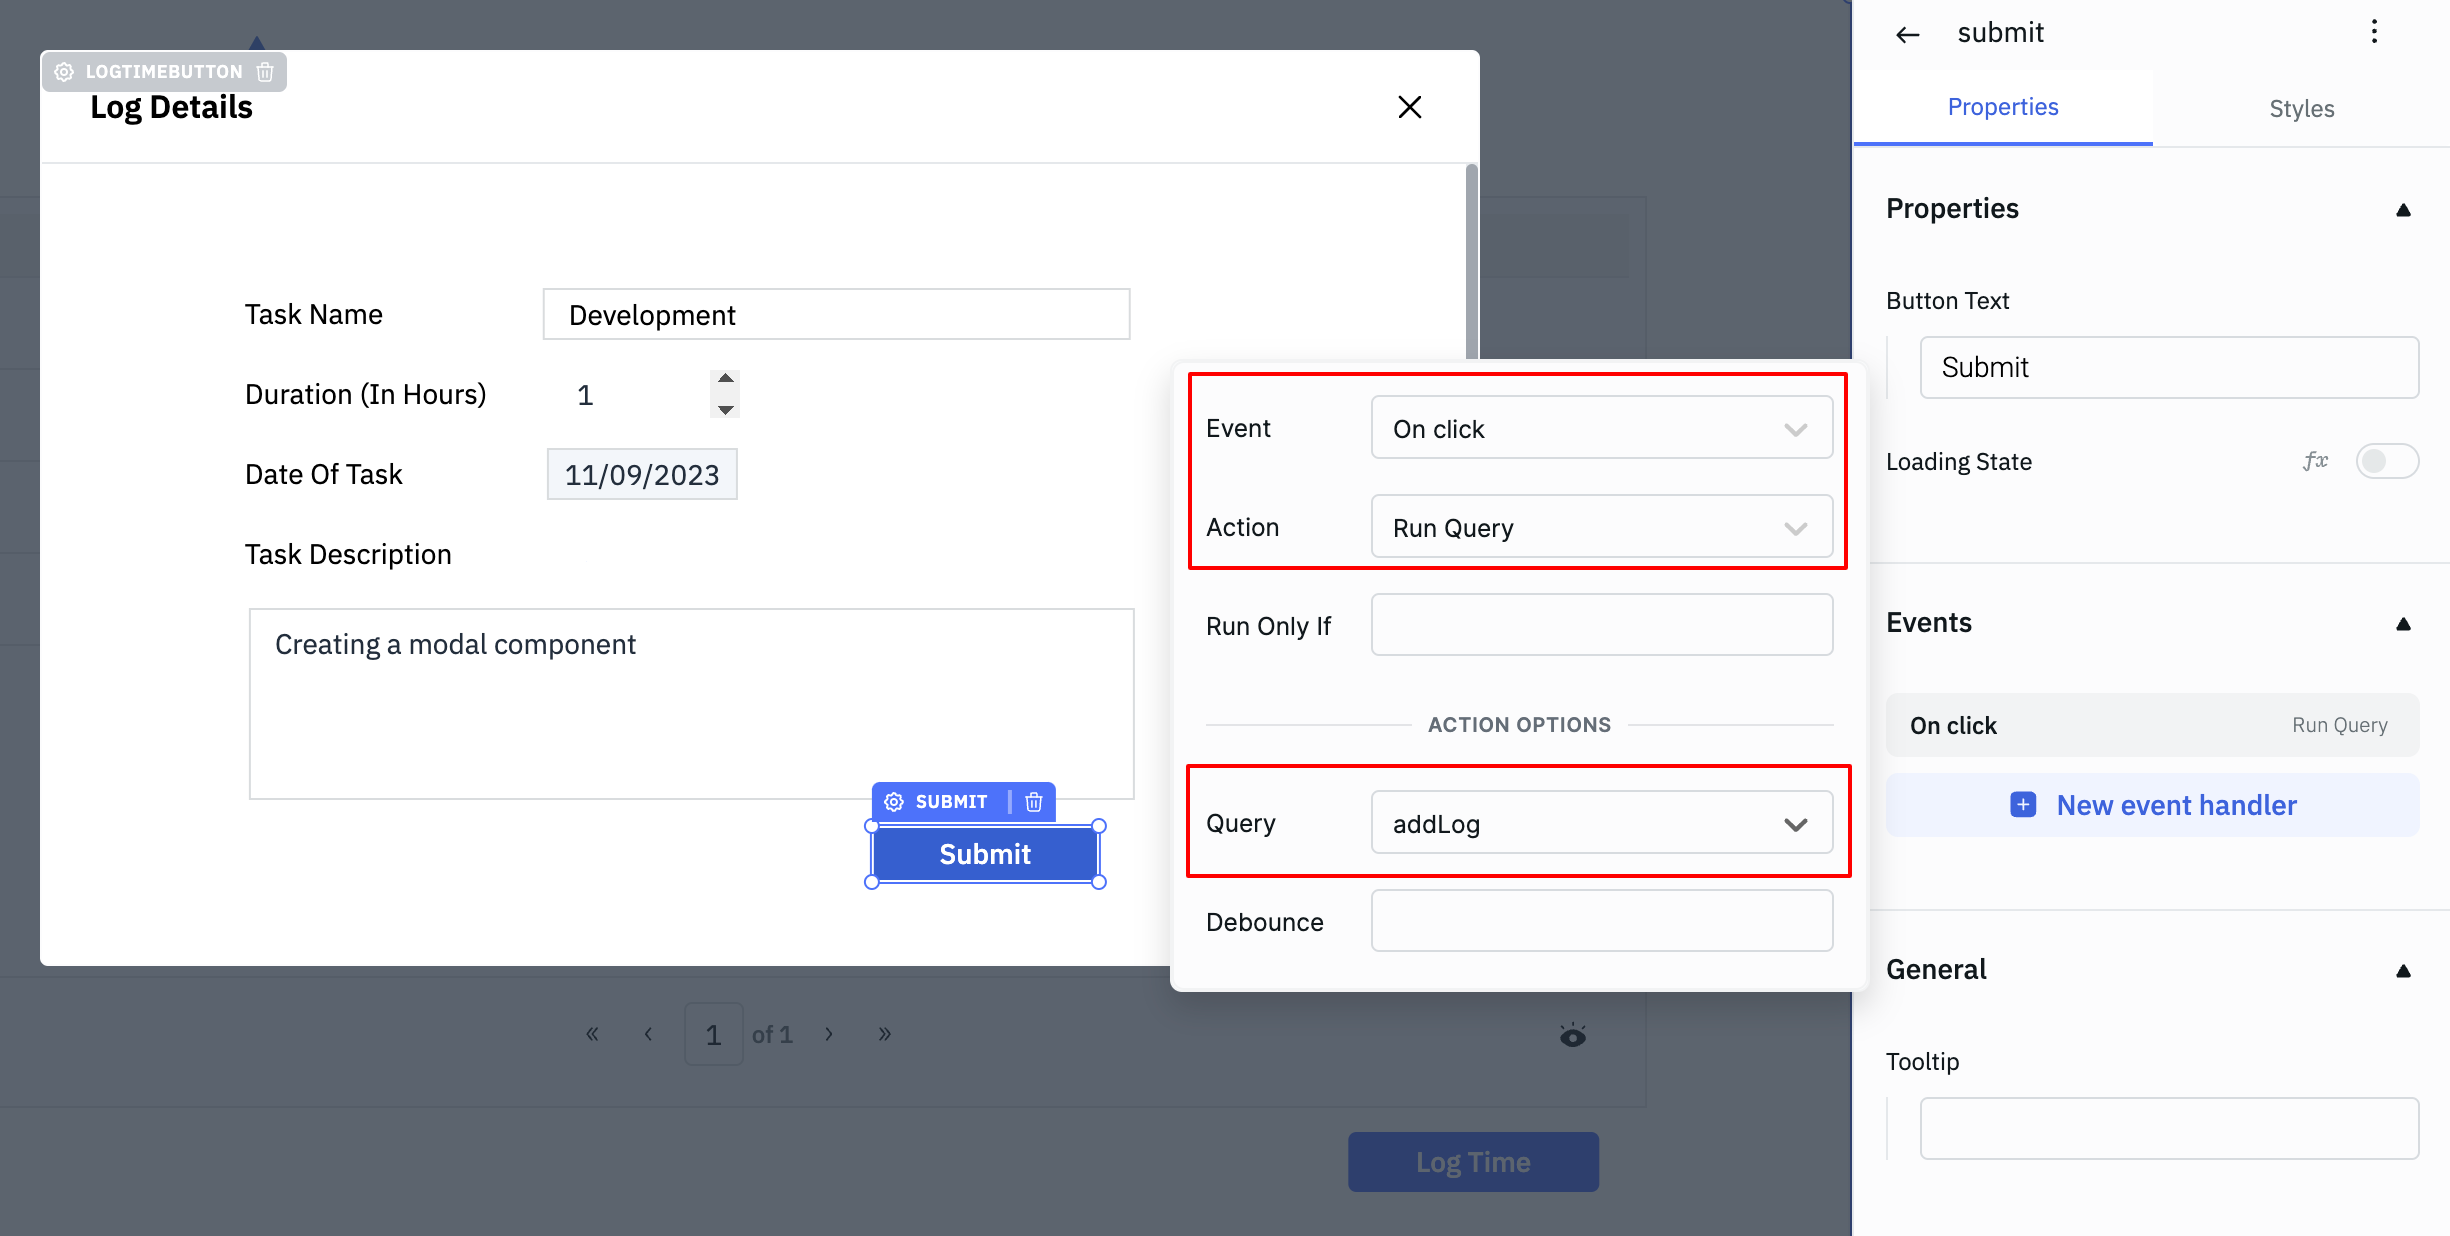
Now whenever we click on the submit button, the addLog query will run and values present in the input fields will be written to the database.
We also need to show a prompt to indicate that the data has been added. Click on + Add Handler, leave the Event as On Click, select the Action as Show Alert and enter Log Added as the Message and leave Alert Type as Info.

Finally, we would want our modal to close once we click on Submit and the required query and alert is triggered. Add one more Event, select Close Modal as the action type and logTimeModal as Modal.
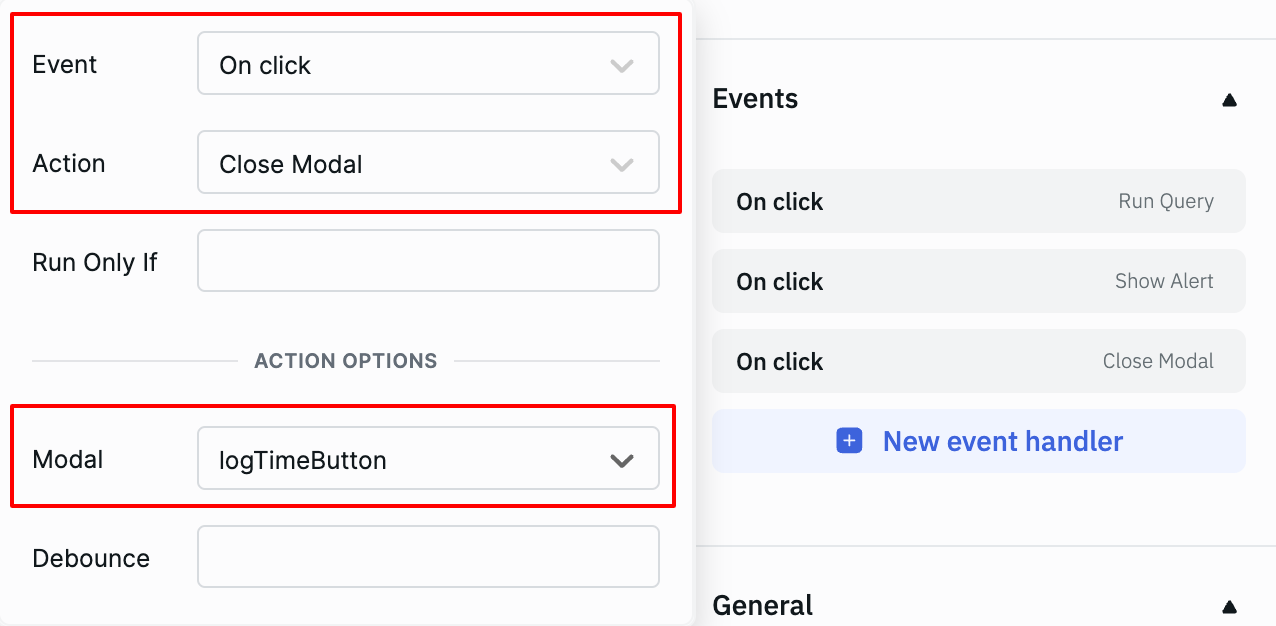
Now every time we click on the Submit button on the modal, the addLog query will run, followed by an alert and the modal being closed.
Adding Actions To Tables
Let's create a way to delete entries from the Table component using Actions.
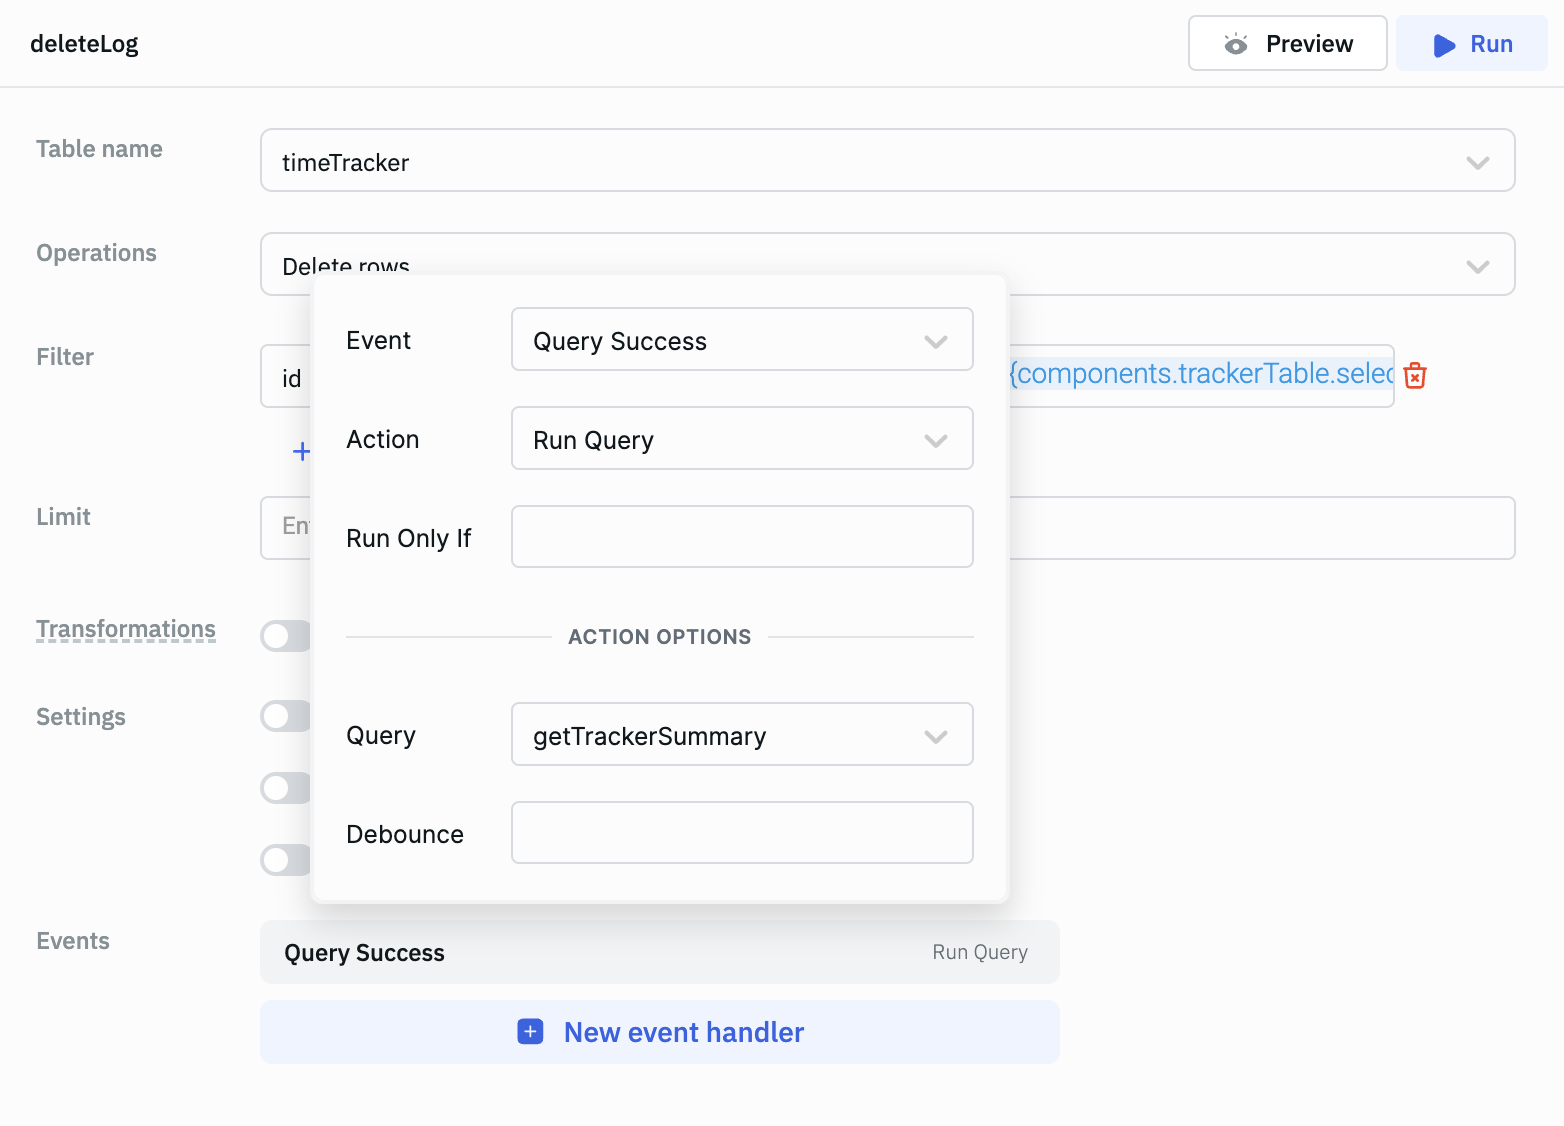
We'll first create the required query to perform the action. Click on the + Add button in the Query Panel. Select ToolJet Database from the list of available sources. Rename the query to deleteLog, select Delete rows as Operations.
For the Filter, select id as the column(first field), equals as the operation(second field) and paste the below code in the key input(third field):
{{components.trackerTable.selectedRow.id}}
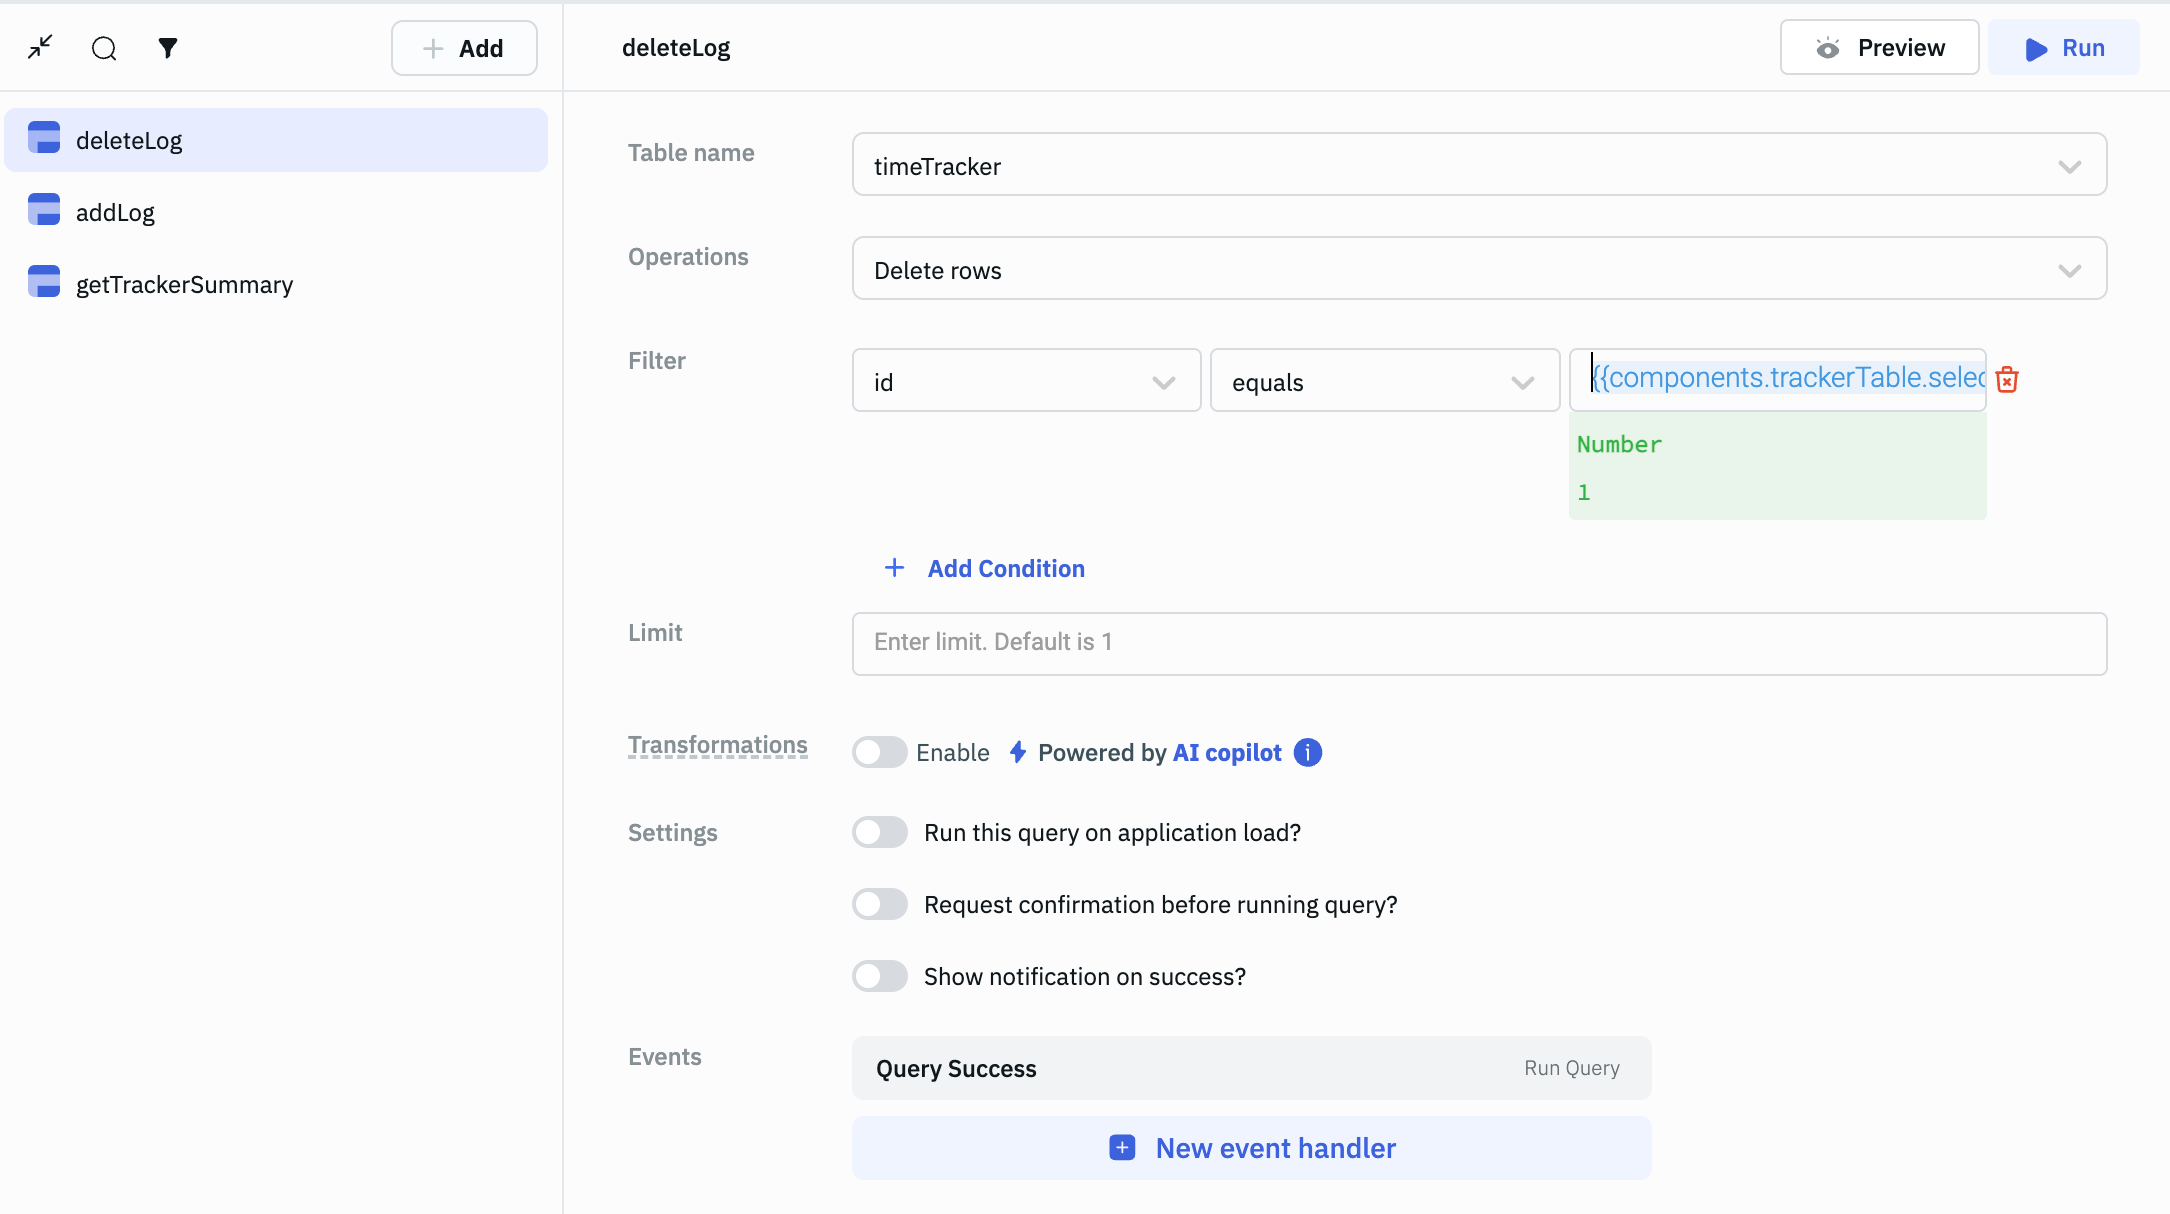
When you click on a table row, its values get stored under the selectedRow key. To remove that row from the database, we match selectedRow.id with the database's id field.
We also need to run the getTrackerSummary query once the deleteLog query is completed to ensure that the Table component gets reloaded with the updated data. Click on the + New Event Handler button in the deleteLog query - a new event will be added. Click on the newly created event, leave Event as Query Success, select Run Query as Action and getTrackerSummary as Query.
Now let's use this query with Actions in the Table component.
Go to the Action Buttons section of the trackerTable properties. Click on + New action button and change Button Text to Delete, Background color to Red(first color in the palette) and Text color to White(last color in the palette.)
Click on + New event handler and leave the Event as On click and select Run Query as the Action. Select deleteLog for the Query dropdown.
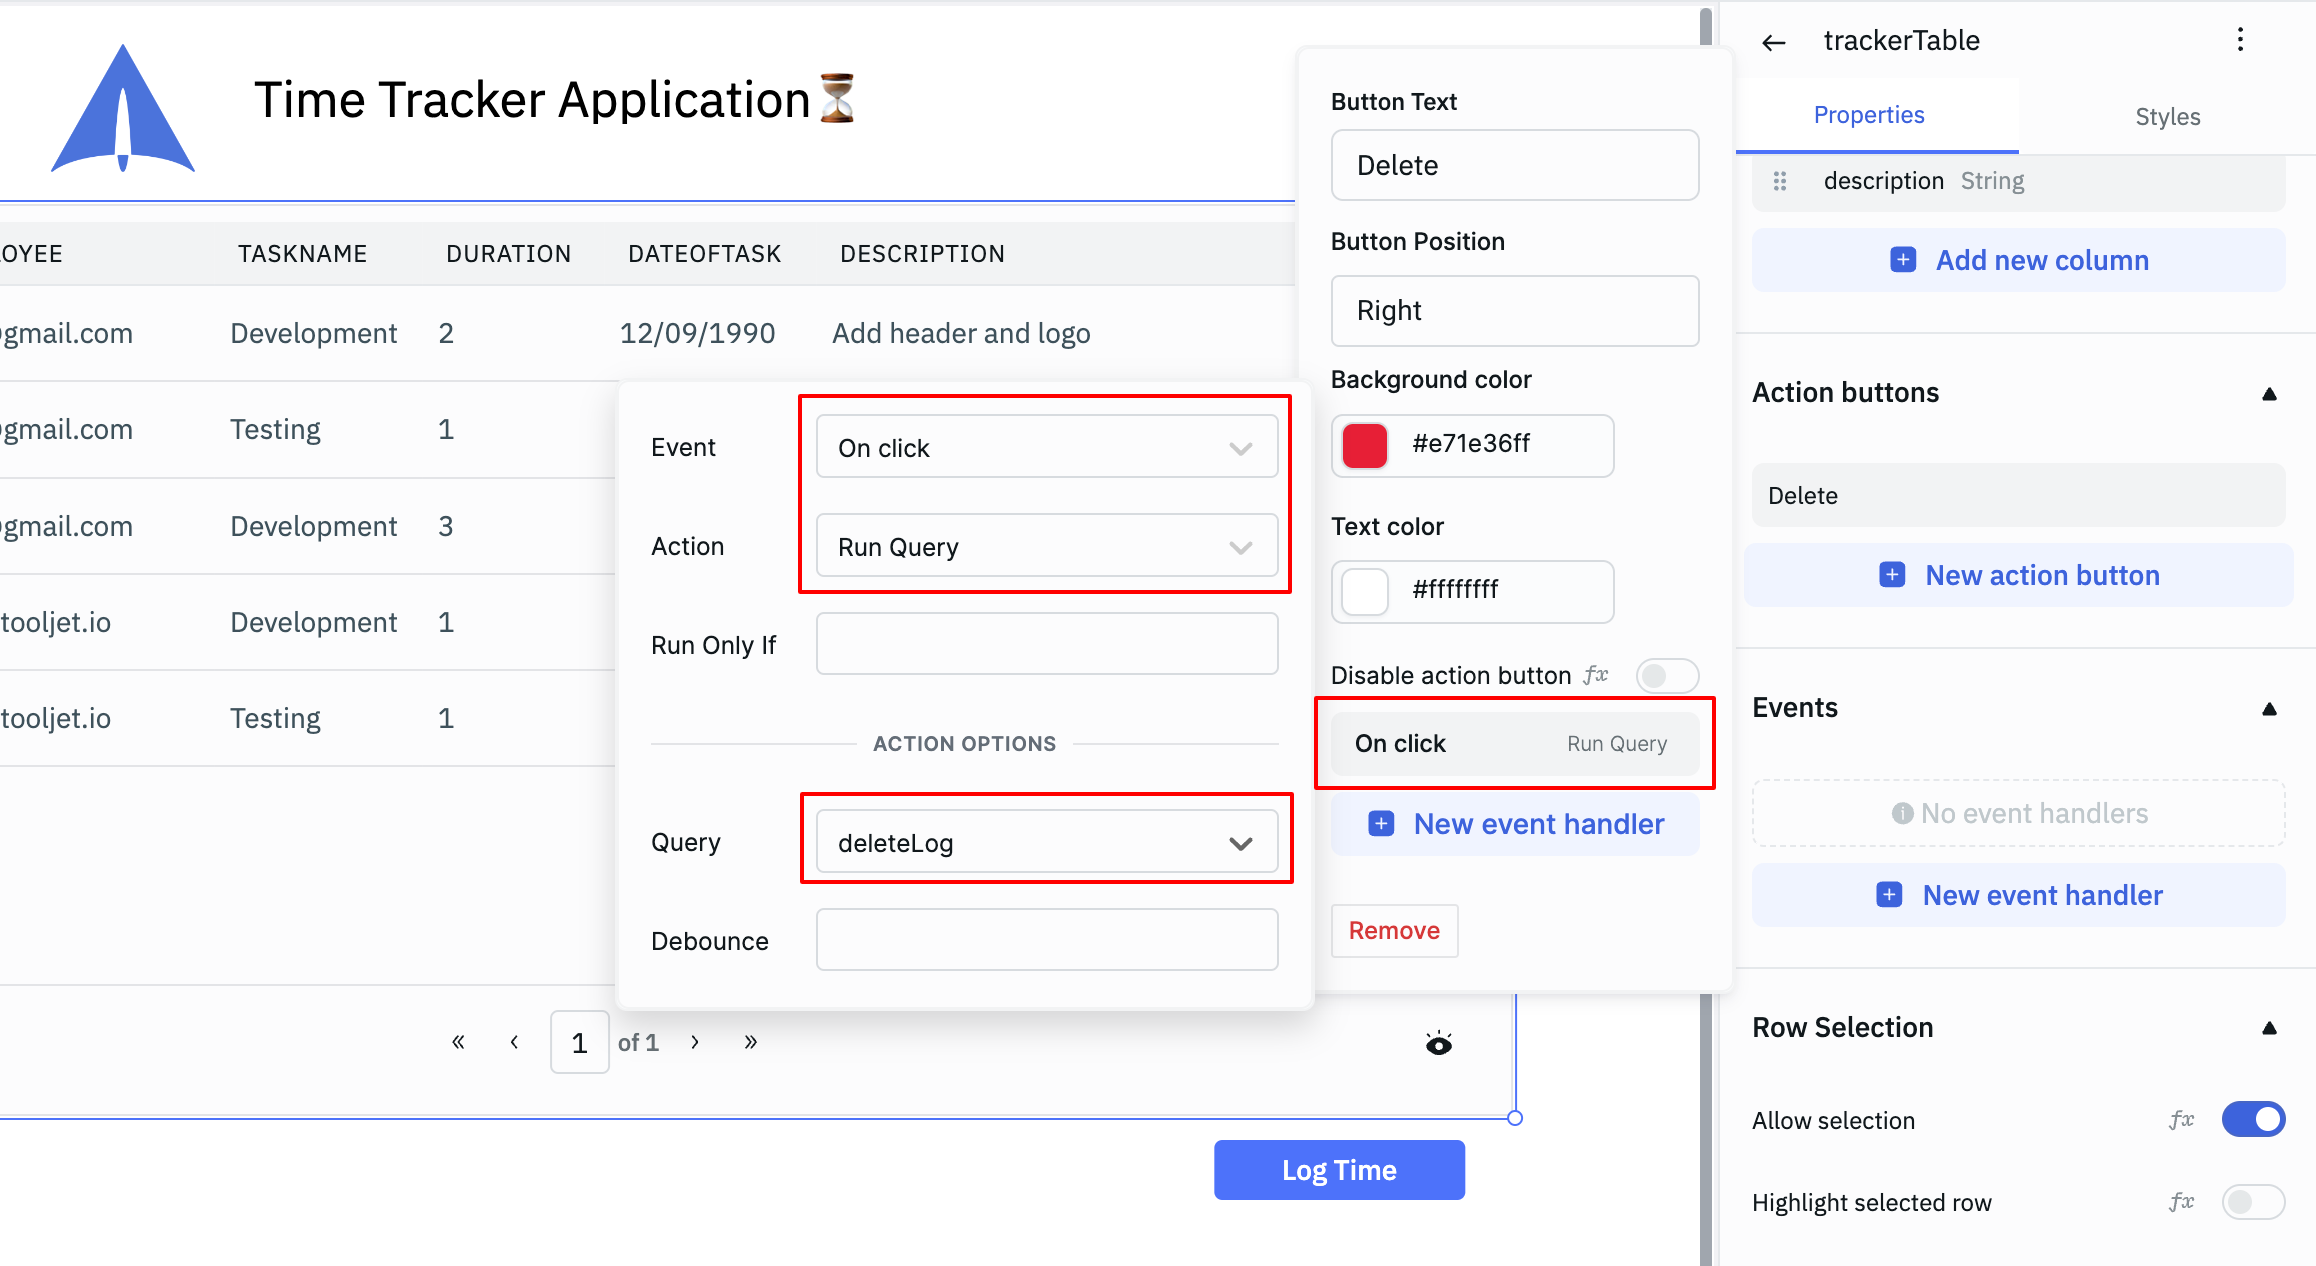
Now every time we click on the Delete action button, the deleteLog query will run and delete the related row.
Filter Data Based On The Logged-In User
In a typical time-tracking application, we only need to show the data related to the logged-in user. To achieve that, we need to add a filter to our getTrackerSummary query.
Open the getTrackerSummary query in the Query Panel, click on the + Add Condition button associated with Filter.
For the Filter, select employee as the column(first field), equals as the operation(second field) and paste the below code in the key input(third field):
{{globals.currentUser.email}}
Add some new entries to the Time Tracker. Earlier, we had put some test entries with [email protected] as the value for the employee column. Now, those entries will not appear and only the entries you have added with your current email(or logged in account) will appear on the table.

Congratulations! You've successfully built a time tracker application and, in the process, covered the essential fundamentals of ToolJet. Now you're well-equipped to take on more complex projects. Happy building!
What Can I Do With ToolJet
If you are building internal tool for your organization, here are few tutorials of sample use-cases for you to get started:
- Build a Feature Request Management App
- Build a Ticket Triaging App with Baserow and ToolJet
- Building a MinIO file explorer app
- Building a Google Cloud Storage (GCS) file explorer app
- Build an AWS S3 file explorer app
- Build Stripe Refund App
- Build a WhatsApp CRM
- Build a cryptocurrency dashboard
- Build a Redis GUI
Find more Tutorials on our Blog.
For ToolJet Contributors
To contribute to ToolJet code, plugins, and documentation, refer to our Contributing Guide.


Help and Support
- We have extensively documented the features of ToolJet, but in case you are stuck, please feel free to e-mail us at [email protected]
- If you are using ToolJet cloud, click on the chat icon at the bottom-left corner for instant help.
- If you have found a bug, please create a GitHub issue for the same.
- Feel free to join our highly active Slack Community.