Creating and Managing Queries
A query is a way to interact with your data sources and acts as the link between your app’s UI and your data. Queries connect your app to configured data sources such as SQL, NoSQL, vector databases, APIs, spreadsheets, and cloud services. Whether it’s retrieving records from your MongoDB collection or updating data in a SQL database, you can use queries to interact with them.
Queries are created in the Query Panel, located at the bottom of the App Builder, where you can either use a visual form-based builder or write code/SQL manually.
Creating a New Query
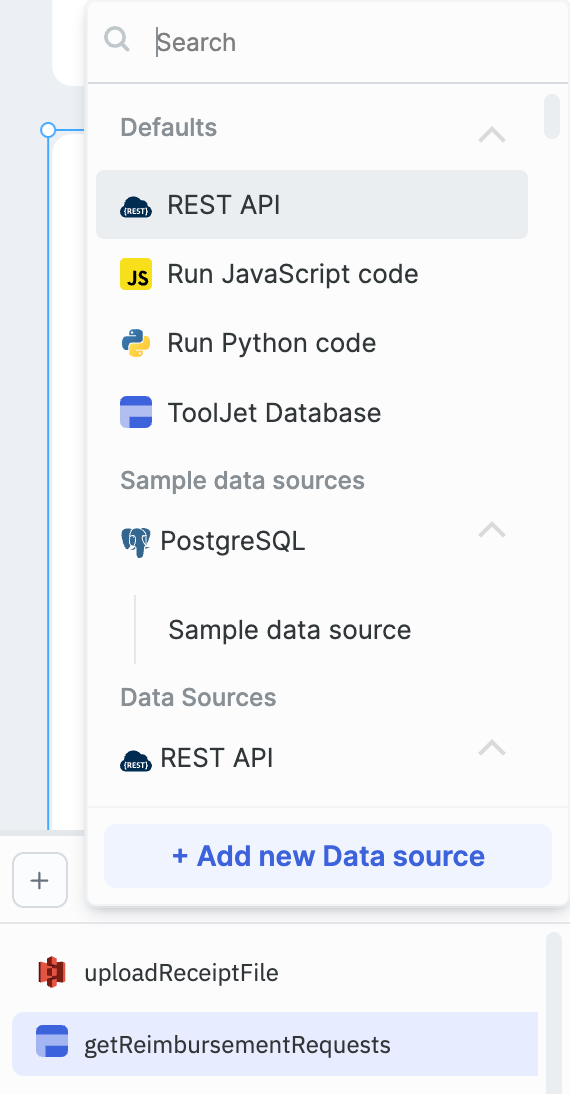
- Click on the + button in the Query Panel to open a menu listing the available data sources or you can add a new data source by clicking on + Add new Data Source button.
- Select the desired data source.
Query Folders
Query Folders let you group related queries into named folders inside the Query Panel, making it easier to manage and navigate large numbers of queries in a single application.
Creating a Folder
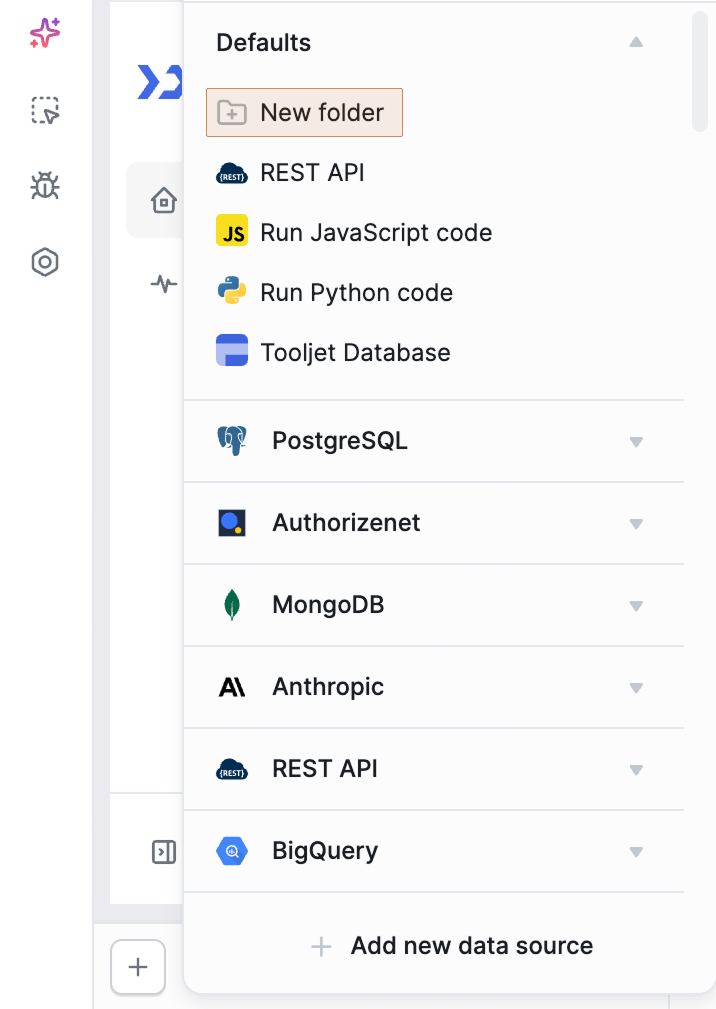
Click the + icon in the Query Panel header. From the menu that appears, select New Folder.
- Only letters (a–z, A–Z) and numbers (0–9) are allowed — no spaces or special characters.
- Cannot start with a number.
- Must be between 1 and 32 characters.
- Must be unique — cannot share a name with another folder or query.
Adding Queries to a Folder
There are three ways to add queries to a folder.
You can also use ToolJet AI's Auto-sort Queries feature to add queries inside the folder using AI.
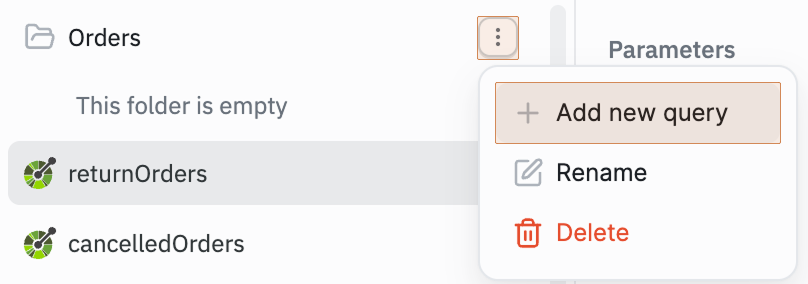
- Create directly inside a folder: Click the three-dot menu on a folder and select Add new query. The new query will be created inside that folder.
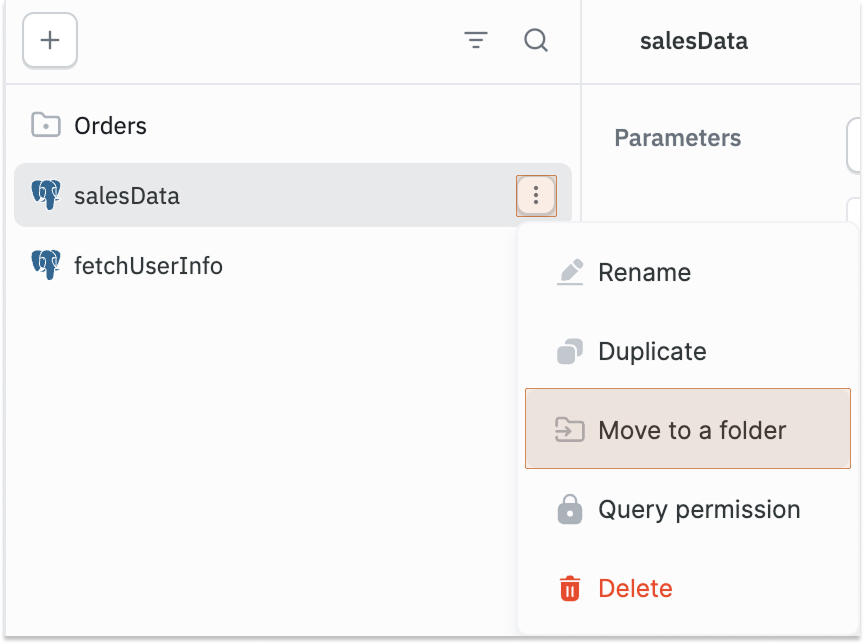
- Move an existing query: Click the three-dot menu on a query and select Move to a folder, then choose the destination folder.
- Drag and drop: Drag an existing query from the list and drop it into the target folder.
Renaming a Folder
Click the three-dot menu on a folder and select Rename. Type the new name and press Enter to confirm, or press Escape to cancel.
Deleting a Folder
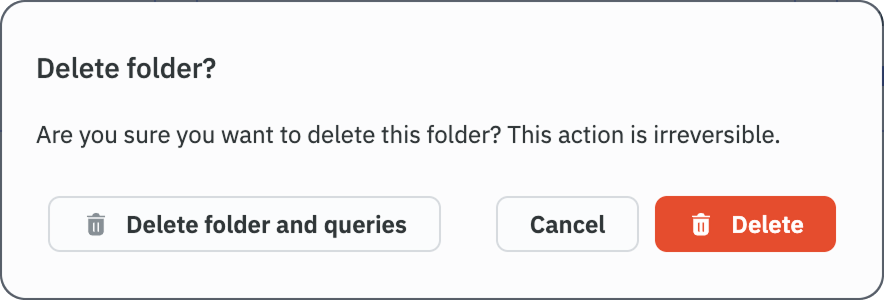
Click the three-dot menu on a folder and select Delete. You will be prompted to choose one of two options:
- Delete: Removes the folder. All queries inside are moved back to the root level.
- Delete folder and queries: Permanently deletes the folder along with all the queries inside it.
Configuring the Query
The interface for configuring queries depends on the type of data source. If you are using any SQL data source, you can configure your query using either GUI mode or SQL mode. Rest of the data sources can be configured using form-based GUI.
GUI mode
-
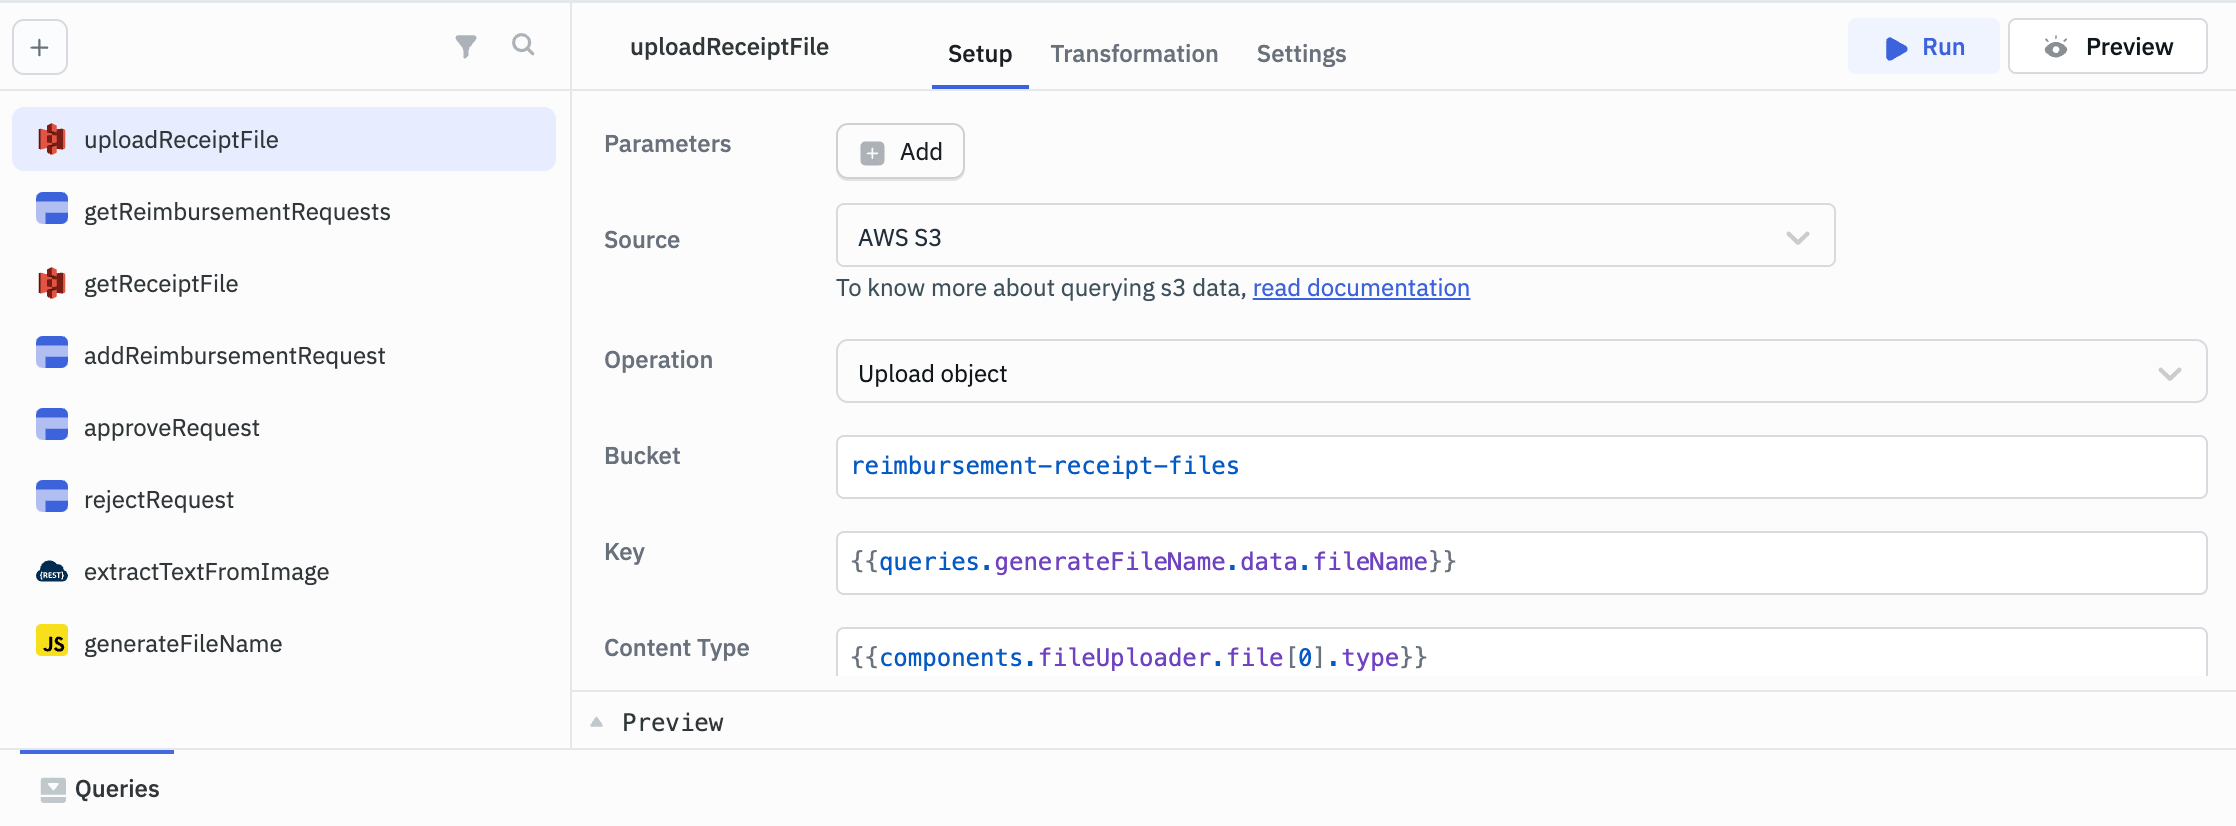
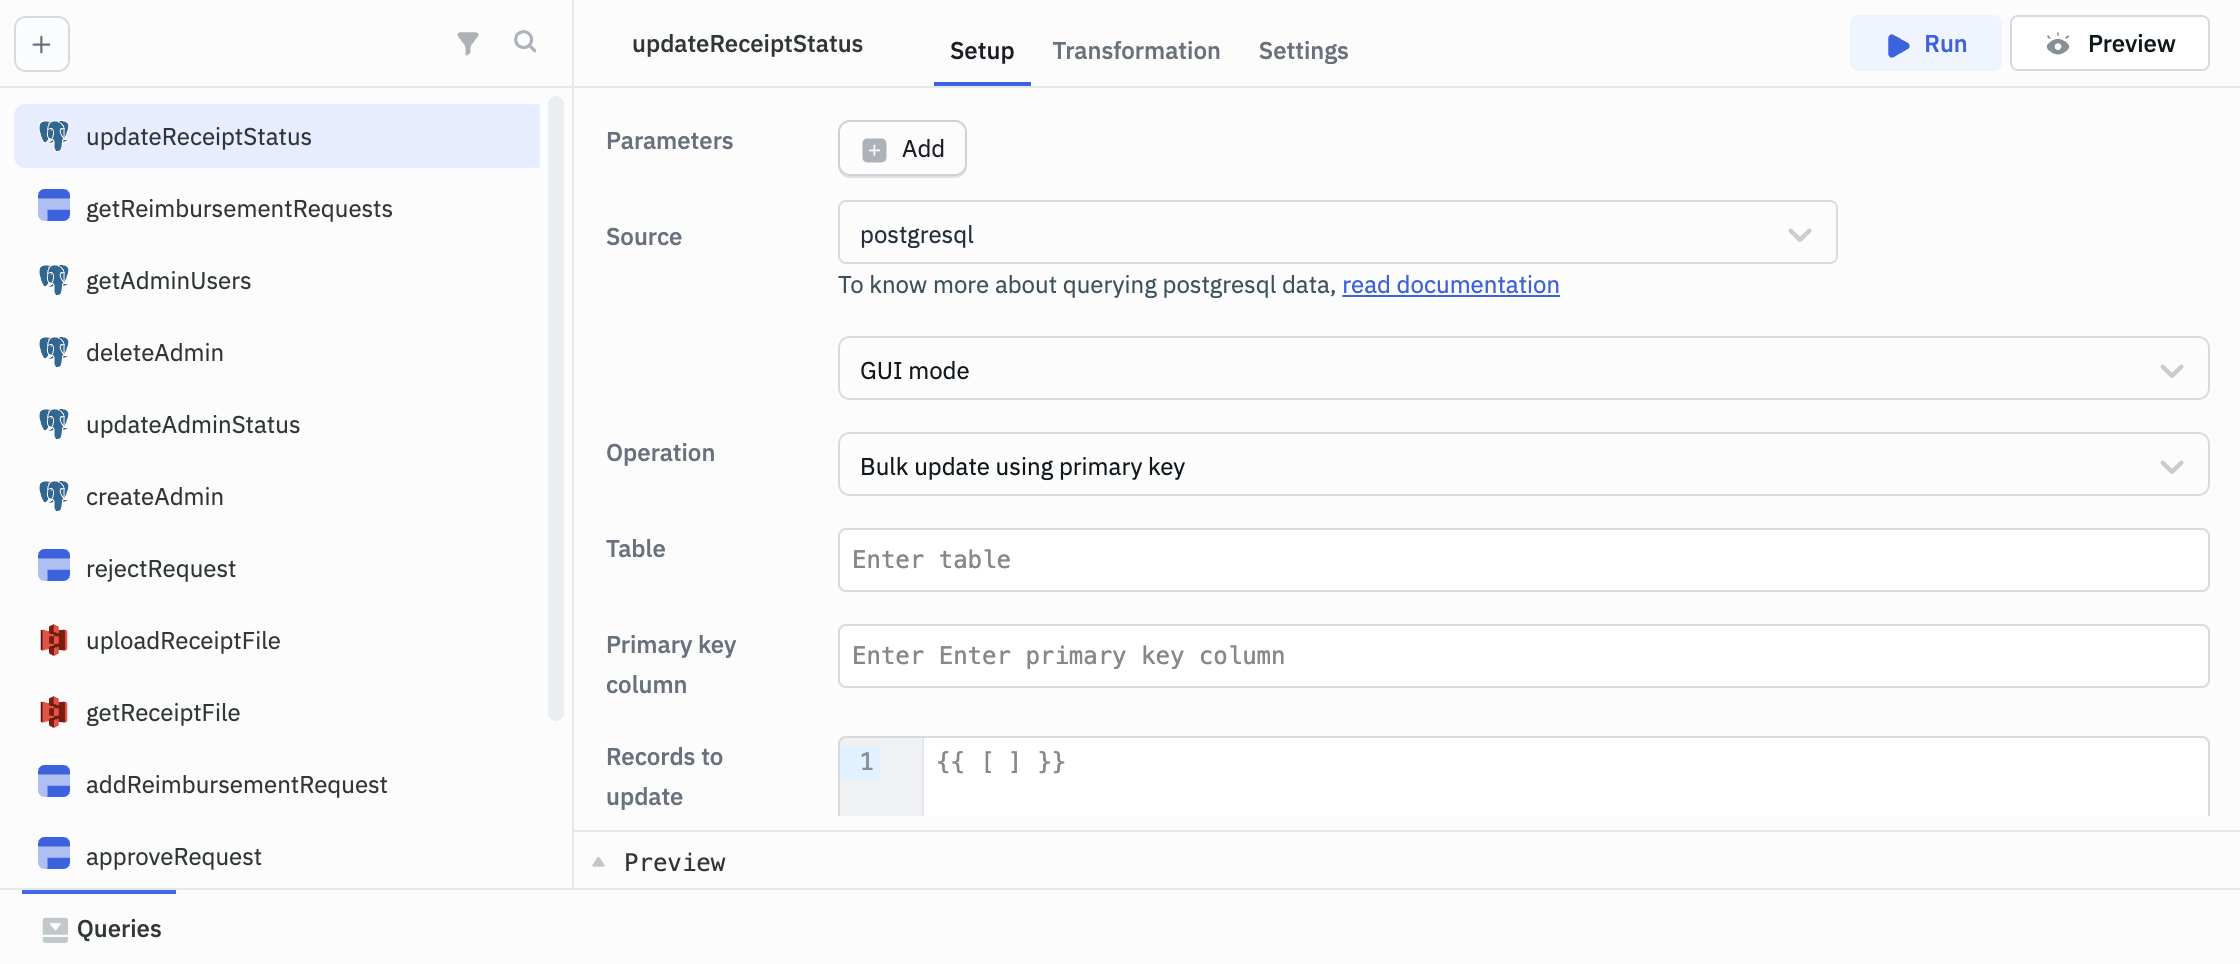
For the Postgres data source, when using GUI mode (as shown in the image below), you’ll need to select the operations you want to perform and then fill out the required fields.
-
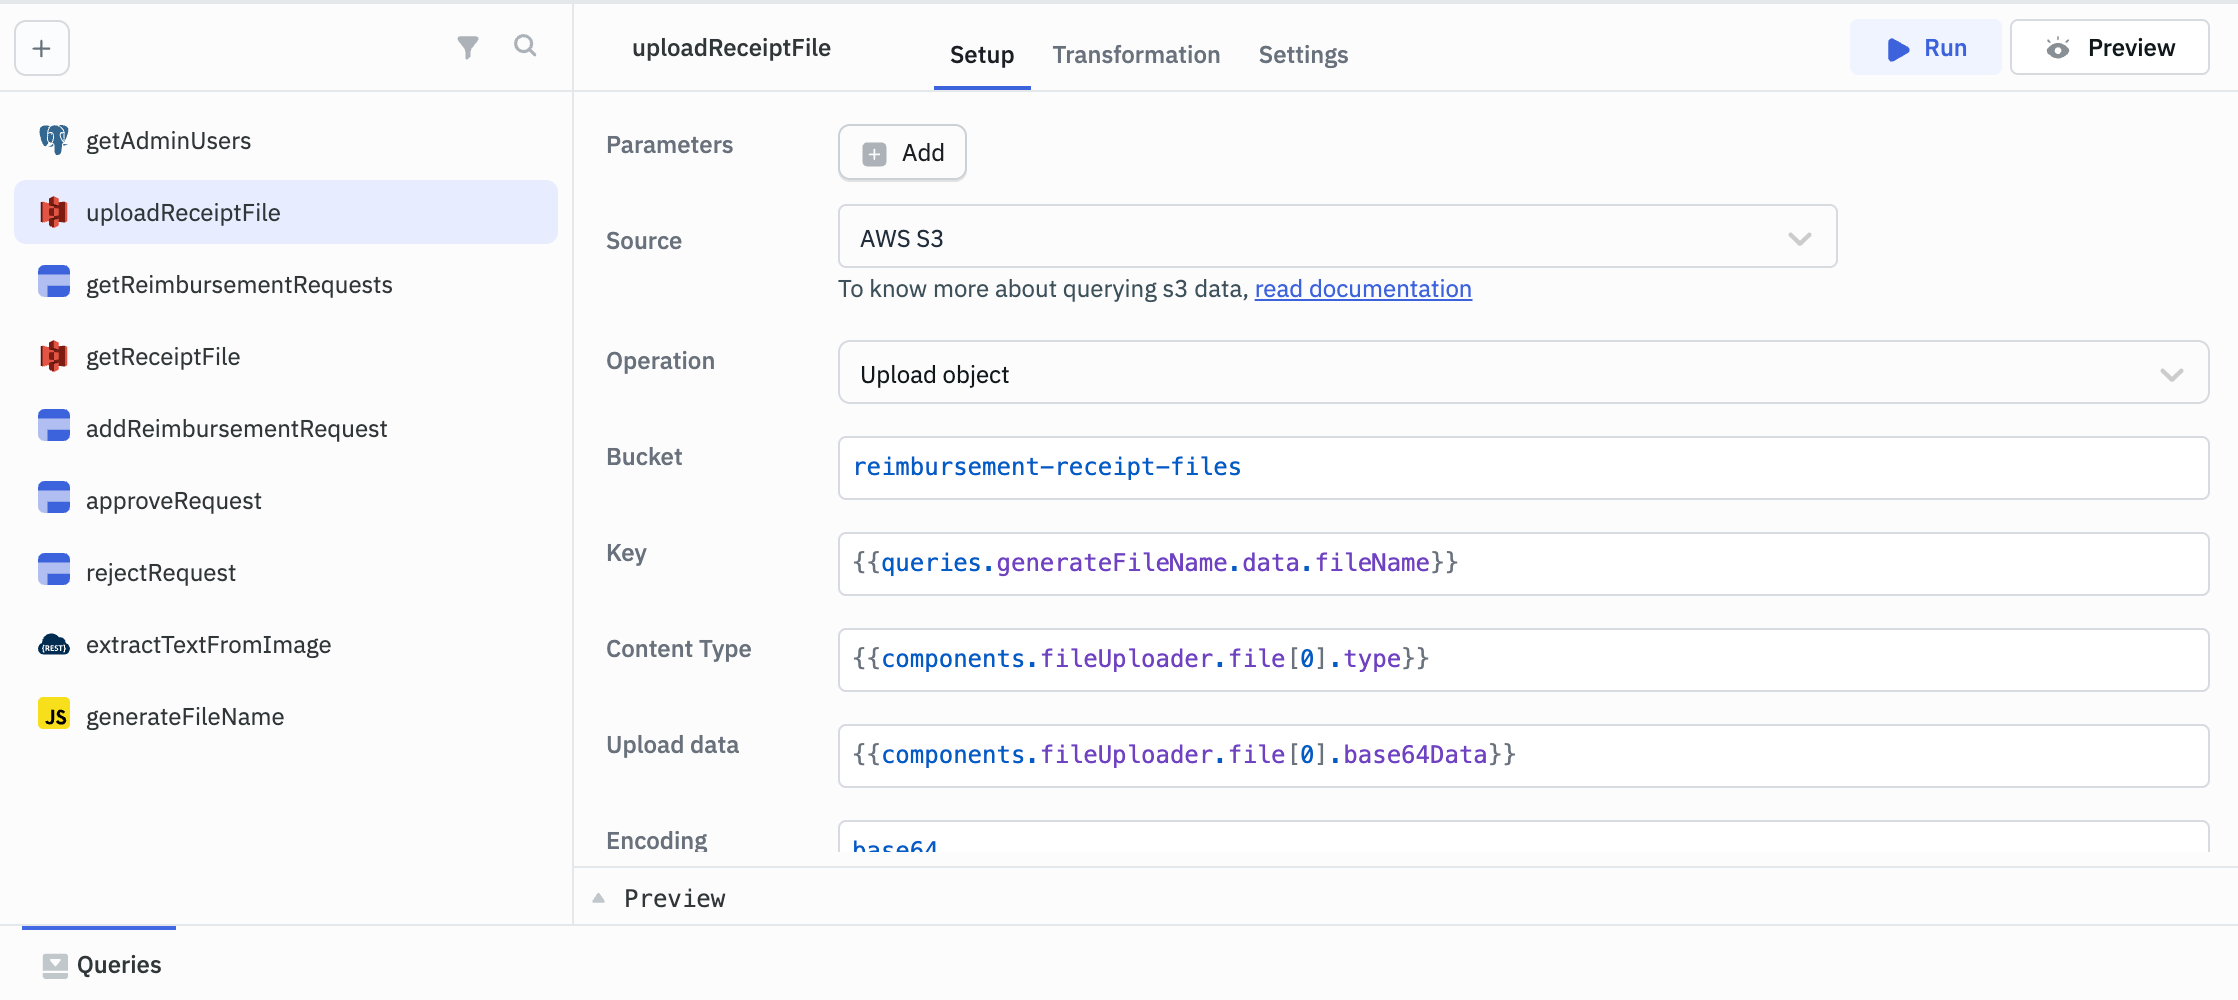
In this example using the AWS S3 data source, you can perform the Upload object operation to upload a file to an S3 bucket. You’ll need to provide details such as the bucket name, key, and other relevant parameters based on the selected operation.
SQL mode
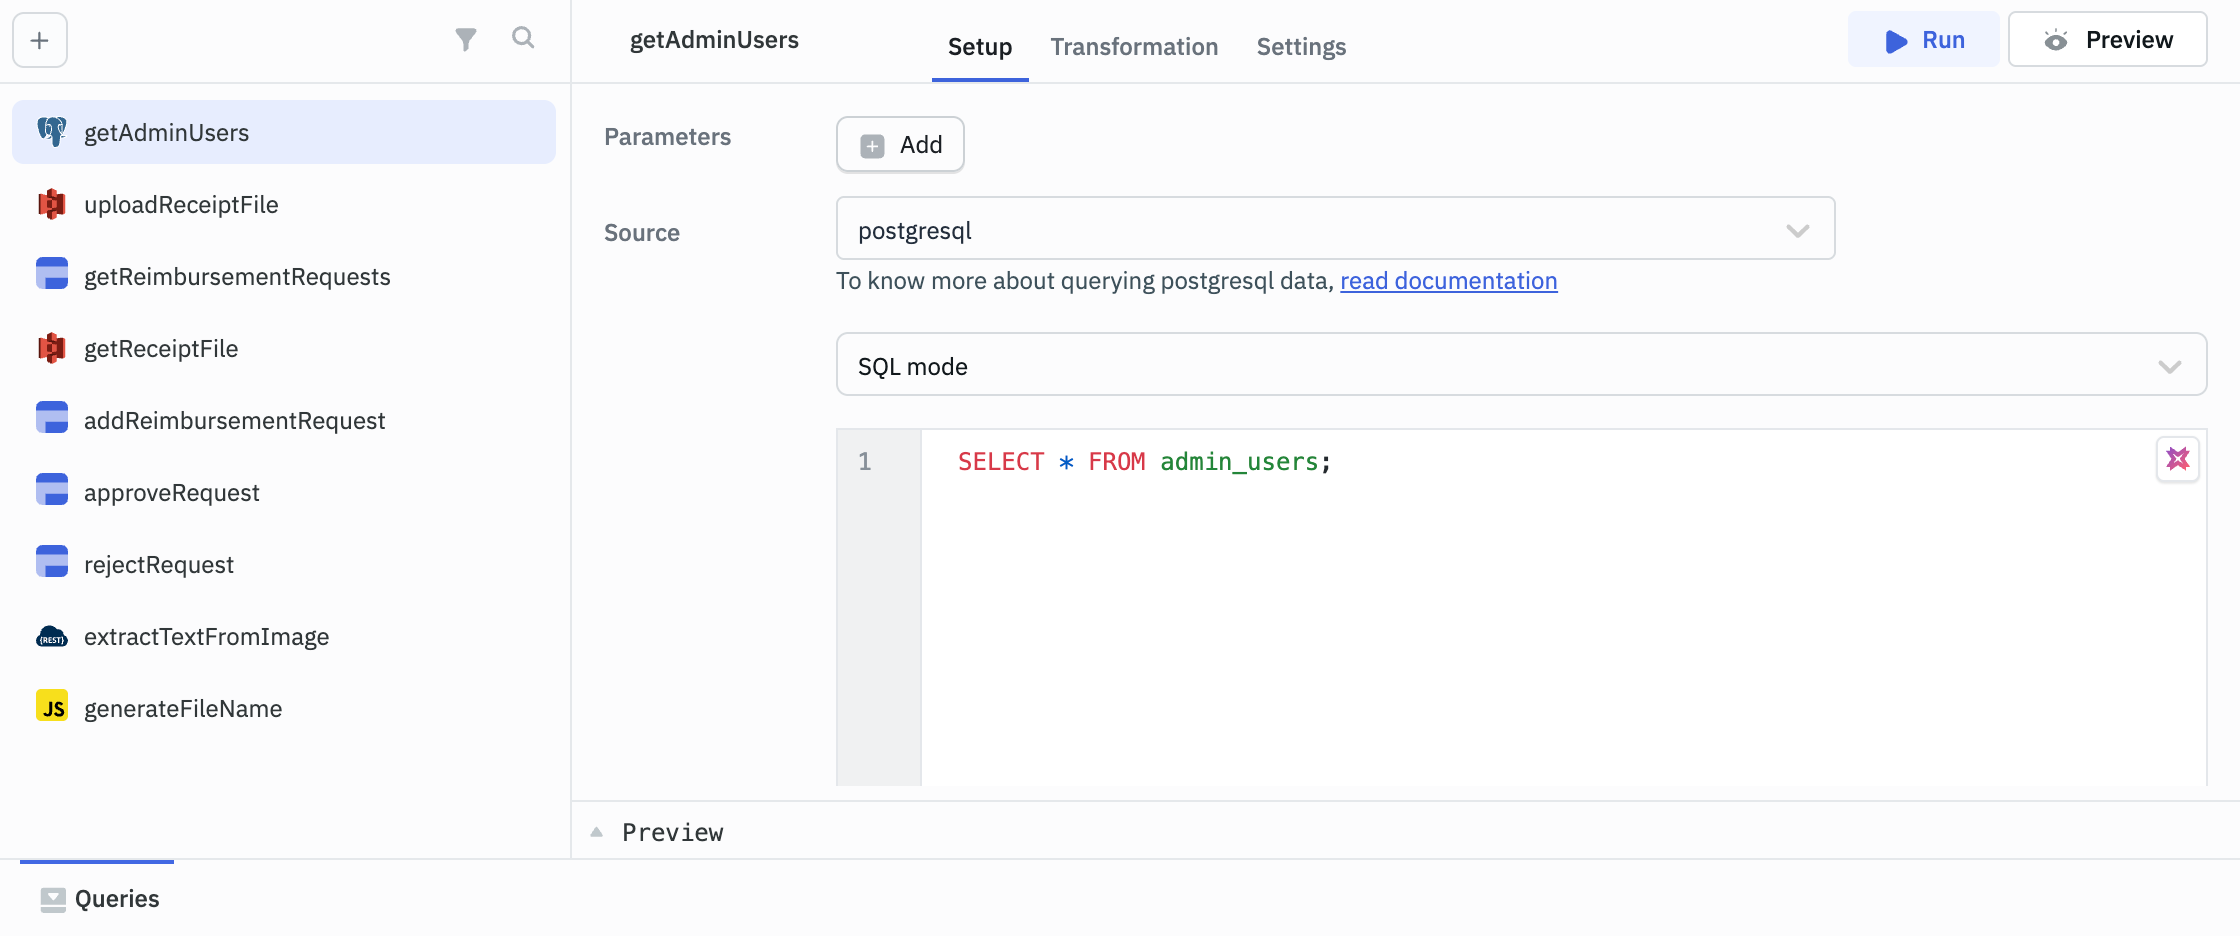
For data sources such as MYSQL, PostgreSQL or SQL Server, you can choose SQL mode where you can write the SQL query to perform your desired operation.
Custom Parameters
You often need a query to fetch different data based on user input, component state, or other logic. Custom parameters allow you to pass dynamic values into a query, making it reusable without hard-coding values.
Let's say you have a query that fetches employee details based on department. Instead of creating a separate query for each department, you can define a parameter like departmentName, and use it to filter results dynamically.
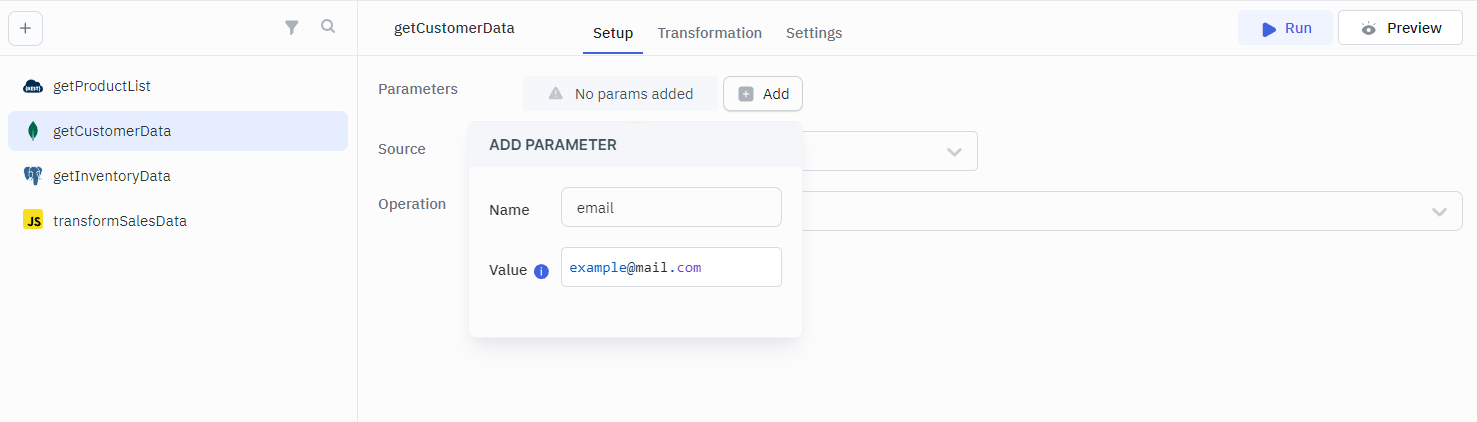
To add parameters, simply click the + Add button next to the Parameters label in the query editor.
For each parameter, you need to specify:
- Name: The identifier for the parameter.
- Default value: This value can be a constant string, number, or object.
Syntax for utilizing the parameter: Employ parameters.<identifier> in your query. It's important to note that parameters can only be utilized within the specific query where they are defined.
Learn more about Using Custom Parameters.
Preview and Run
Before connecting a query to your app’s UI, use the Preview button to check what it returns. This is especially useful when working with external APIs or complex SQL. You can inspect the raw or JSON response, debug any issues, and make sure the data matches what your components need.
Once things look good, use the Run button to execute the query and verify how it interacts with your components and other queries.
Aborting a Query
If a query is taking too long, for example a SQL query without a LIMIT clause that ends up fetching millions of rows, you don't need to wait for it to finish, or refresh the app to stop it.
- If a query triggered via Run or Preview is still active after 3 seconds, an Abort button appears next to Run and Preview.
- Click Abort, or use the shortcut ⌘ + . (Mac) / Ctrl + . (Windows/Linux), to stop waiting for the response.
- While a query is running, the Run, Preview, and AI query generation controls are disabled until you abort it or it completes on its own.
Abort cancels the pending request on the client only. This stops the app builder from waiting for a response, but the underlying data source may continue processing the query on its end until it completes.
Abort is not available for RunJS, RunPy, and Workflow queries, since they don't run as cancellable network requests.
Queries can also be aborted programmatically using queries.<queryName>.abort(), or as an event action. Learn more in Run Actions from RunJS and the Abort Query action reference.
Query Level Permission
You can configure query-level permissions to allow only selected end users or user groups to run the query.
Configuring Query Level Permission
Follow these steps to configure query level permission:
Role Required: Admin or Builder
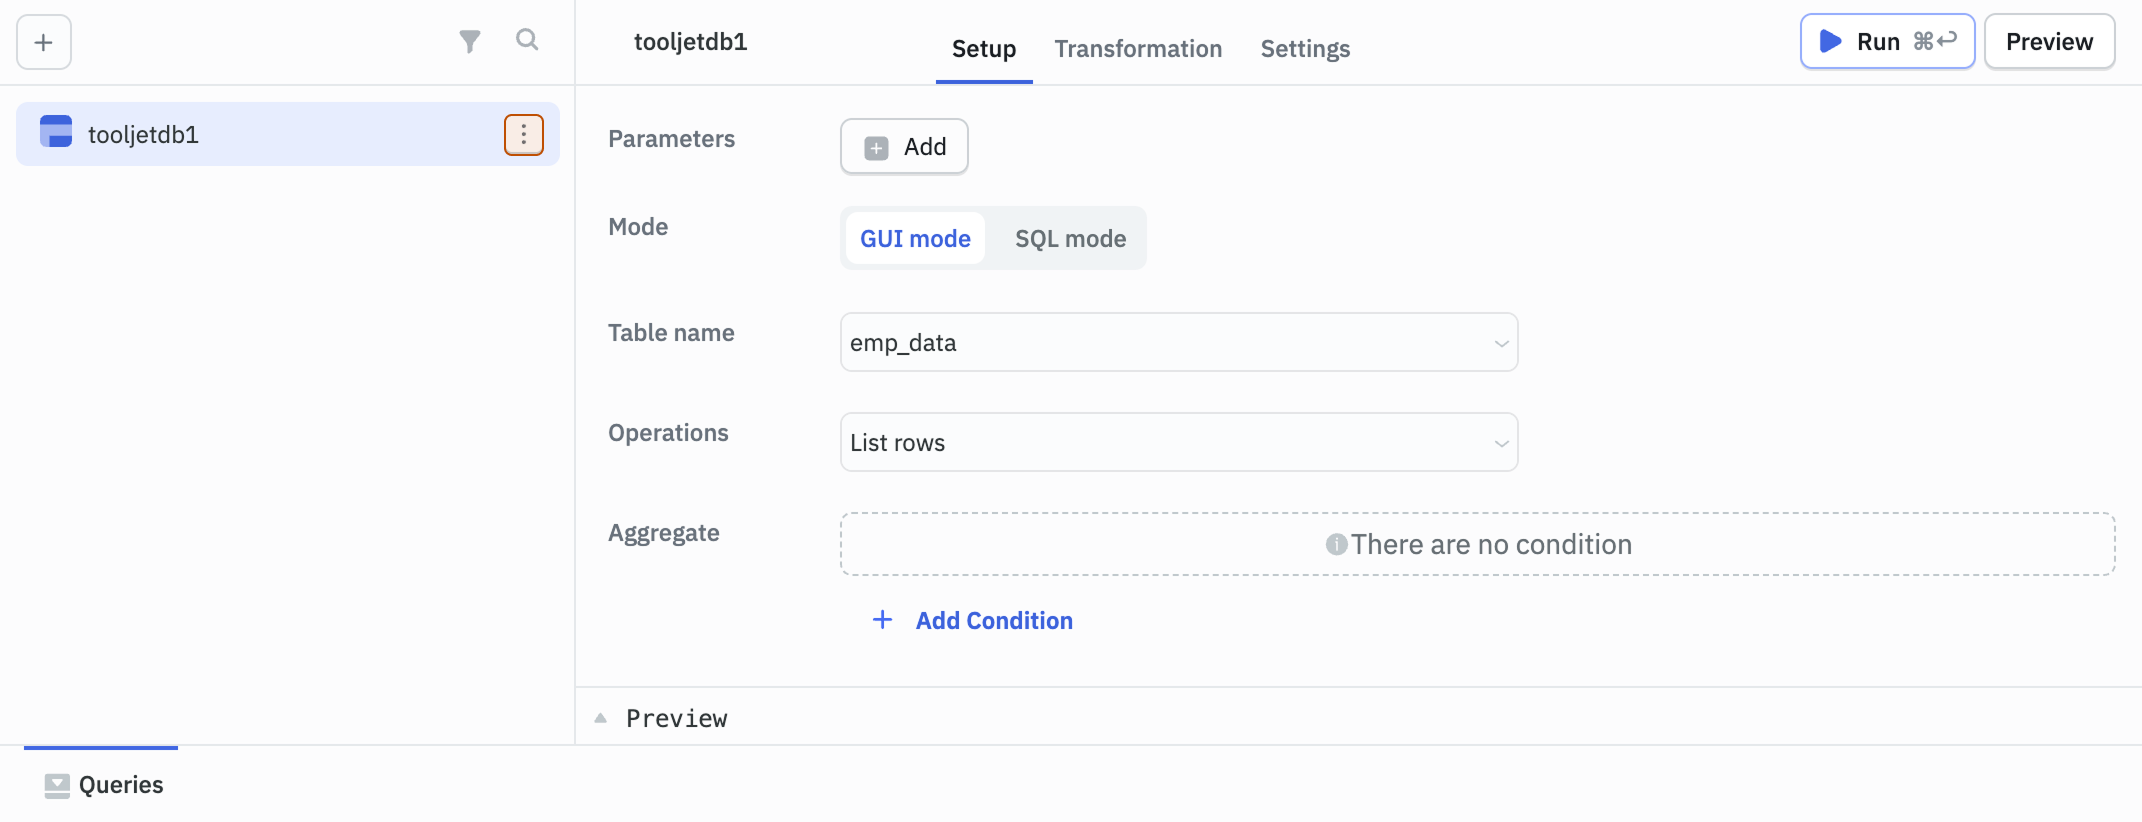
- Select the query, then click the kebab menu (three dots) next to the query name on the query panel.
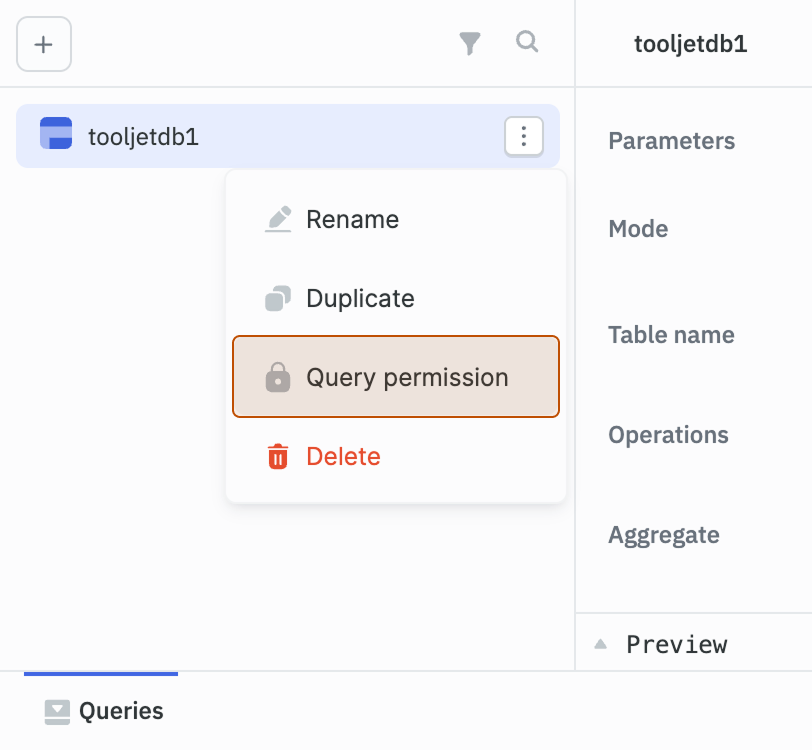
- Select Query permission.
- Select the Type:
- All users with access to the app: Grants access to all users who can access the application.
- Users: Select specific users from the dropdown. Note: These users must already have access to the application.
- User groups: Restricts access to members of selected user groups. Note: The selected user groups must have access to the application.
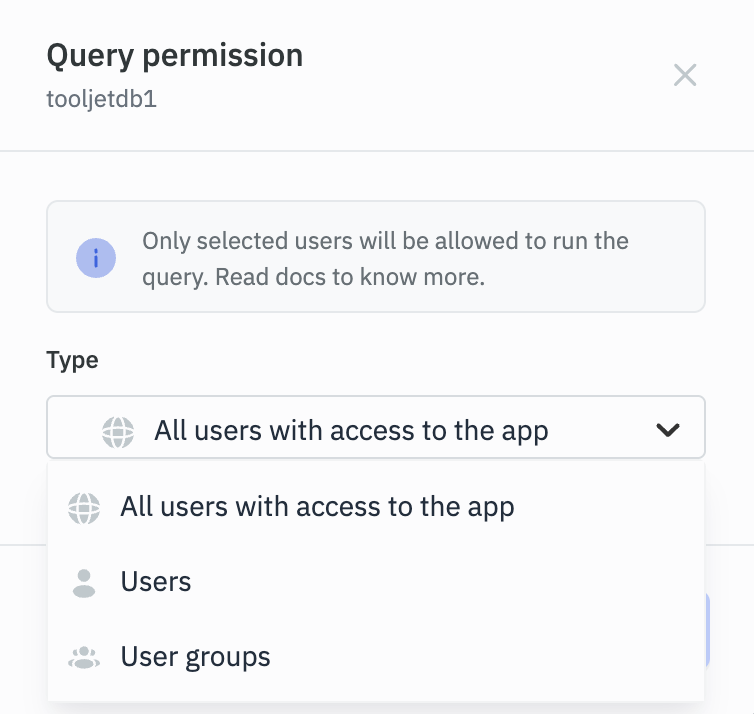
Note: If a query's permissions have been configured by an admin and the builder is not included in the allowed users or groups, the builder will not be able to run or modify the query or its permissions.
Triggers
Triggers allow you to control when and how a query executes within your application. You can find them under the Settings tab in the query editor. Following are the triggers available:
Run This Query on Application Load
You can use this when you want data to be available as soon as the page loads, like auto-fetching a user’s dashboard data or populating dropdown options without requiring user input.
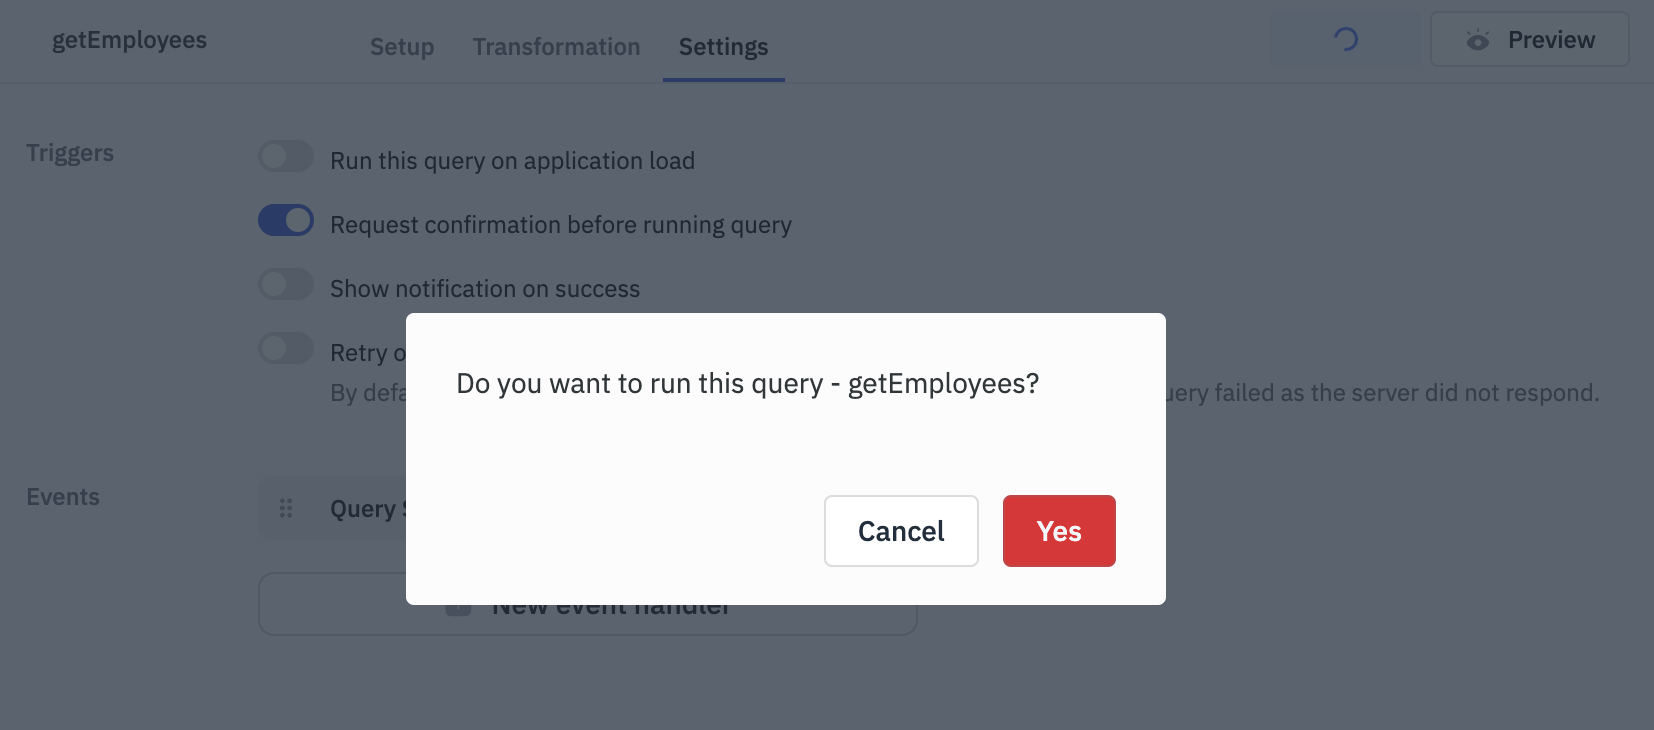
Request Confirmation Before Running Query
For actions that modify or delete data, enable this to prompt users for confirmation before the query runs. It acts as a safeguard against accidental clicks that could alter critical records.
Static toggle: Switch the toggle on to always prompt for confirmation.
fx (dynamic expression): Click the fx button next to the toggle to switch to expression mode. When fx is active, the toggle is visually disabled and a code input appears where you can enter any expression that resolves to a boolean — for example, {{components.userRole.value === 'admin'}} would only prompt admin users. Toggling fx off evaluates the current expression to a boolean so no state is lost.
Confirmation message: When confirmation is enabled (either via the static toggle or fx), a Confirmation message field appears below. Enter any text here to replace the default prompt. The field supports {{}} expressions, so messages can be dynamic — for example, Delete {{components.table1.selectedRow.name}}?. If left empty, the default message is shown: Do you want to run this query — queryName?
Show Notification on Success
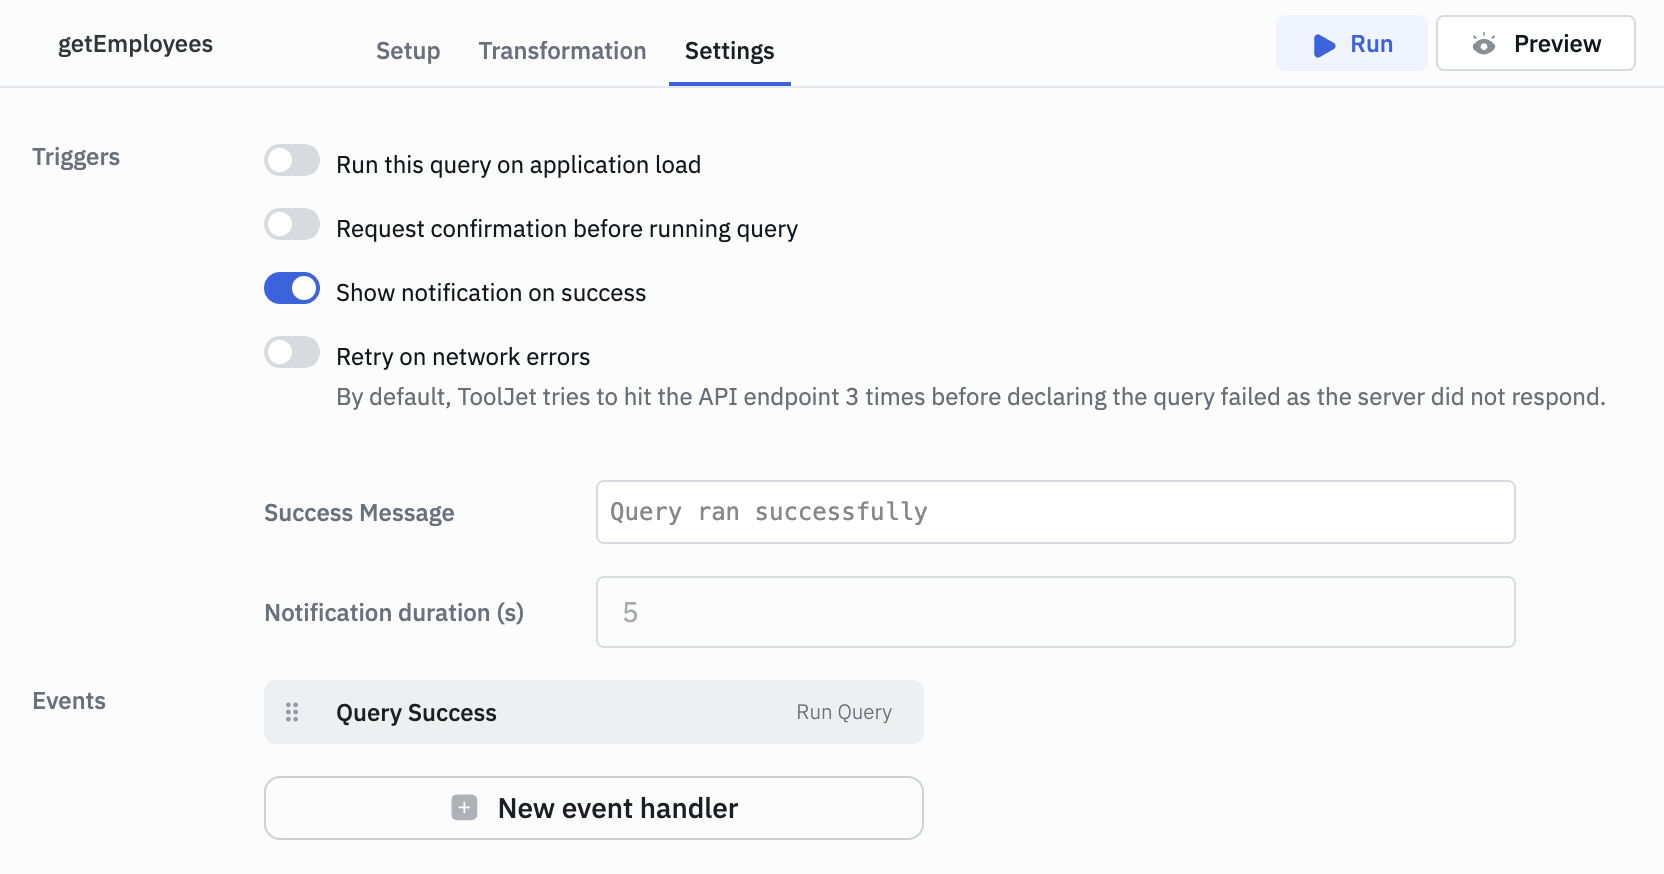
Let users know when actions are completed successfully. This improves UX by giving real-time feedback. You can customize the message and how long it stays visible.
Retry on Network Errors
This setting is only available for REST API queries. Here, you get an option to automatically retry REST API requests in case of certain network errors or specific HTTP status codes. By default, it retries a failed API request up to 3 times before marking it as failed. Refer to REST API Documentation for more details.
Disable Query
Use this to conditionally prevent a query from running. Enter a code expression in the Disable query field — when the expression resolves to true, the query is blocked from executing.
// Example: disable during an active edit session
{{components.editModeToggle.value === true}}
When a disable expression is set, the optional Disable message field becomes active. Enter a message here to be surfaced to end users when they attempt to run the disabled query. If left empty, the default message is: This query is disabled.
// Example: dynamic disable message
Editing is in progress — save your changes before running this query.
Leave the Disable query field empty to keep the query always enabled.