App Themes
ToolJet supports App Themes giving teams complete control over the look and feel of their applications. With this feature, you can define and manage multiple themes and apply them across your apps in a consistent and reusable way.
Each workspace can have one or more themes configured, and any application within that workspace can use any of the defined themes. This helps in maintaining visual consistency across applications, improves brand alignment, and enhances user experience.
Why Use App Themes?
App Themes empower your organization by:
- Brand consistency: Align your internal tools with your company’s visual identity.
- Reusability: Define once, use across multiple apps.
- Customization: Update the look of all your apps in one go by editing the theme.
- Collaboration: Teams working on different apps can maintain a unified design system.
This is especially useful for teams with apps across different environments (e.g., internal tools, client-facing apps, admin panels) where each might need a slightly different yet consistent visual identity.
How to Use App Themes
An App Theme allows you to customize the UI components of your ToolJet apps by configuring a set of visual styles such as:
- Brand Colors (Primary, Secondary, Tertiary)
- Text colors
- Border and surface styling
- System state colors (e.g., error, success)

You can configure these settings for both light and dark modes, and instantly preview changes using the built-in preview panel.

Using App Themes in ToolJet involves two simple steps — creating the theme and applying it to your applications.
1. Create an App Theme
Role Required: Admin/Builder
-
Go to your Workspace Settings.
-
Click on the Themes tab.
-
Click Create new theme.
-
Enter a name for the theme. The name must be 5 to 100 characters, must be unique in the workspace, and can't be
ToolJet. -
Configure your theme styles in each tab. Each color has a Light and a Dark value, and starts from the default ToolJet theme:
Tab Colors Brand Primary, Secondary (Optional), Tertiary (Optional) Text Primary, Placeholder Border Default, Weak System status Success, Error, Warning Surface App background, Surface 1, Surface 2, Surface 3 -
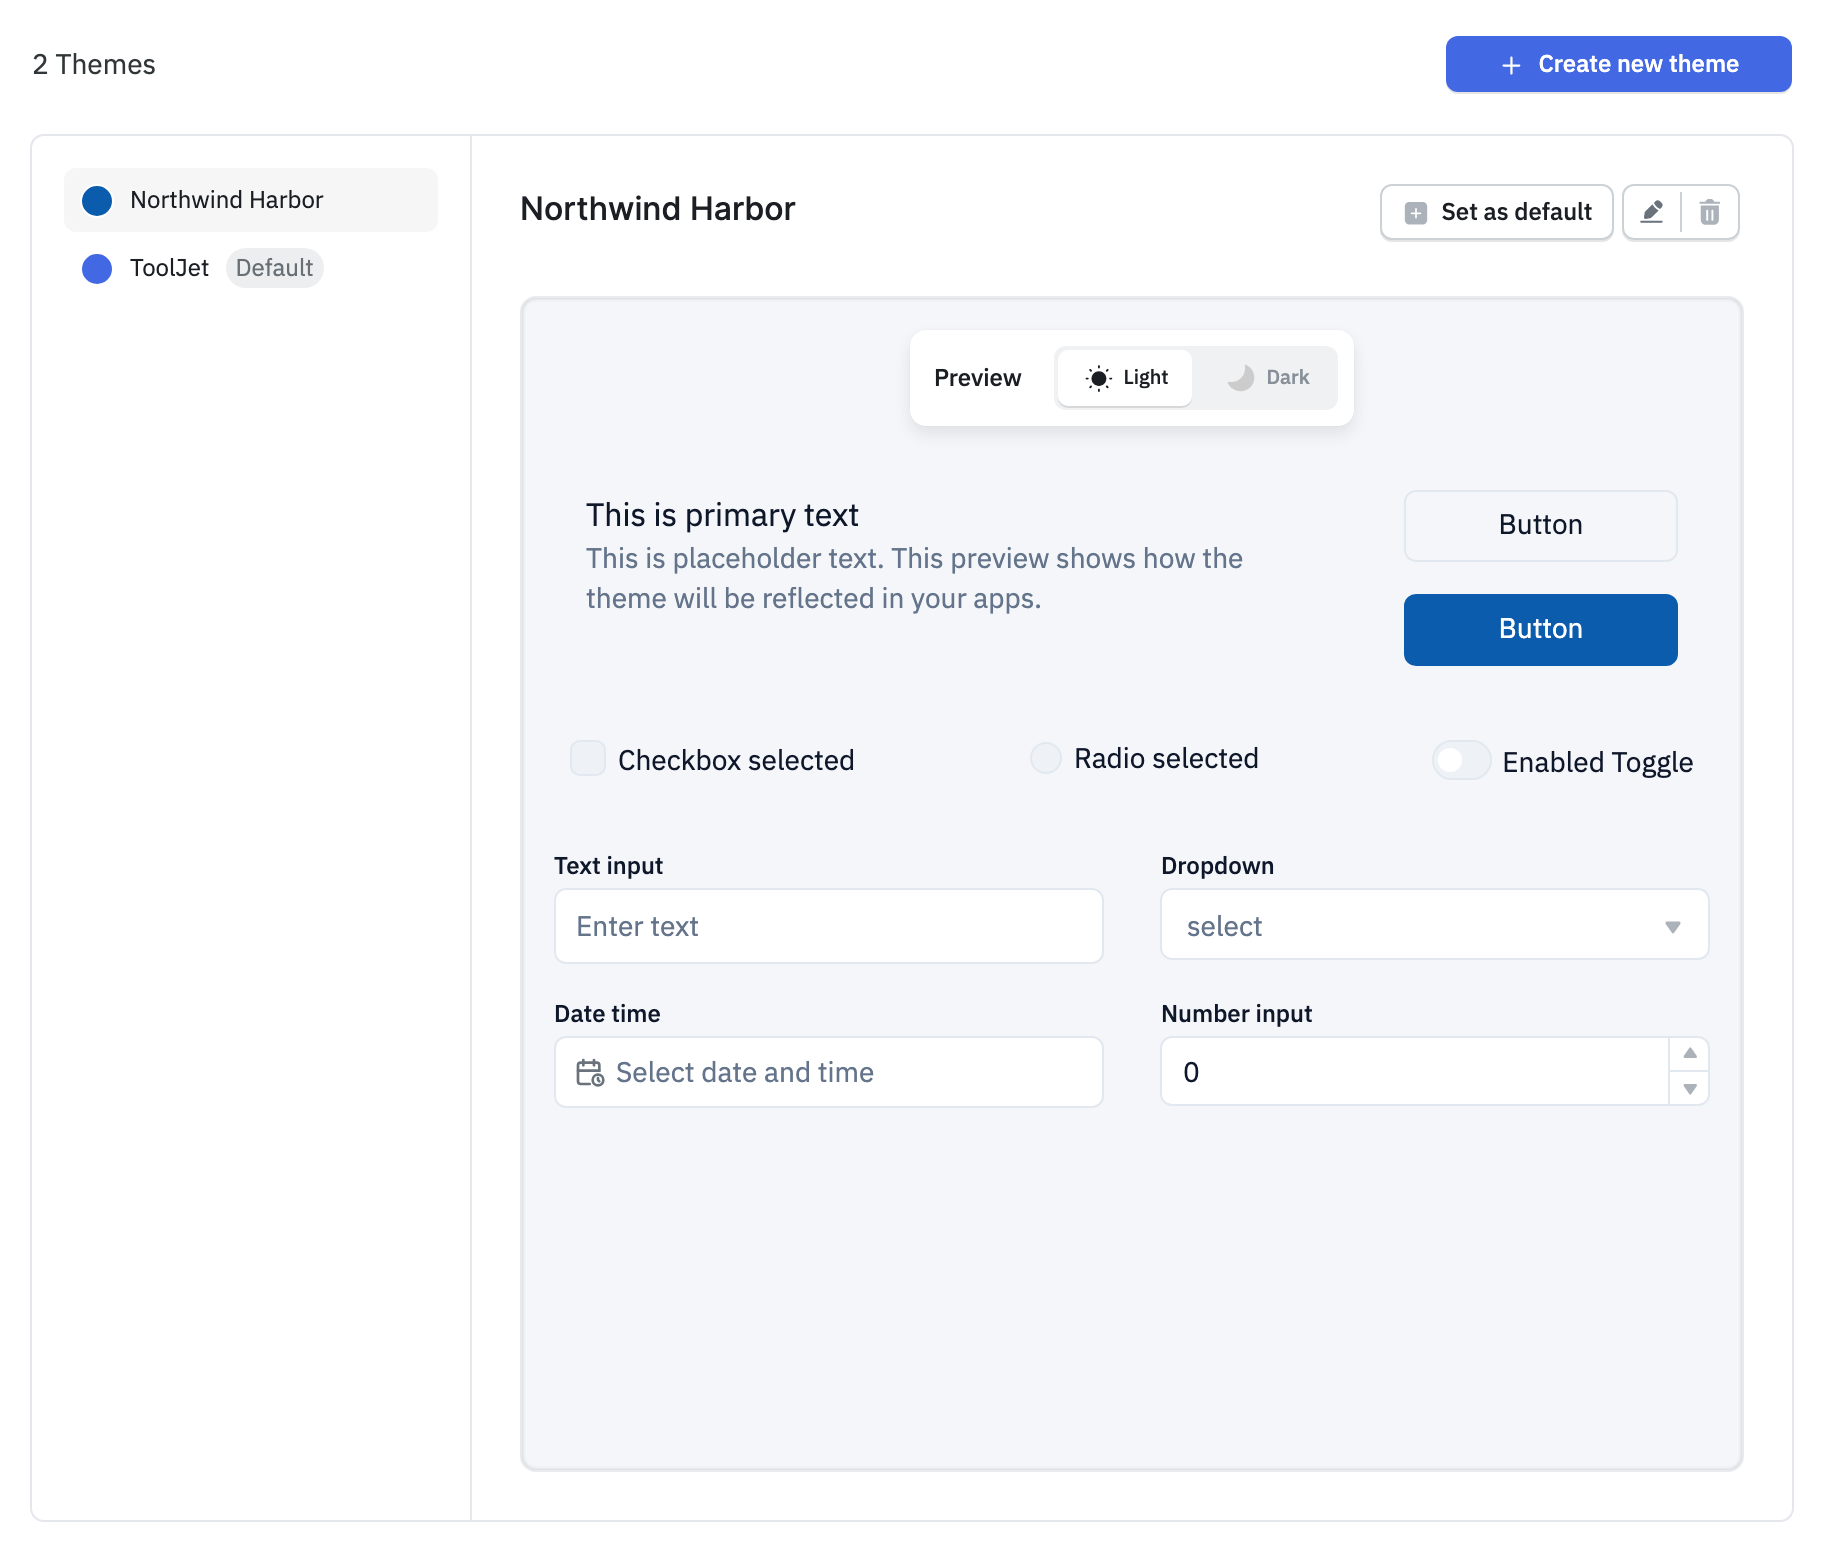
Use the Light and Dark toggle in the Preview panel to check how the theme looks in each mode.
-
Click Save once you're done, or click Discard to reset your changes.
You can create multiple themes as per your needs — for different teams, environments, or clients.
App Themes is a paid feature. On plans without it, Create new theme is disabled, existing custom themes are disabled, and apps use the built-in ToolJet theme.
Manage Themes
The Themes tab lists every theme in the workspace. The workspace default theme has a Default tag. Select a theme to preview it, then use these actions:
- Set as default: Makes the theme the default for all new applications created in the workspace.
- Edit: Click the edit icon next to Set as default to change the theme's name or colors.
- Rename Theme: Available from the theme's menu in the list.
- Delete Theme: Available from the theme's menu in the list, or from the delete icon in the theme's header.
The built-in ToolJet theme can't be edited, renamed, or deleted, but you can set it back as the default.
2. Apply the Theme to Your Application
Role Required: Admin/Builder
- Open the app where you want to use the theme.
- Click the Settings icon in the left sidebar to open Global settings.
- In the Canvas Styles section, find the Theme dropdown. It shows the currently selected theme, and the workspace's default theme is marked Default.
- Click the dropdown to view and select from all your configured themes. To create a new one, click Create a new theme at the bottom of the dropdown. This opens the workspace theme settings in a new tab.

Once selected, your app will now use the chosen theme as the base style for components.
3. Use Theme Styles in Your Components
To make your components adopt the theme styles:
- Select a component in the app canvas.
- Go to the Style tab of the component.
- Wherever color can be set (background, border, text), you’ll see a Theme option next to the color picker. Once selected you'll see the list of theme colors such as Brand/Primary, Brand/Secondary, Text/Primary, etc.
These options map directly to what you configured during theme setup.

Once components are styled using theme options, changing the theme from Global Settings will instantly update all those components, making your app visually consistent and easy to update.
When you create an app from a template, ToolJet adds the template's theme to your workspace and applies it to the app. Template themes are named after their color palette, for example Slate and silver. If your workspace already has a theme with that name, the app uses the existing theme. On plans without App Themes, no theme is added. The app keeps the ToolJet theme, and the template's light-mode colors are applied to its components directly.
Scenarios
Here are some scenarios where app themes shine:
- Brand-specific apps: Create different themes for different brands/clients your company serves.
- Dark & light mode toggle: Provide a seamless visual switch for end-users between light and dark modes.
- Multi-team organizations: Let each team within your org create and maintain their own theme without affecting others.
Example
Here’s an example showing how an application interface looks before and after applying an app theme.
Before (Default Theme)
This is the default ToolJet UI without any app theme applied. It uses the standard branding and neutral colors.

After (App Theme Applied)

This is the same application after applying the "Coral" app theme. Notice the button color, primary accents, and overall visual alignment now reflect the chosen palette.
By simply configuring a theme once at the workspace level, you can instantly apply a fresh look across all apps, improving usability, clarity, and brand identity.