Delete Multiple Rows in a Table
This guide explains how to delete multiple rows from a table, assuming you've already connected to a data source. We'll use PostgreSQL for this example, but you can adjust the queries based on the SQL database that you are using.
1. Create a Query to Fetch the Data from the Database
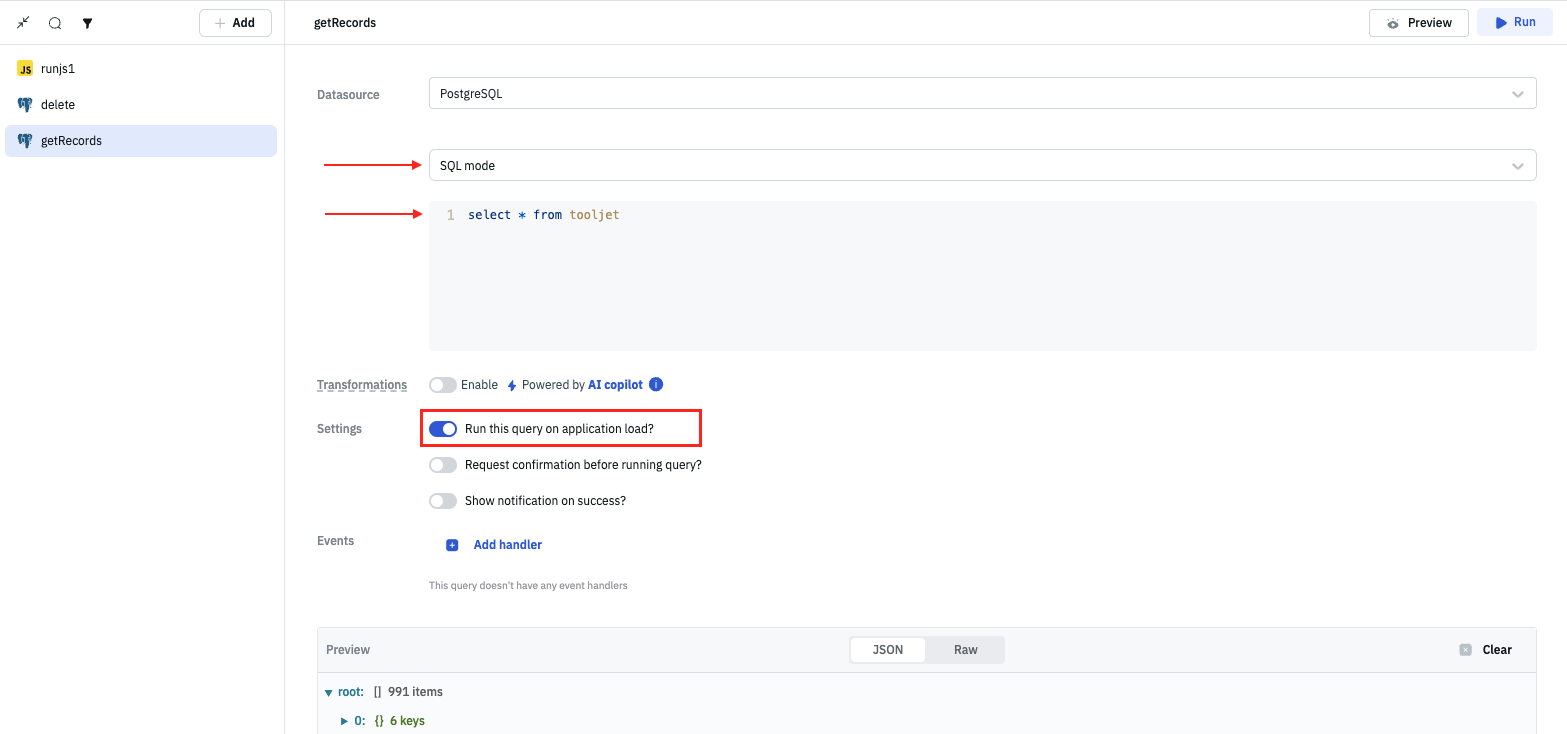
- Create a new query and name it getRecords.
- Select SQL mode and enter the following query:
SELECT * FROM tooljet // replace tooljet with your table name
- Enable the
Run the query on application load?option to execute the query automatically when the application starts.
2. Populating the Table with Data
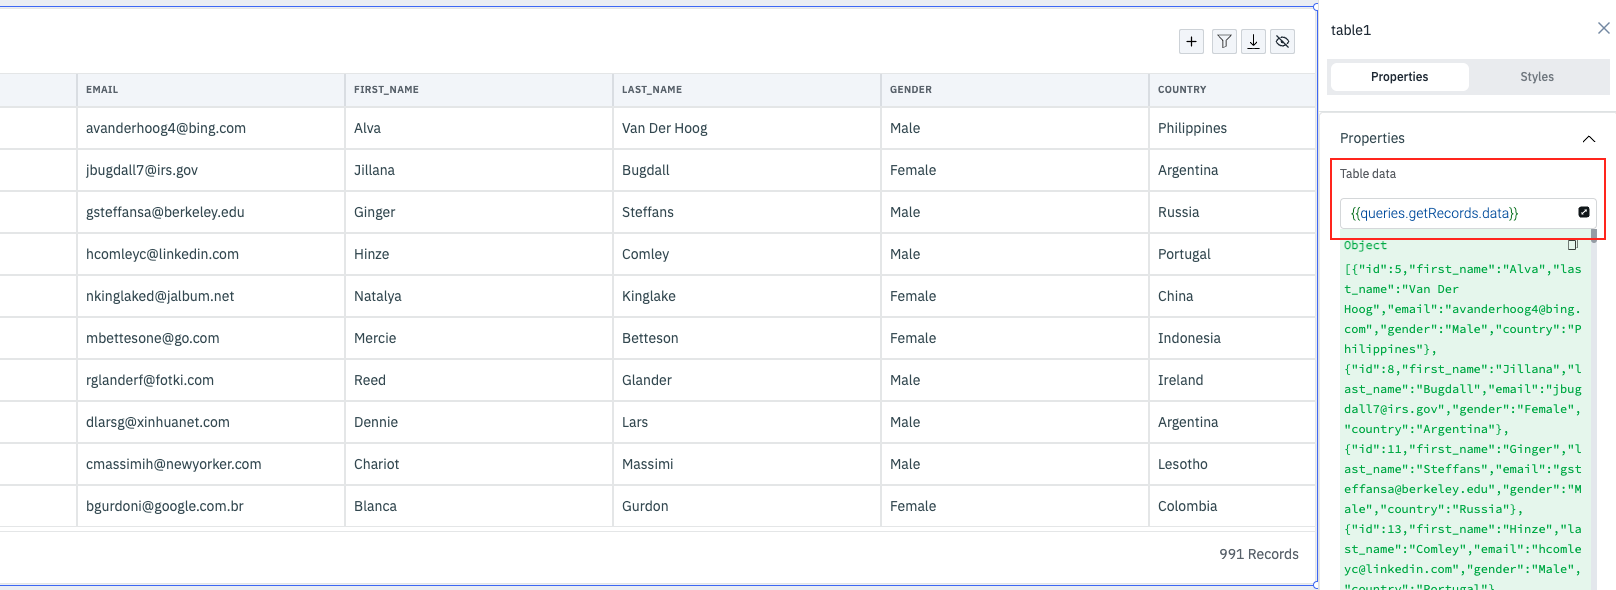
- Drag and drop a Table component on the canvas.
- In Table properties, go to the
Dataproperty and set the value to{{queries.getRecords.data}}. - Now if you run the getRecords query, the returned data will be loaded in the Table component.
3. Enable Bulk Row Selection on Table
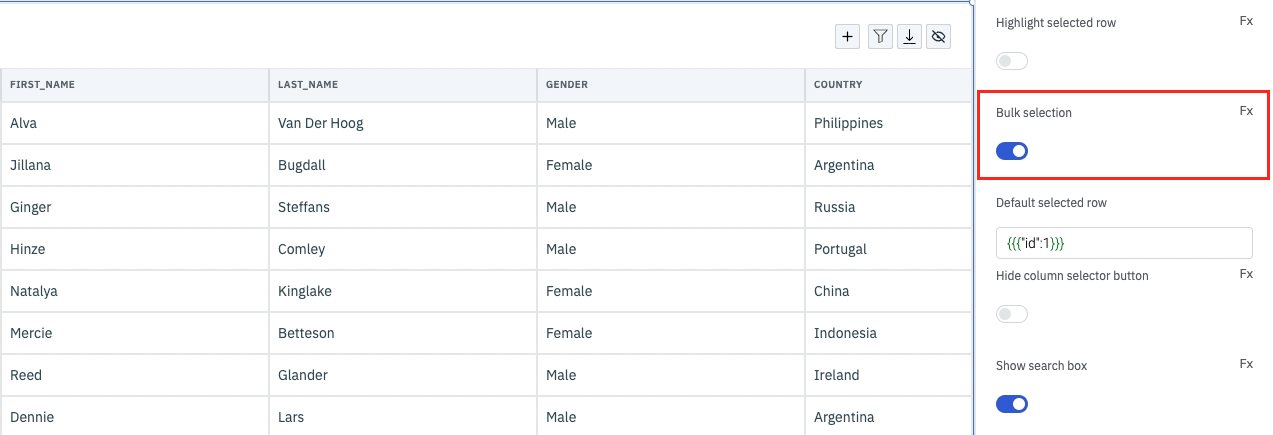
- Go to the Table properties and enable the
Bulk selectionoption. - Enabling this option will allow you to select multiple rows on the table.
4. Create a Custom JavaScript Query
- Create a new Run Javascript code query. It will be named runjs1 by default.
- Enter the following code:
const uniqueIdentifier = "id";

const idsToDelete = Object.values(components.table1.selectedRows).map(dataUpdate => dataUpdate[uniqueIdentifier]);

const idsString = idsToDelete.map(id => `'${id}'`).join(', ');

const SQL = `DELETE FROM tooljet WHERE ${uniqueIdentifier} IN (${idsString});`;

return SQL;
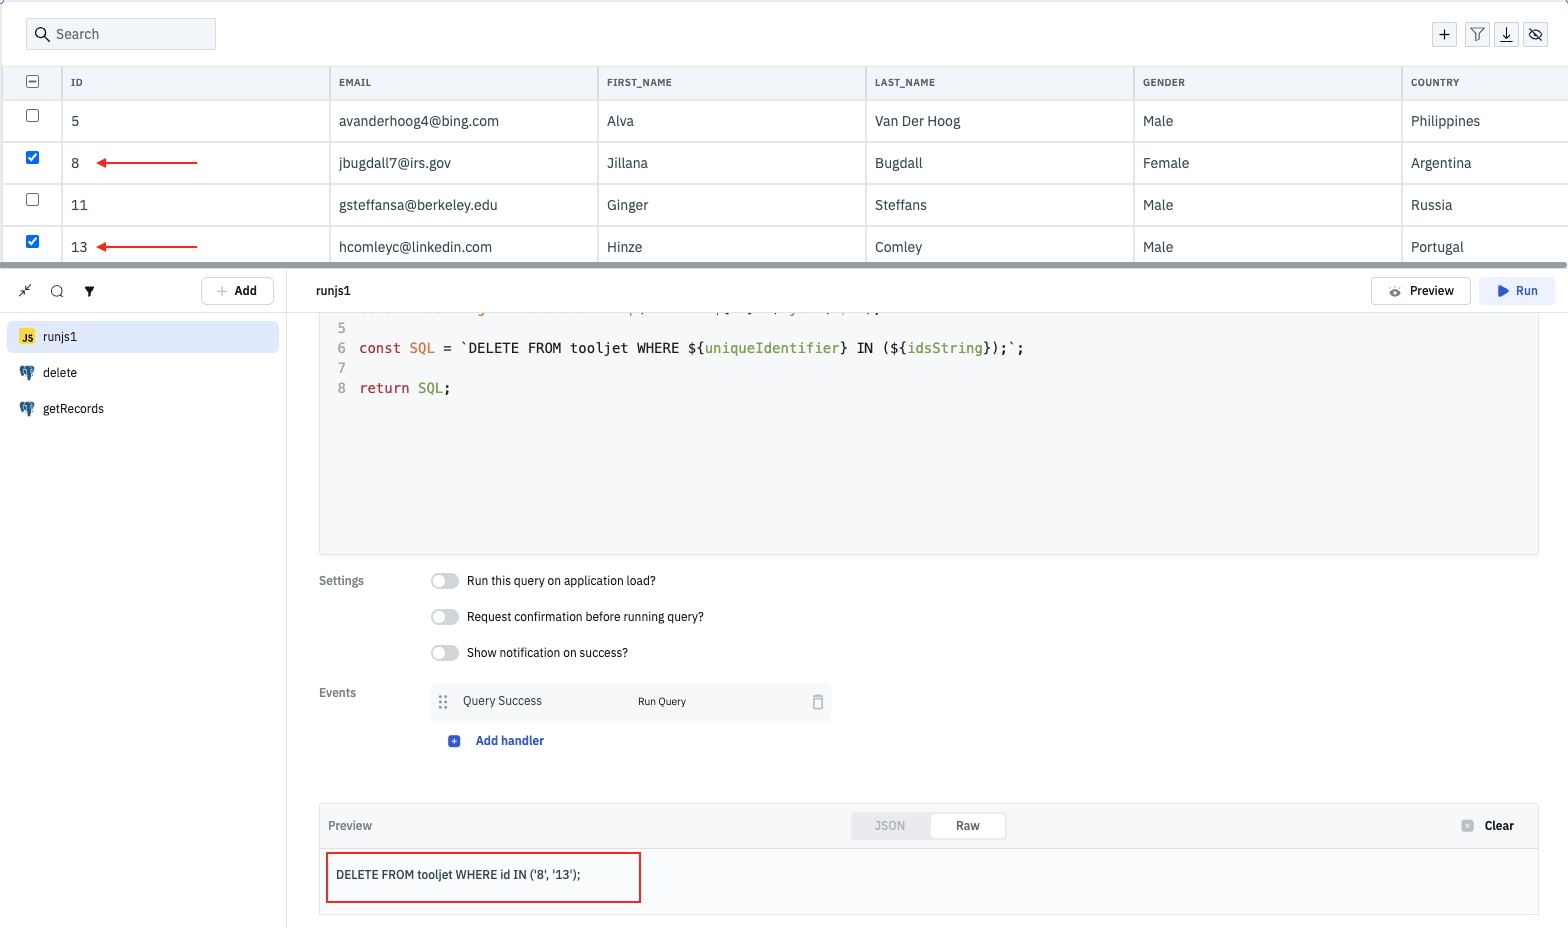
The above code generates a SQL query that deletes rows from the database table where the id field matches the selected IDs in ToolJet's Table component.
- Click on the Preview button to see the SQL statement generated by the query.
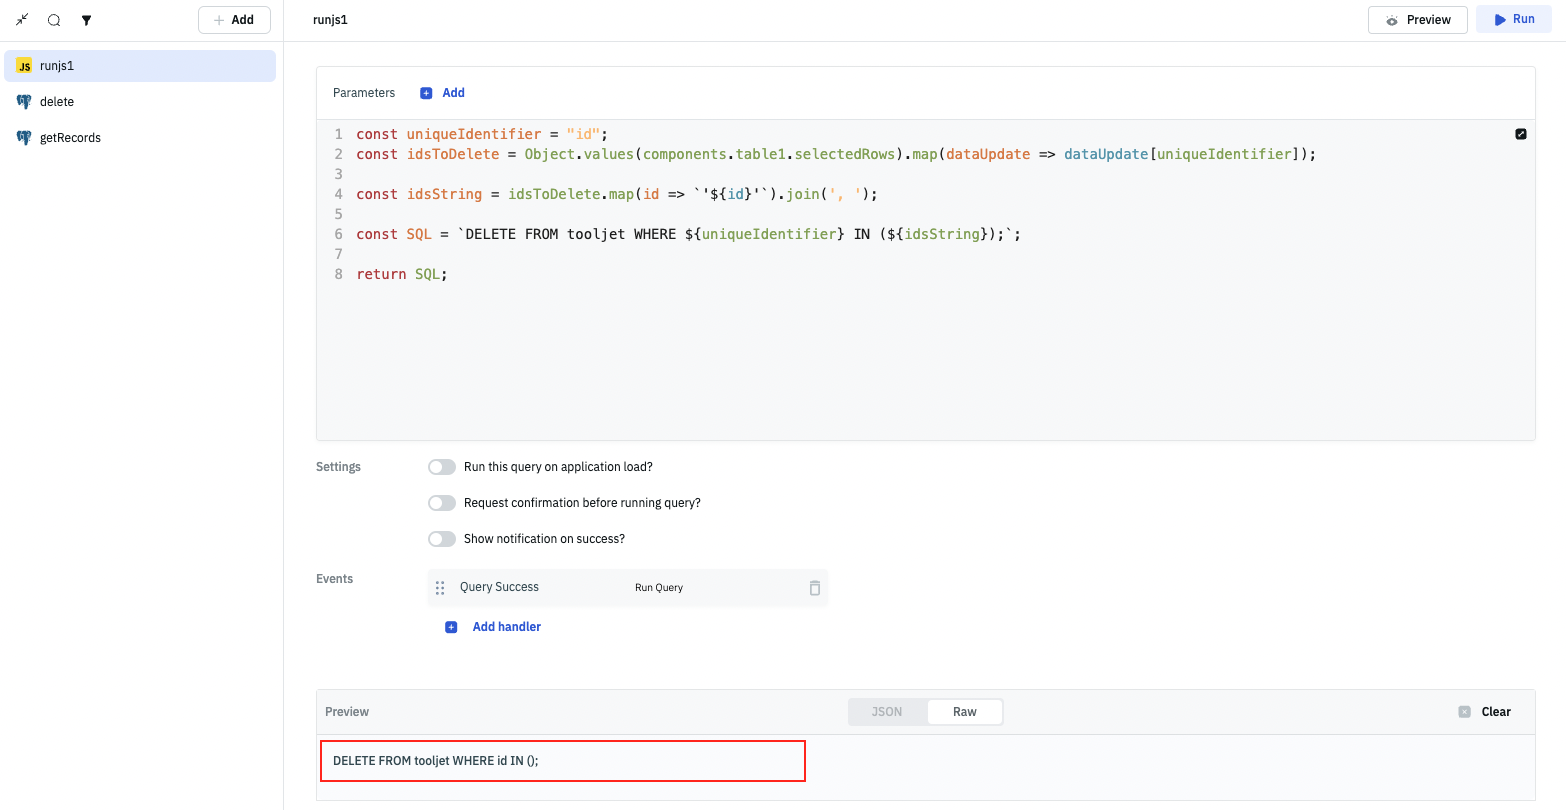
If you're using a different column as the unique identifier, feel free to update the code accordingly. You can also update the Table name if you have renamed it, the default name is table1.
- Select a few rows on the Table component and then Preview the SQL query generated by the runjs1 query.
5. Create a New Query to Delete the Rows
- Create a new query, name it
delete, and select SQL mode. - Enter the following code:
{{queries.runjs1.data}}
In this query, we are dynamically loading the SQL statement generated by the JavaScript query.

6. Add a Button to Delete the Selected Rows
- Drag and drop a Button component on the canvas.
- Edit its properties and set the
Button textproperty to "Delete selected". - Add a new Event to the button.
- Select On click as the Event, Run Query as the Action, and runjs1 as the Query.

- Optionally, we can add a loading state to the Button whenever the delete or getRecords query is running:
{{queries.delete.isLoading || queries.getRecords.isLoading}}
- Add a new Event to the runjs1 query.
- Select Query Success as the Event, Run Query as the Action and delete as the Query.

Now, whenever you click on the Button component, the runjs1 query will run and generate a delete SQL statement with selected rows on the table. Once the runjs1 query executes, the delete query will execute and delete the rows from the database.
- Add a new Event to the delete query.
- Select Query Success as the Event, Run Query as the Action and getRecords as the Query.

By implementing this, we are ensuring that every time rows are deleted, the Table component will automatically refresh to display the most recent data fetched from the database.