Dashboard
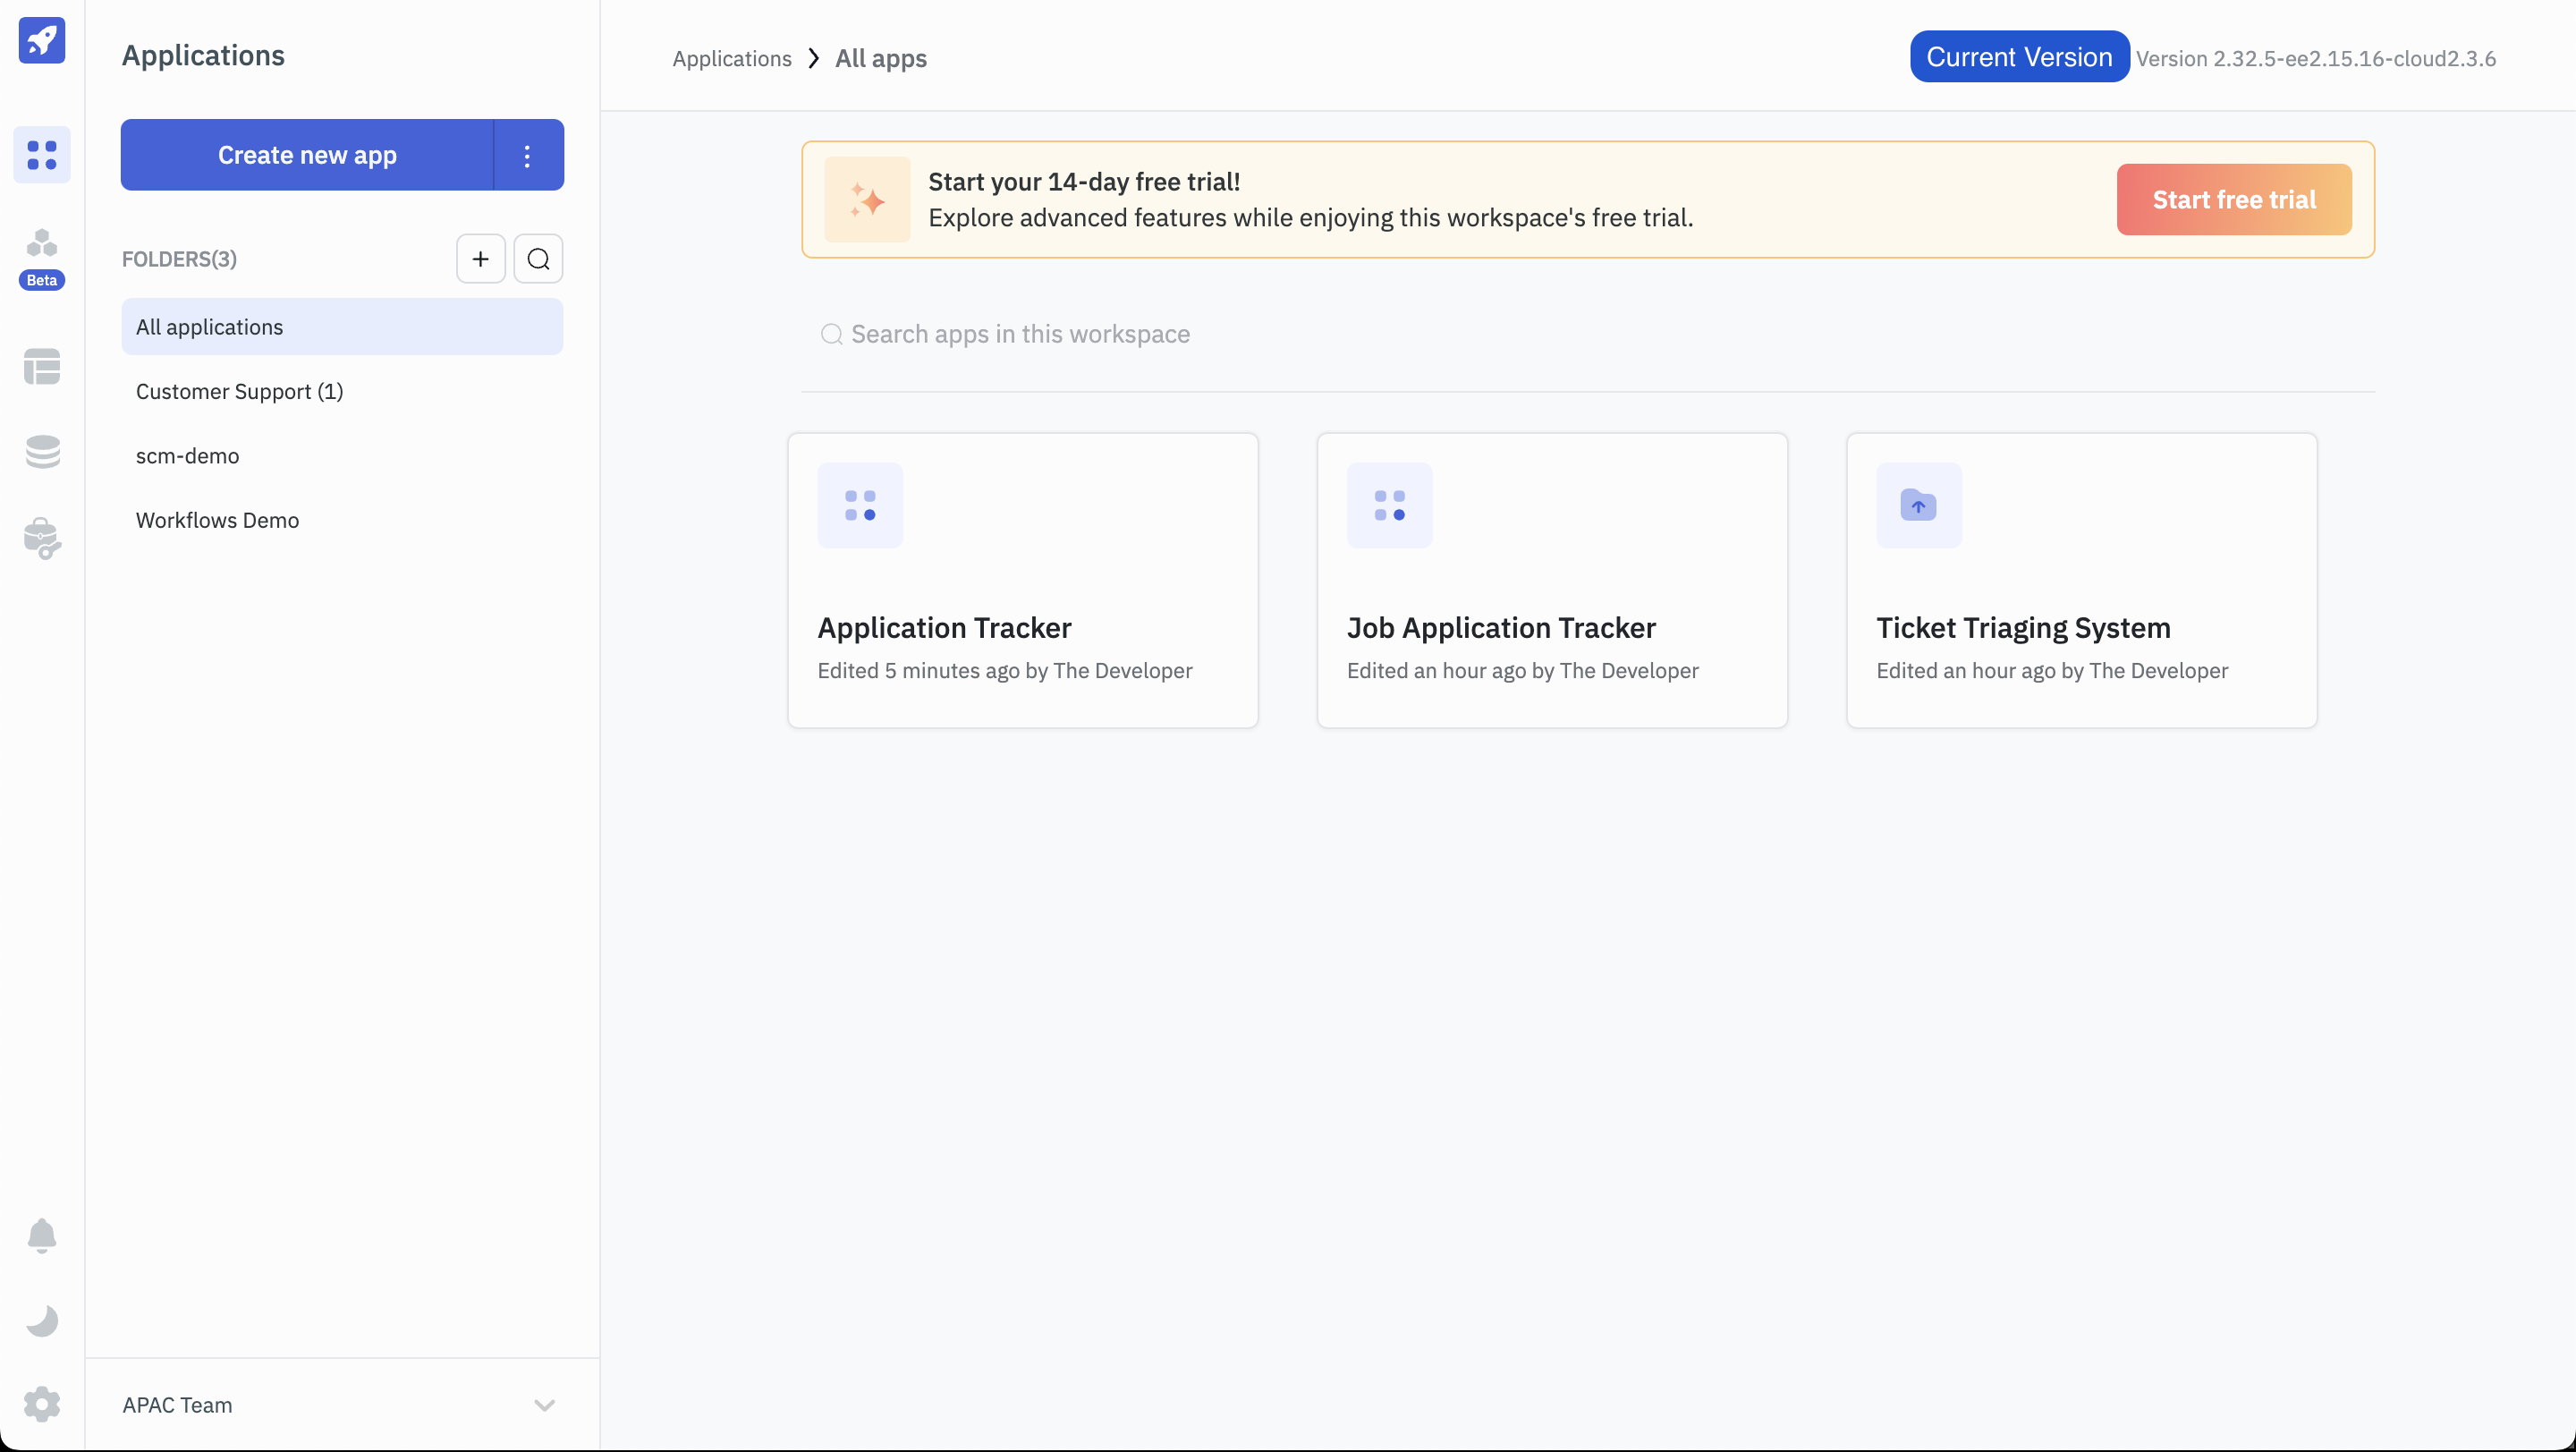
The ToolJet Dashboard is the initial landing page that you see upon logging into your workspace. This interface serves as a central hub where you can access a variety of features. Primarily, it displays all the applications you've created within ToolJet. Moreover, you have the capability to create new workspaces and applications directly from this dashboard. Additionally, it provides an option to create folders for categorizing and managing applications for easier organization, access control, and workflow management.
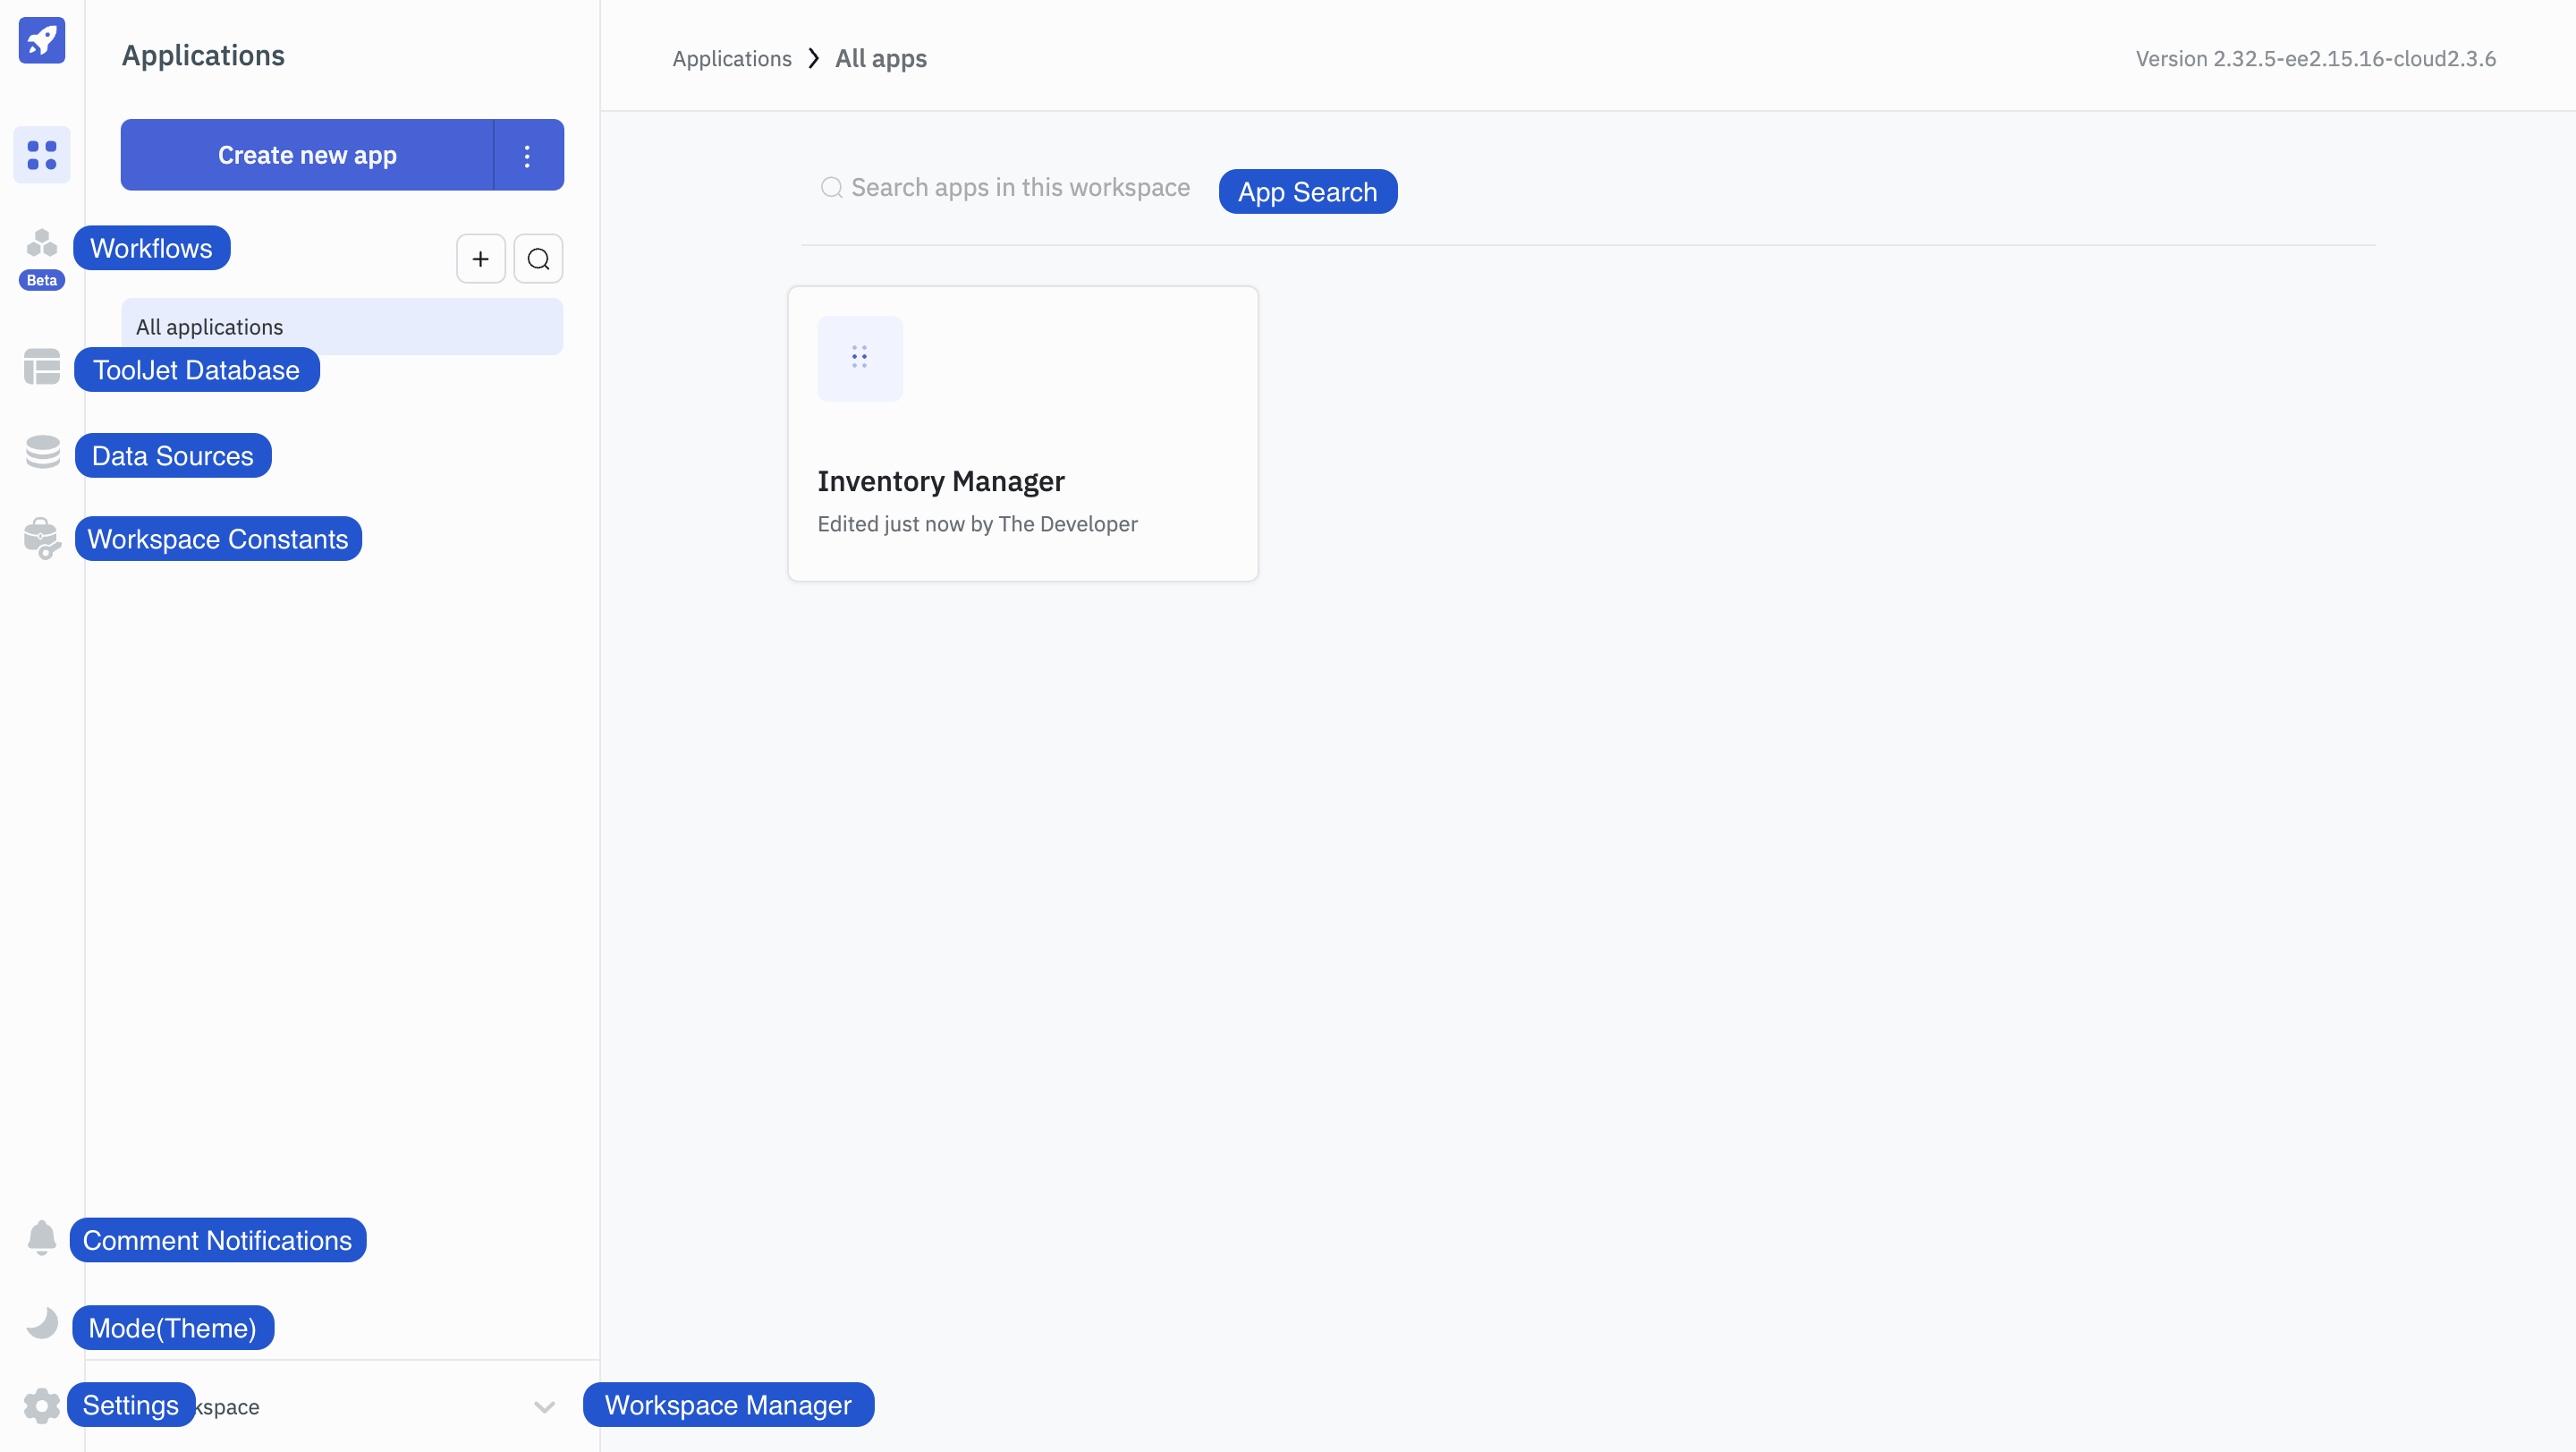
Furthermore, the dashboard serves as a gateway to various essential sections, such as Workflows, ToolJet Database, Data Sources, Marketplace, Workspace Settings, Settings, and Audit logs. You can effortlessly navigate to these sections directly from the dashboard.
Workspace Manager
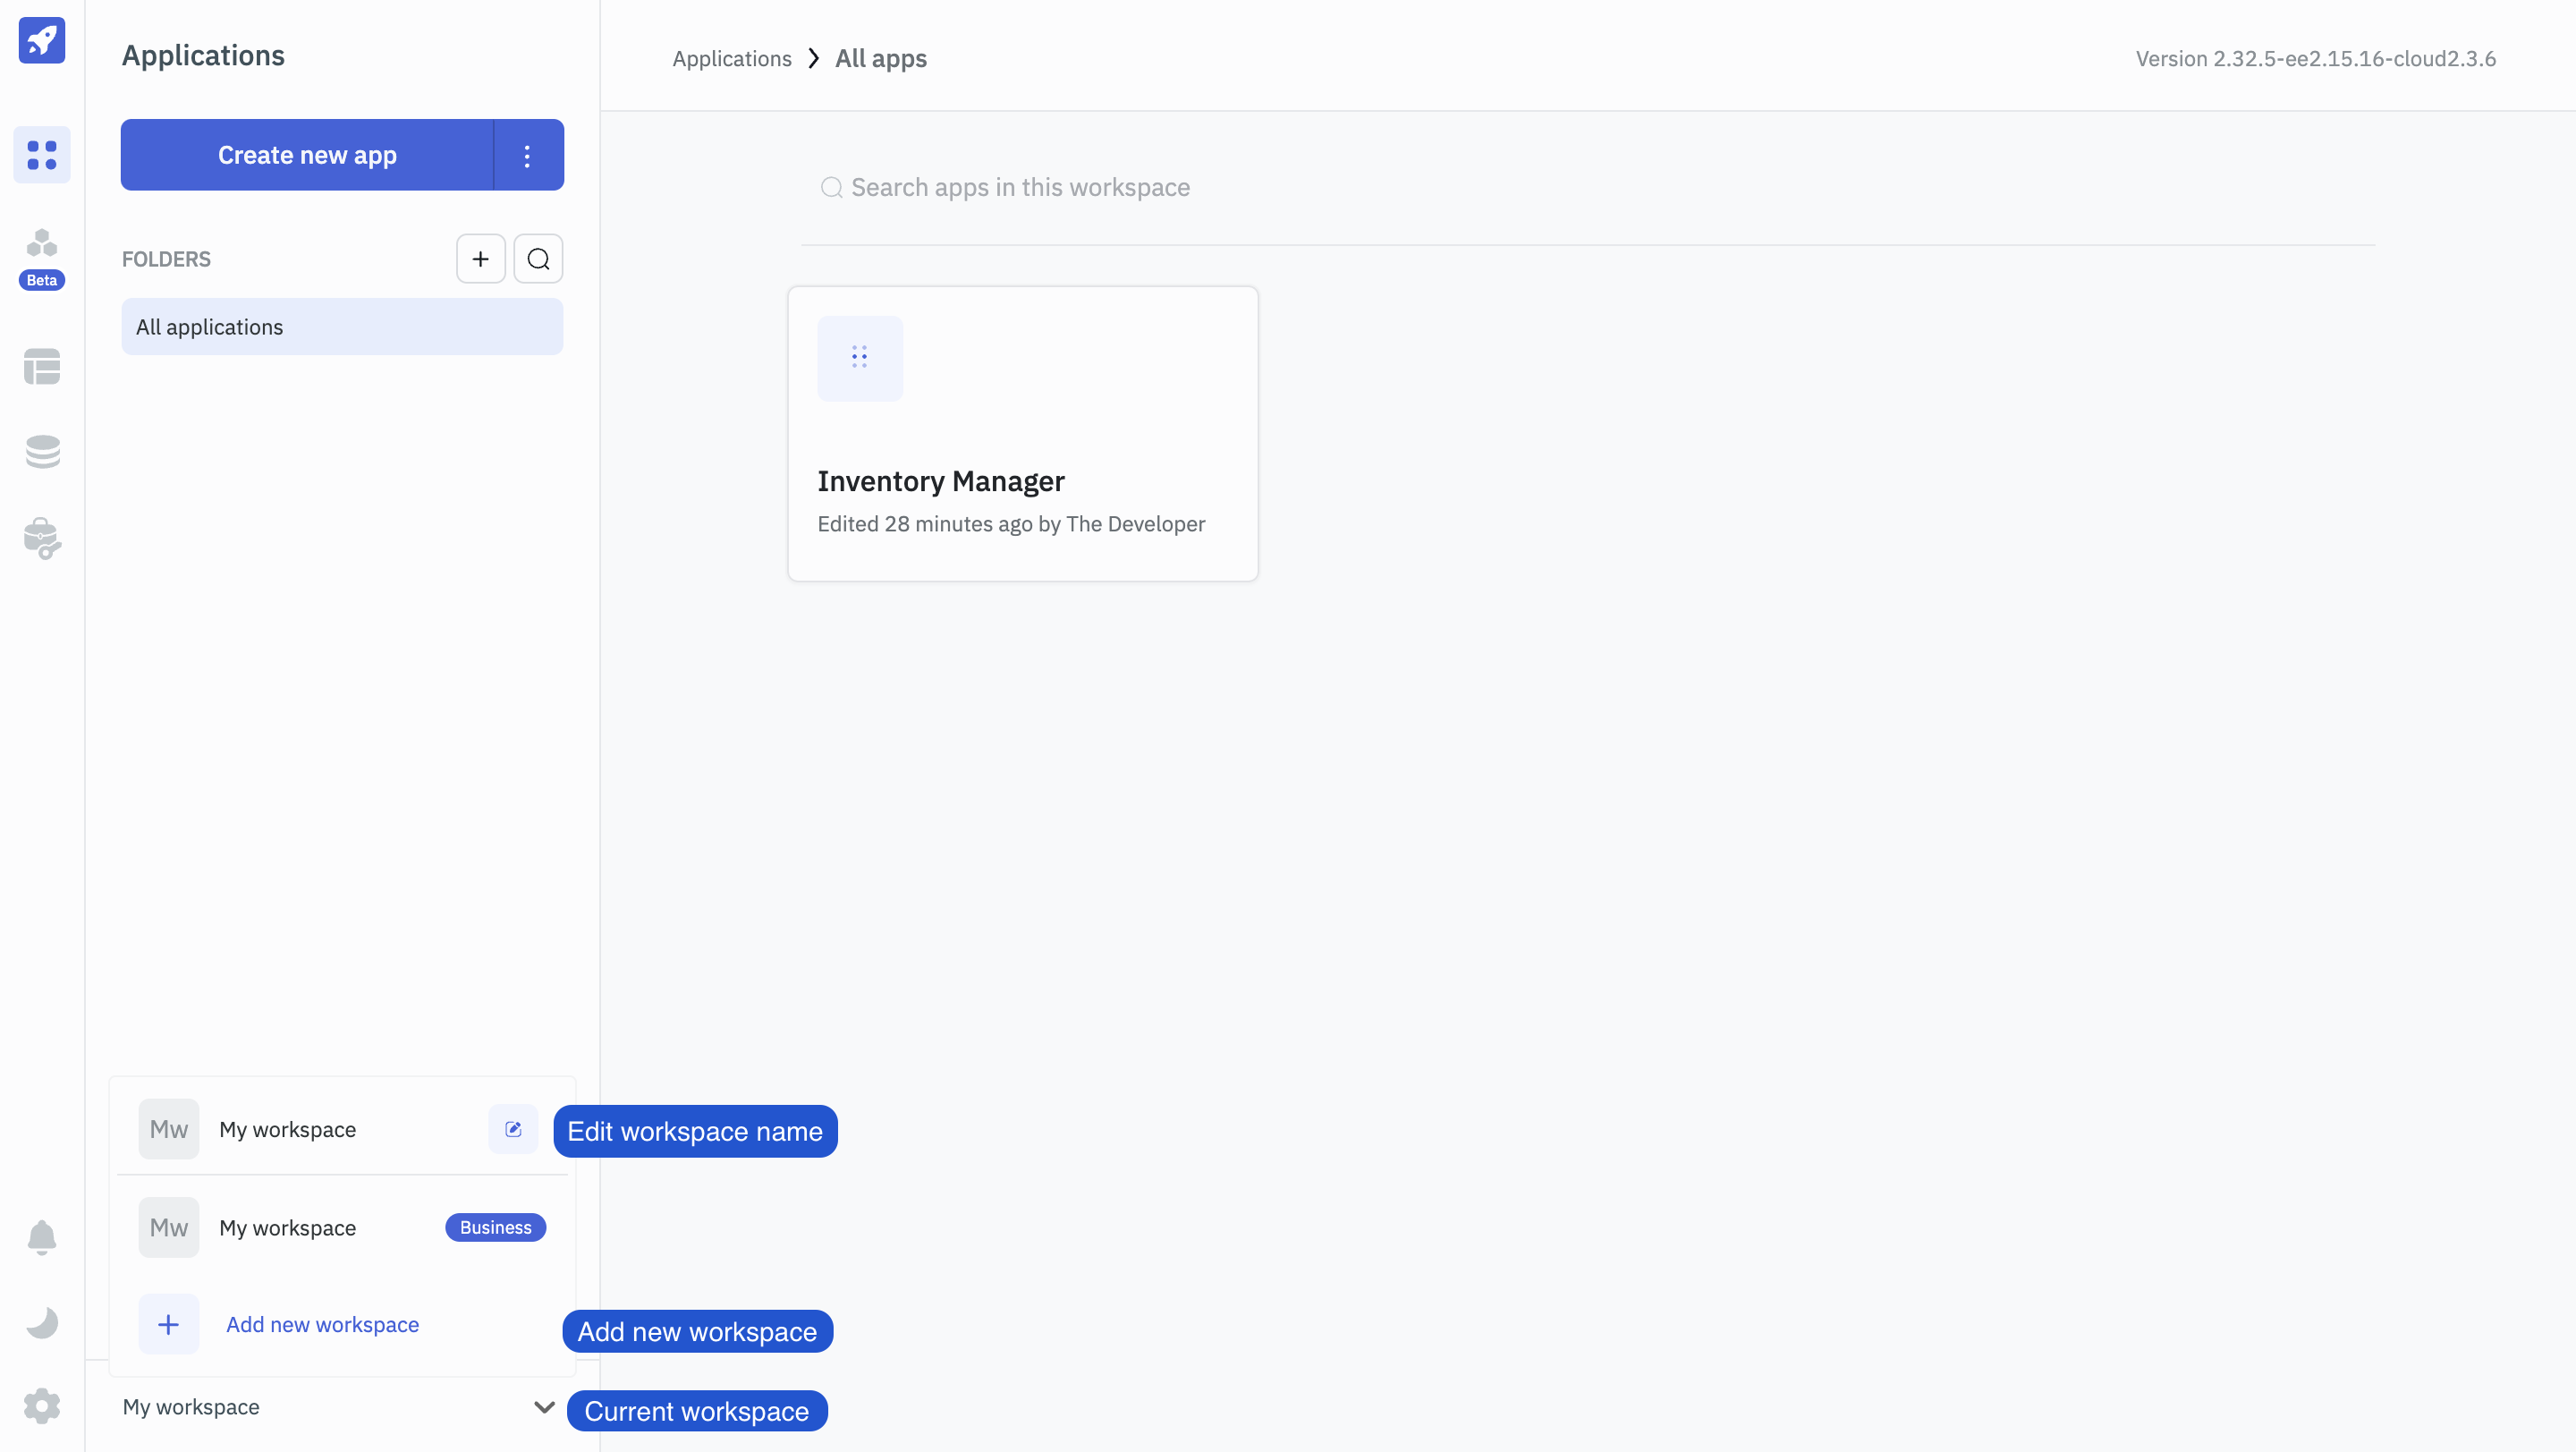
The workspace manager is located on the bottom left corner of the dashboard. Clicking on the workspace manager will open a dropdown menu listing all the workspaces you belong to. You can switch between workspaces by clicking on the workspace name from the dropdown menu.
Add New Workspace
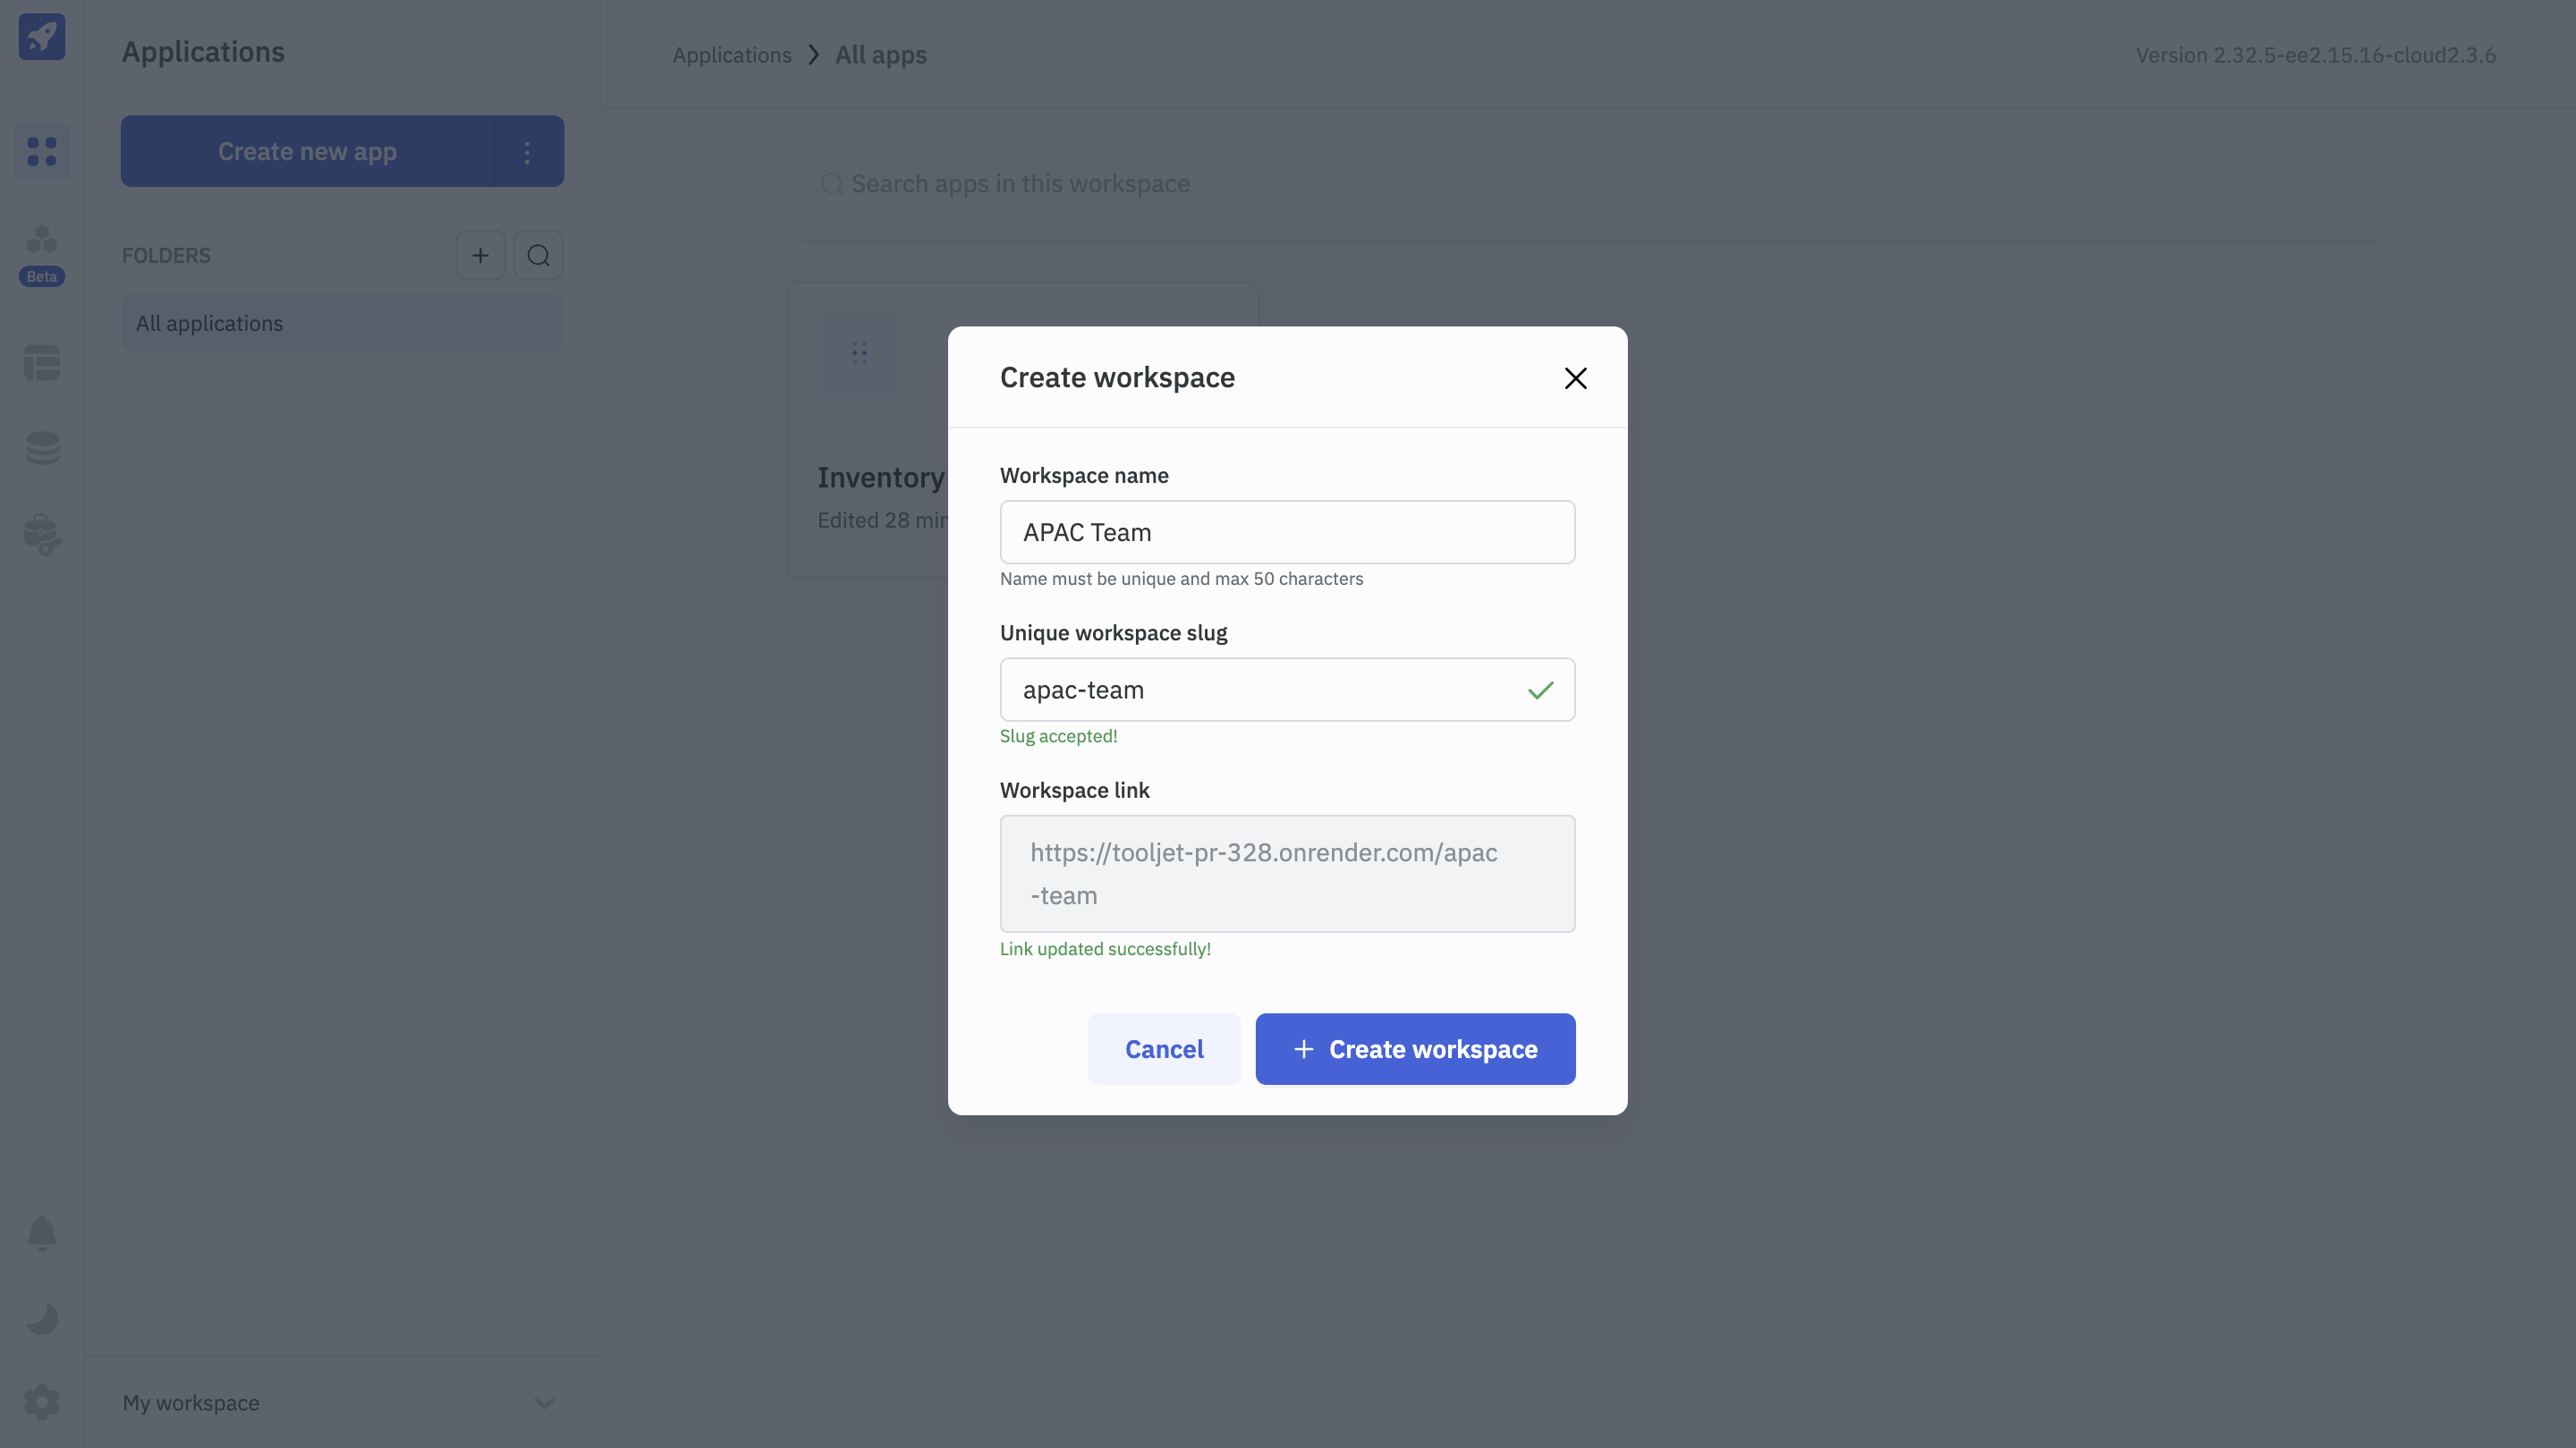
On clicking the Add new workspace button, a modal will open where you can enter the name of the workspace, enter the unique workspace slug, and can see the preview of the workspace URL. Click on the + Create Workspace button to create a new workspace.
Previously, the workspace slug was an automatically generated workspace ID, like this: https://tooljet.com/262750db-b2b8-4abb-9404-8995c2ecb2a0. Now, you can set a custom, unique slug for your workspace which will generate a more accessible or readable URL such as https://tooljet.com/apac-team).
Conditions for workspace slug
- The workspace slug should be unique.
- The workspace slug should not contain any special characters except
-. - The workspace slug should not contain any spaces.
- The workspace slug should not contain any capital letters.
- The workspace slug should not be empty.
Edit Workspace
Similar to the Add new workspace button, clicking on the Edit workspace button will open a modal where you can edit the name of the workspace and the workspace slug. Click on the Save button to update the changes.
Create a New App
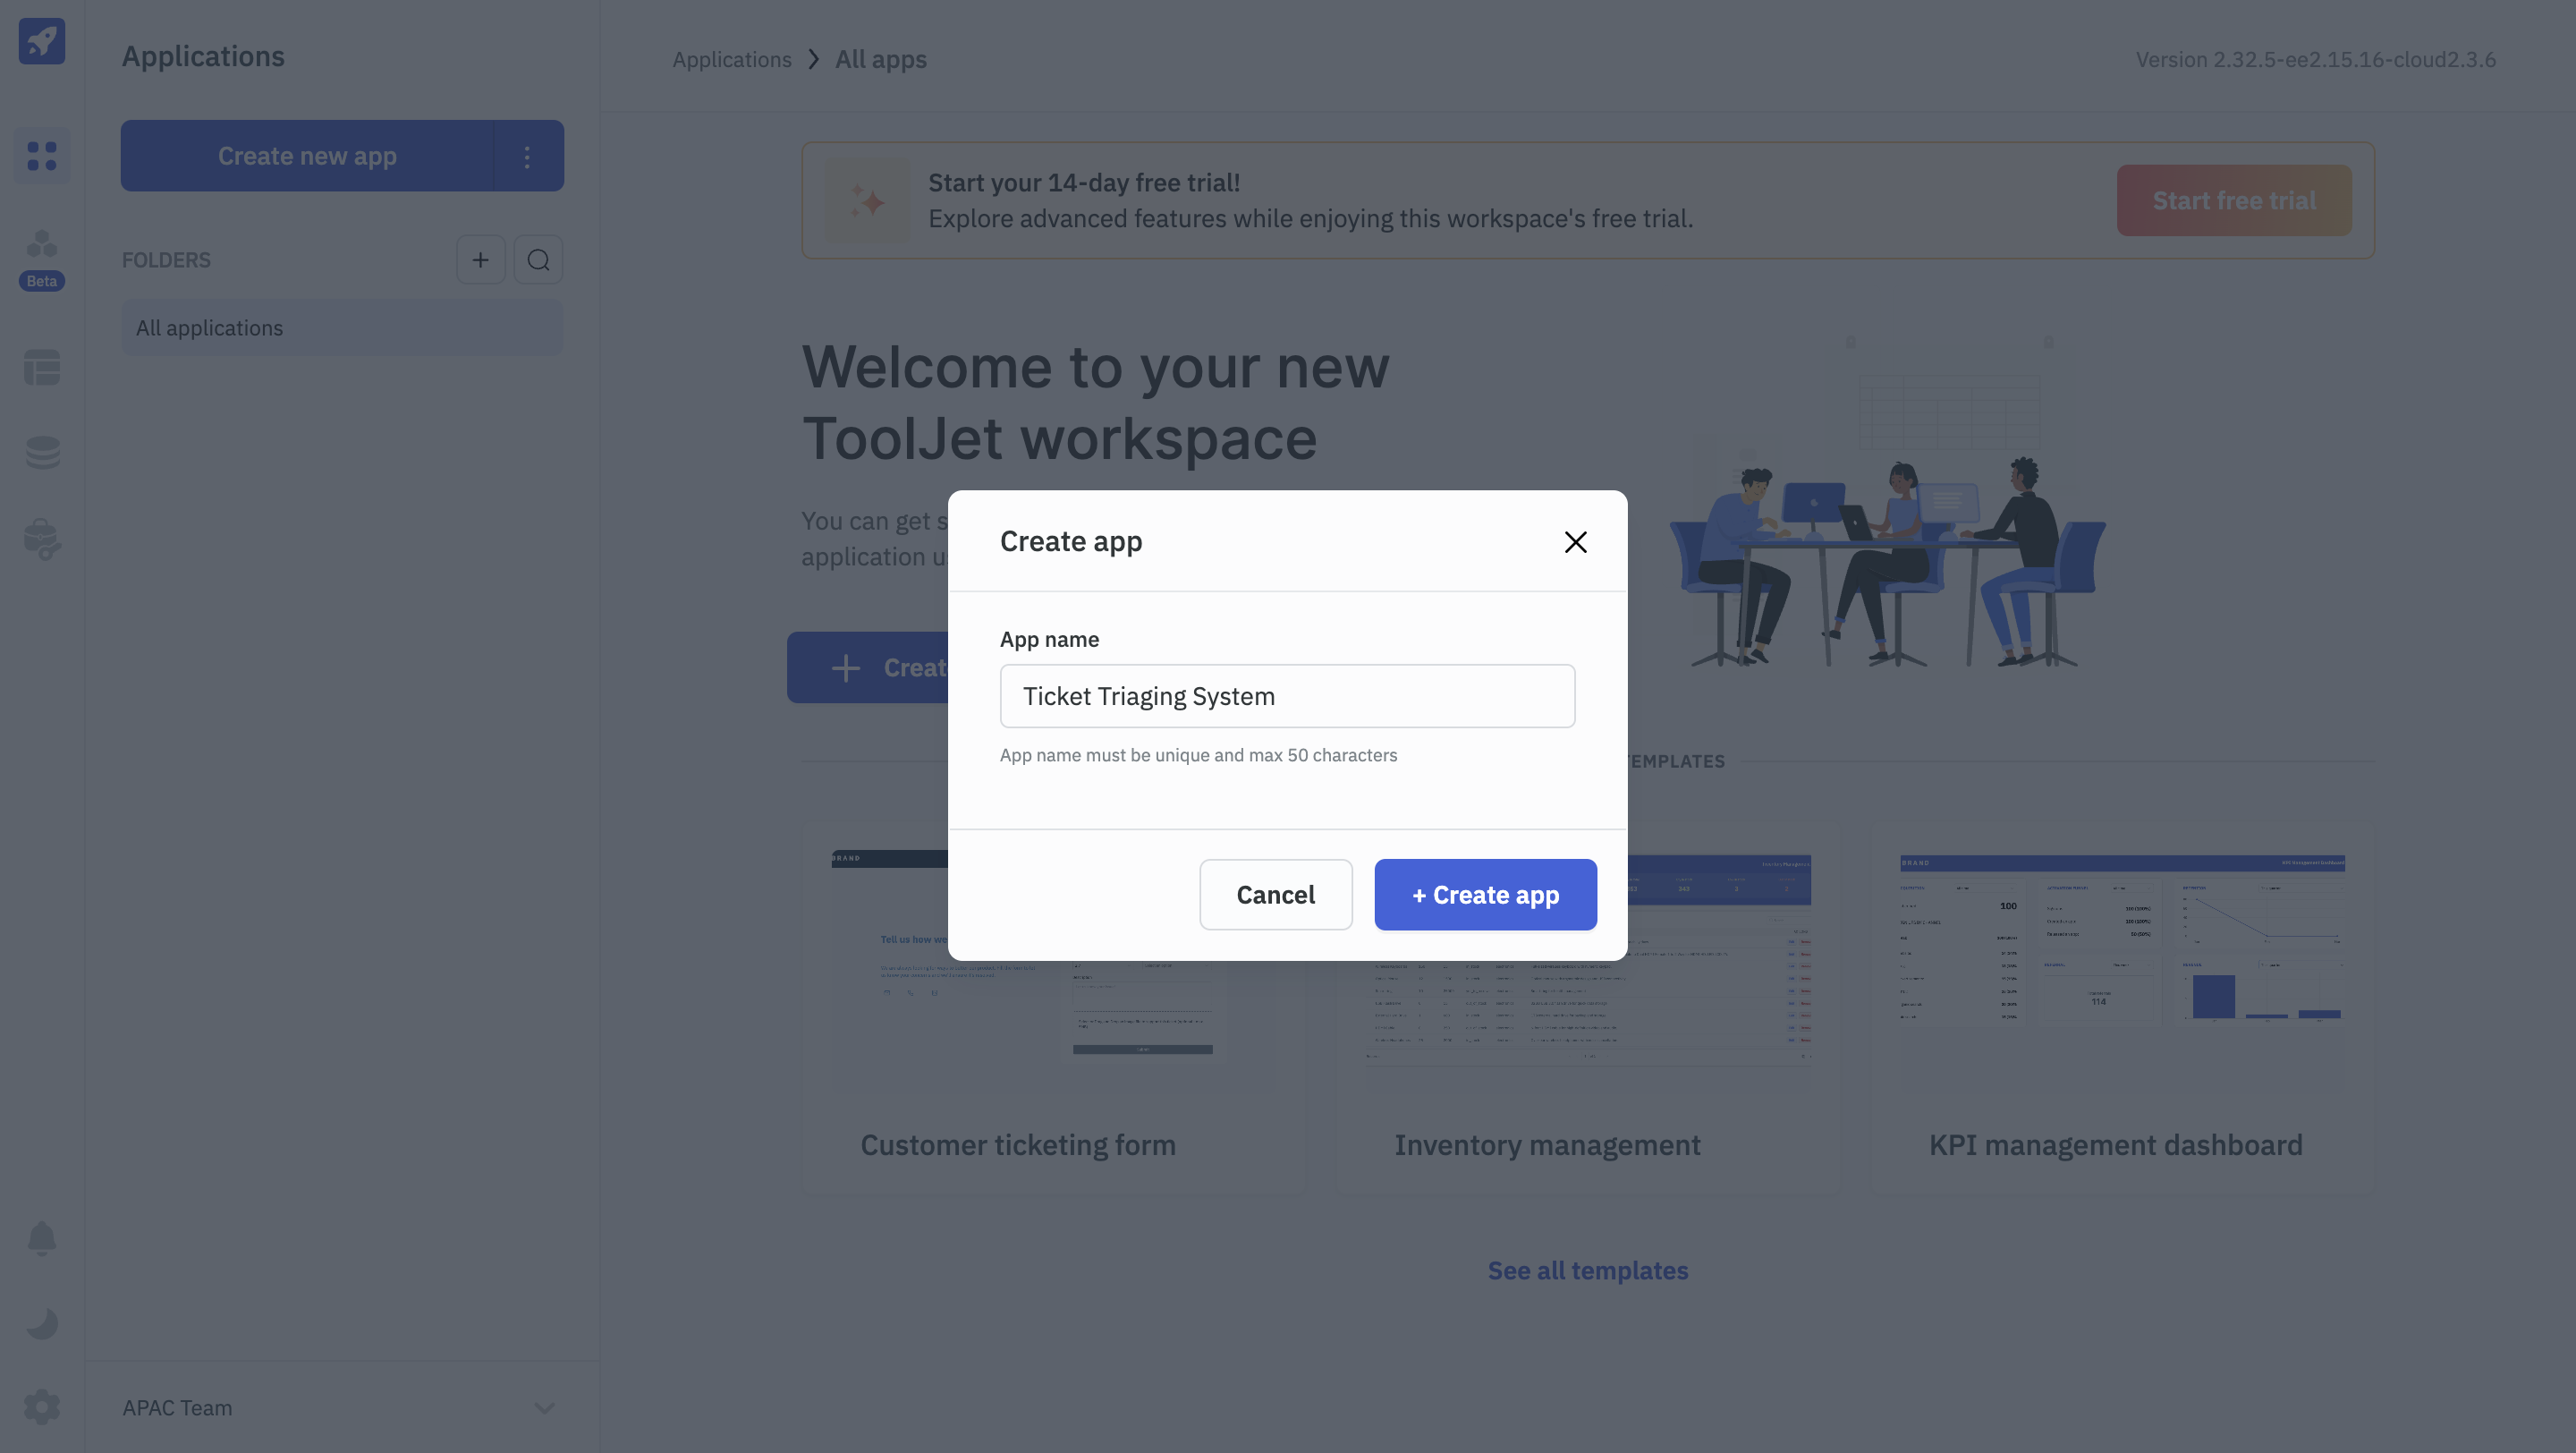
To create a new app, click on the Create new app button on the top left corner of the dashboard. Clicking on this button will open a modal where you can enter the name of the app and then click on the + Create app button to create a new app.
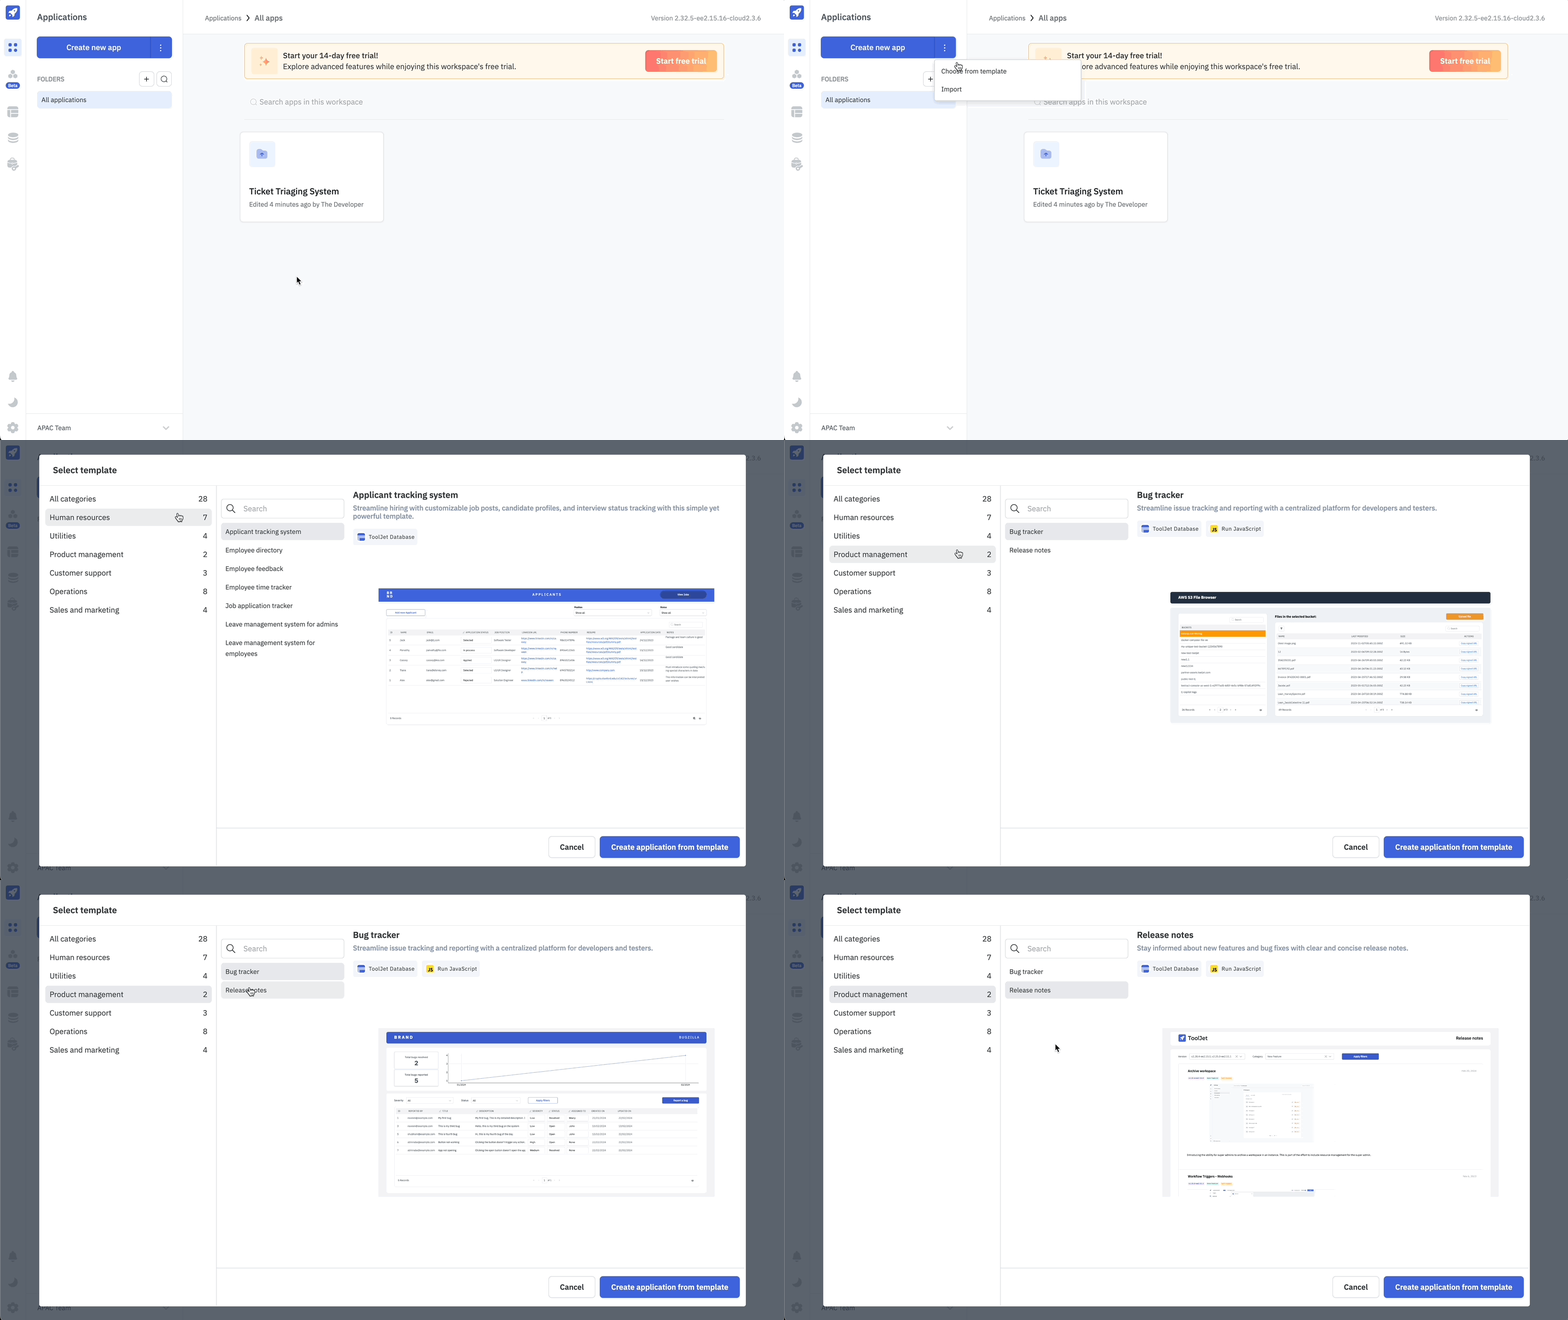
There are three dots on the right side of the Create new app button. Clicking on these dots will open a dropdown menu with two options:
Choose from Templates
This option will open a modal with a list of pre-built templates. You can choose any template from this list to create a new app.
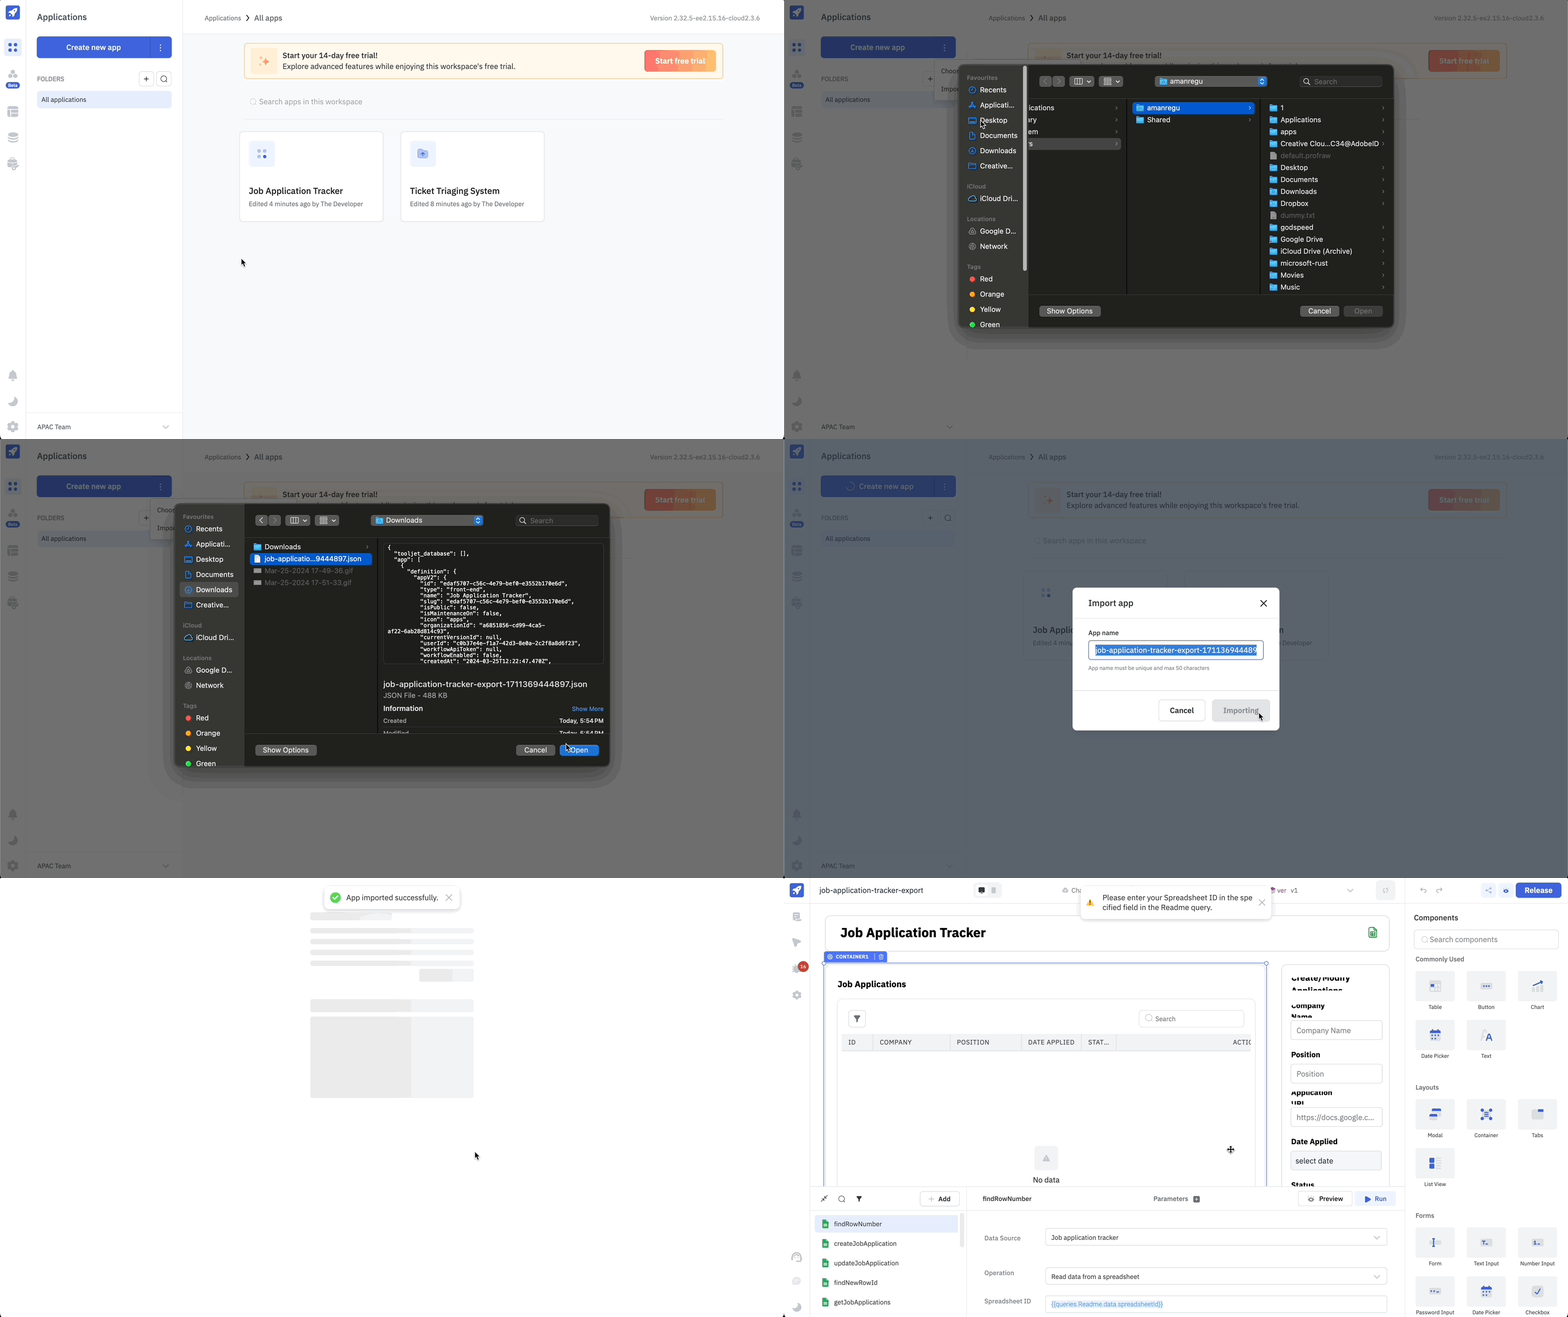
Import
This option will open a file picker to import a JSON file. This JSON file should contain the app data exported from ToolJet.
Importing an App Connected to Marketplace Plugins
When importing an app with Marketplace plugins, the Marketplace plugin should be installed in the ToolJet workspace where the app is being imported. If the Marketplace plugin is not installed, the app will be imported without the queries for that plugin.
When Marketplace plugin is installed
If Marketplace plugin is installed in the ToolJet workspace where the app is being imported, the queries connected to the Marketplace plugin will be available in the imported application. The queries will be linked to the data source with the same name if it is already present. If the data source is not present, a new data source will be created of that Marketplace plugin and linked to the queries.
When Marketplace plugin is not installed
If you have an app with a query linked to a Marketplace plugin, and you import that app in a ToolJet workspace where the Marketplace plugin is not installed as the data source, the queries will be not be available in the imported application.
Importing App Connected to ToolJet Table
When the app(JSON file) that includes the table schema is imported, and the table is not present in the ToolJet database of the workspace where the app is being imported, a new table will be created in the ToolJet database with the same name as the table in the imported app.
If the table with the same name is already present in the workspace, the new table will be created with the name <table name>_<unix timestamp>. Example: <tablename>_1627980000.
Folders
Create a new folder
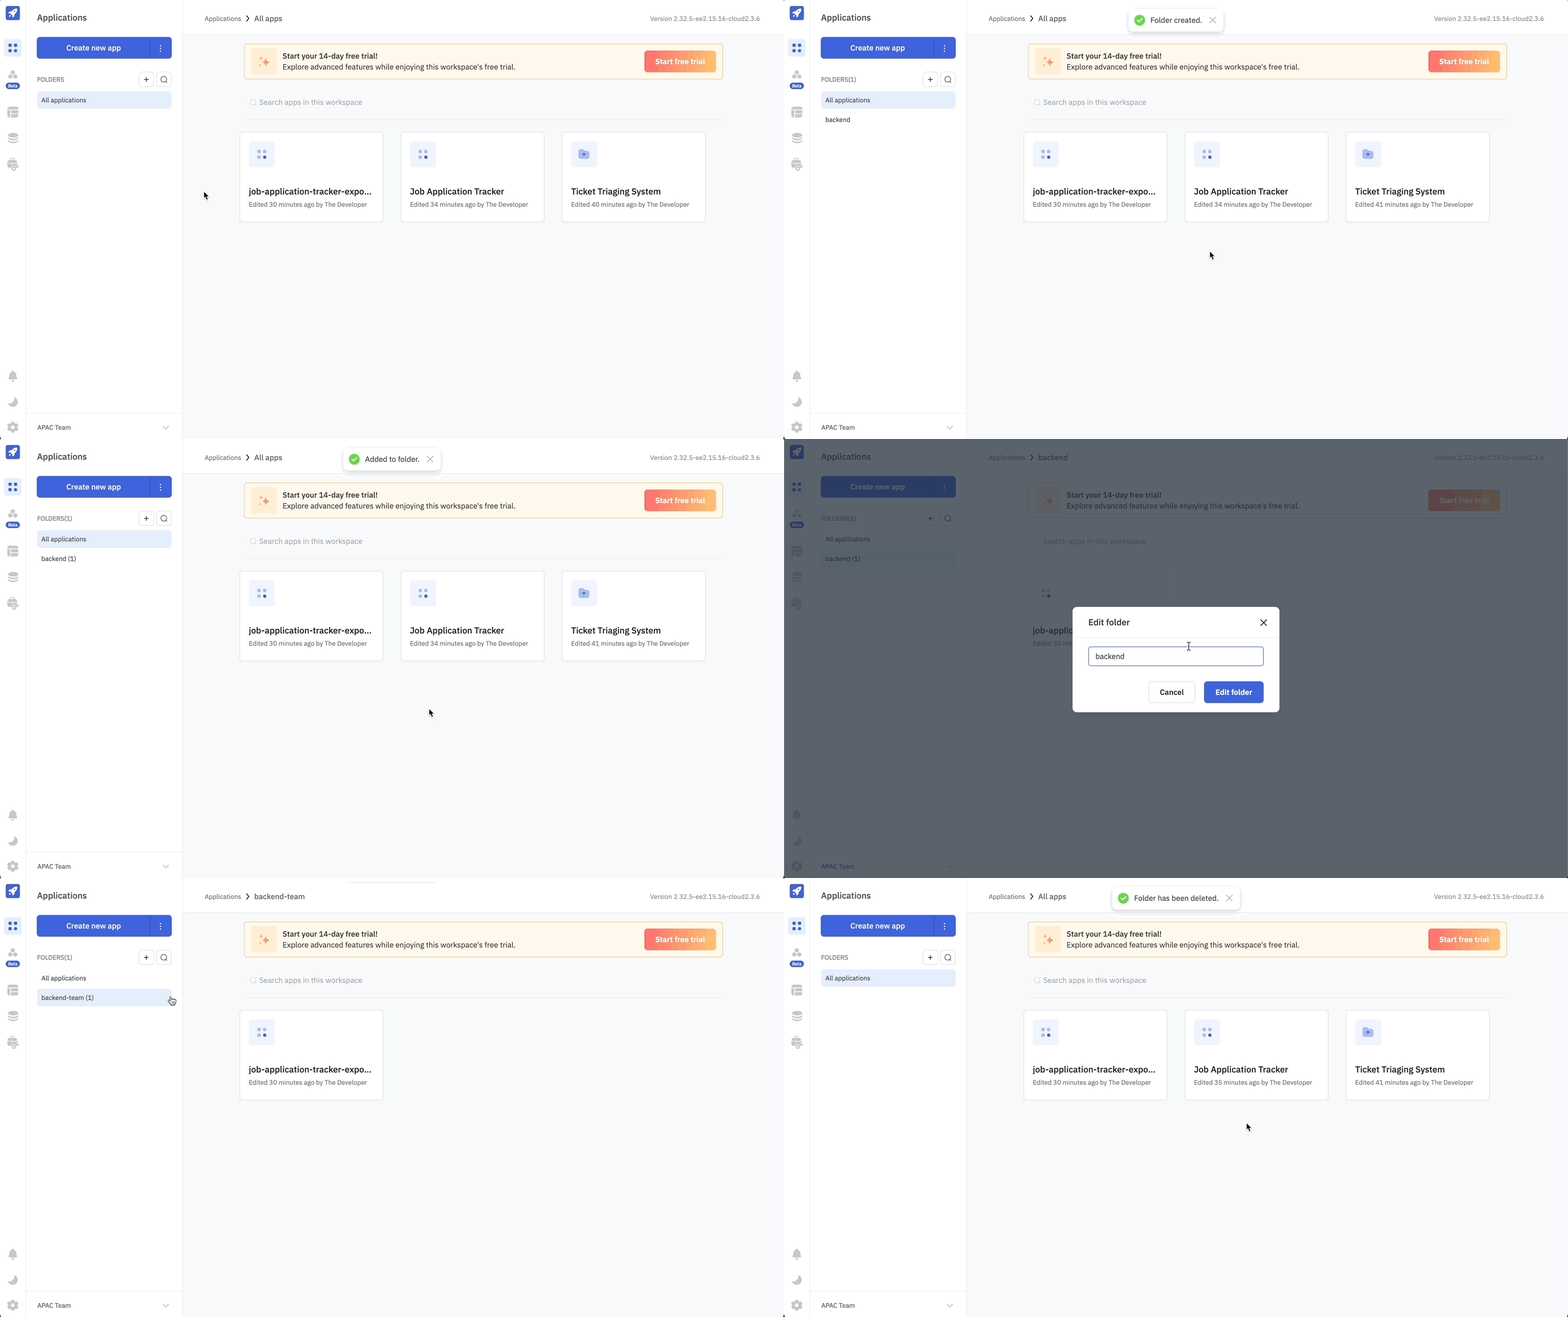
Folders can be created to organize your apps. To create a new folder, click on the + button on the left drawer of the dashboard. Clicking on this button will open a modal, enter the name of the folder and click on the Create Folder button to create a new folder.
Delete or Edit Folder
A folder can be deleted or renamed. To delete or rename a folder, click on the kebab menu on the right side of the folder name. Clicking on kebab menu will open a dropdown menu with two options:
- Edit folder: This option will open a modal, enter the new name of the folder and click on the
Editbutton to rename the folder. - Delete folder: This option will open a confirmation modal to delete the folder. Click on the
Deletebutton to delete the folder.
Search Folders
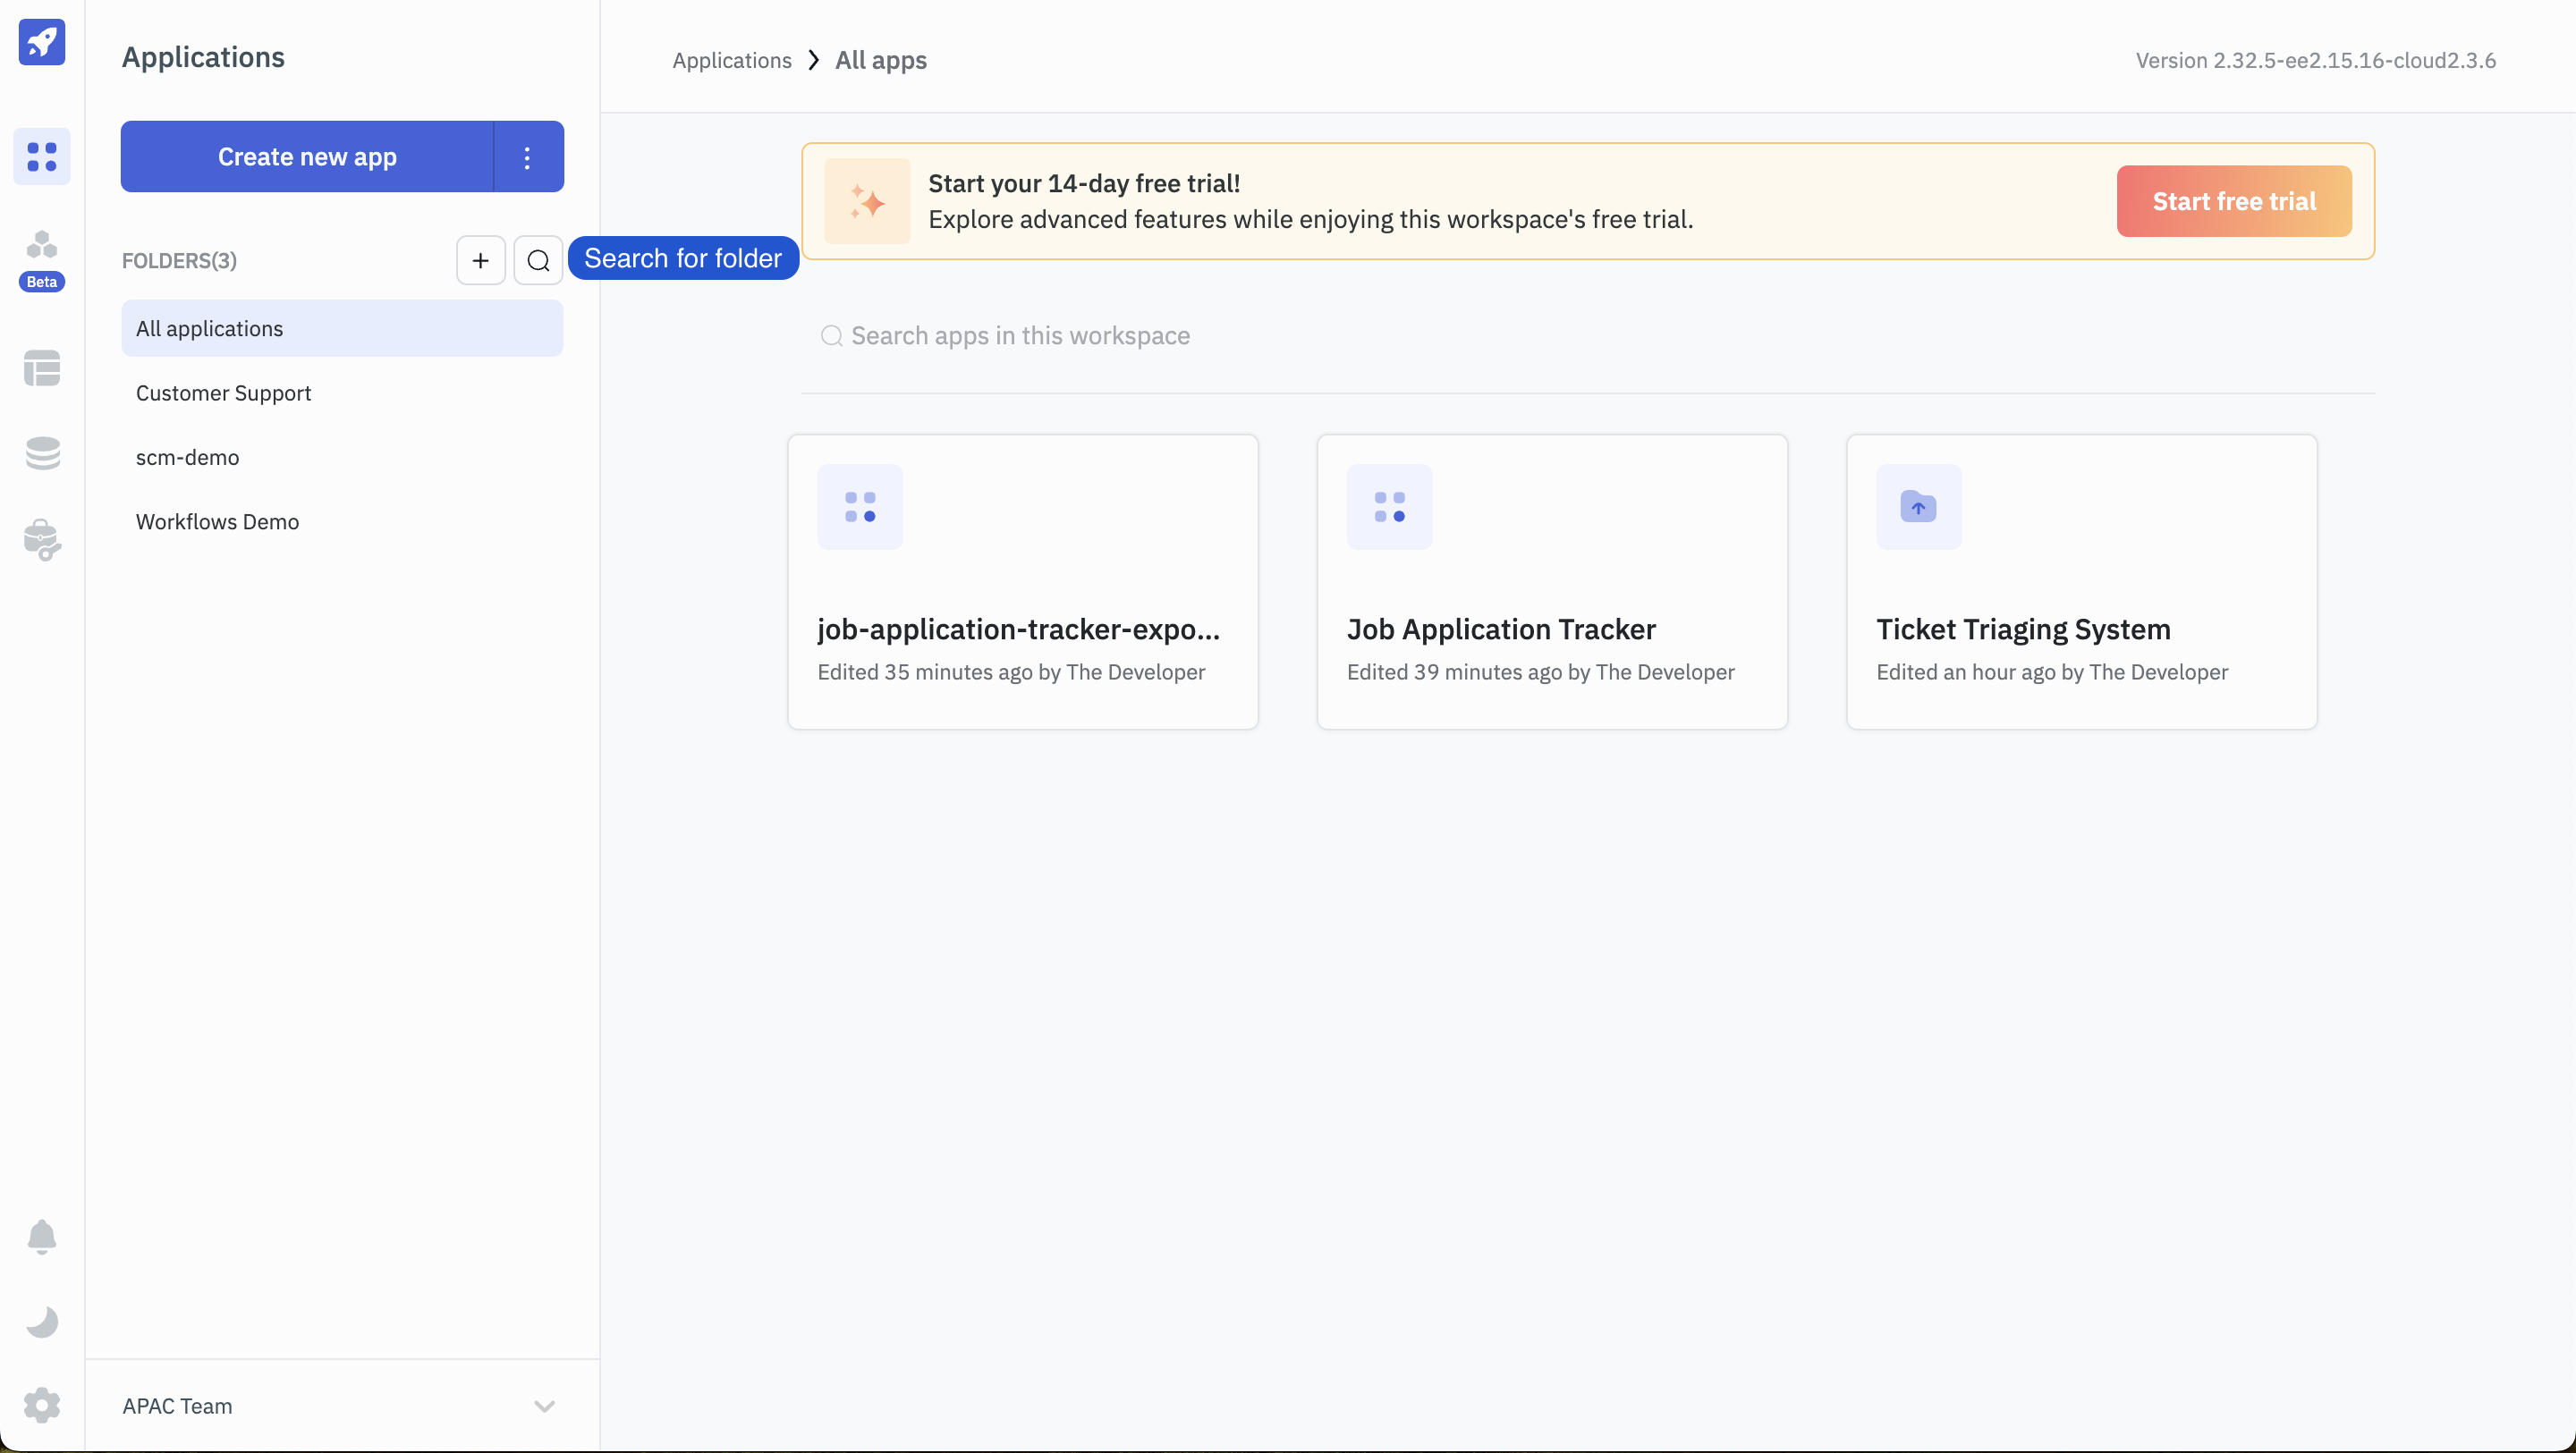
Folders can be searched by clicking on the search icon on the left drawer of the dashboard. Clicking on the search icon will open a search bar, enter the name of the folder to search.
Slug for Folders
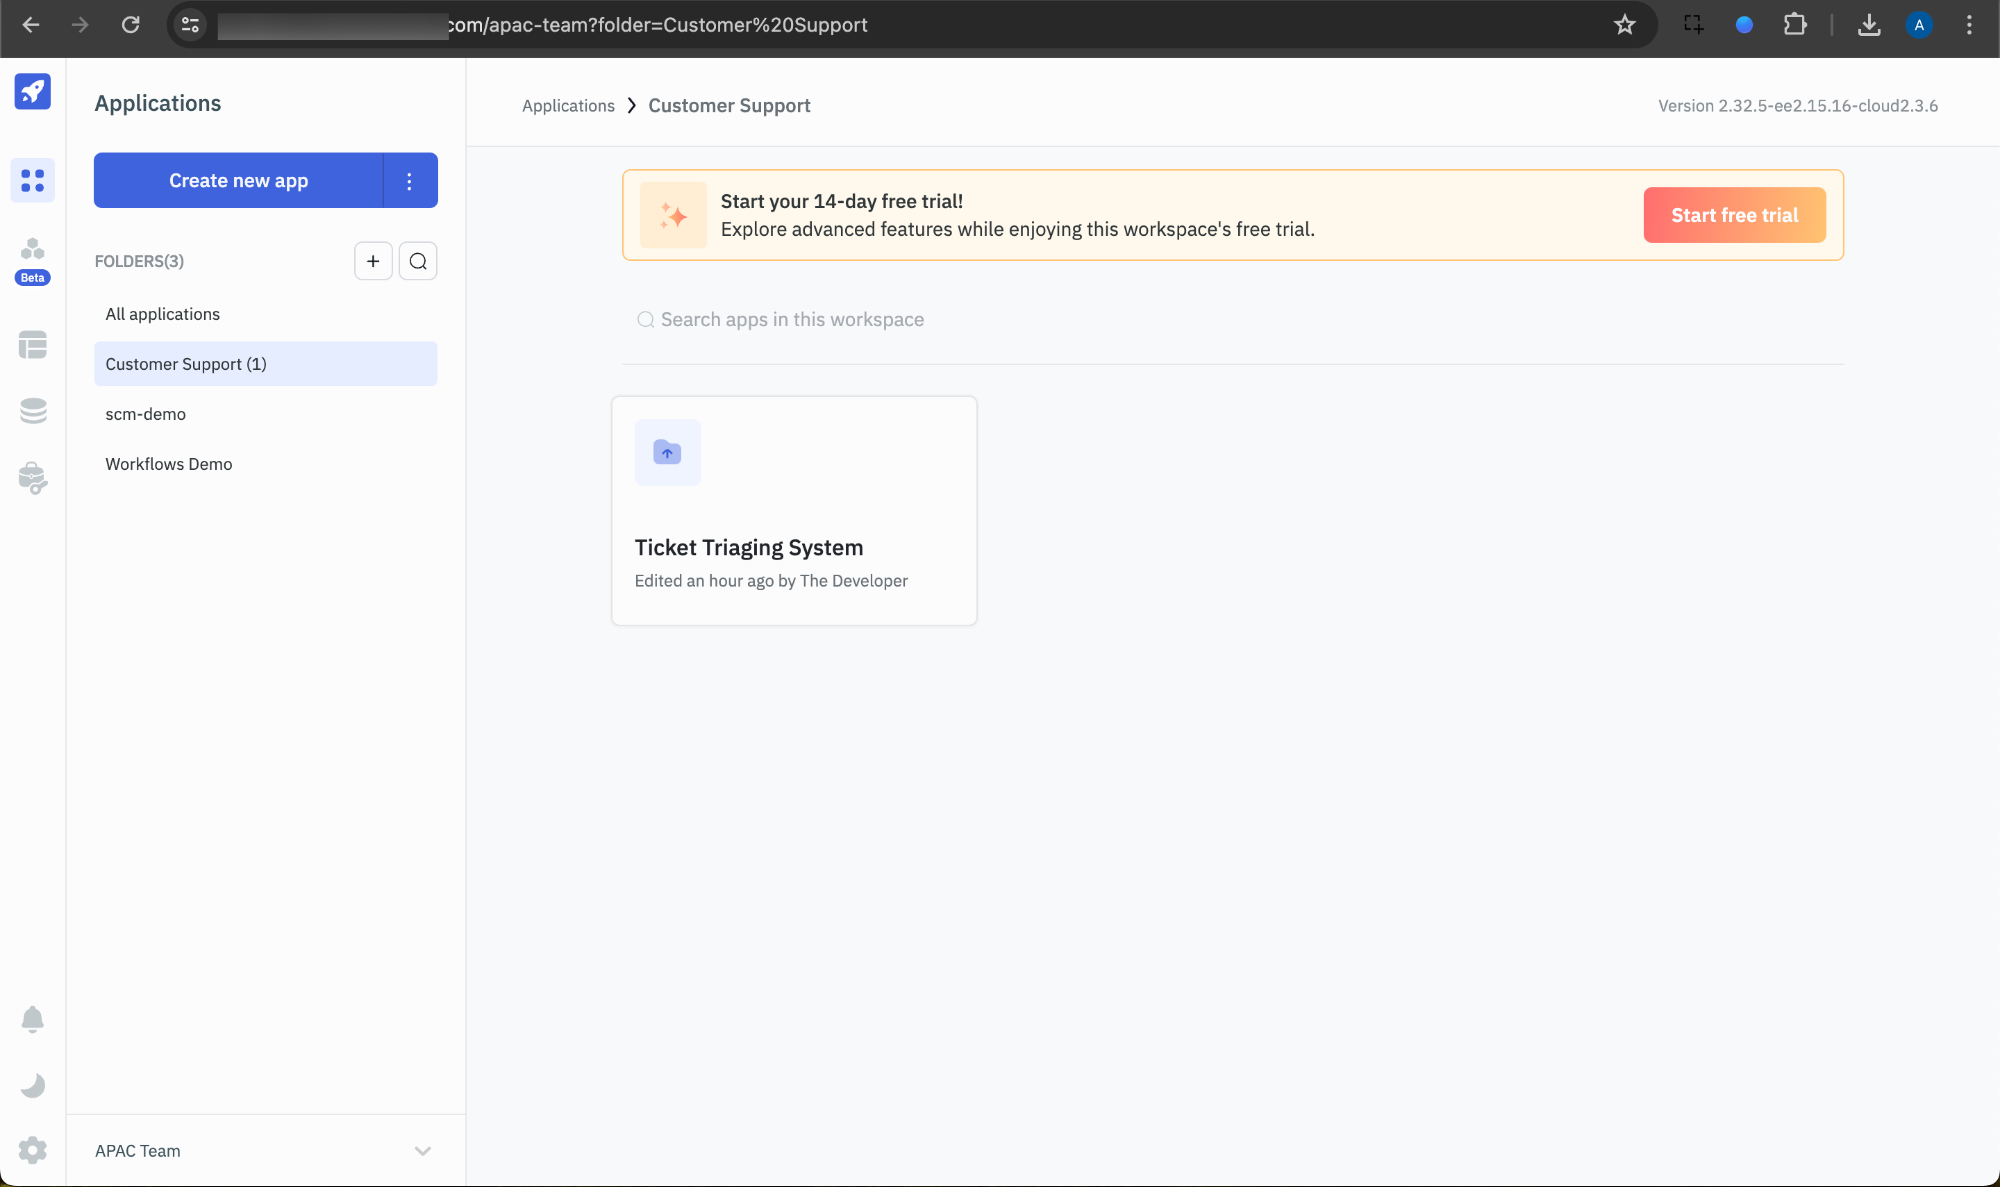
The folder's URL slug is generated automatically from its name, providing direct access to the folder using the slug.
To get the URL of a specific folder, the user will have to select that folder and then copy the URL from the address bar of the browser. The copied URL can be used to share with other users of the workspace.
Example: If the name of the folder is Customer Support, The folder can be accessed directly from the URL https://tooljet.com/<workspace-name>?folder=Customer%20Support.
App Cards
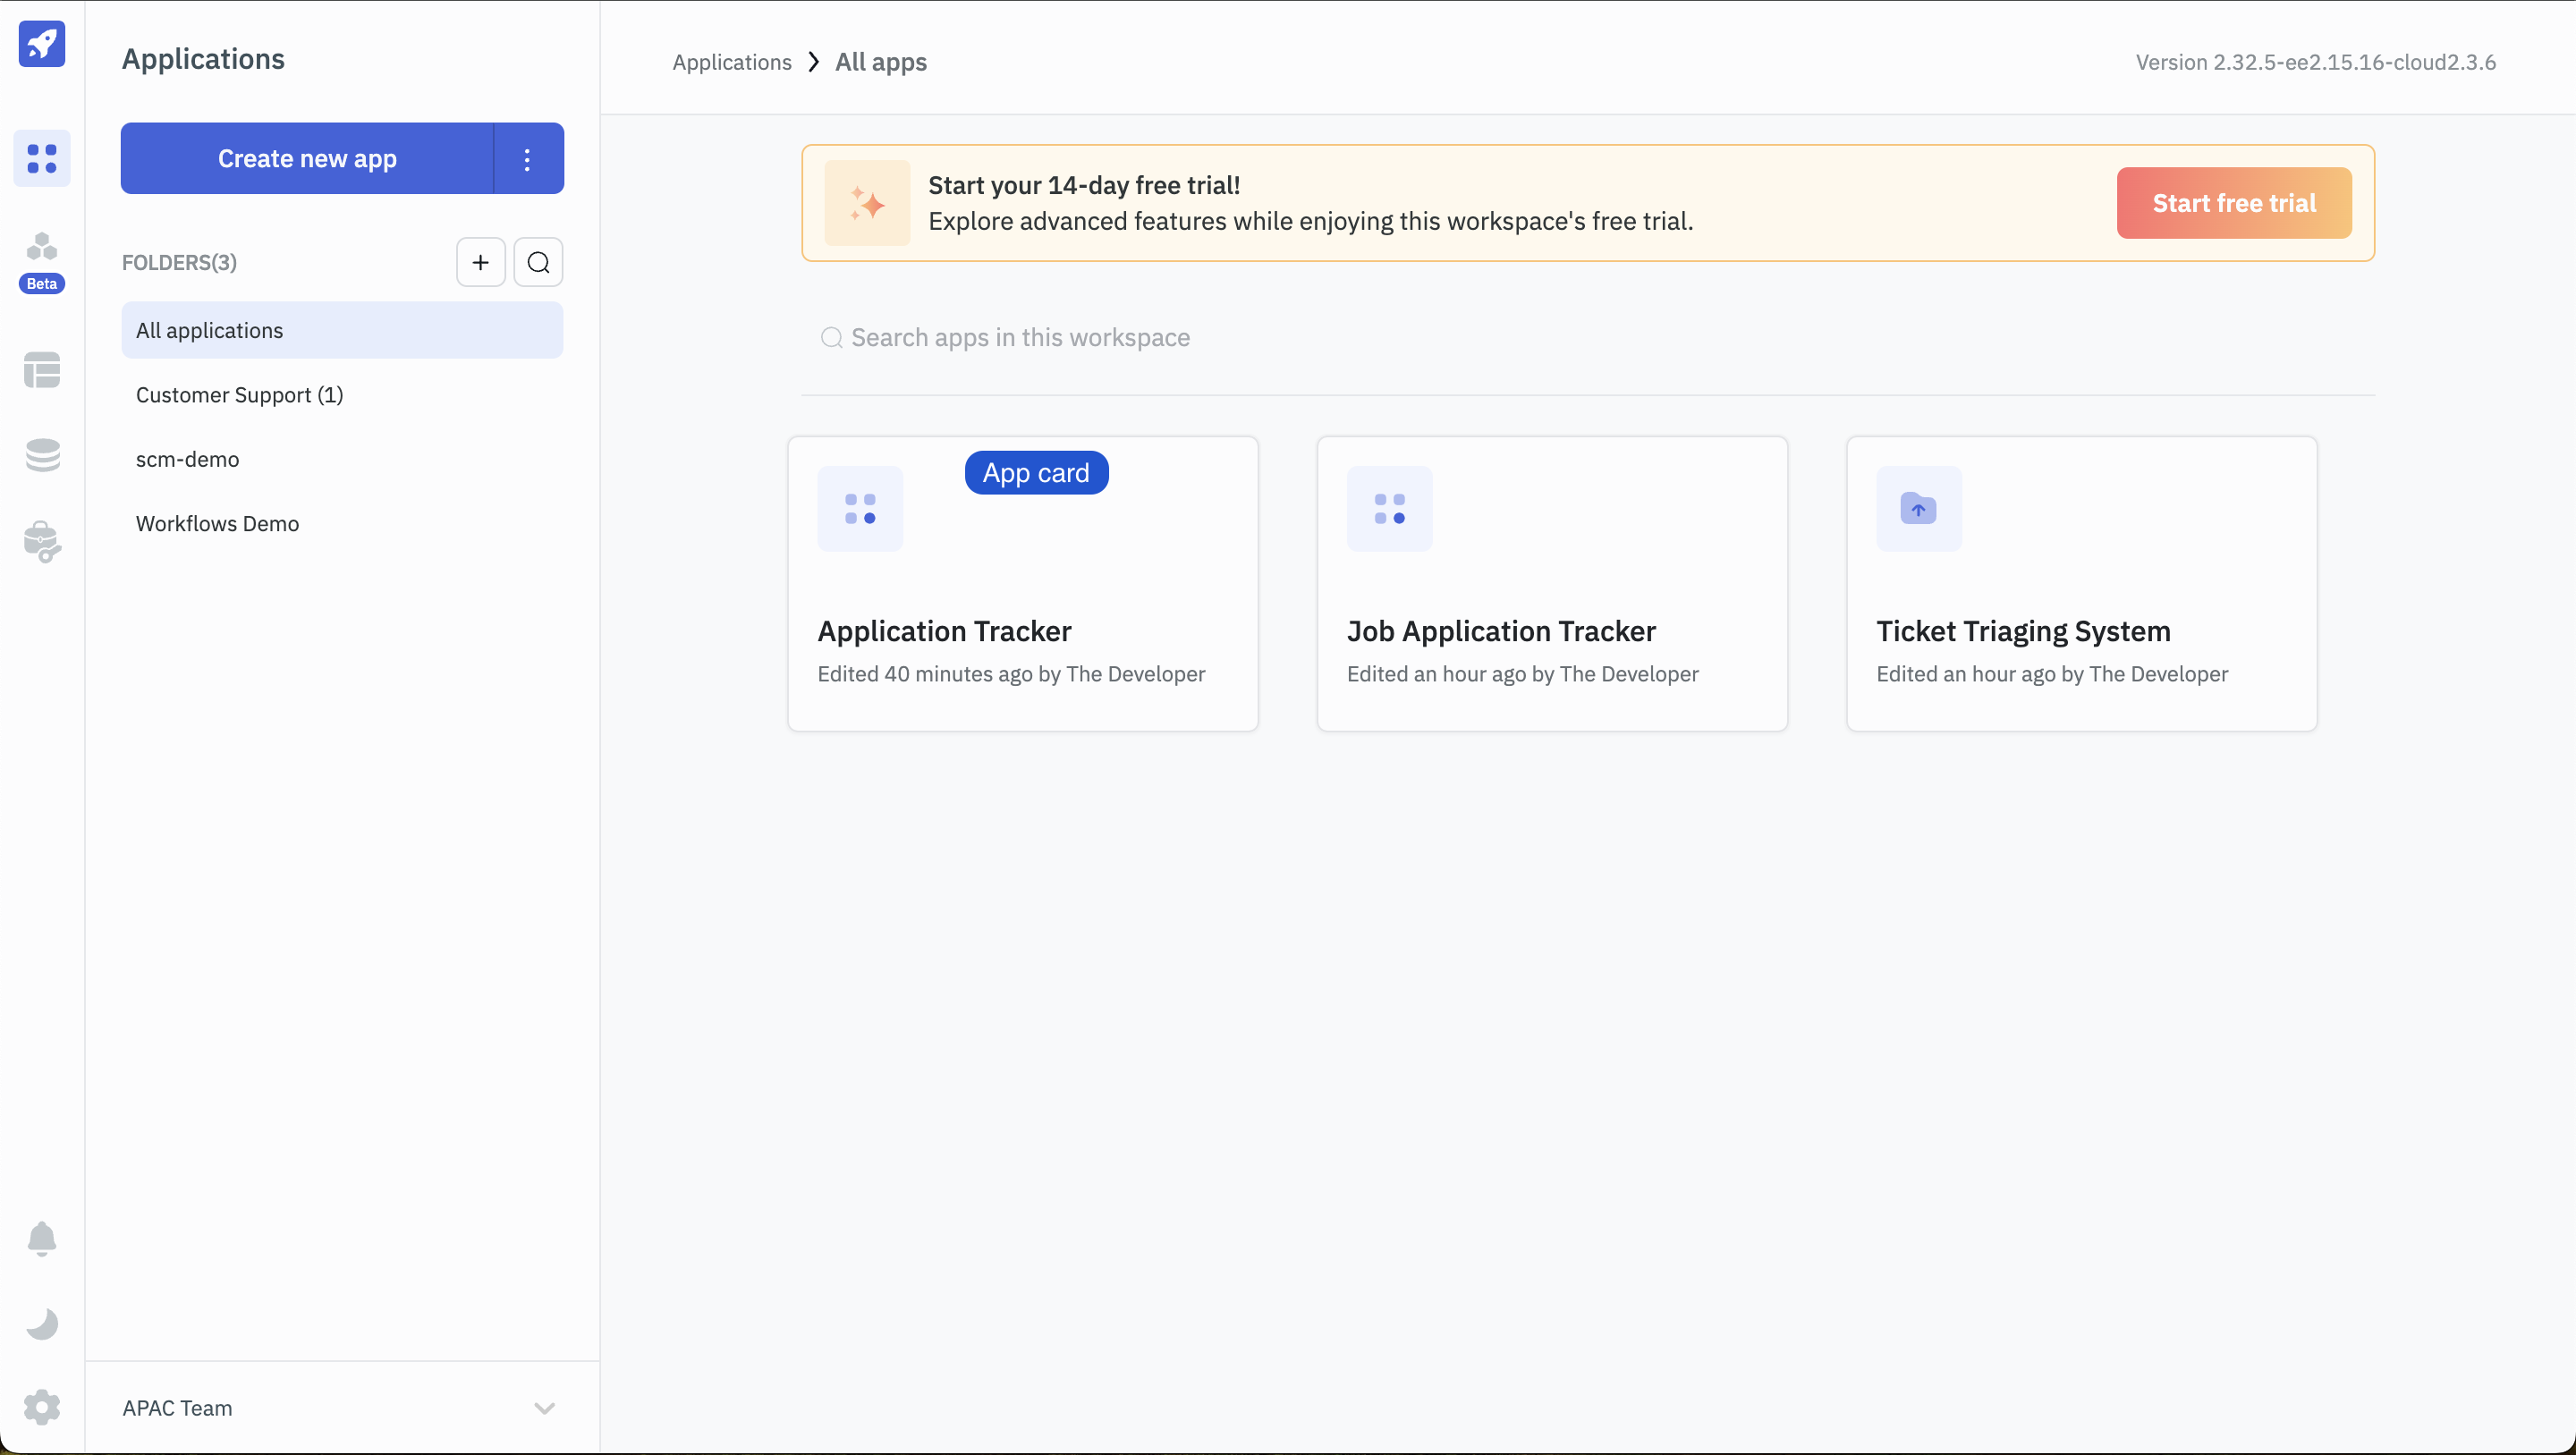
The dashboard displays all the apps created in the workspace as cards. These cards are displayed in a grid layout. The app cards display the name of the app, the name of the creator, and the date of creation. The app cards also display the app icon, which can be changed by clicking on the Change Icon option from the app menu.
App Menu
The app menu is located on the top right corner of the app card. Clicking on the app menu will open a dropdown menu containing various options. These options are:
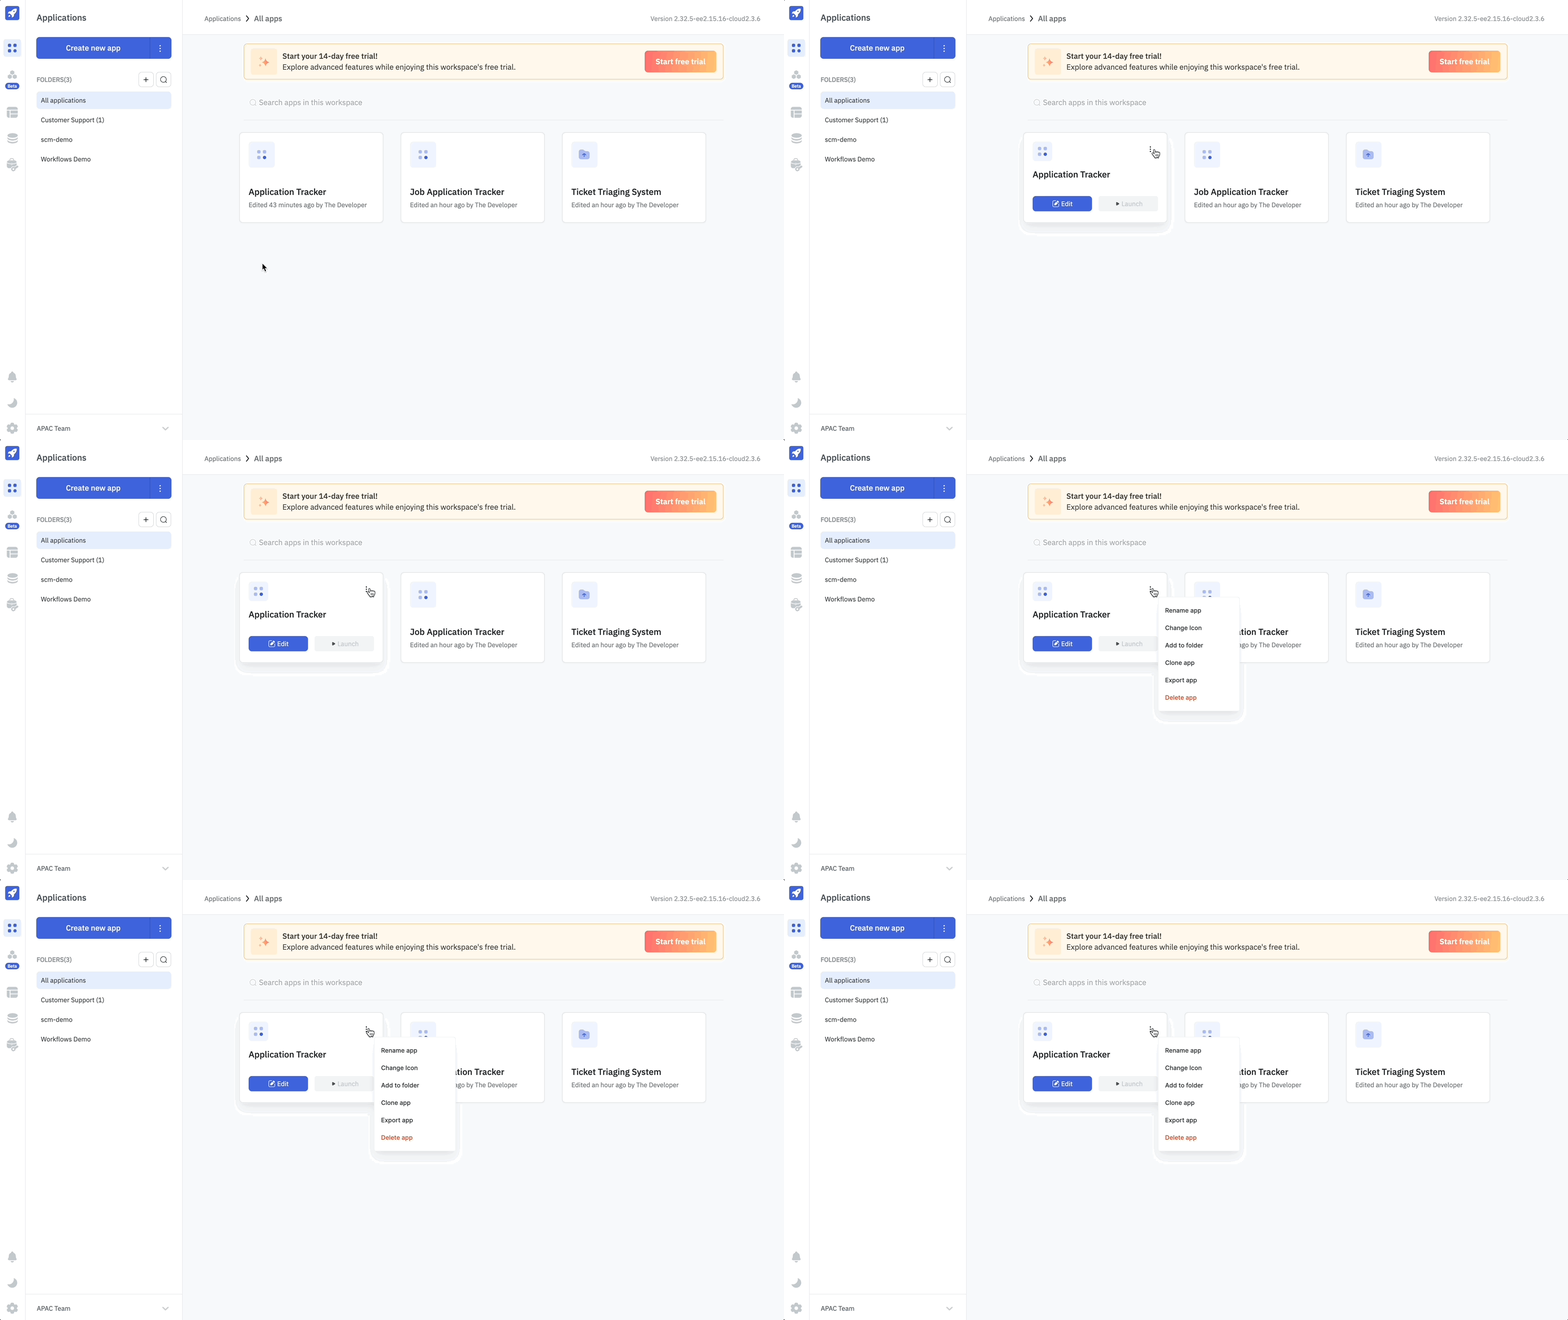
Change Icon
This option will open a modal with a list of icons. You can choose any icon from this list to change the app icon.
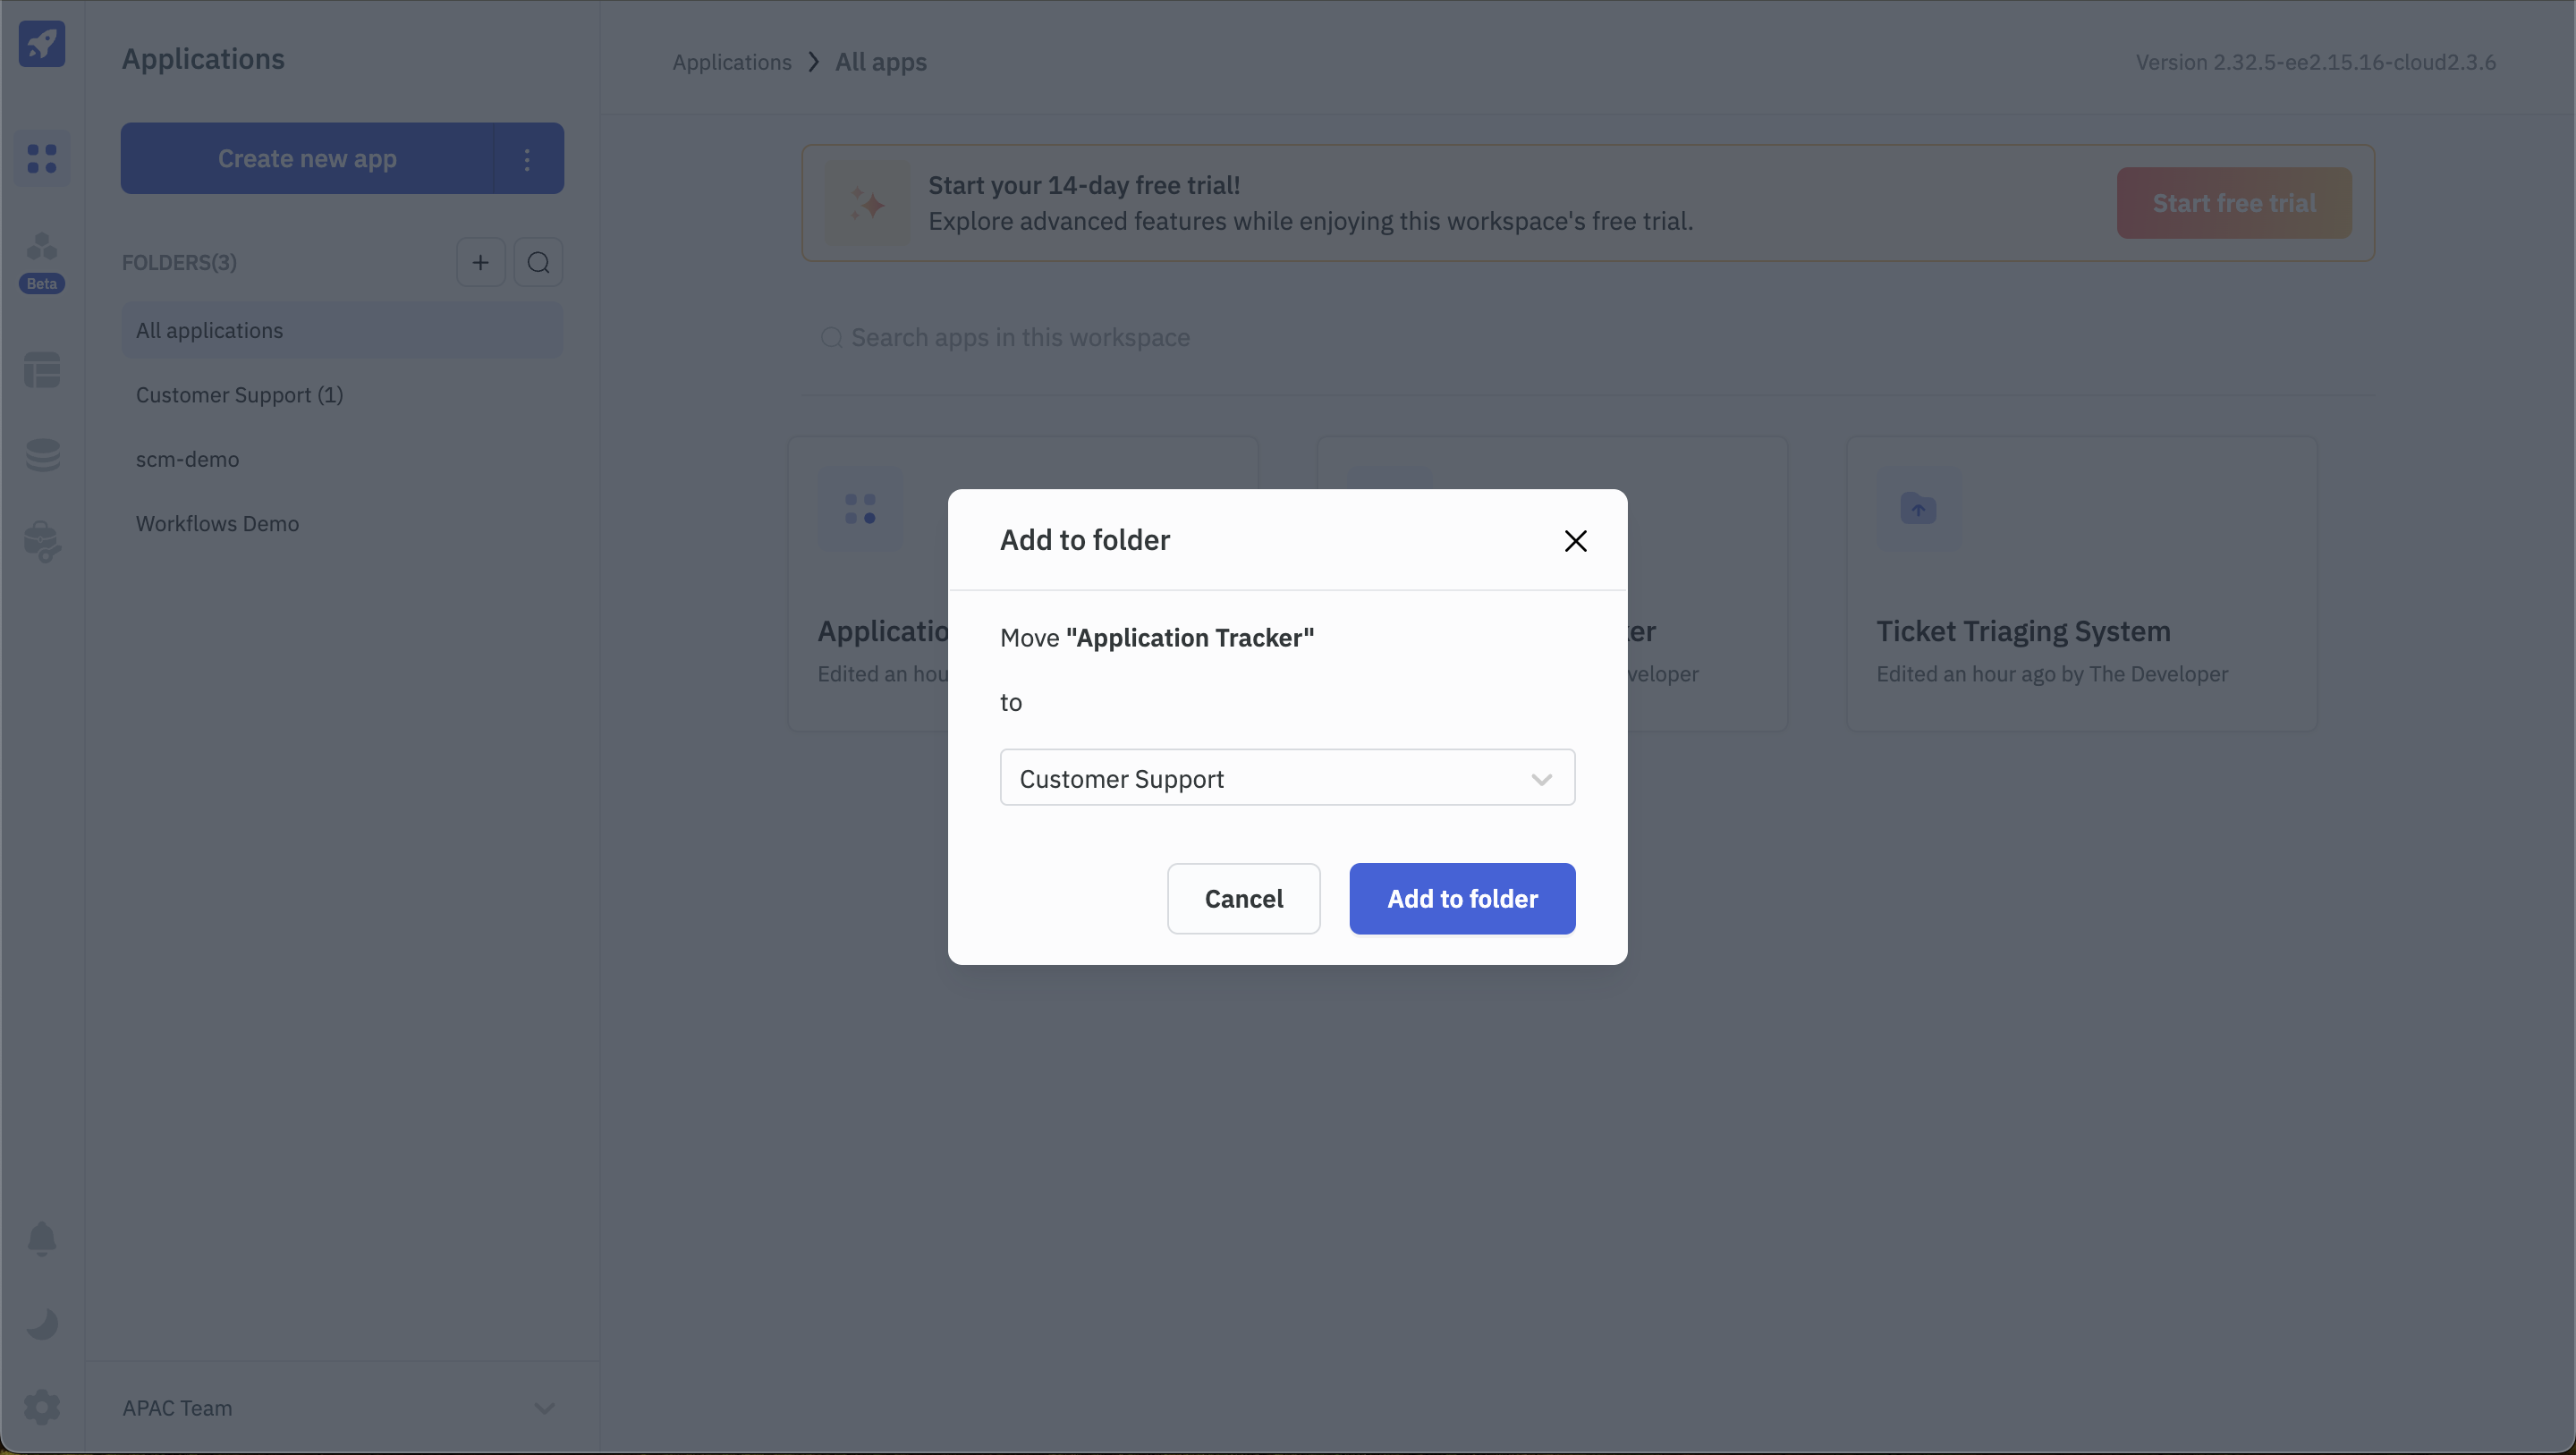
Add to Folder
This option will open a modal with a list of folders. You can choose any folder from this list to add the app to the folder.
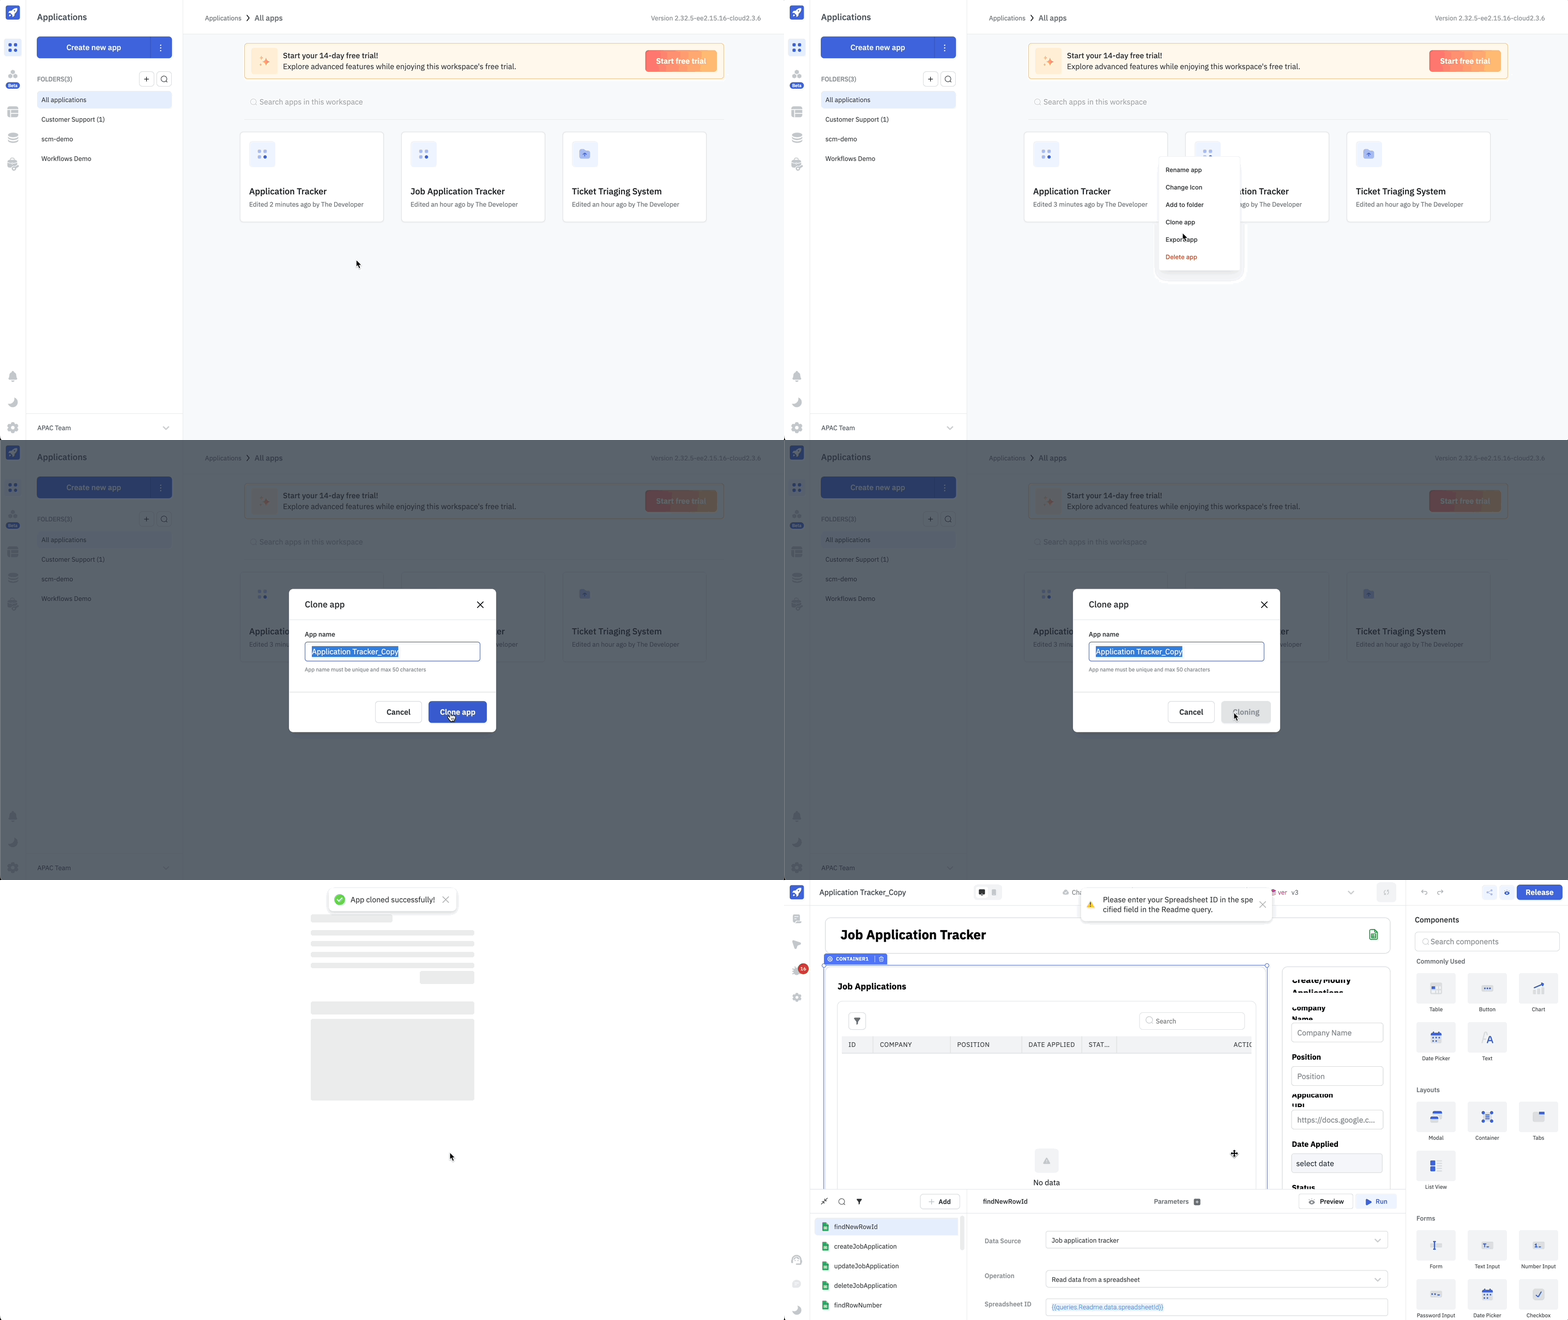
Clone App
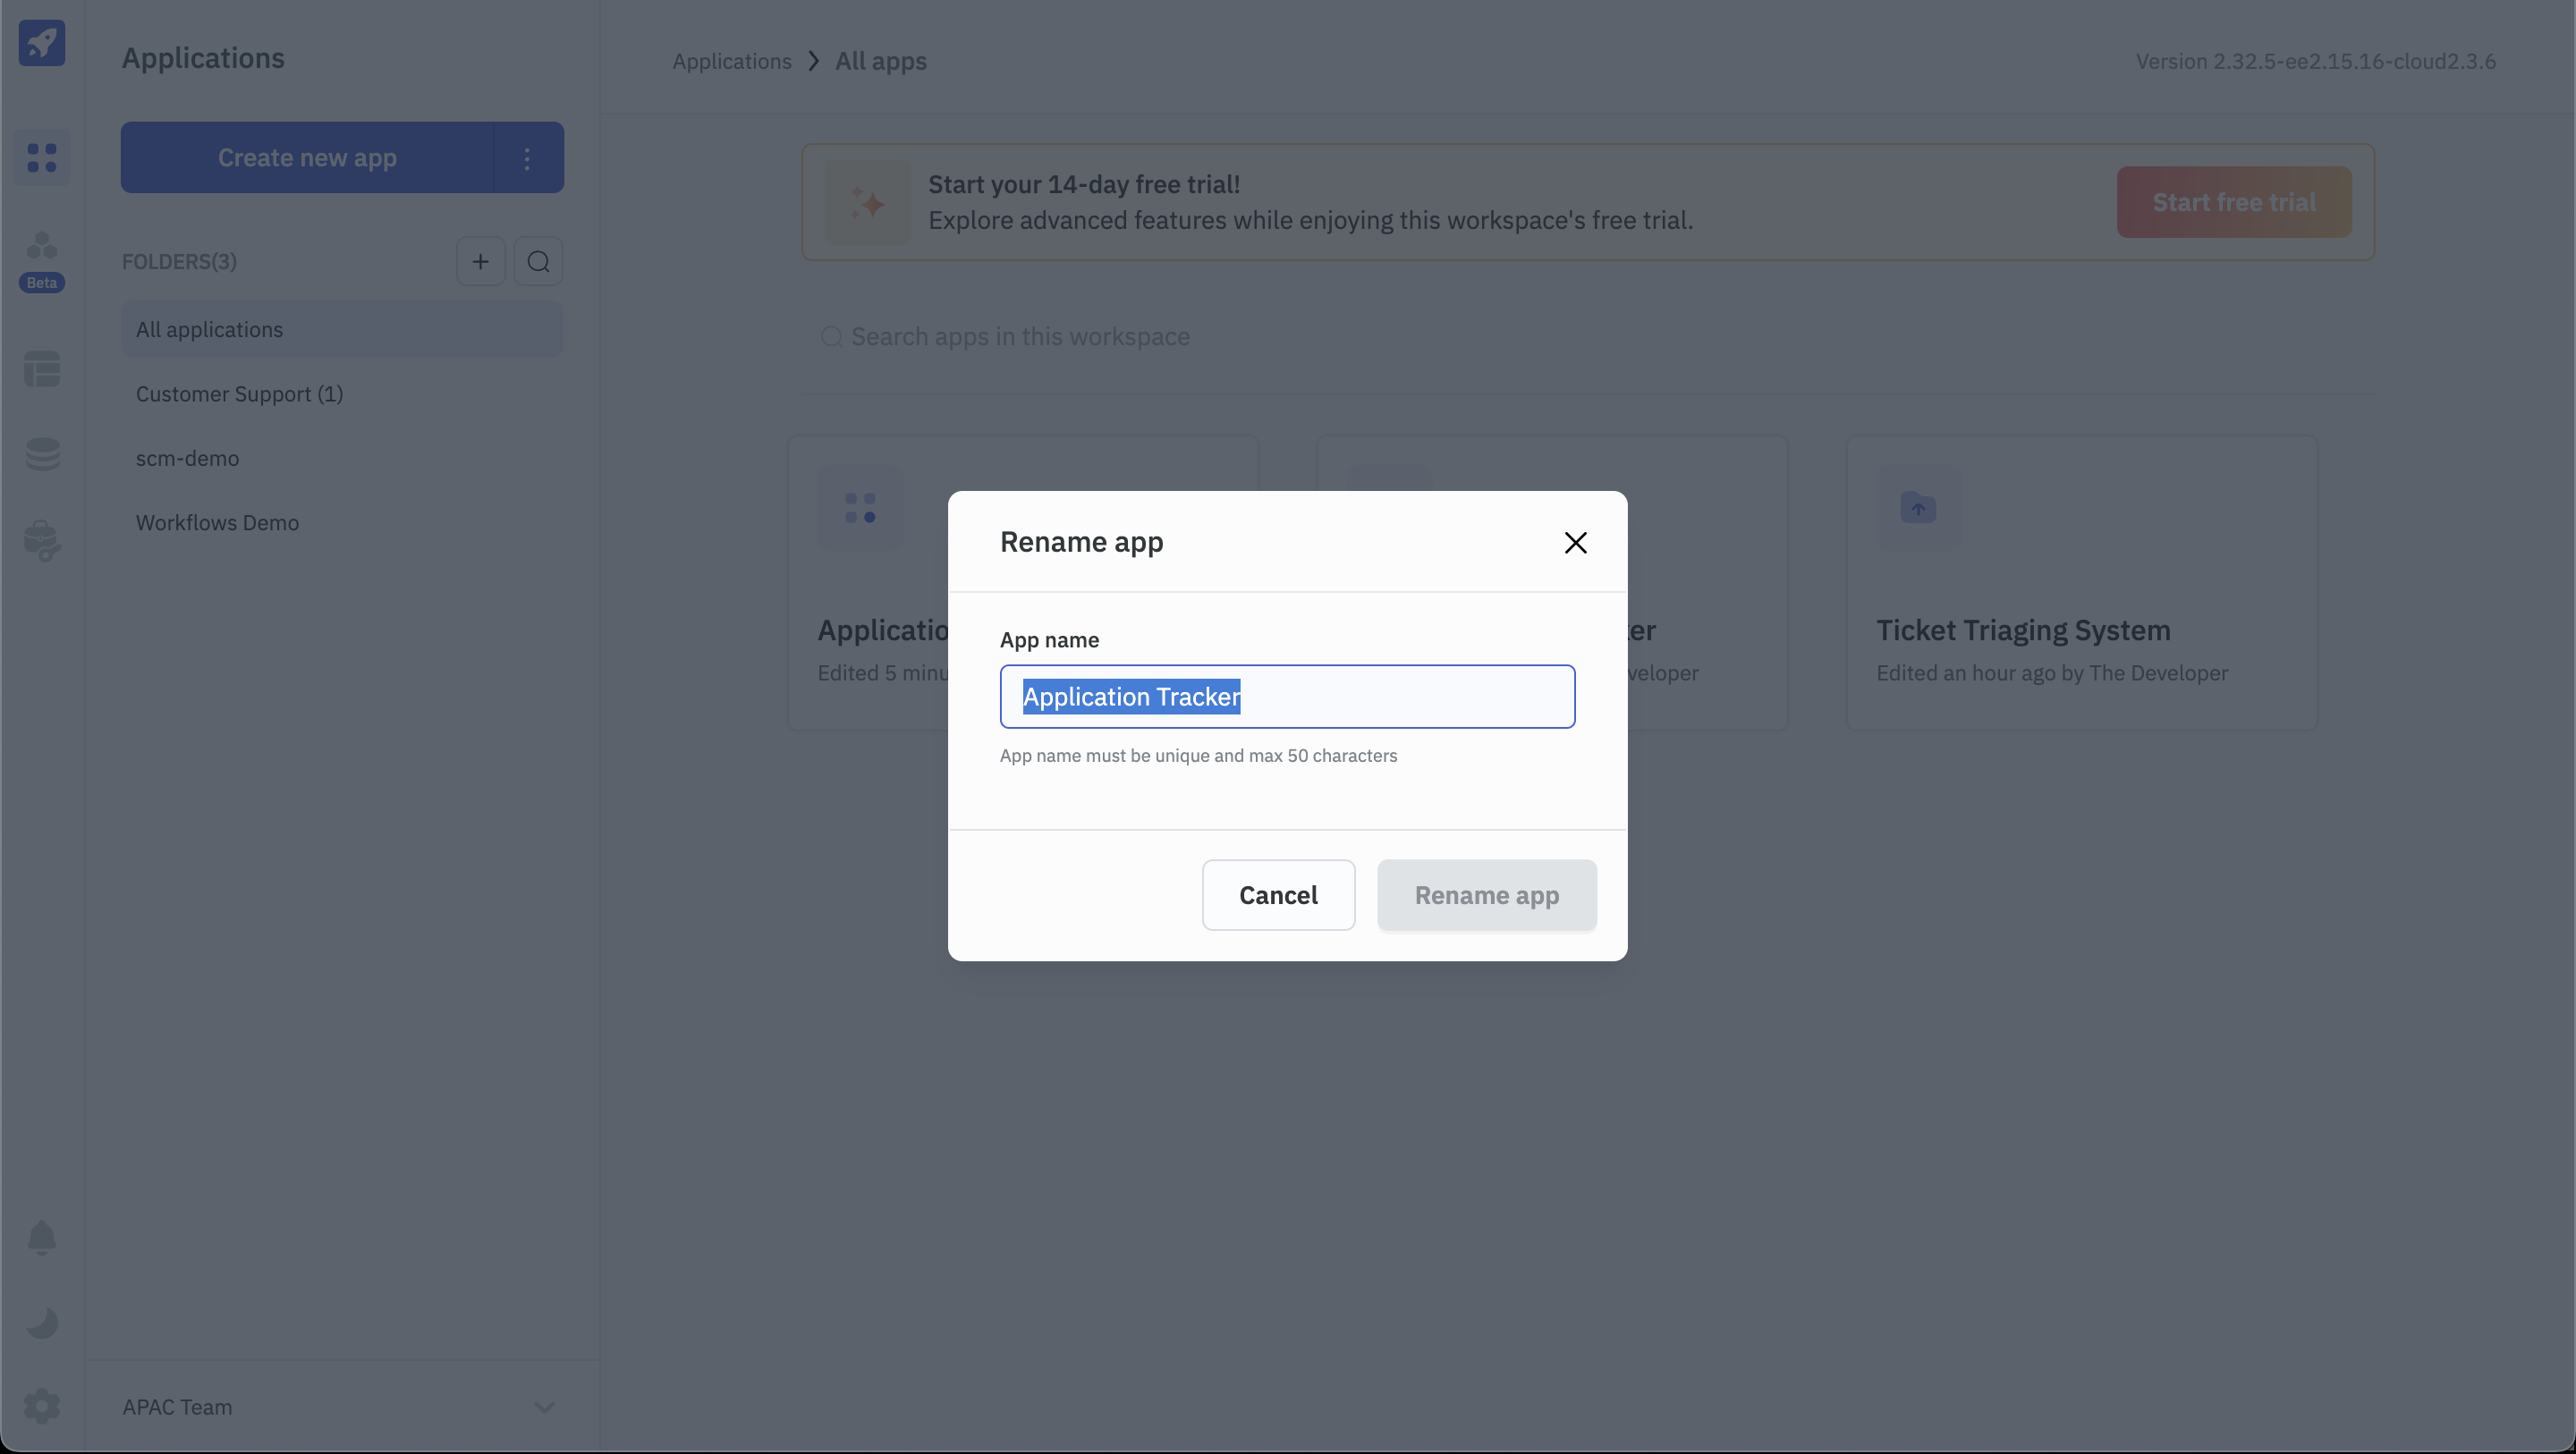
Selecting this option will open a modal where you can enter the desired name for the cloned app. After providing the desired name, click on the Clone app button. This will immediately open the cloned app in the app builder with the same configuration as the original app.
Export App
This option downloads a JSON file containing the application data. This JSON file can be imported to ToolJet to create a new app. The exported app will include all the queries connected to global data sources including the data source created from Marketplace plugins.
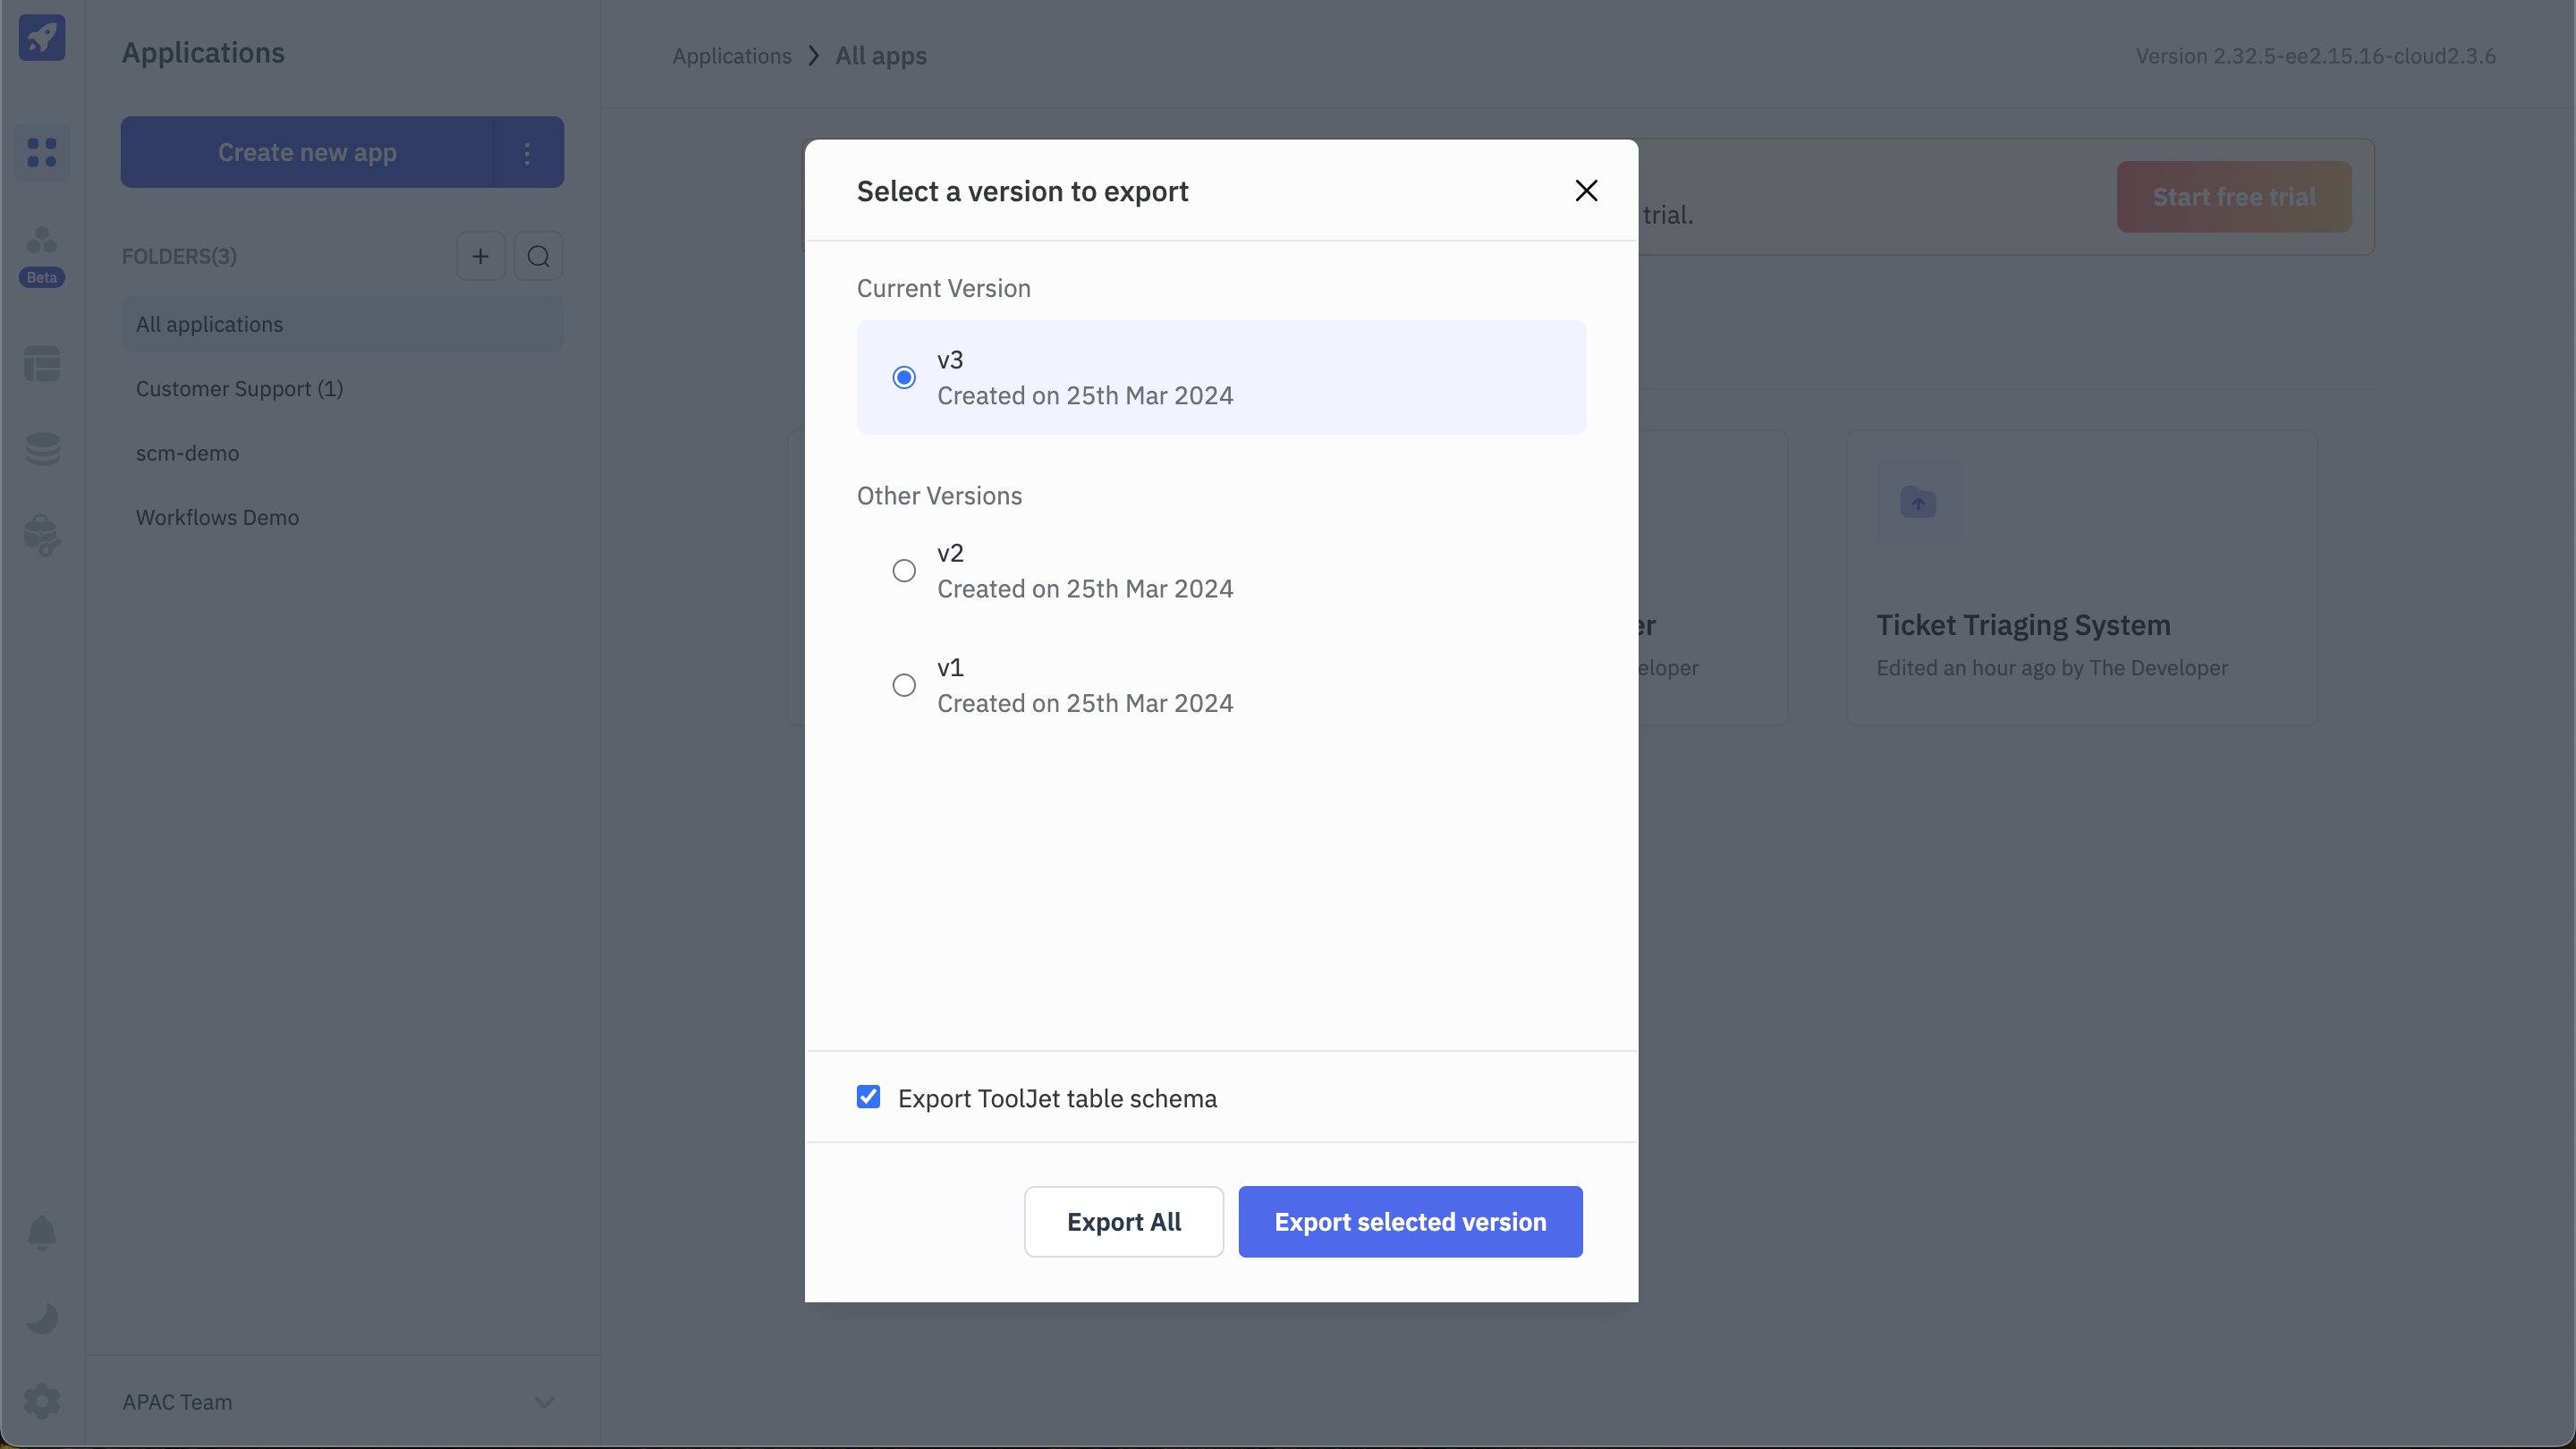
This option allows you to select a specific version of the app to export or export all the versions of the app. To export a specific version of the app, select a version from the list of available versions in the modal and click on the Export selected version and to export all the versions of the app, click on the Export All button.
Export ToolJet table schema
Selecting this option will include the schema of the ToolJet table connected to that application in the exported JSON file. This option is available for all the apps on ToolJet however only the apps with a ToolJet table connected(includes tjdb query) will have the schema included in the exported JSON file.
This JSON file can be used to import the application to ToolJet along with the table schema that was connected to the application.
Delete App
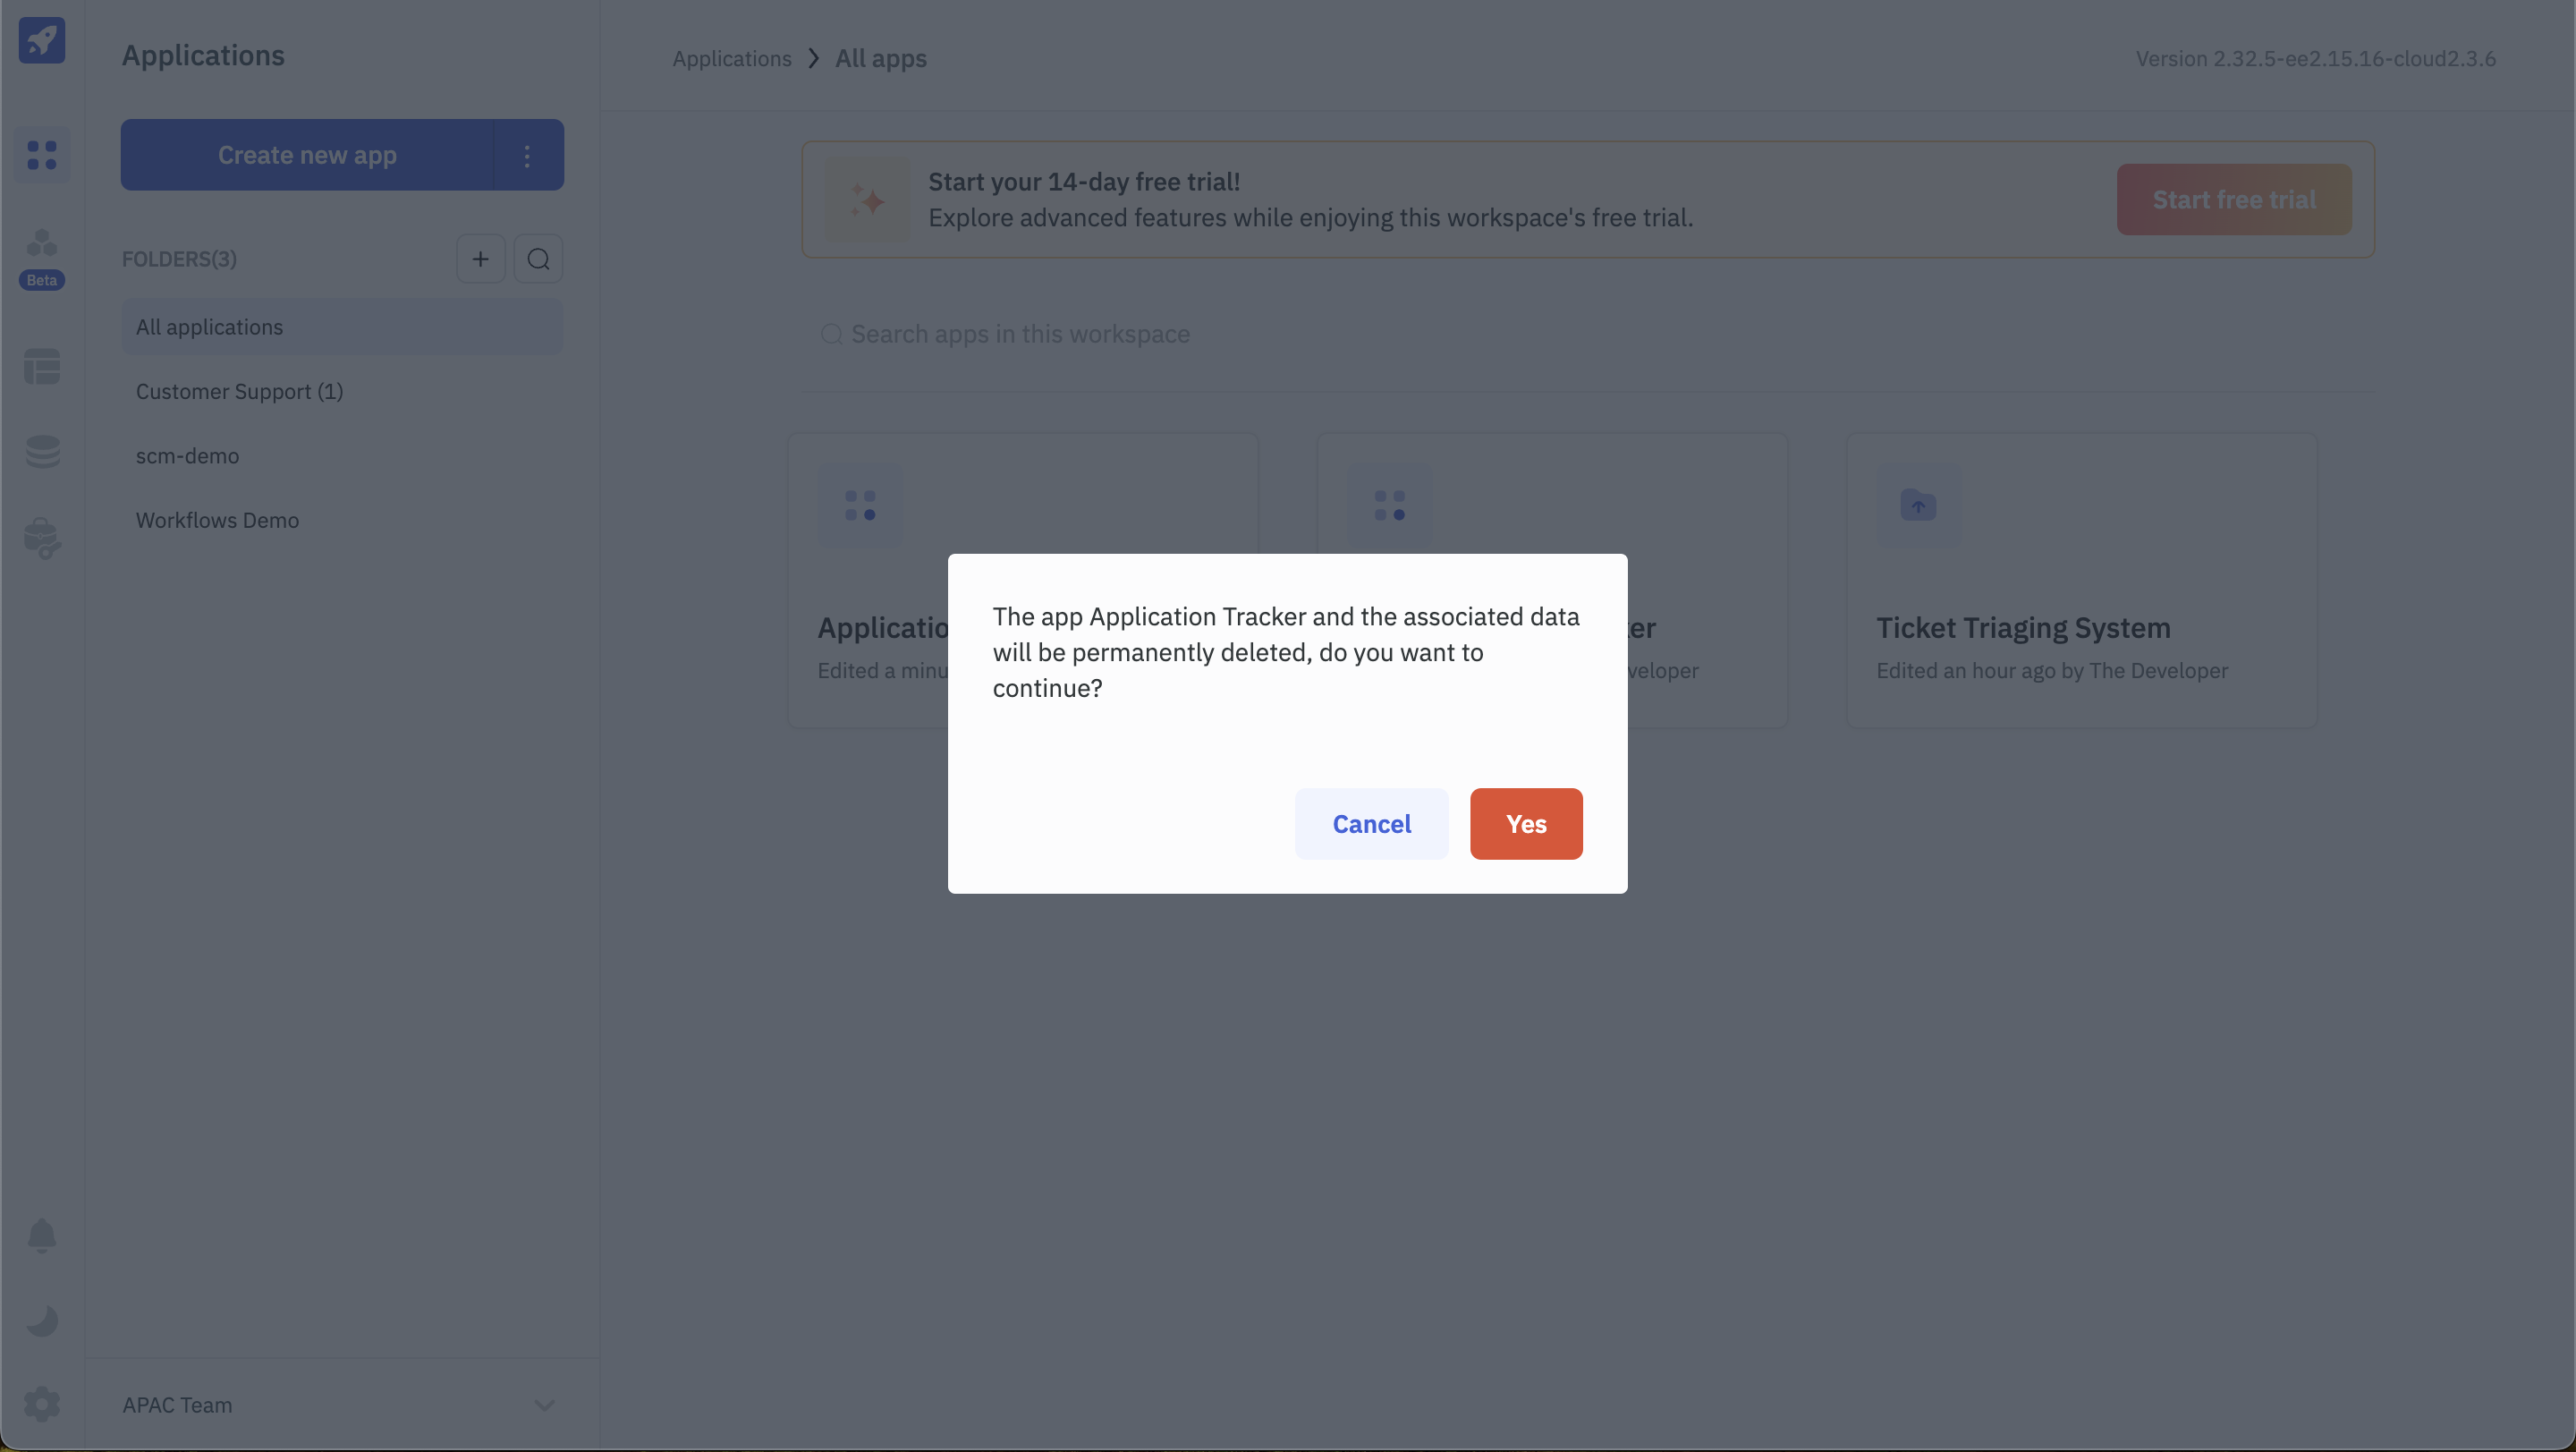
This option will open a confirmation modal to delete the app. Click on the Delete button to delete the app.
App Search
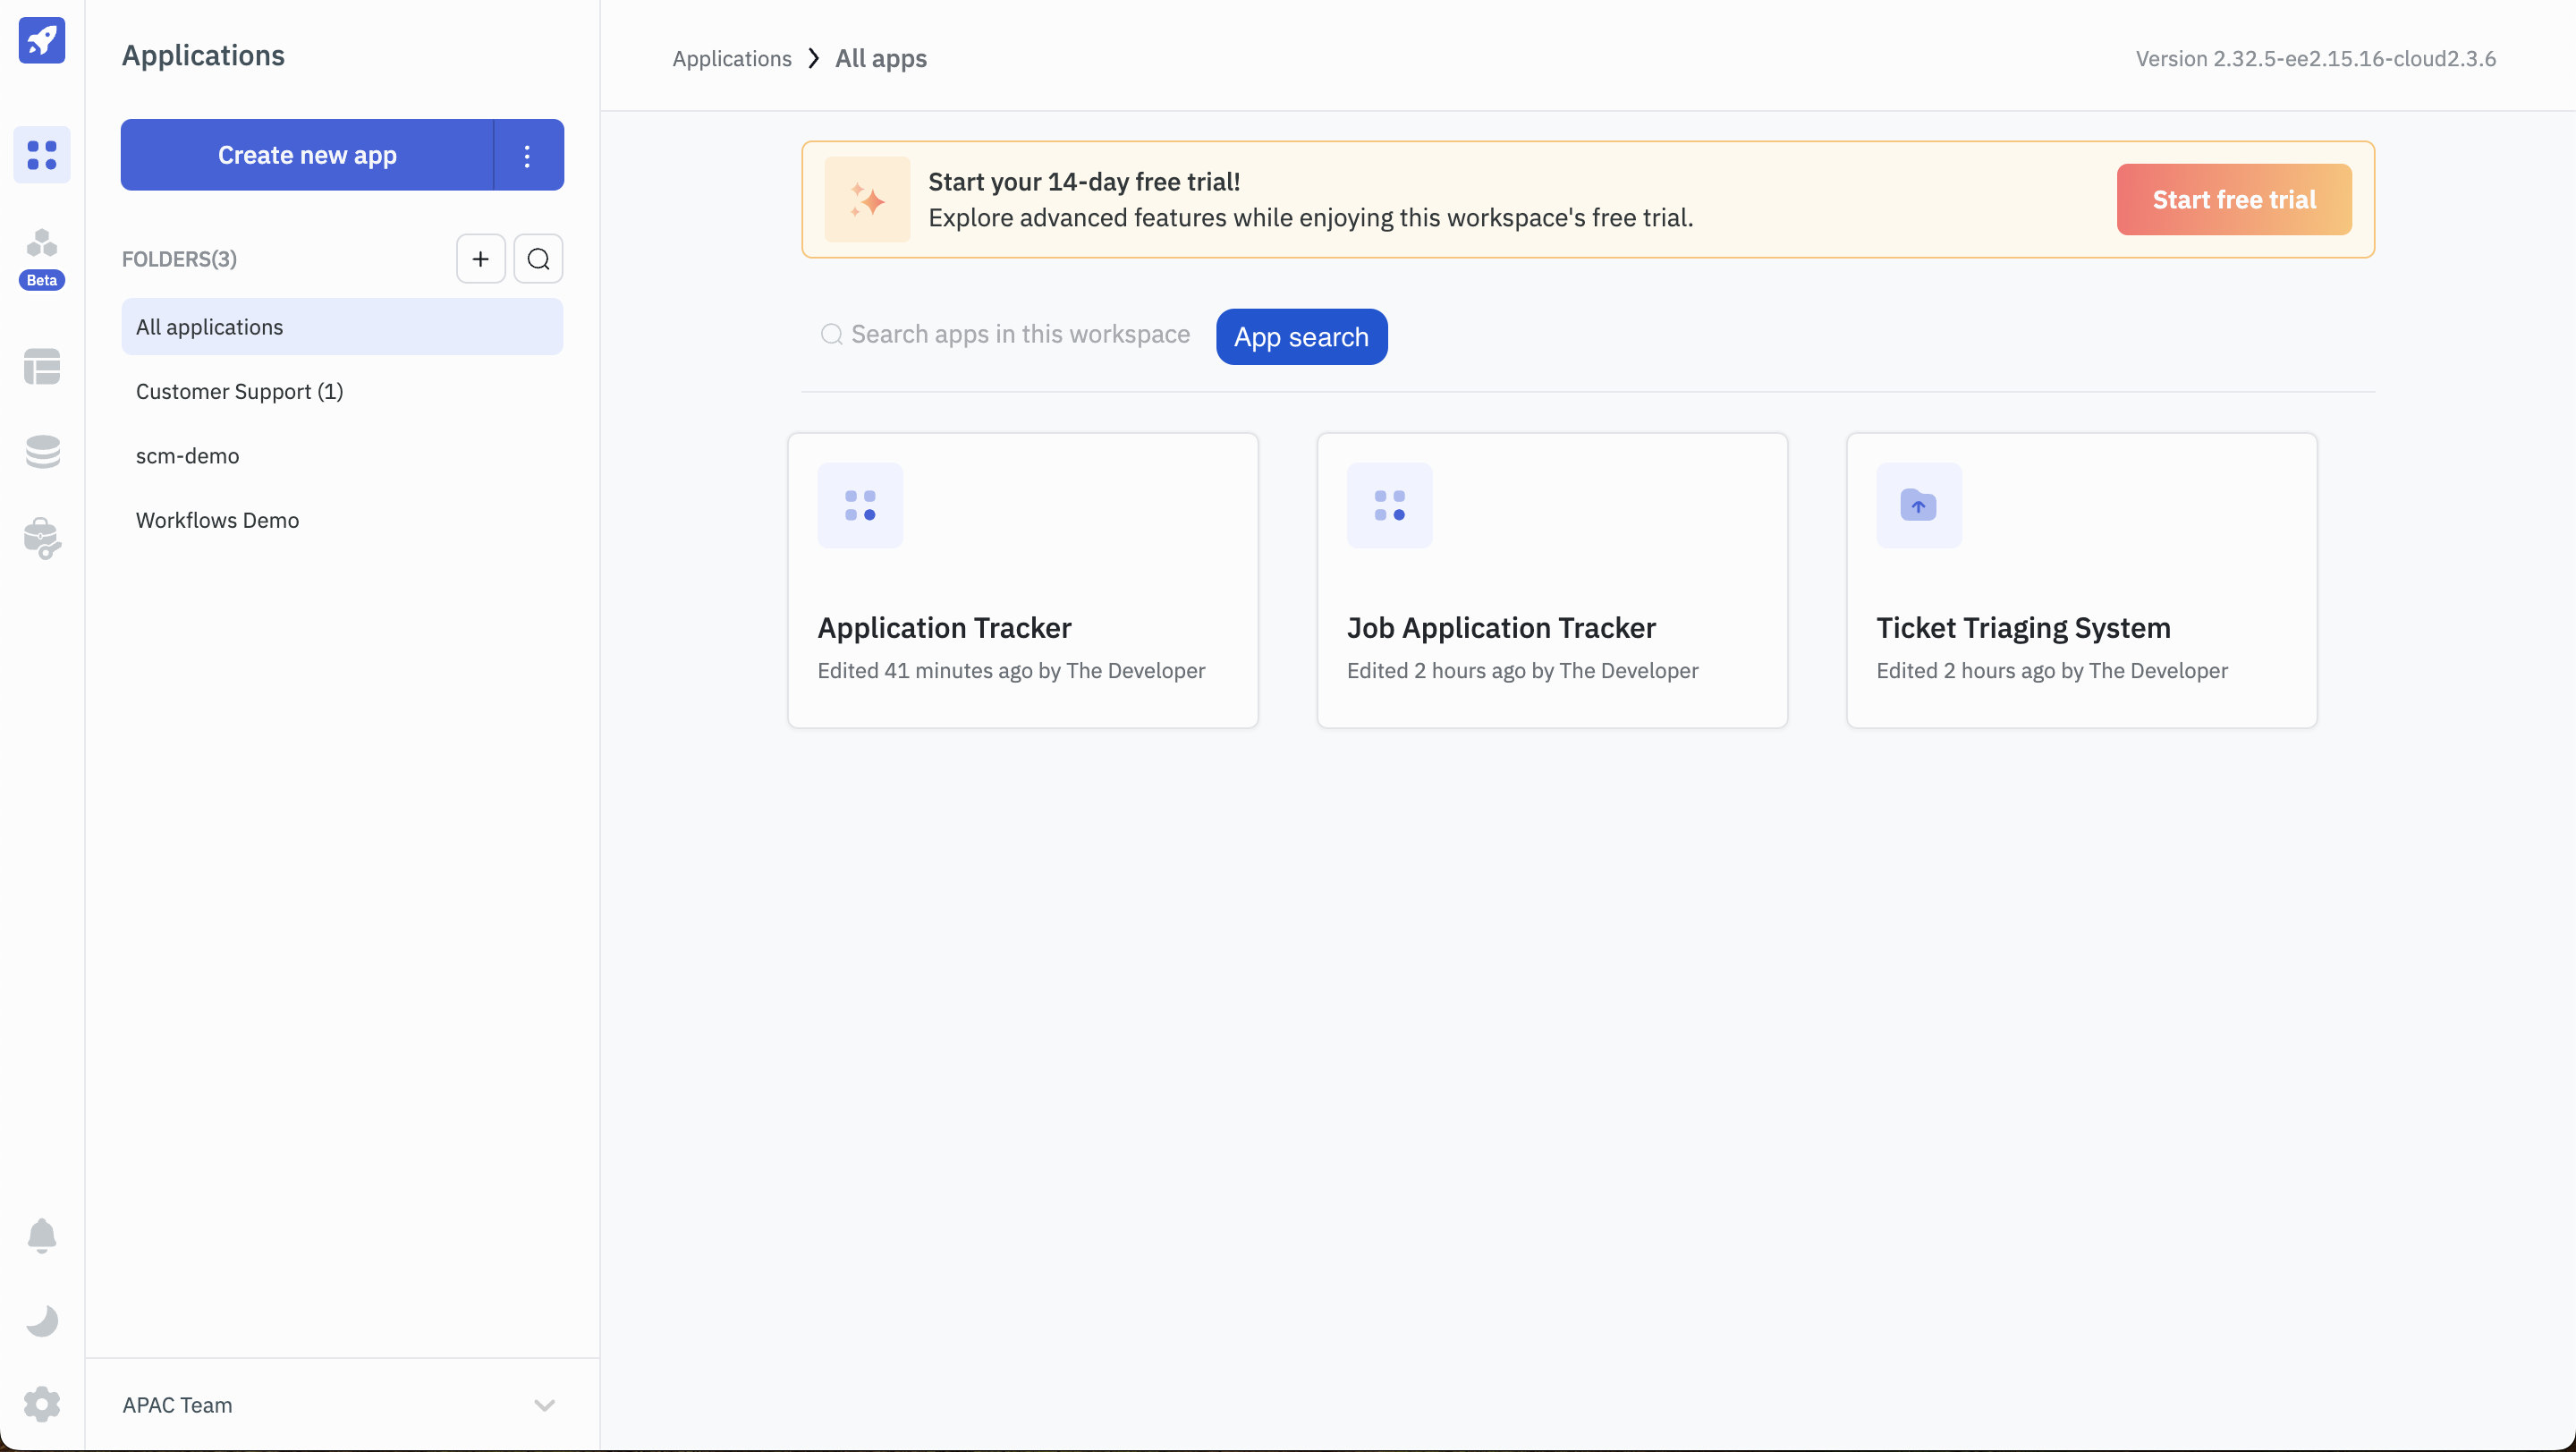
Apps can be searched by clicking on the search bar on the center of the dashboard. Click on the search bar and enter the name of the app to search.
Current ToolJet Version
The current version of ToolJet is displayed on the top right corner of the dashboard.
