Deploying ToolJet on Google Cloud Run
You should setup a PostgreSQL database manually to be used by ToolJet.
Follow the steps below to deploy ToolJet on Cloud run with gcloud CLI.
Deploying ToolJet application
- Create a new Google Cloud Run Service:
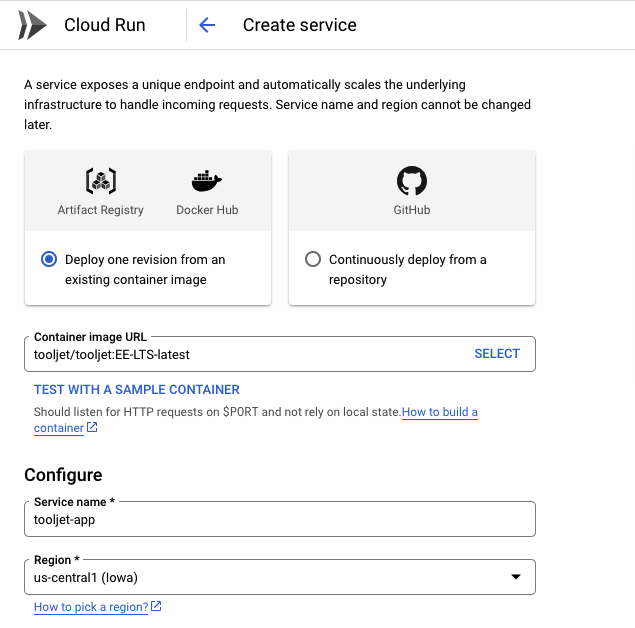
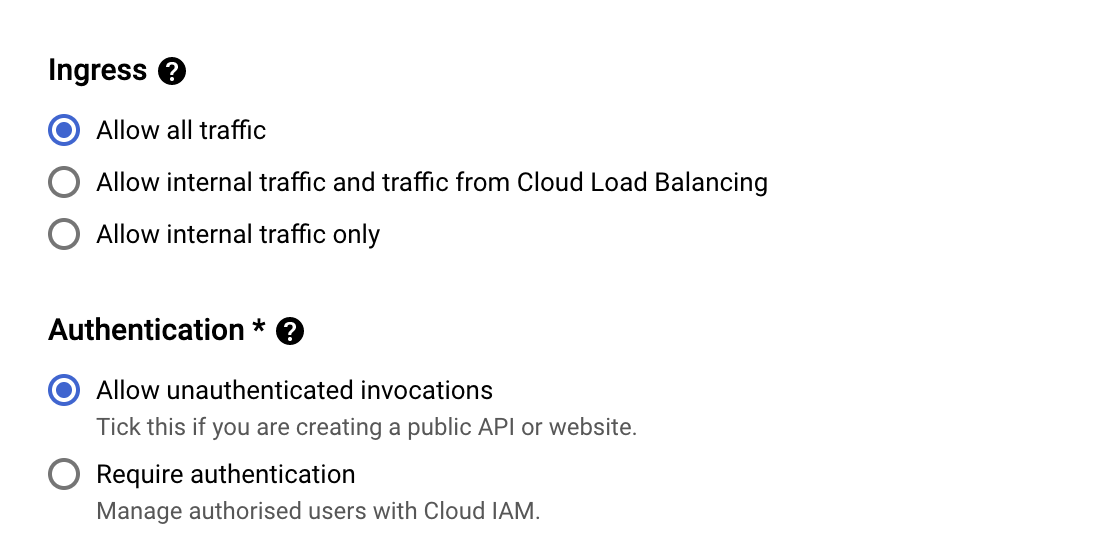
- Ingress and Authentication can be set as shown below, to begin with. Feel free to change the security configurations as per you see fit.
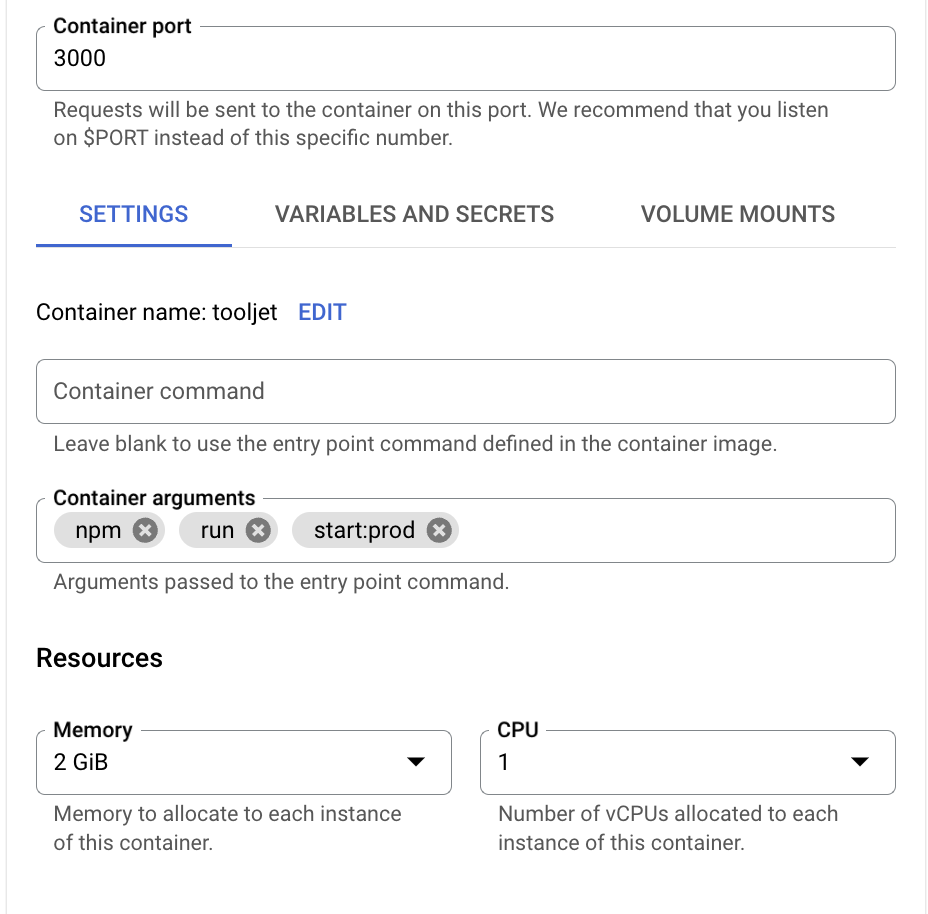
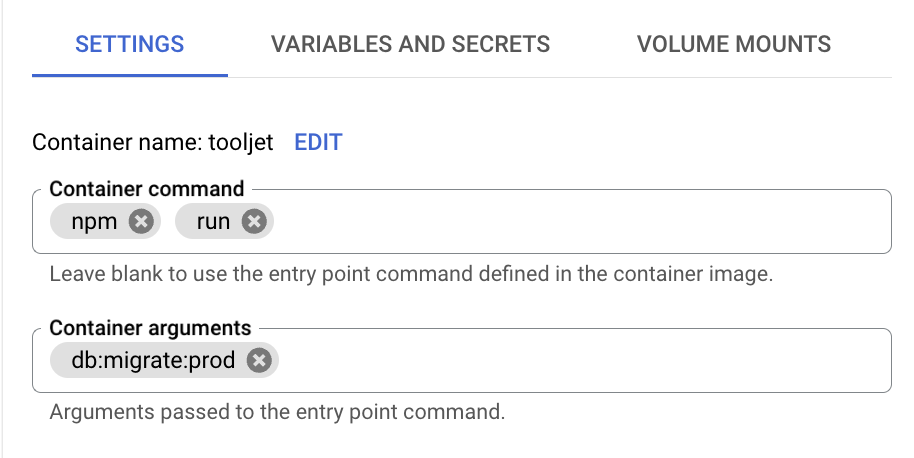
- Under containers tab, please make sure the port is set to 3000 and command
npm, run, start:prodis entered in container argument field with CPU capacity set to 2GiB:
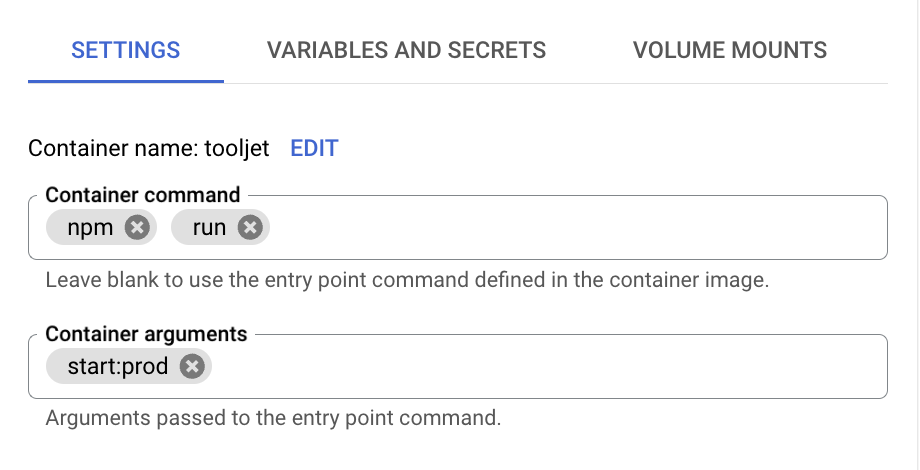
- If the command mentioned above is not compatible, please use the following command structure instead:
- Should you encounter any migration issues, please execute the following command. Be aware that executing this command may cause the revision to break. However, modifying the command back to
npm, run, start:prodwill successfully reboot the instance:
- Under environmental variable please add the below ToolJet application variables. You can also refer env variable here.
Update TOOLJET_HOST environment variable if you want to use the default url assigned with Cloud run after the initial deploy.
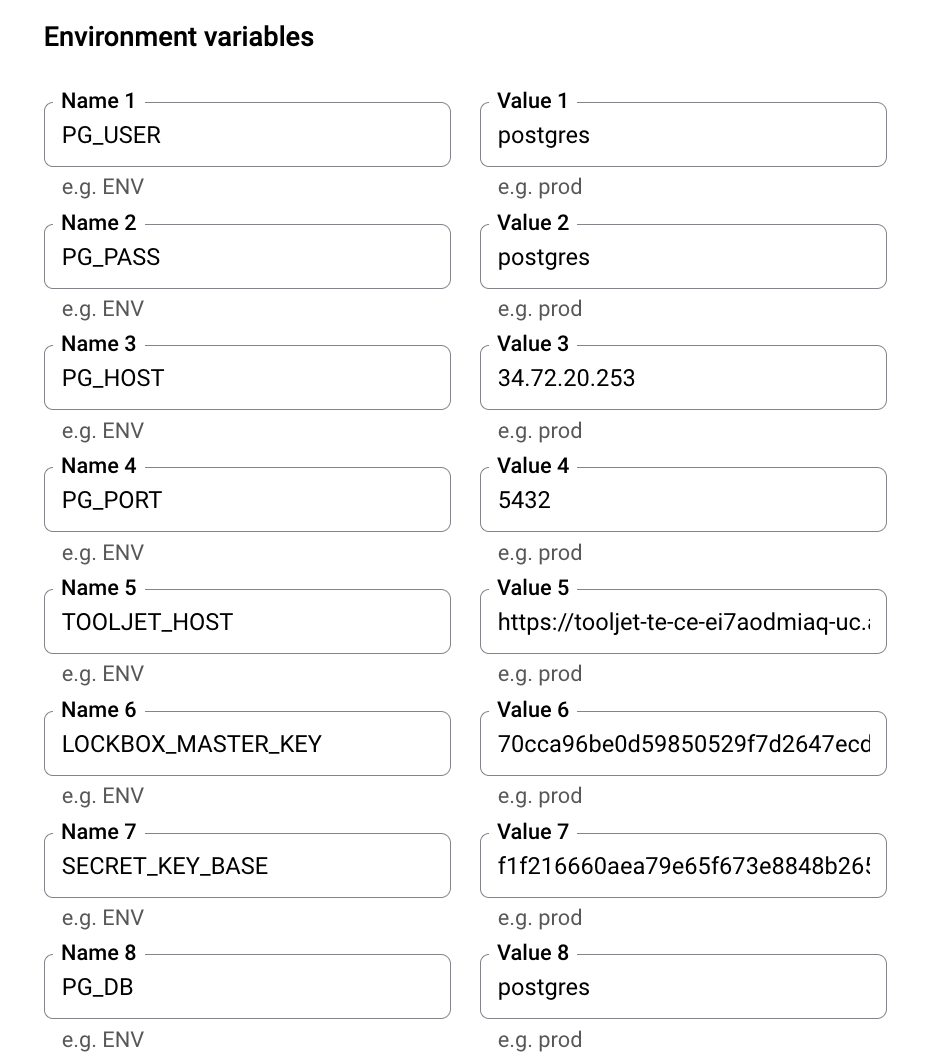
If you are using Public IP for Cloud SQL, then database host connection (value for PG_HOST) needs to be set using unix socket format, /cloudsql/<CLOUD_SQL_CONNECTION_NAME>.
- Please go to the connection tab. Under Cloud SQL instance please select the PostgreSQL database which you have set-up.
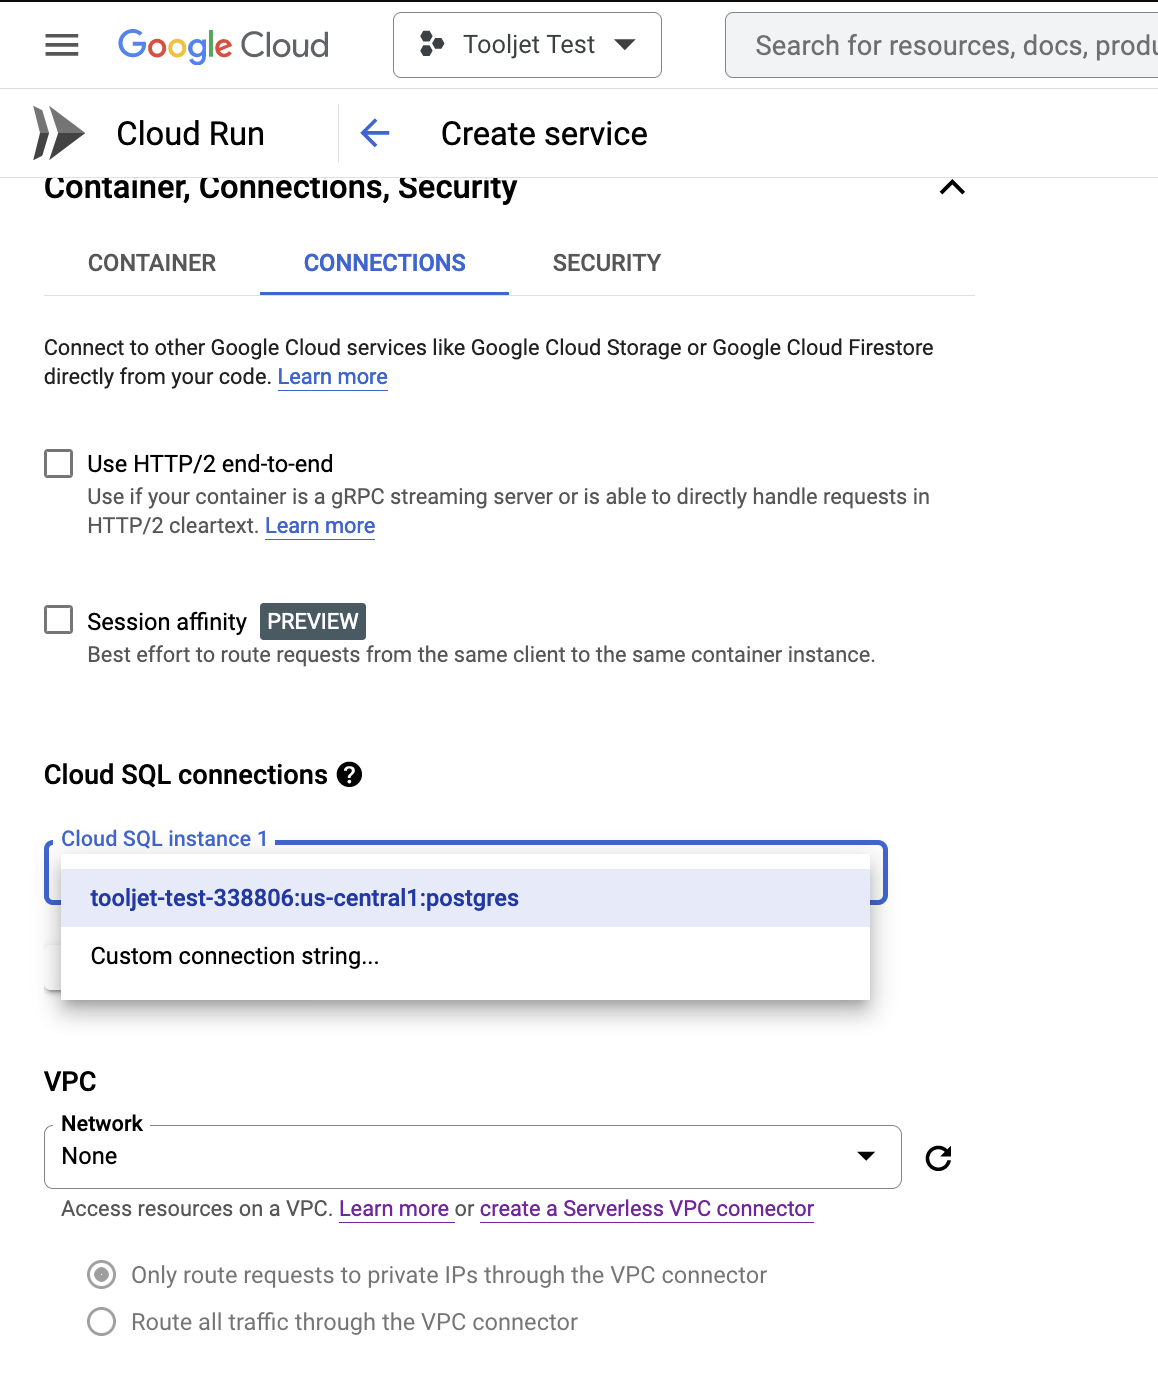
Click on deploy once the above parameters are set.
Once the Service is created and live, to make the Cloud Service URL public. Please follow the steps here to make the service public.
Deploying ToolJet Database
To use ToolJet Database, you'd have to set up and deploy PostgREST server which helps querying ToolJet Database. Deploying ToolJet Database is mandatory from ToolJet 3.0 or else the migration might break, checkout the following docs to know more about new major version, including breaking changes that require you to adjust your applications accordingly:
-
Cloud Run requires prebuilt image to be present within cloud registry. You can pull specific PostgREST image from docker hub and then tag with your project to push it to cloud registry.
docker pull postgrest/postgrest:v12.0.2Please run the above command by launching googleCLI which will help to push the PostgREST image to Google container registry.
-
Ingress and Authentication can be set as shown below, to begin with. Feel free to change the security configurations as per you see fit.

-
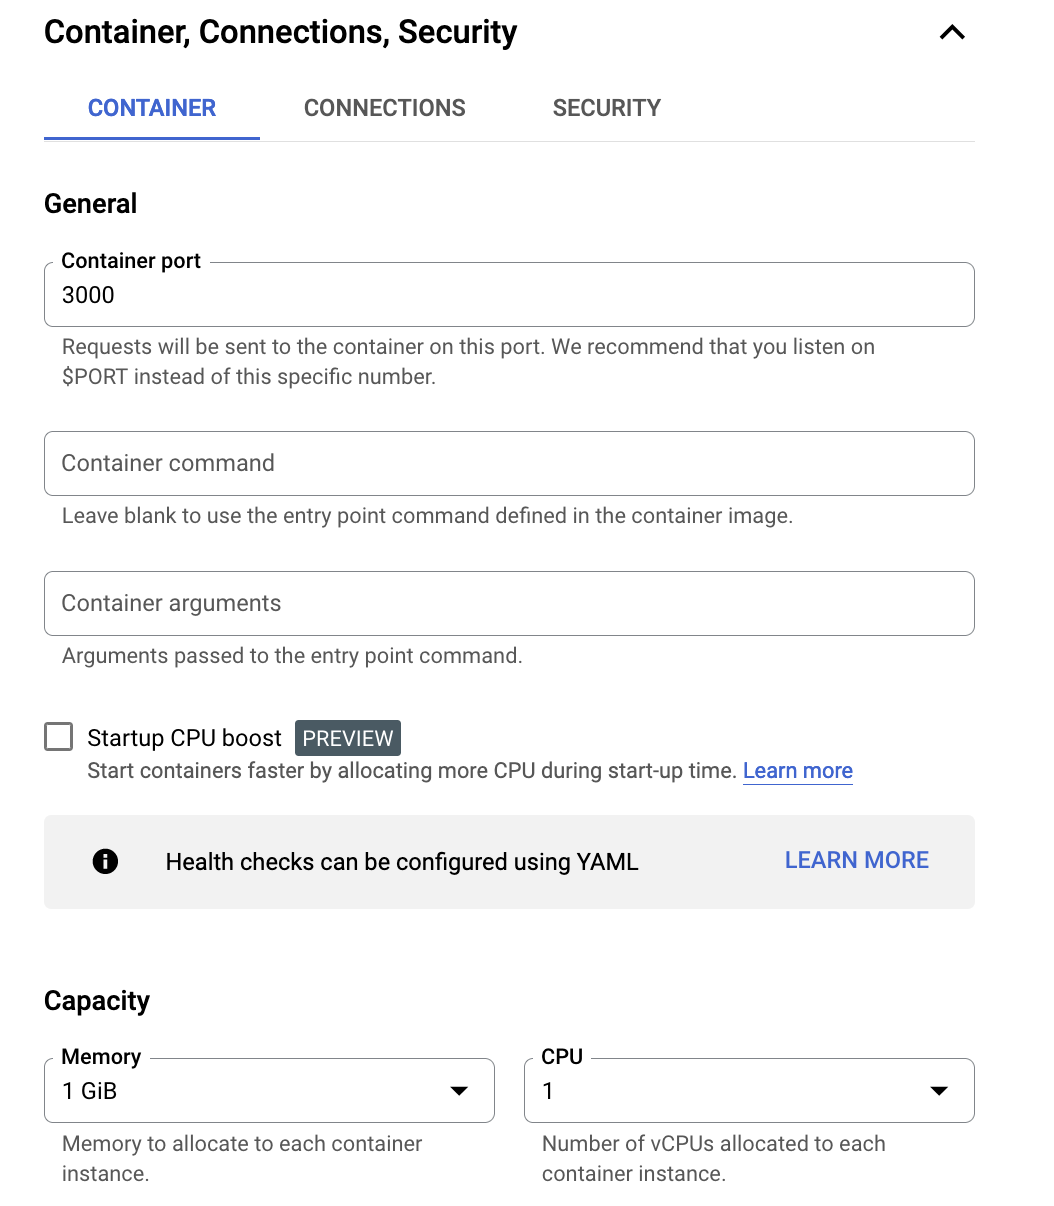
Under containers tab, please make sure the port is set 3000 and CPU capacity is set to 1GiB.
-
Under environmental variable please add corresponding ToolJet database env variables. You can also refer env variable.
-
Please go to connection tab. Under Cloud SQL instance please select the PostgreSQL database which you have set-up for ToolJet application or the separate PostgreSQL database created respective to ToolJet Database from the drop-down option.
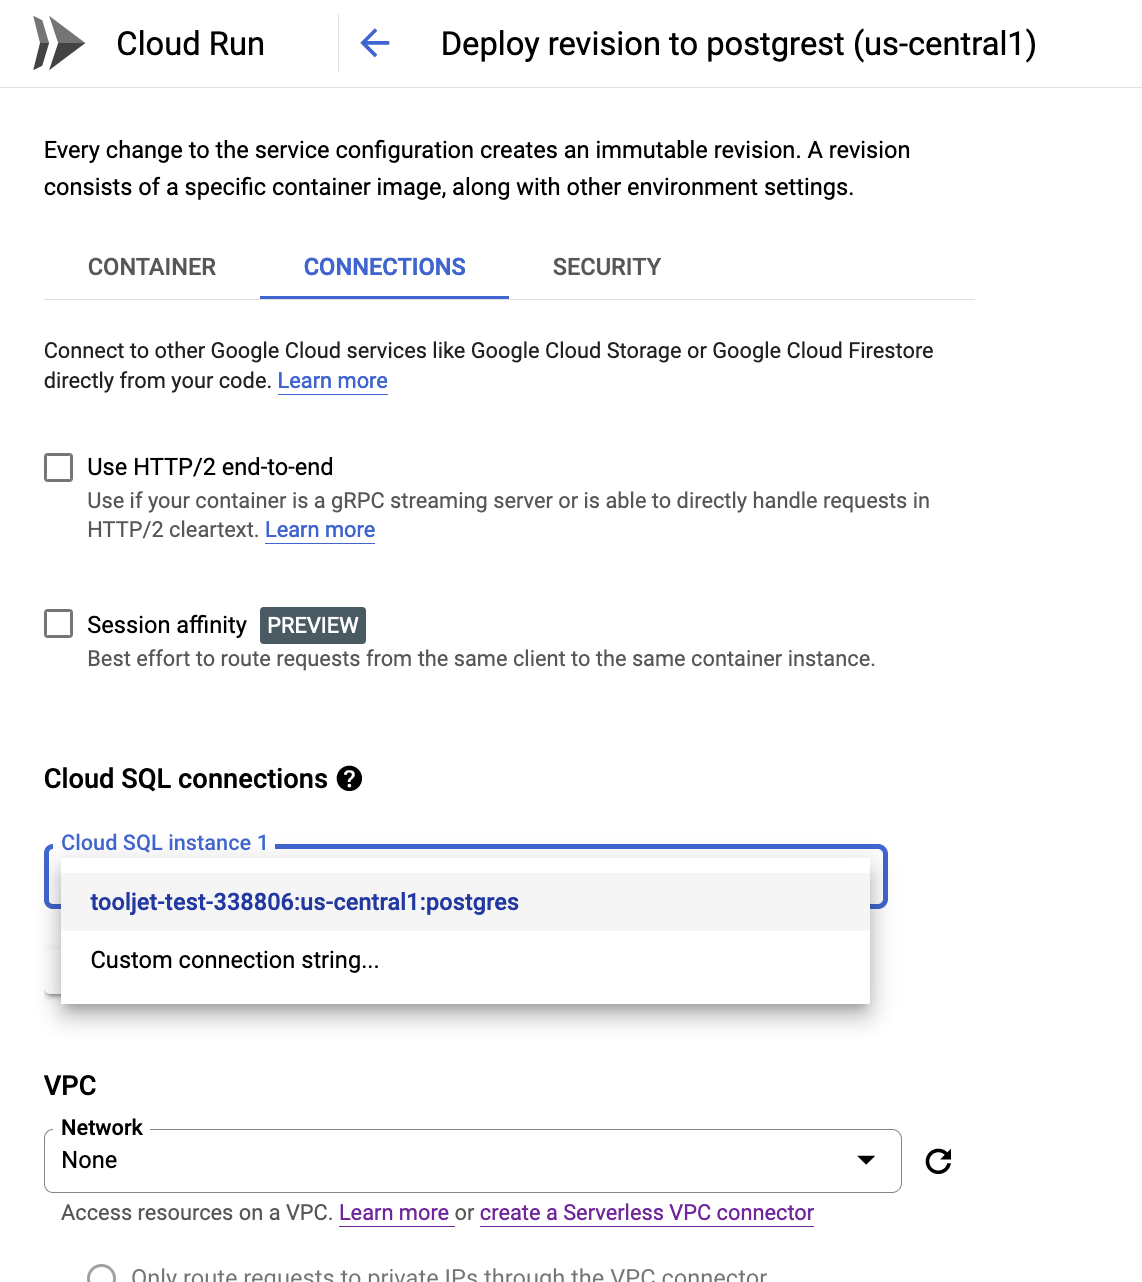
Click on deploy once the above parameters are set.
infoOnce the Service is created and live, to make the Cloud Service URL public. Please follow the steps here to make the service public.
-
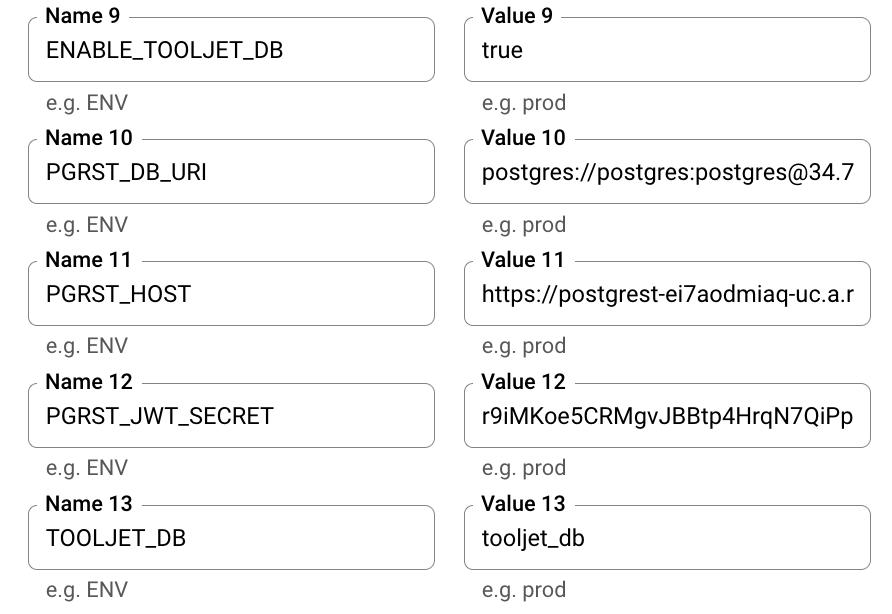
Additional Environmental variable to be added to ToolJet application or ToolJet Server connect to PostgREST server. You can also refer env variable here
Workflows
ToolJet Workflows allows users to design and execute complex, data-centric automations using a visual, node-based interface. This feature enhances ToolJet's functionality beyond building secure internal tools, enabling developers to automate complex business processes.
Enabling Workflow Scheduling
Please deploy the below containers to enable workflows scheduling.
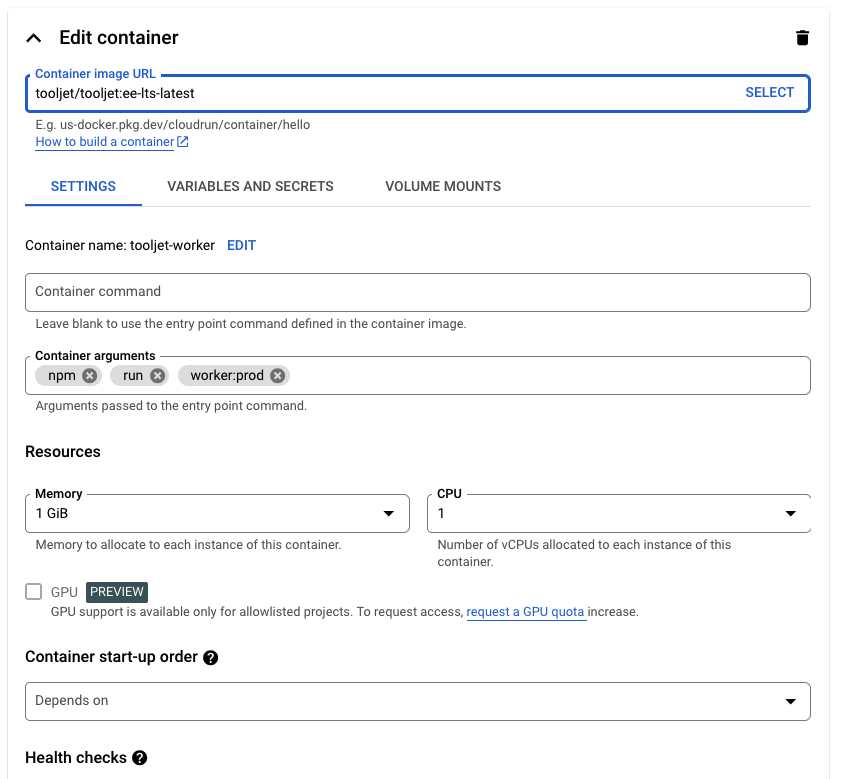
Worker container:
You can use the same tooljet/tooljet:ee-latest image tag and ensure it has env variables from the tooljet-app container.
To activate workflow scheduling, set the following environment variables:
WORKFLOW_WORKER=true
ENABLE_WORKFLOW_SCHEDULING=true
TOOLJET_WORKFLOWS_TEMPORAL_NAMESPACE=default
TEMPORAL_SERVER_ADDRESS=<Temporal_Server_Address>
Under the containers tab, please make sure the command npm, run, worker:prod is set.
Temporal server container:
- Set the image tag as
temporalio/auto-setup:1.25.1
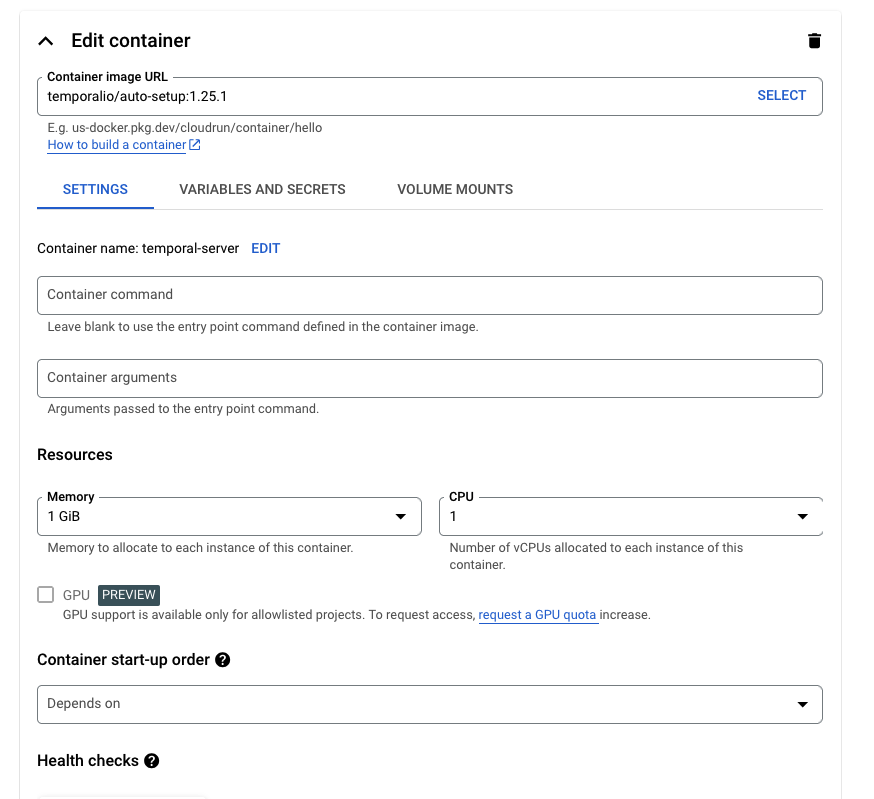
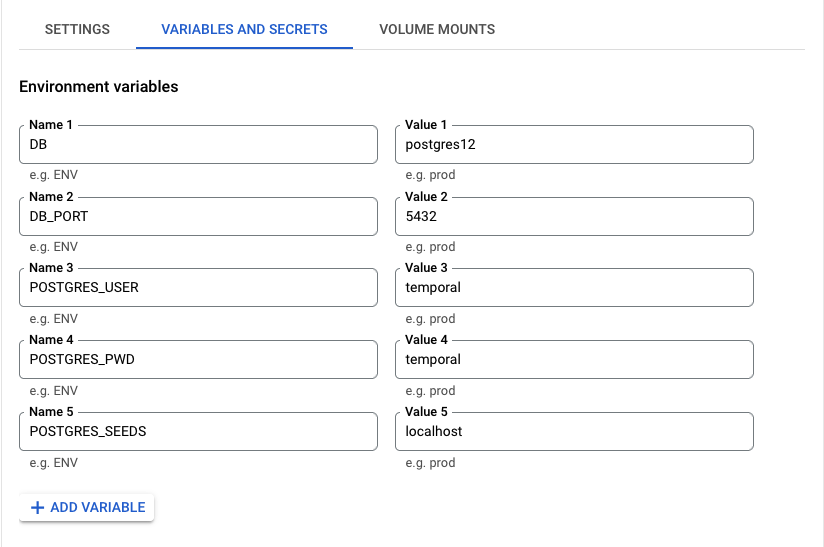
- Add the below env variables to the temporal container:
Upgrading to the Latest LTS Version
New LTS versions are released every 3-5 months with an end-of-life of atleast 18 months. To check the latest LTS version, visit the ToolJet Docker Hub page. The LTS tags follow a naming convention with the prefix LTS- followed by the version number, for example tooljet/tooljet:ee-lts-latest.
If this is a new installation of the application, you may start directly with the latest version. This guide is not required for new installations.
Prerequisites for Upgrading to the Latest LTS Version:
-
It is crucial to perform a comprehensive backup of your database before starting the upgrade process to prevent data loss.
-
Users on versions earlier than v2.23.0-ee2.10.2 must first upgrade to this version before proceeding to the LTS version.
If you have any questions feel free to join our Slack Community or send us an email at [email protected].