GitSync
The GitSync feature enables synchronization of workspace applications with a git repository, streamlining application management and version control on ToolJet.
Overview
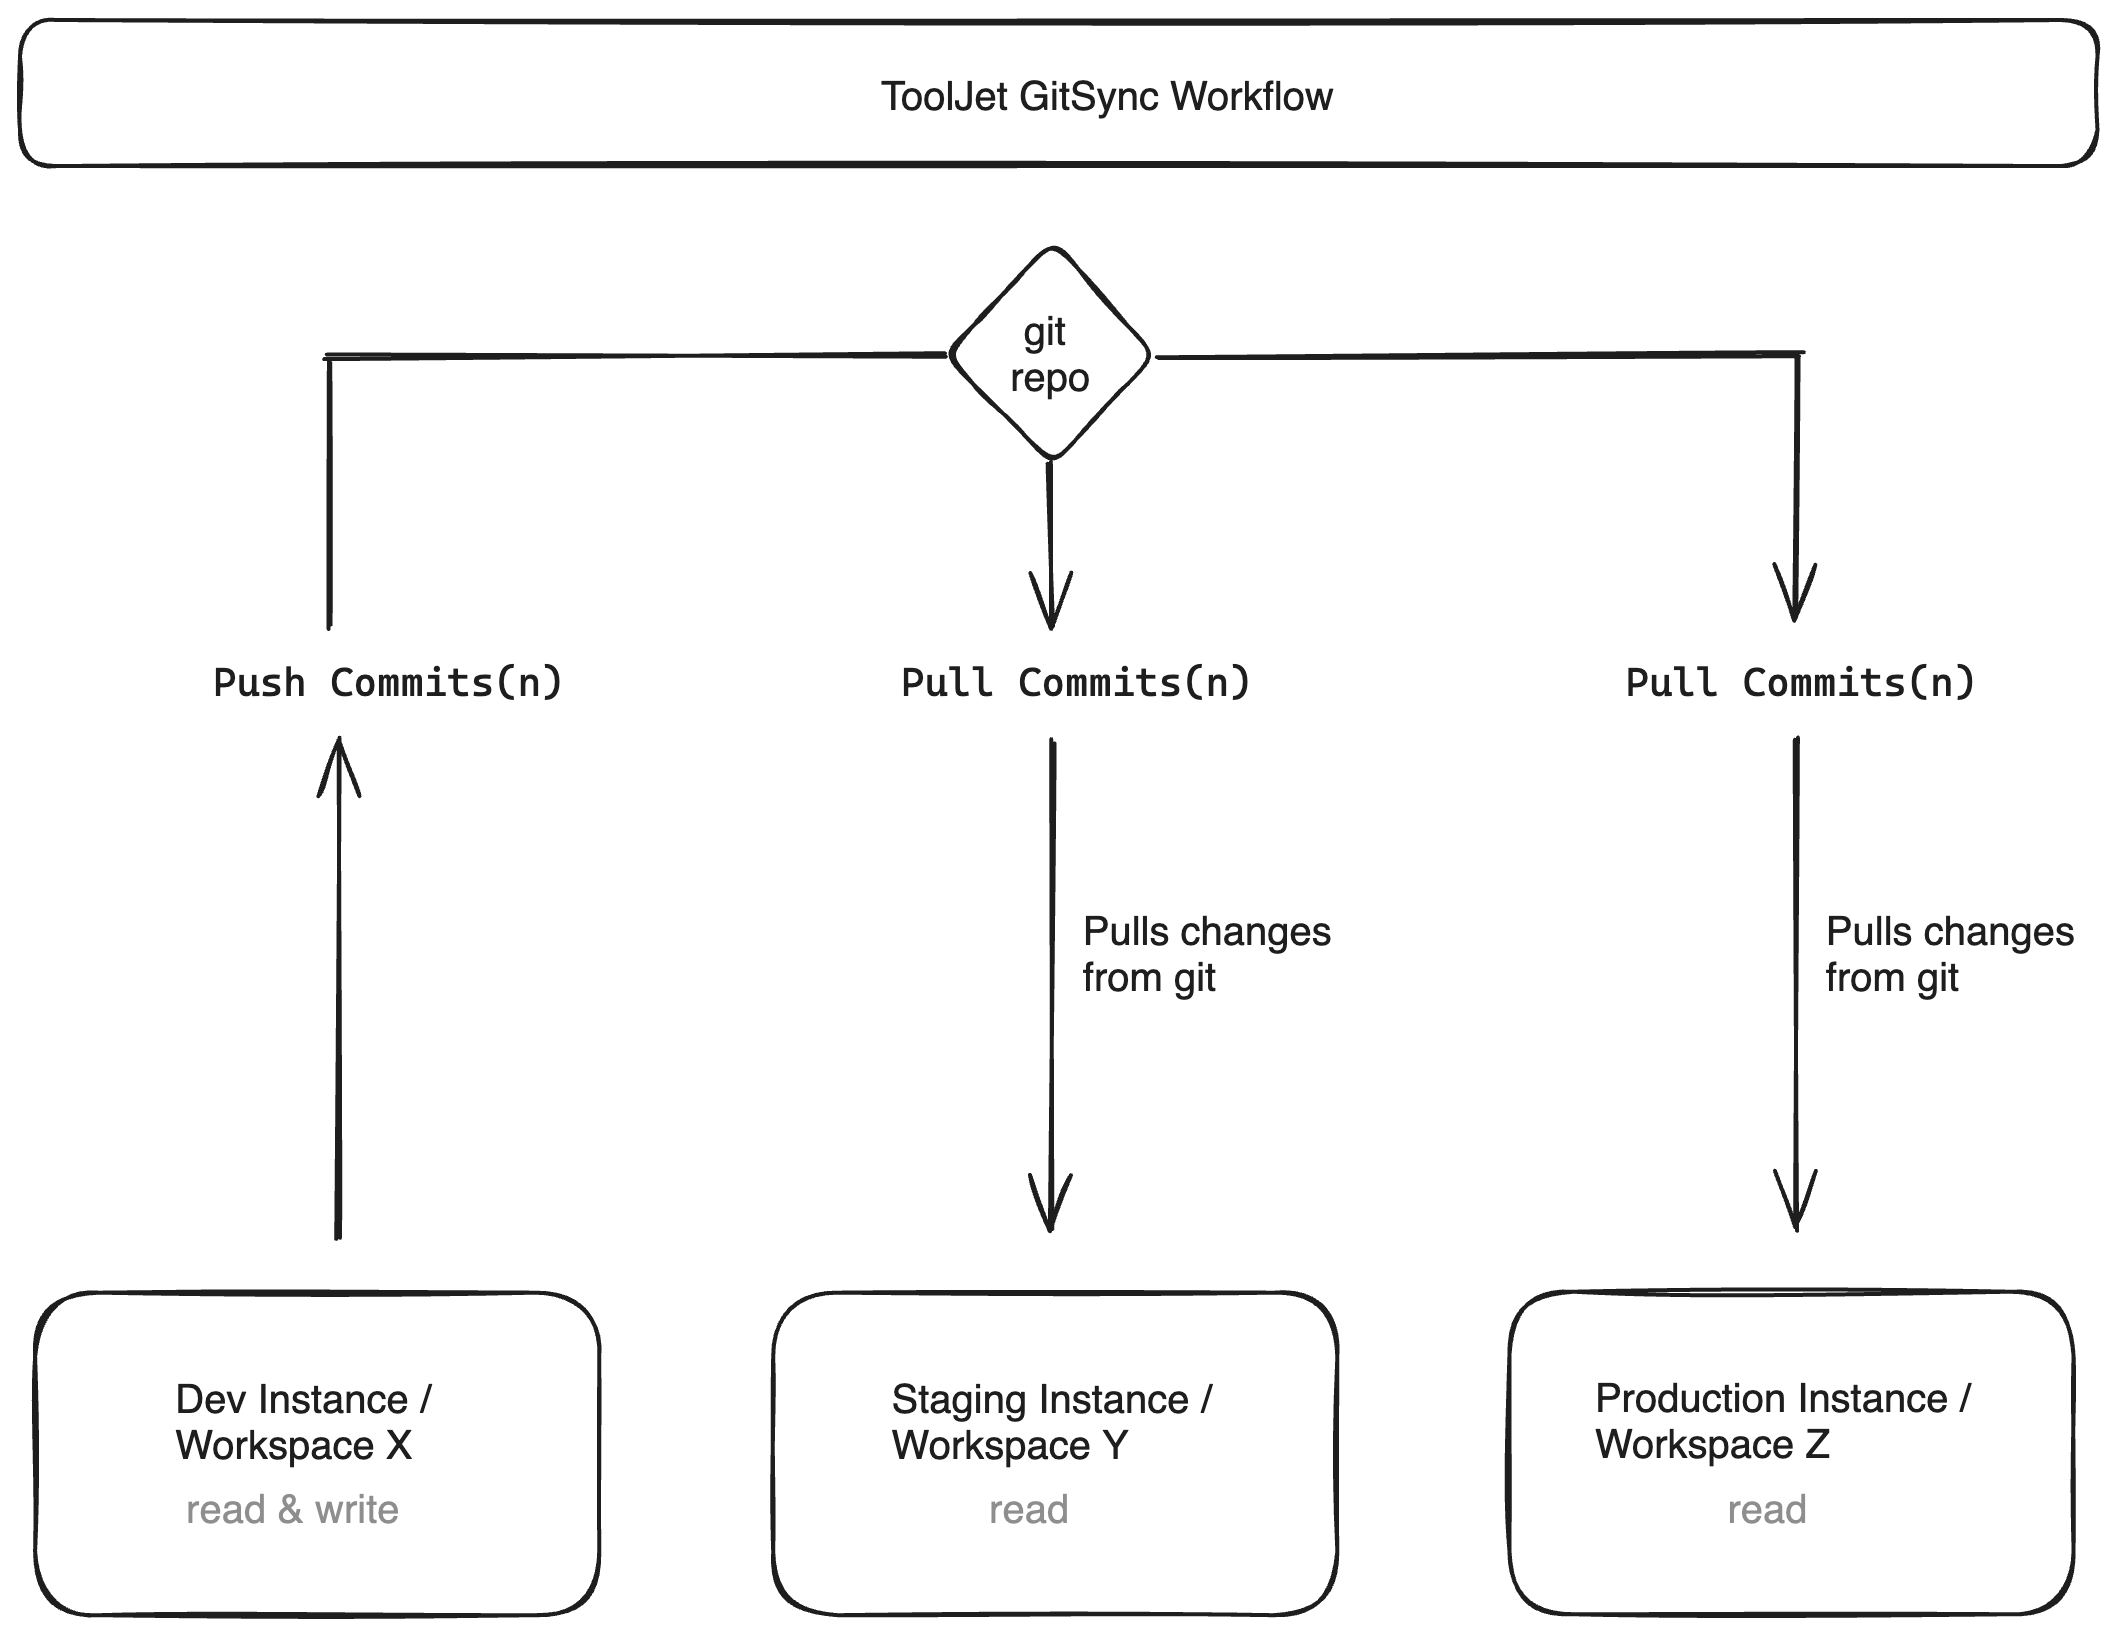
ToolJet applications can be synchronized with a Git repository, offering the flexibility to tailor your application development and deployment processes across various environments while aligning with best practices for the application development lifecycle.
Key Use-Cases
Backup of Apps
GitSync provides a straightforward solution for creating backups of your applications. By pushing changes to a Git repository, users can ensure a secure and versioned history of their application. This serves as a reliable backup mechanism, safeguarding against accidental application/version deletion or corruption.
Environment Migration
Facilitating the movement of applications across different ToolJet deployments (e.g., from development to staging to production), GitSync acts as a pivotal tool for environment migration. Users can effortlessly transfer their applications across environments by pushing changes to a Git repository.
Setting up GitSync
- ToolJet support git repo managers like GitHub, GitLab, Bitbucket, AWS CodeCommit, and Azure Repos.
- Only Admins have the permission to configure the GitSync feature on workspace level.
- The default branch name for the git repository should be master.
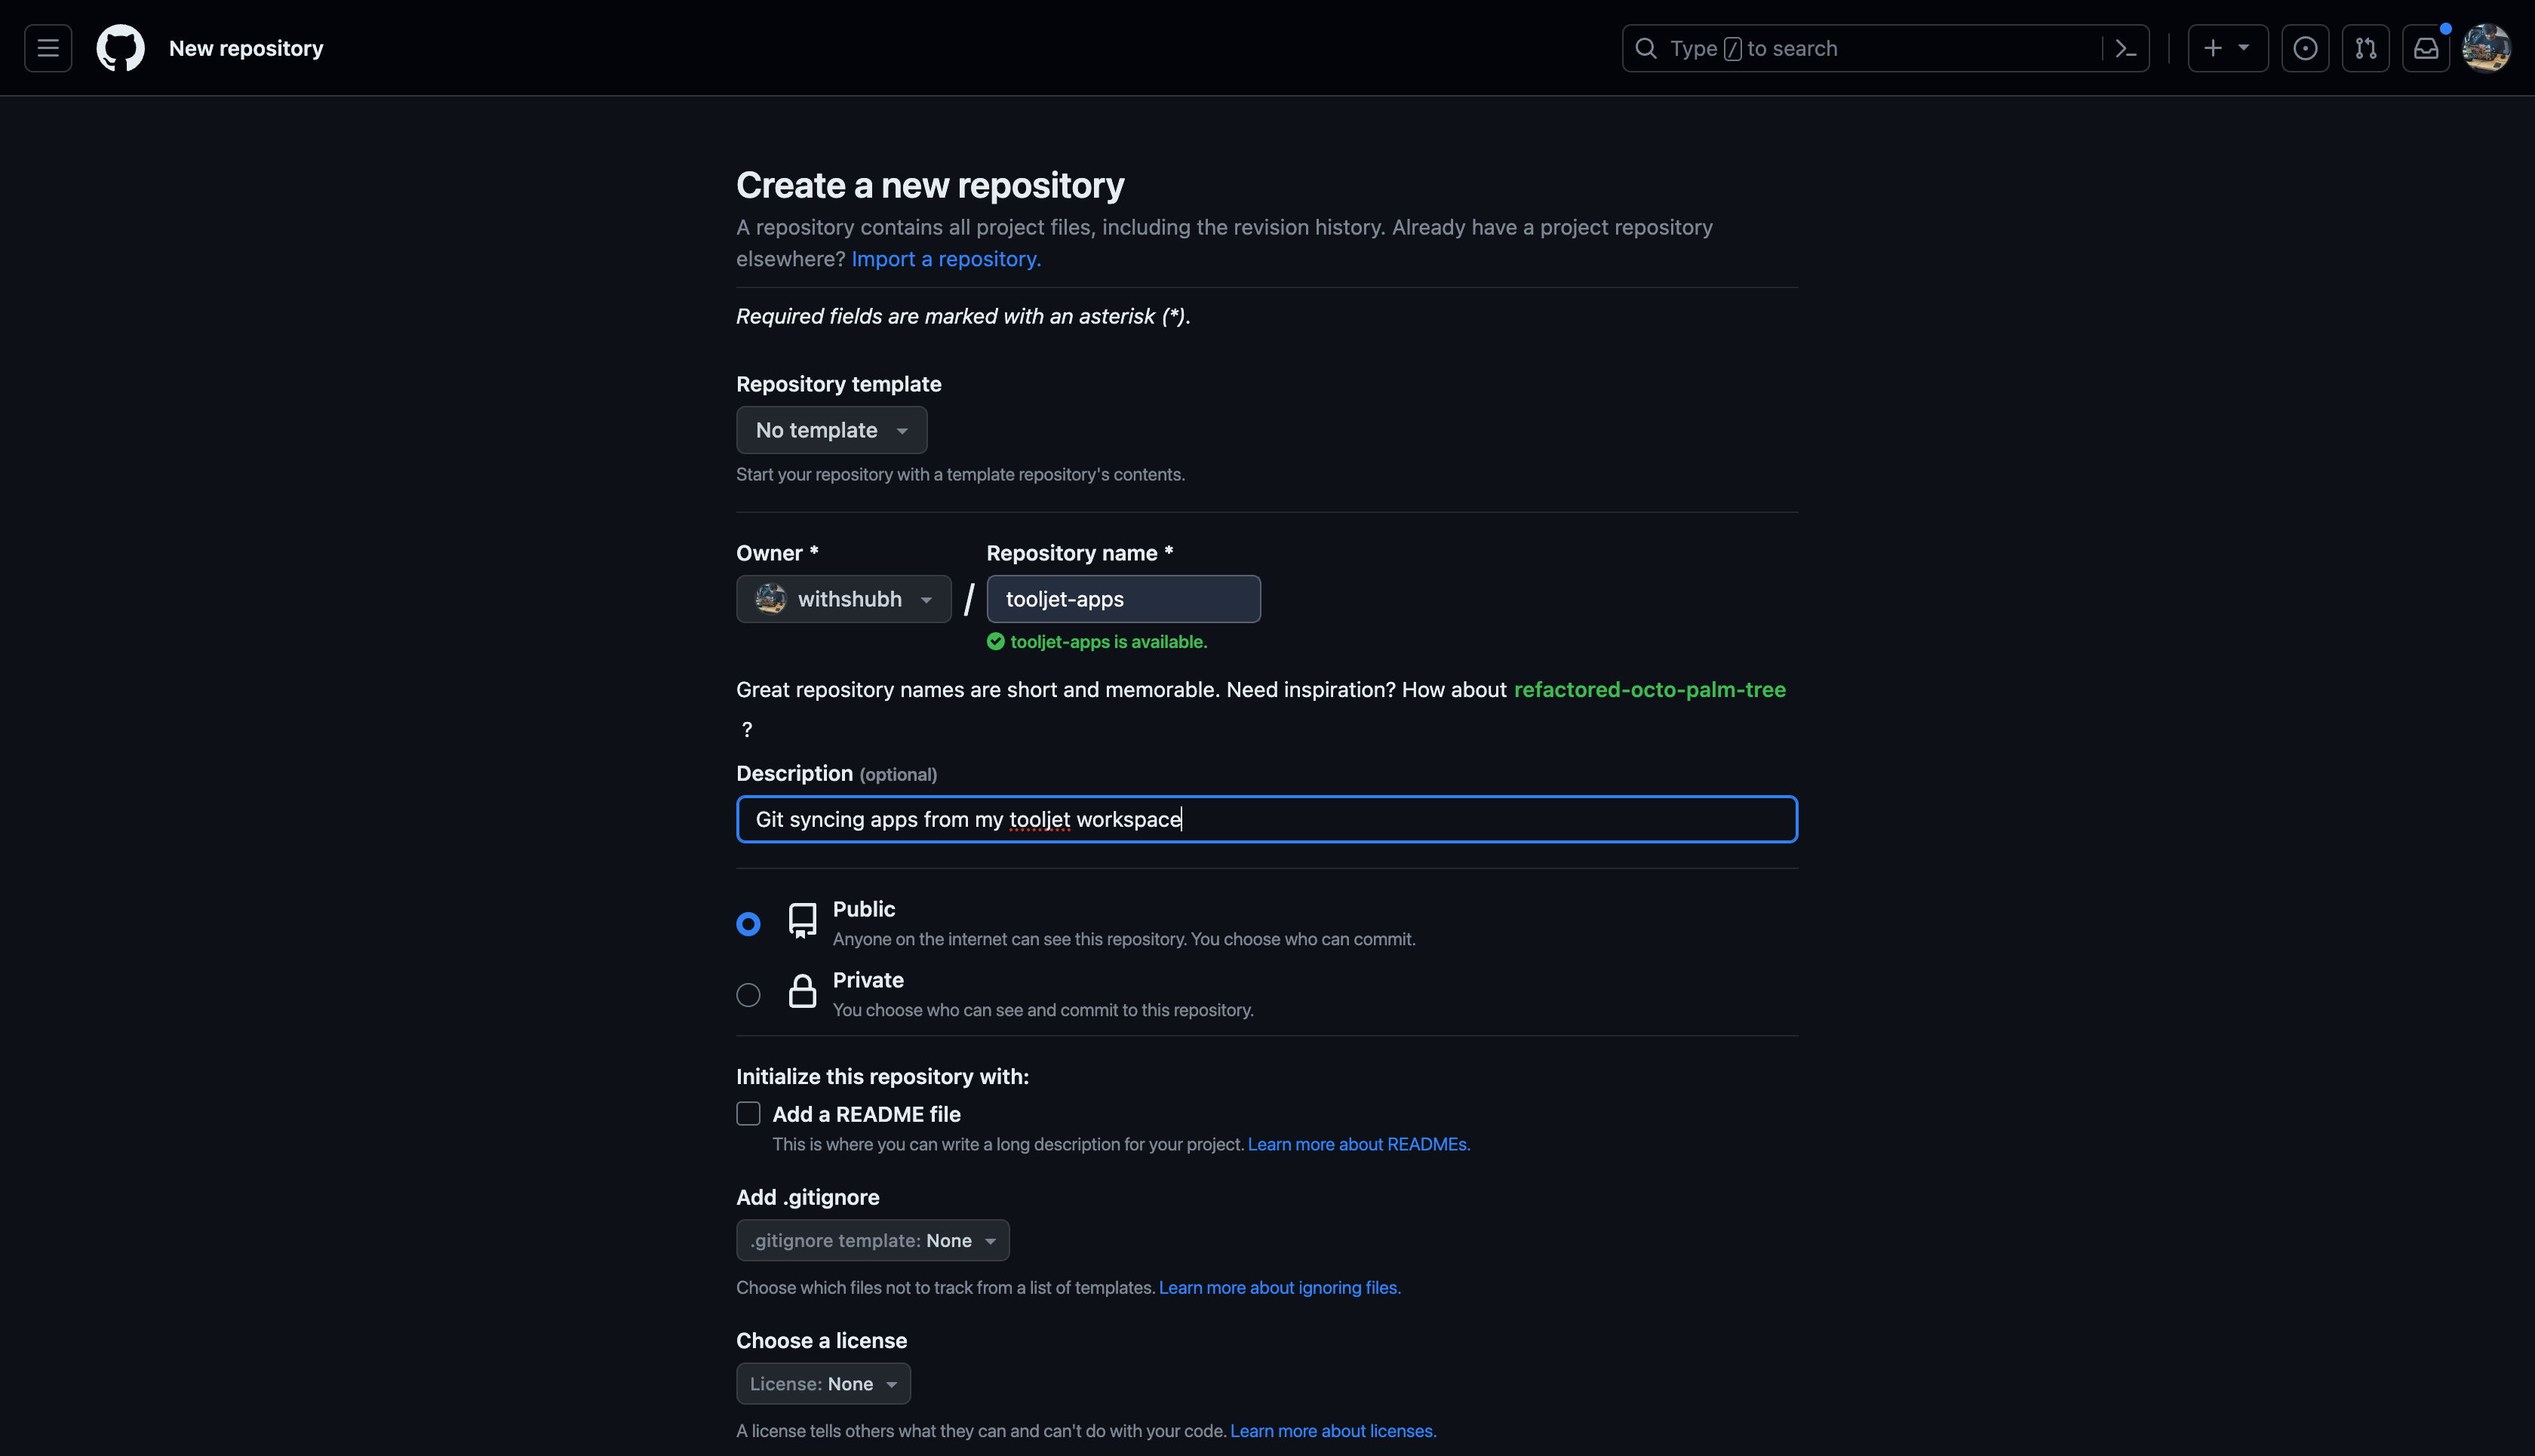
1. Create a New Repository
Create a new repository on your git repo manager. The repository can be public or private. You can also use an existing repository. Make sure that the repository is empty.
- GitHub
- GitLab

2. Obtain the Repository URL
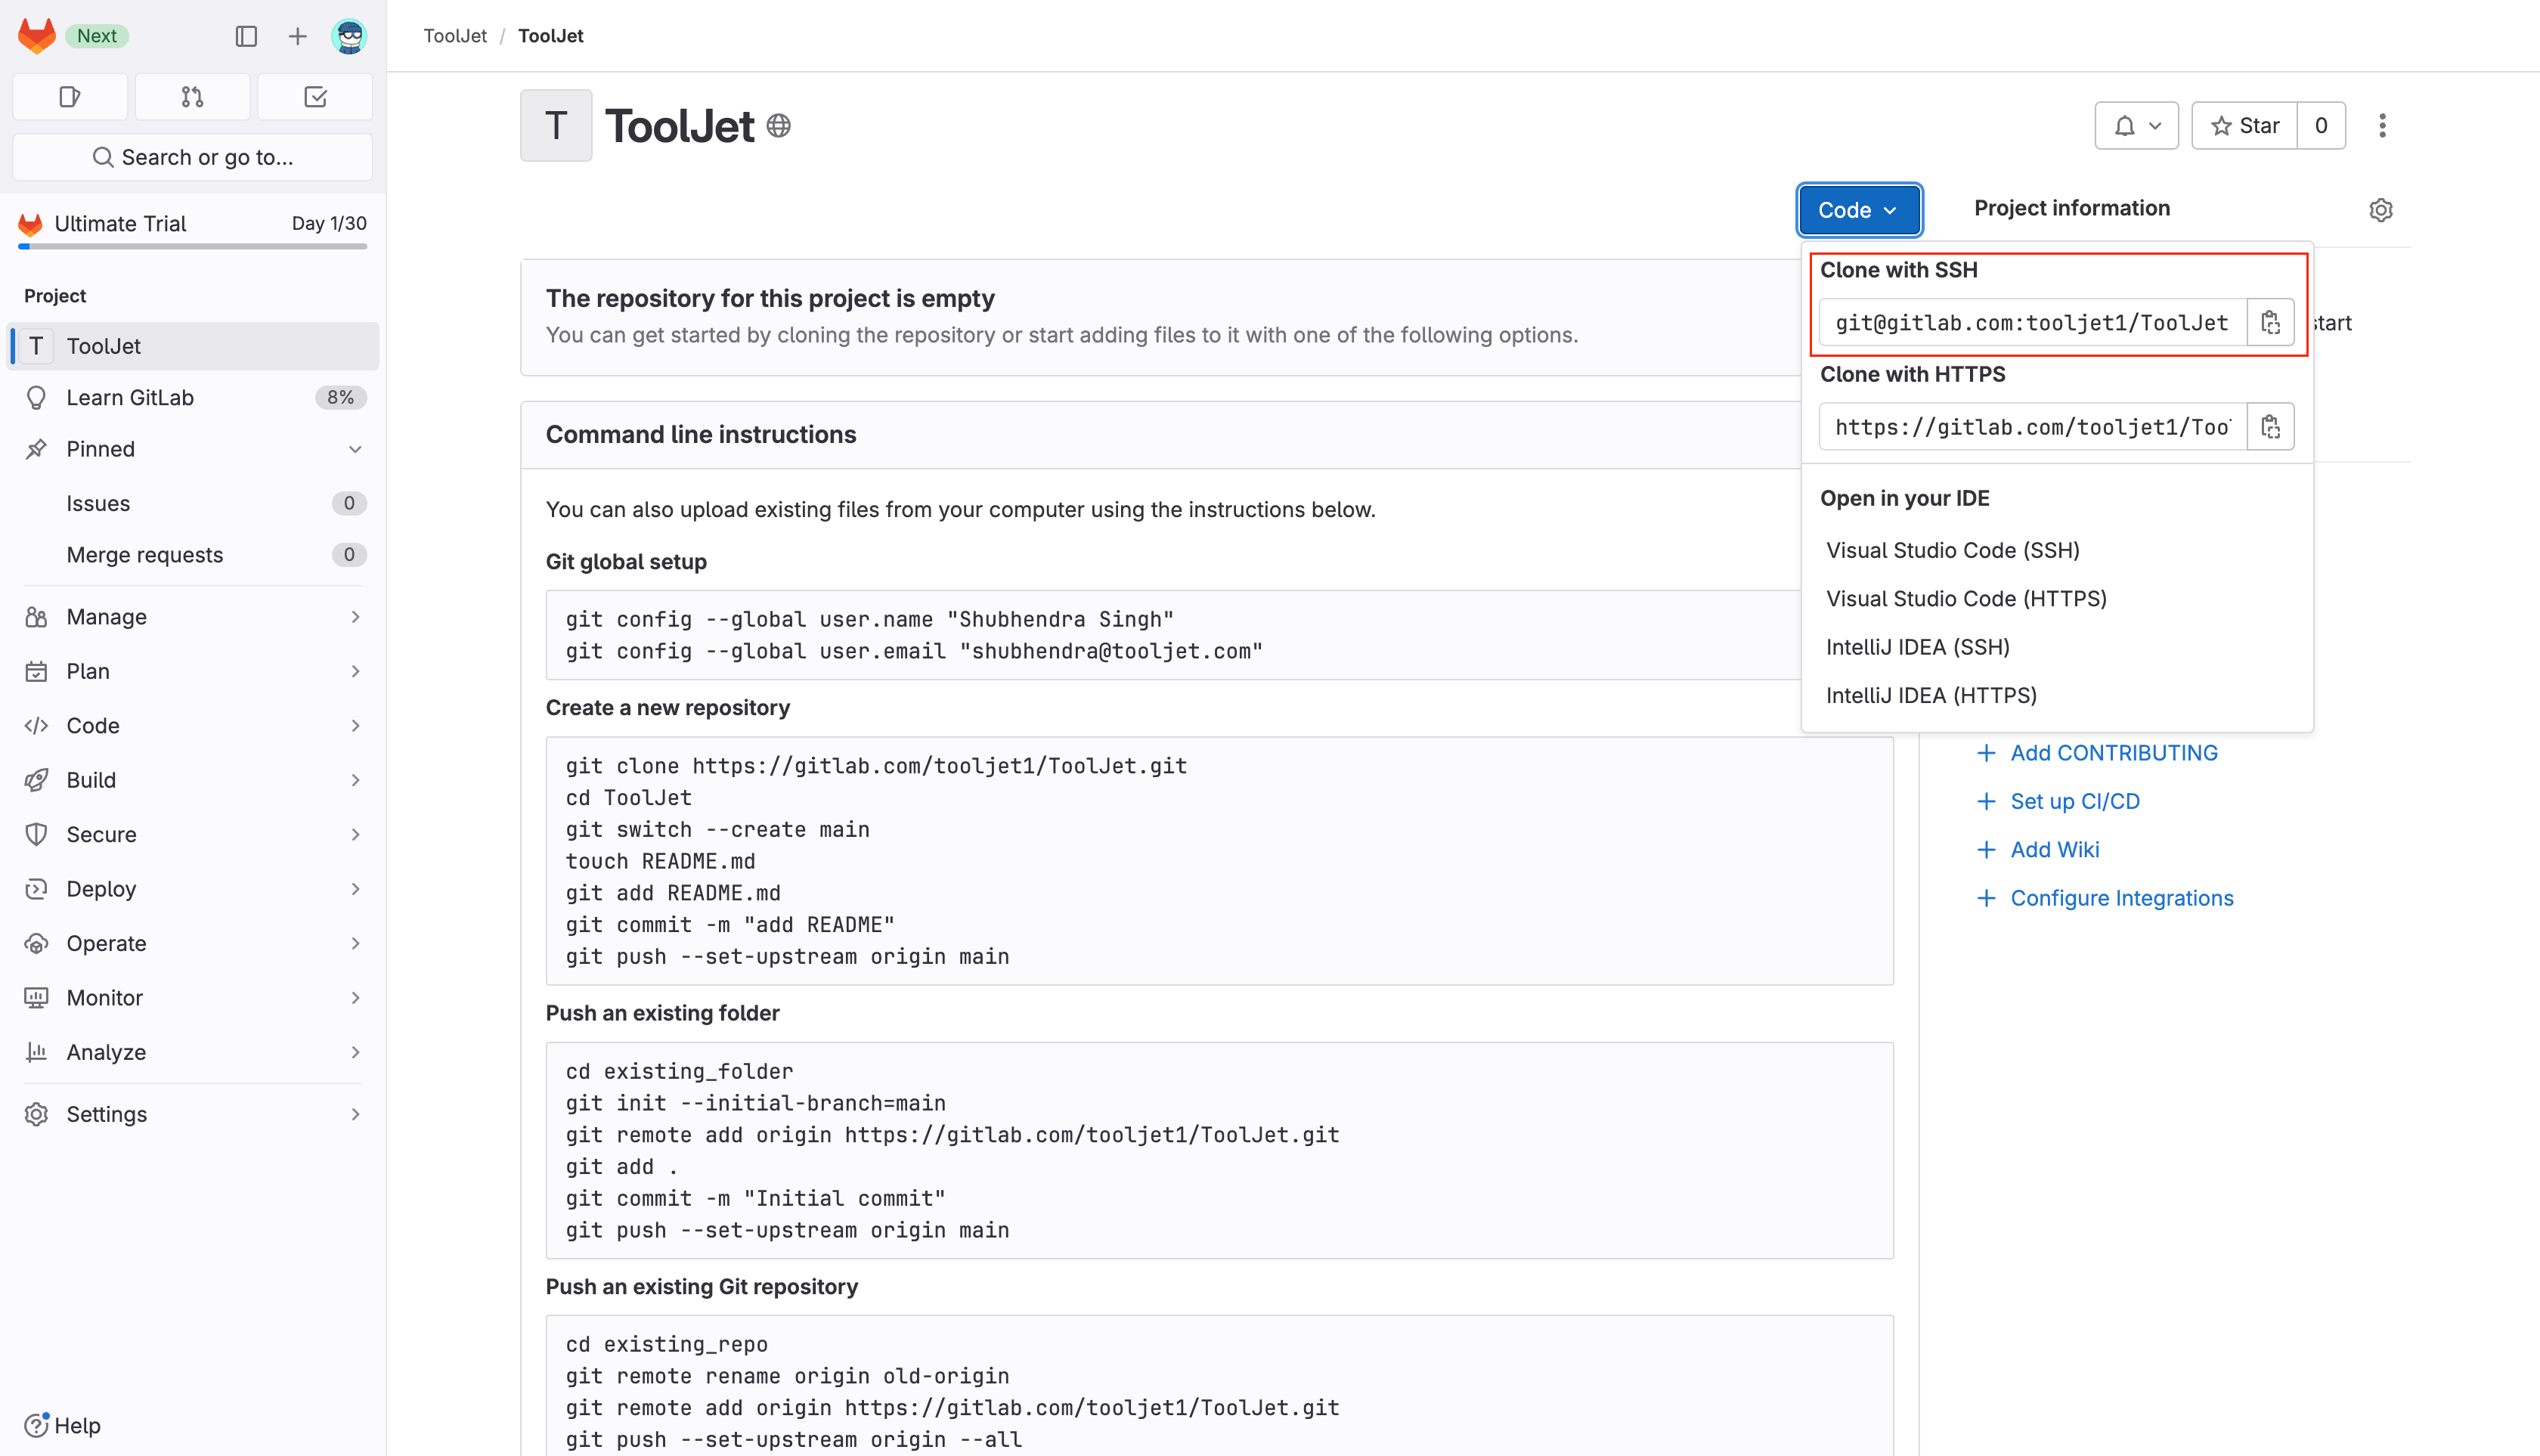
Obtain the SSH URL of your repository.
- GitHub
- GitLab
When a repository is created, GitHub shows a screen with the repository URL. If the repository is already created, you can obtain the URL by clicking on the Clone or download button.
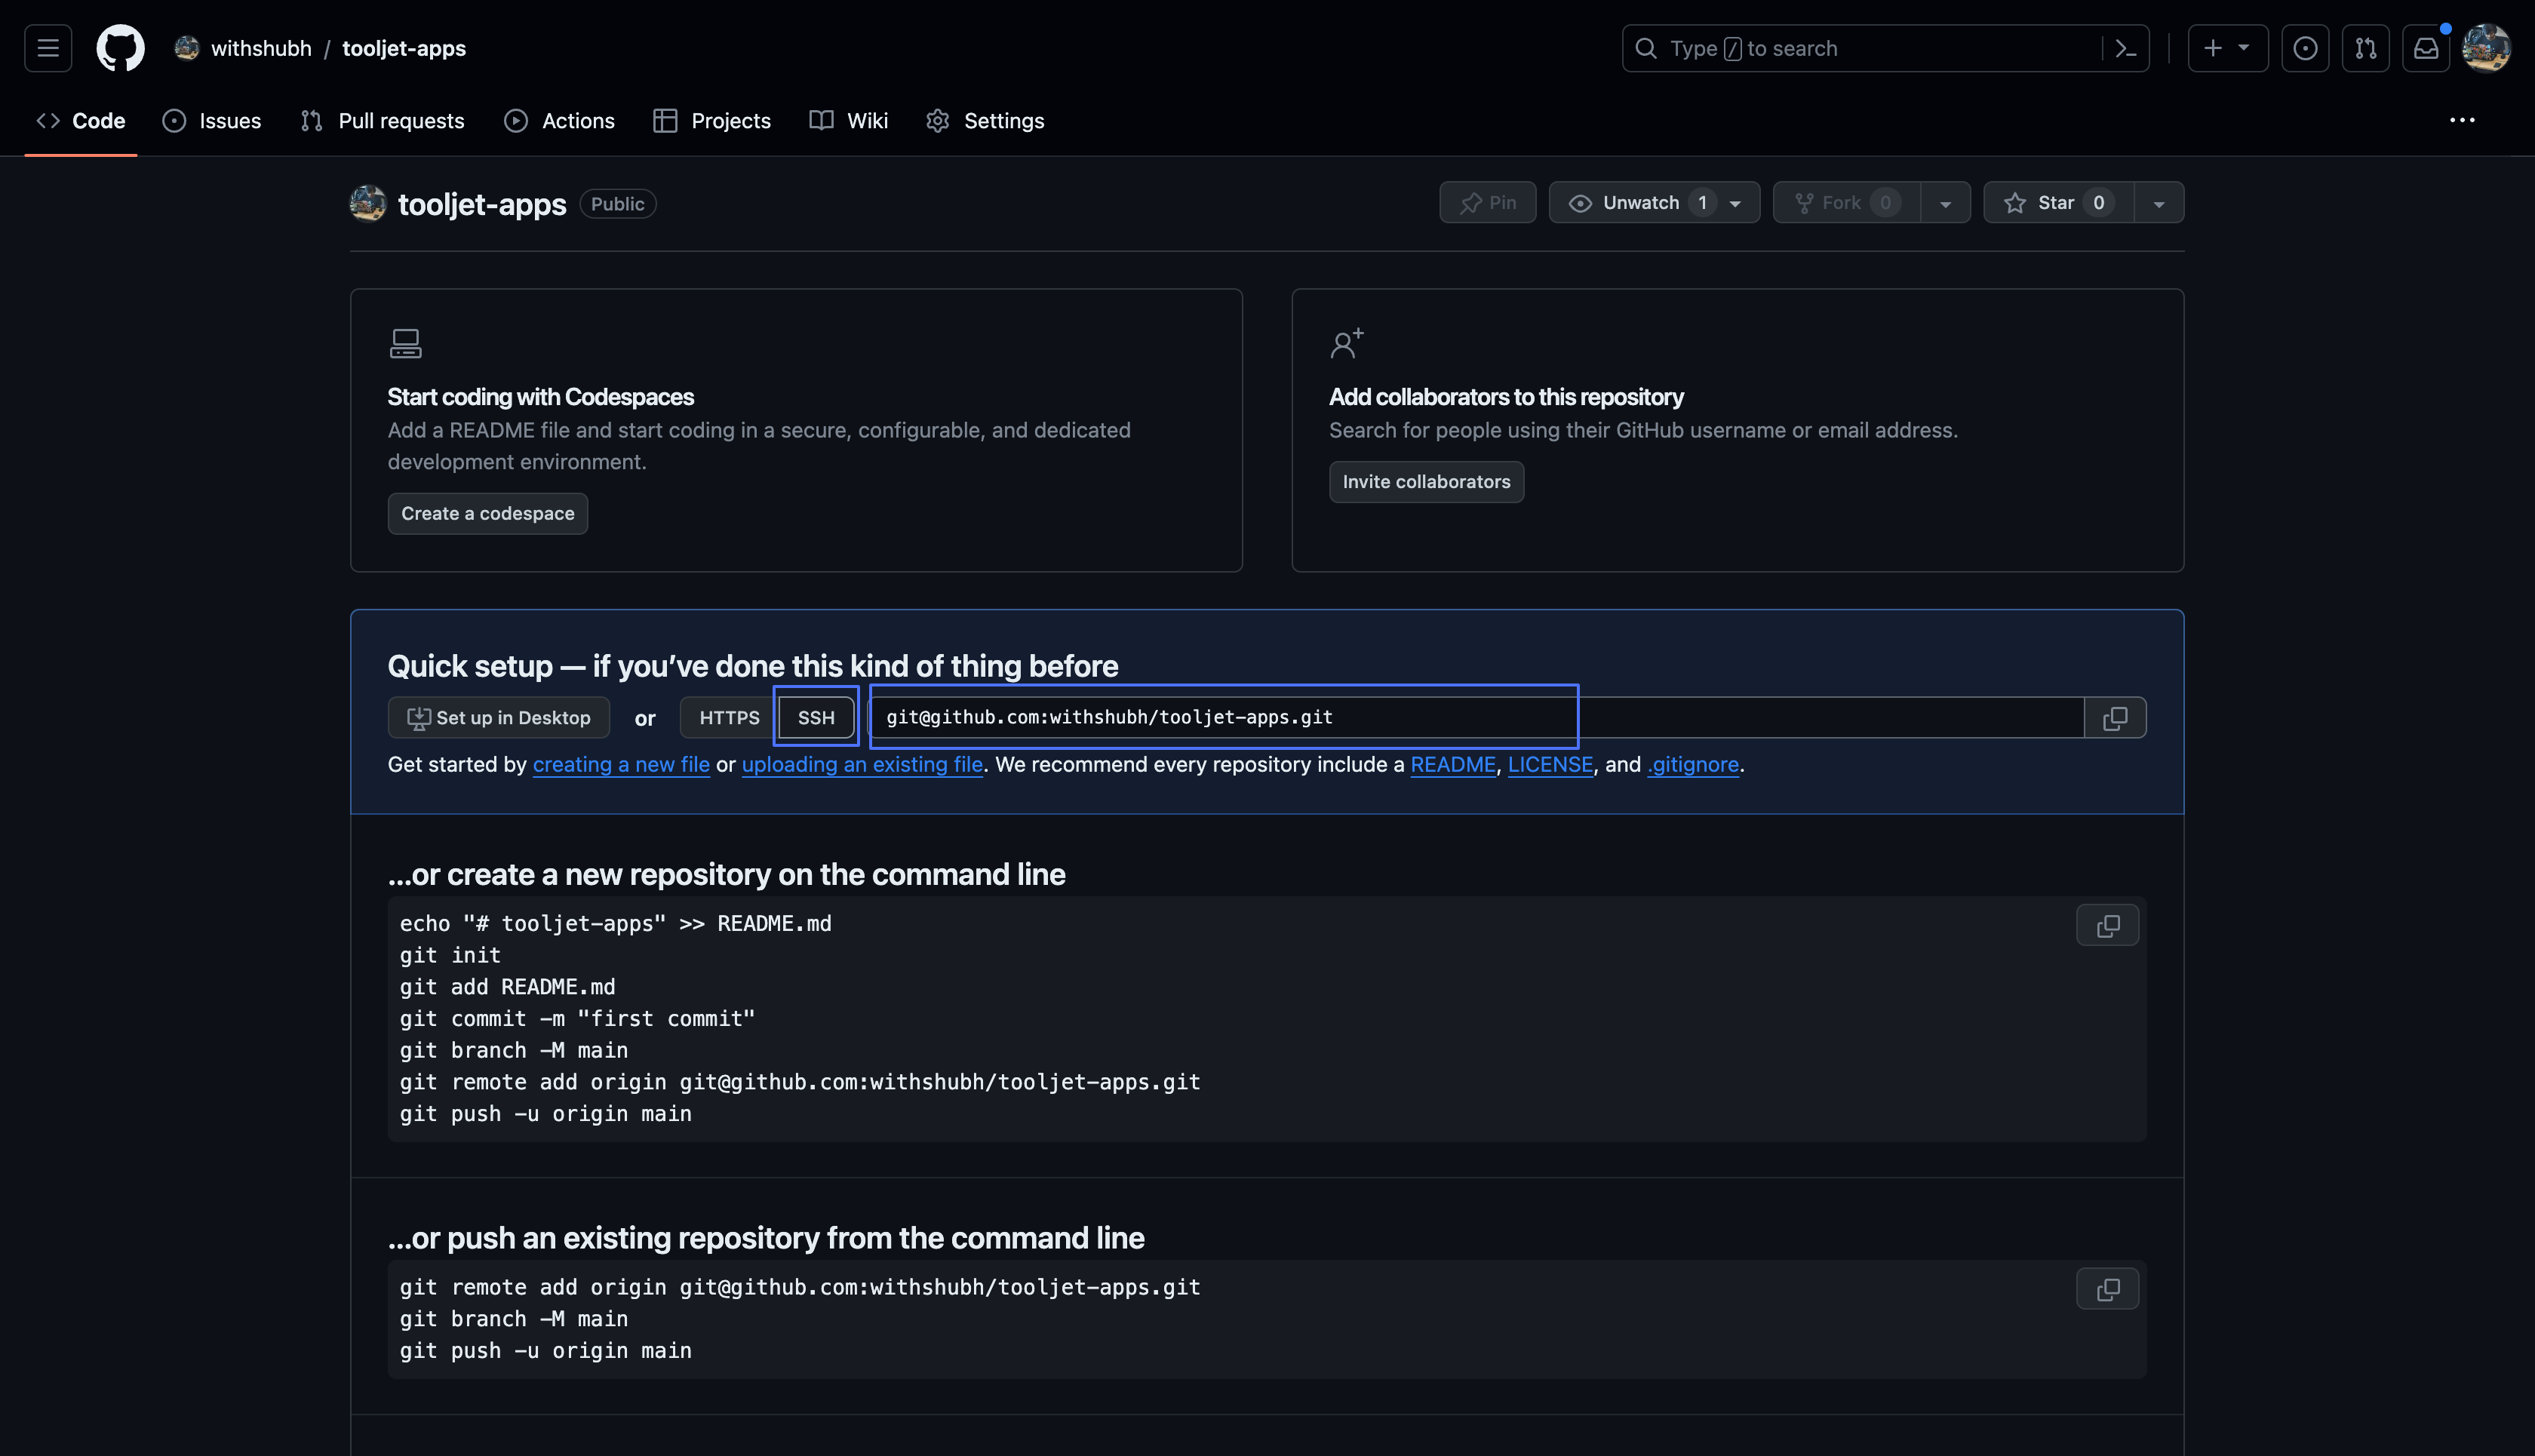
On GitLab, you can obtain the URL by clicking on the Clone button and selecting the SSH option.
3. Configure the GitSync Feature on ToolJet
- Go to the Workspace settings, and click on the Configure git tab.
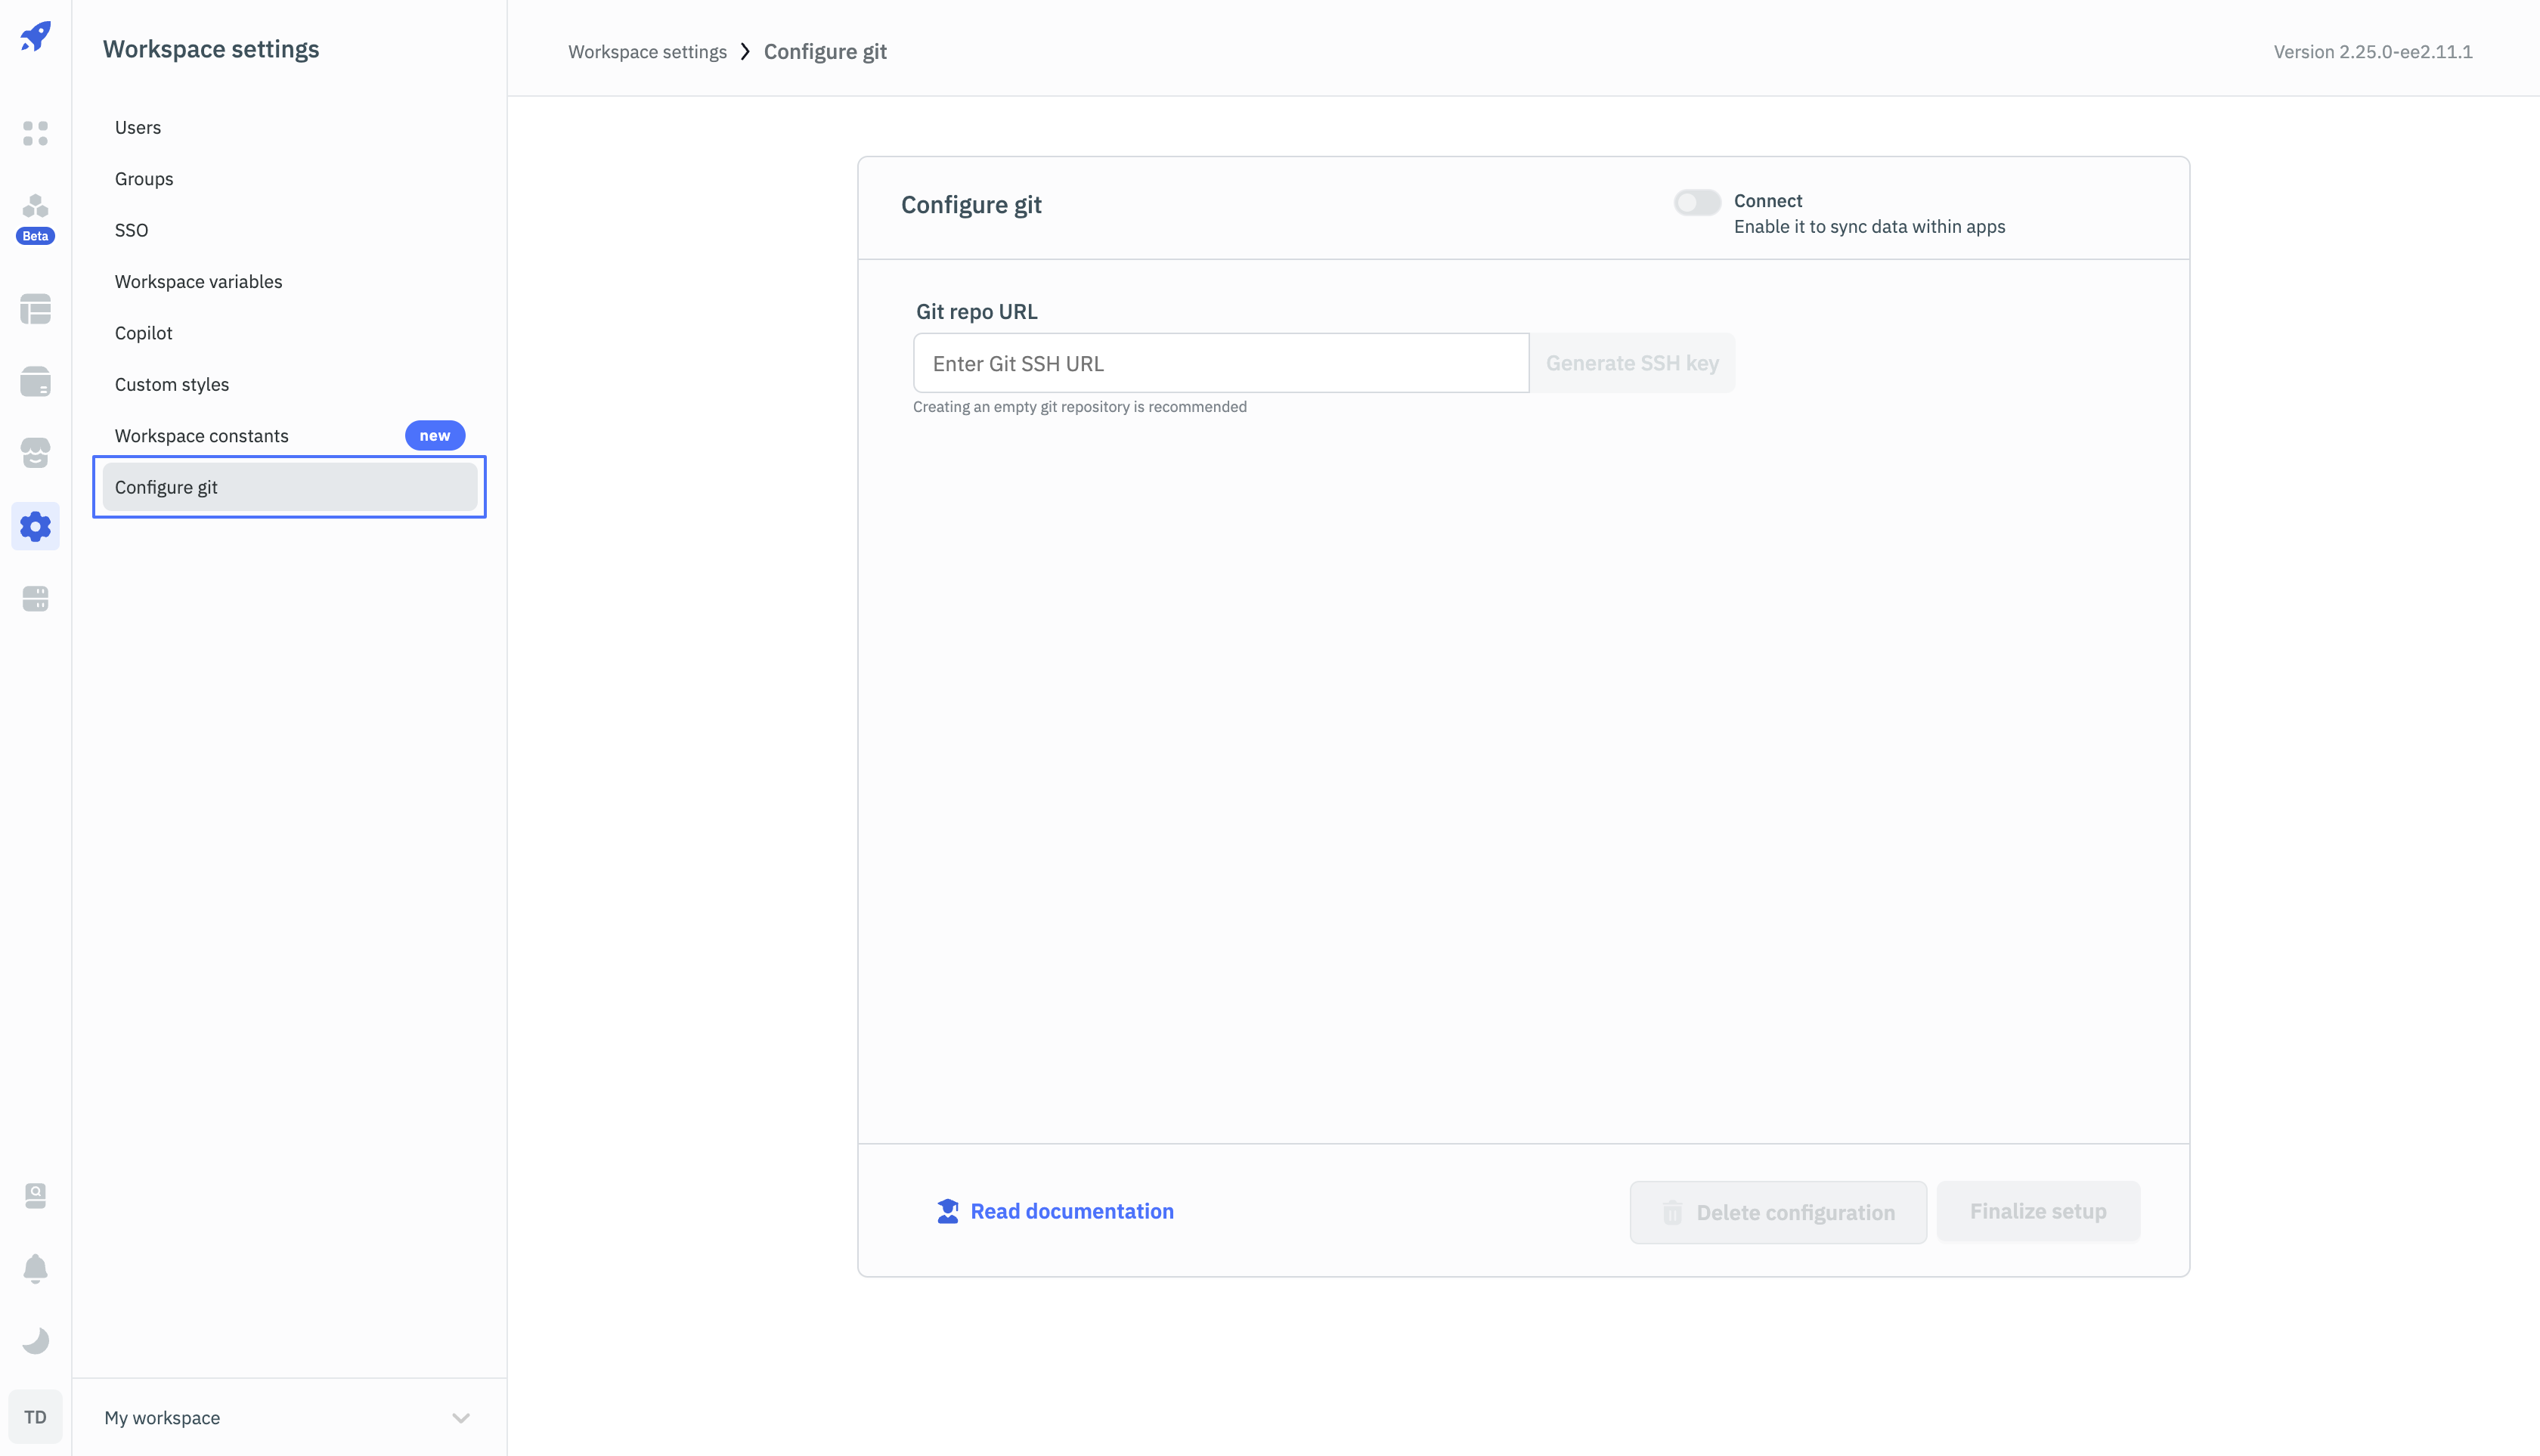
- Enter the SSH URL of the repository (obtained in Step 2) in the Git repo URL field.
- Click on the Generate SSH key button, and copy the SSH key that is generated. The SSH key is used to authenticate ToolJet with the repository.
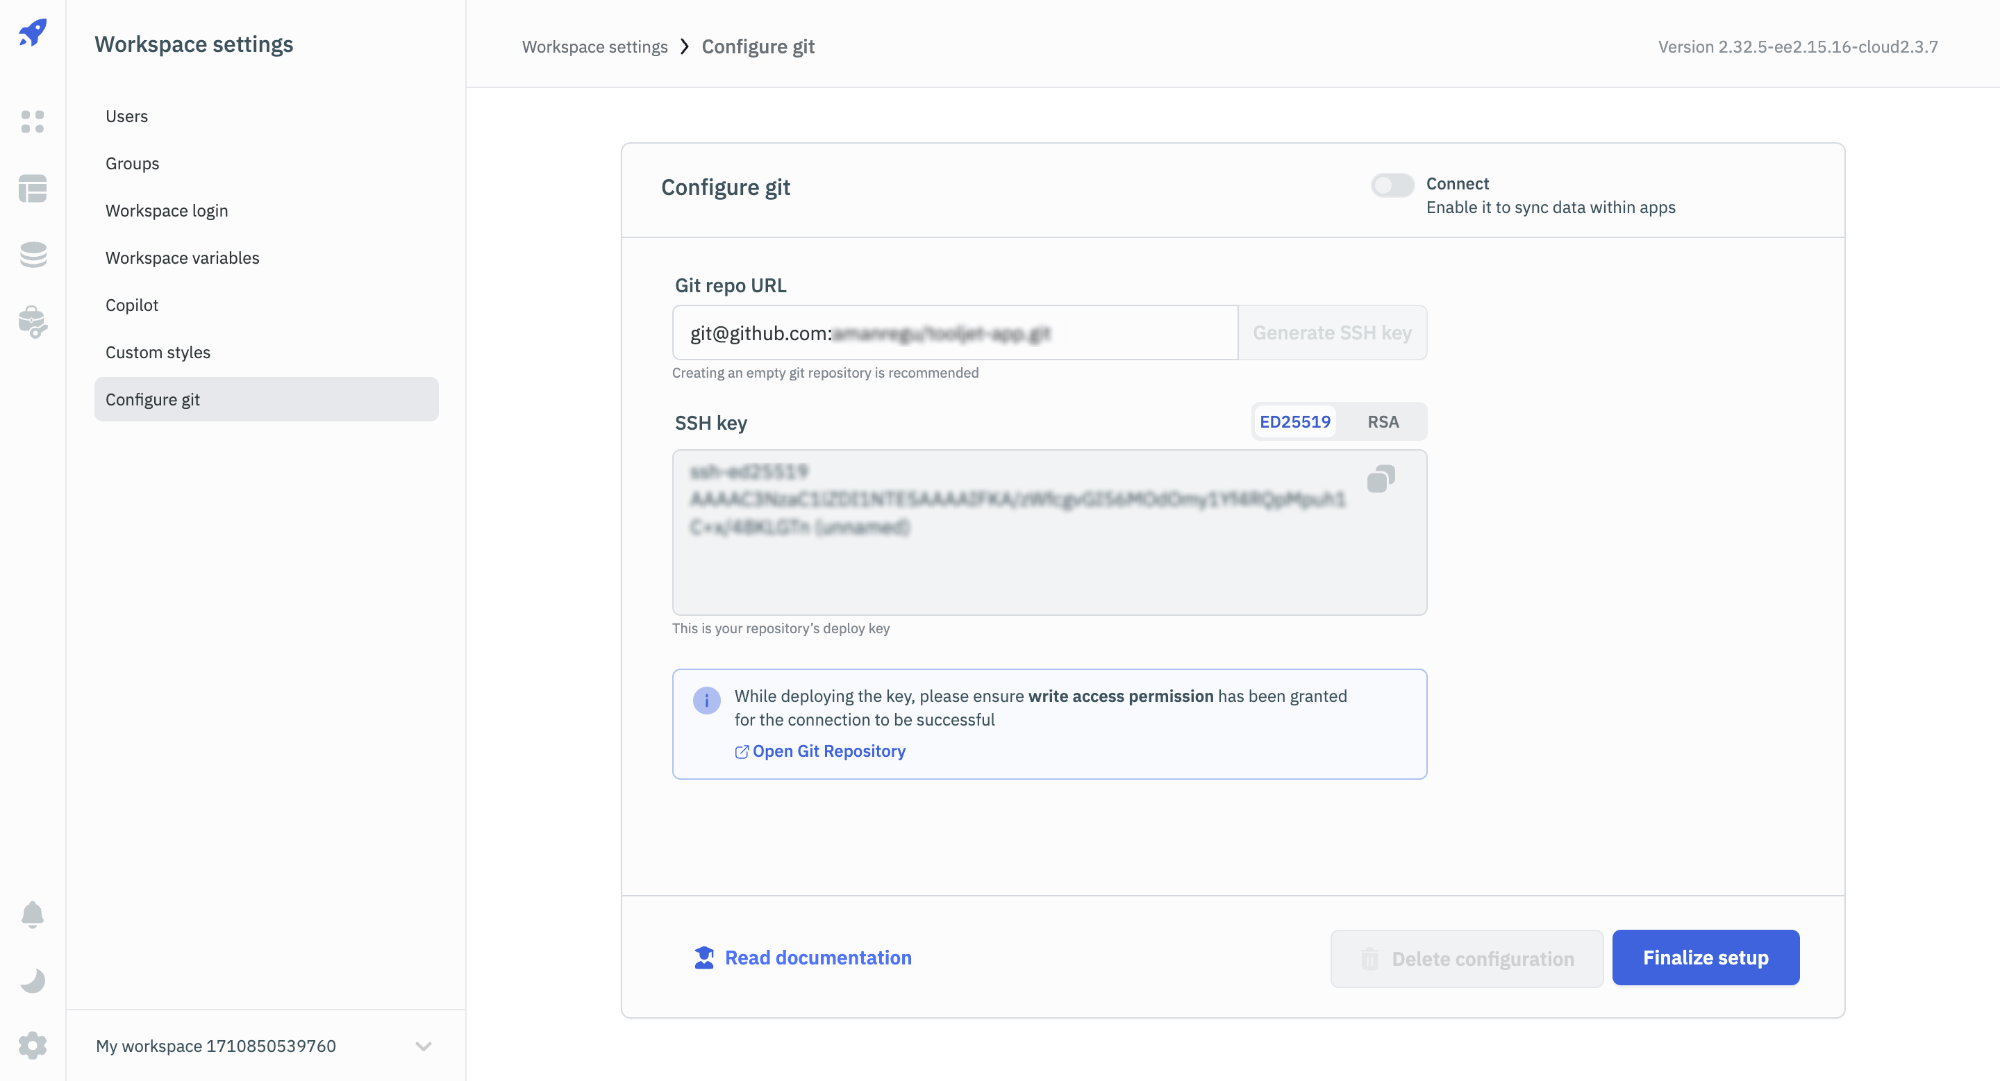
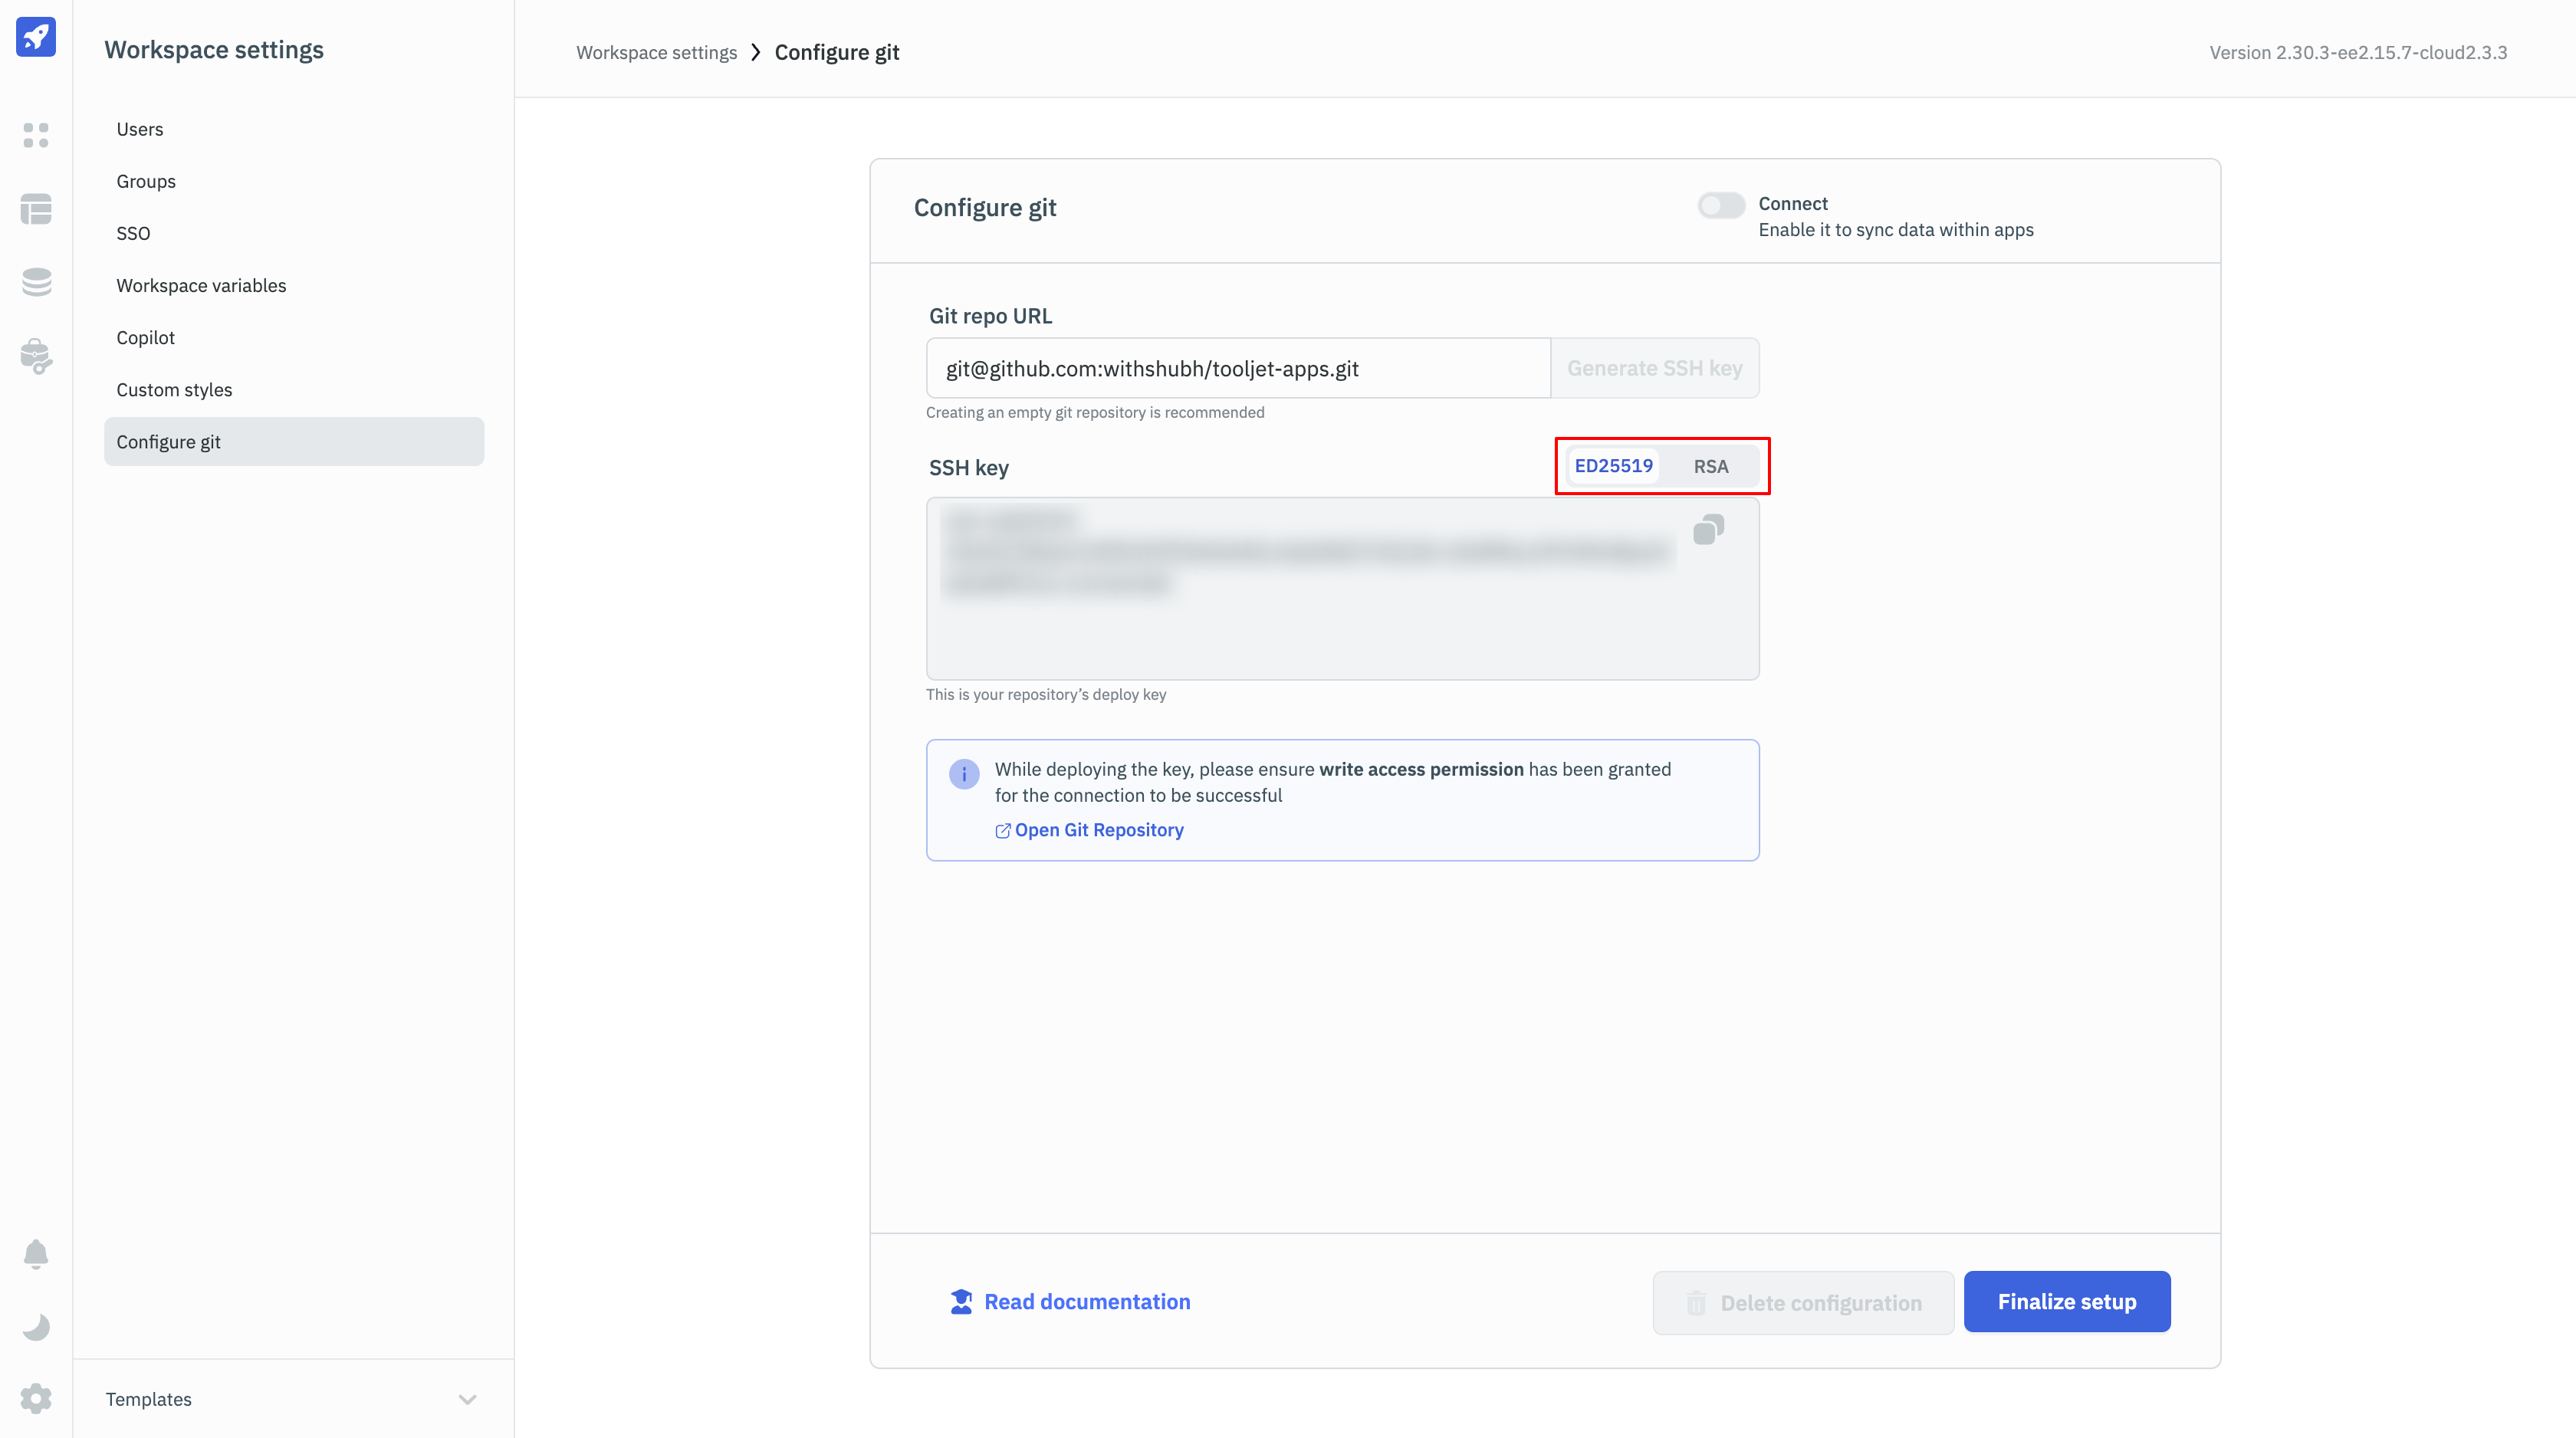
There are two types of generated SSH keys:
- ED25519: This is a secure and efficient algorithm that is used for generating SSH keys. It is recommended to use this key type. VCS providers like GitHub and GitLab recommend using this key type
- RSA: This is an older algorithm that is used for generating SSH keys. It is not recommended to use this key type. Older VCS providers like Bitbucket recommend using this key type.
4. Deploy the SSH Key
- GitHub
- GitLab
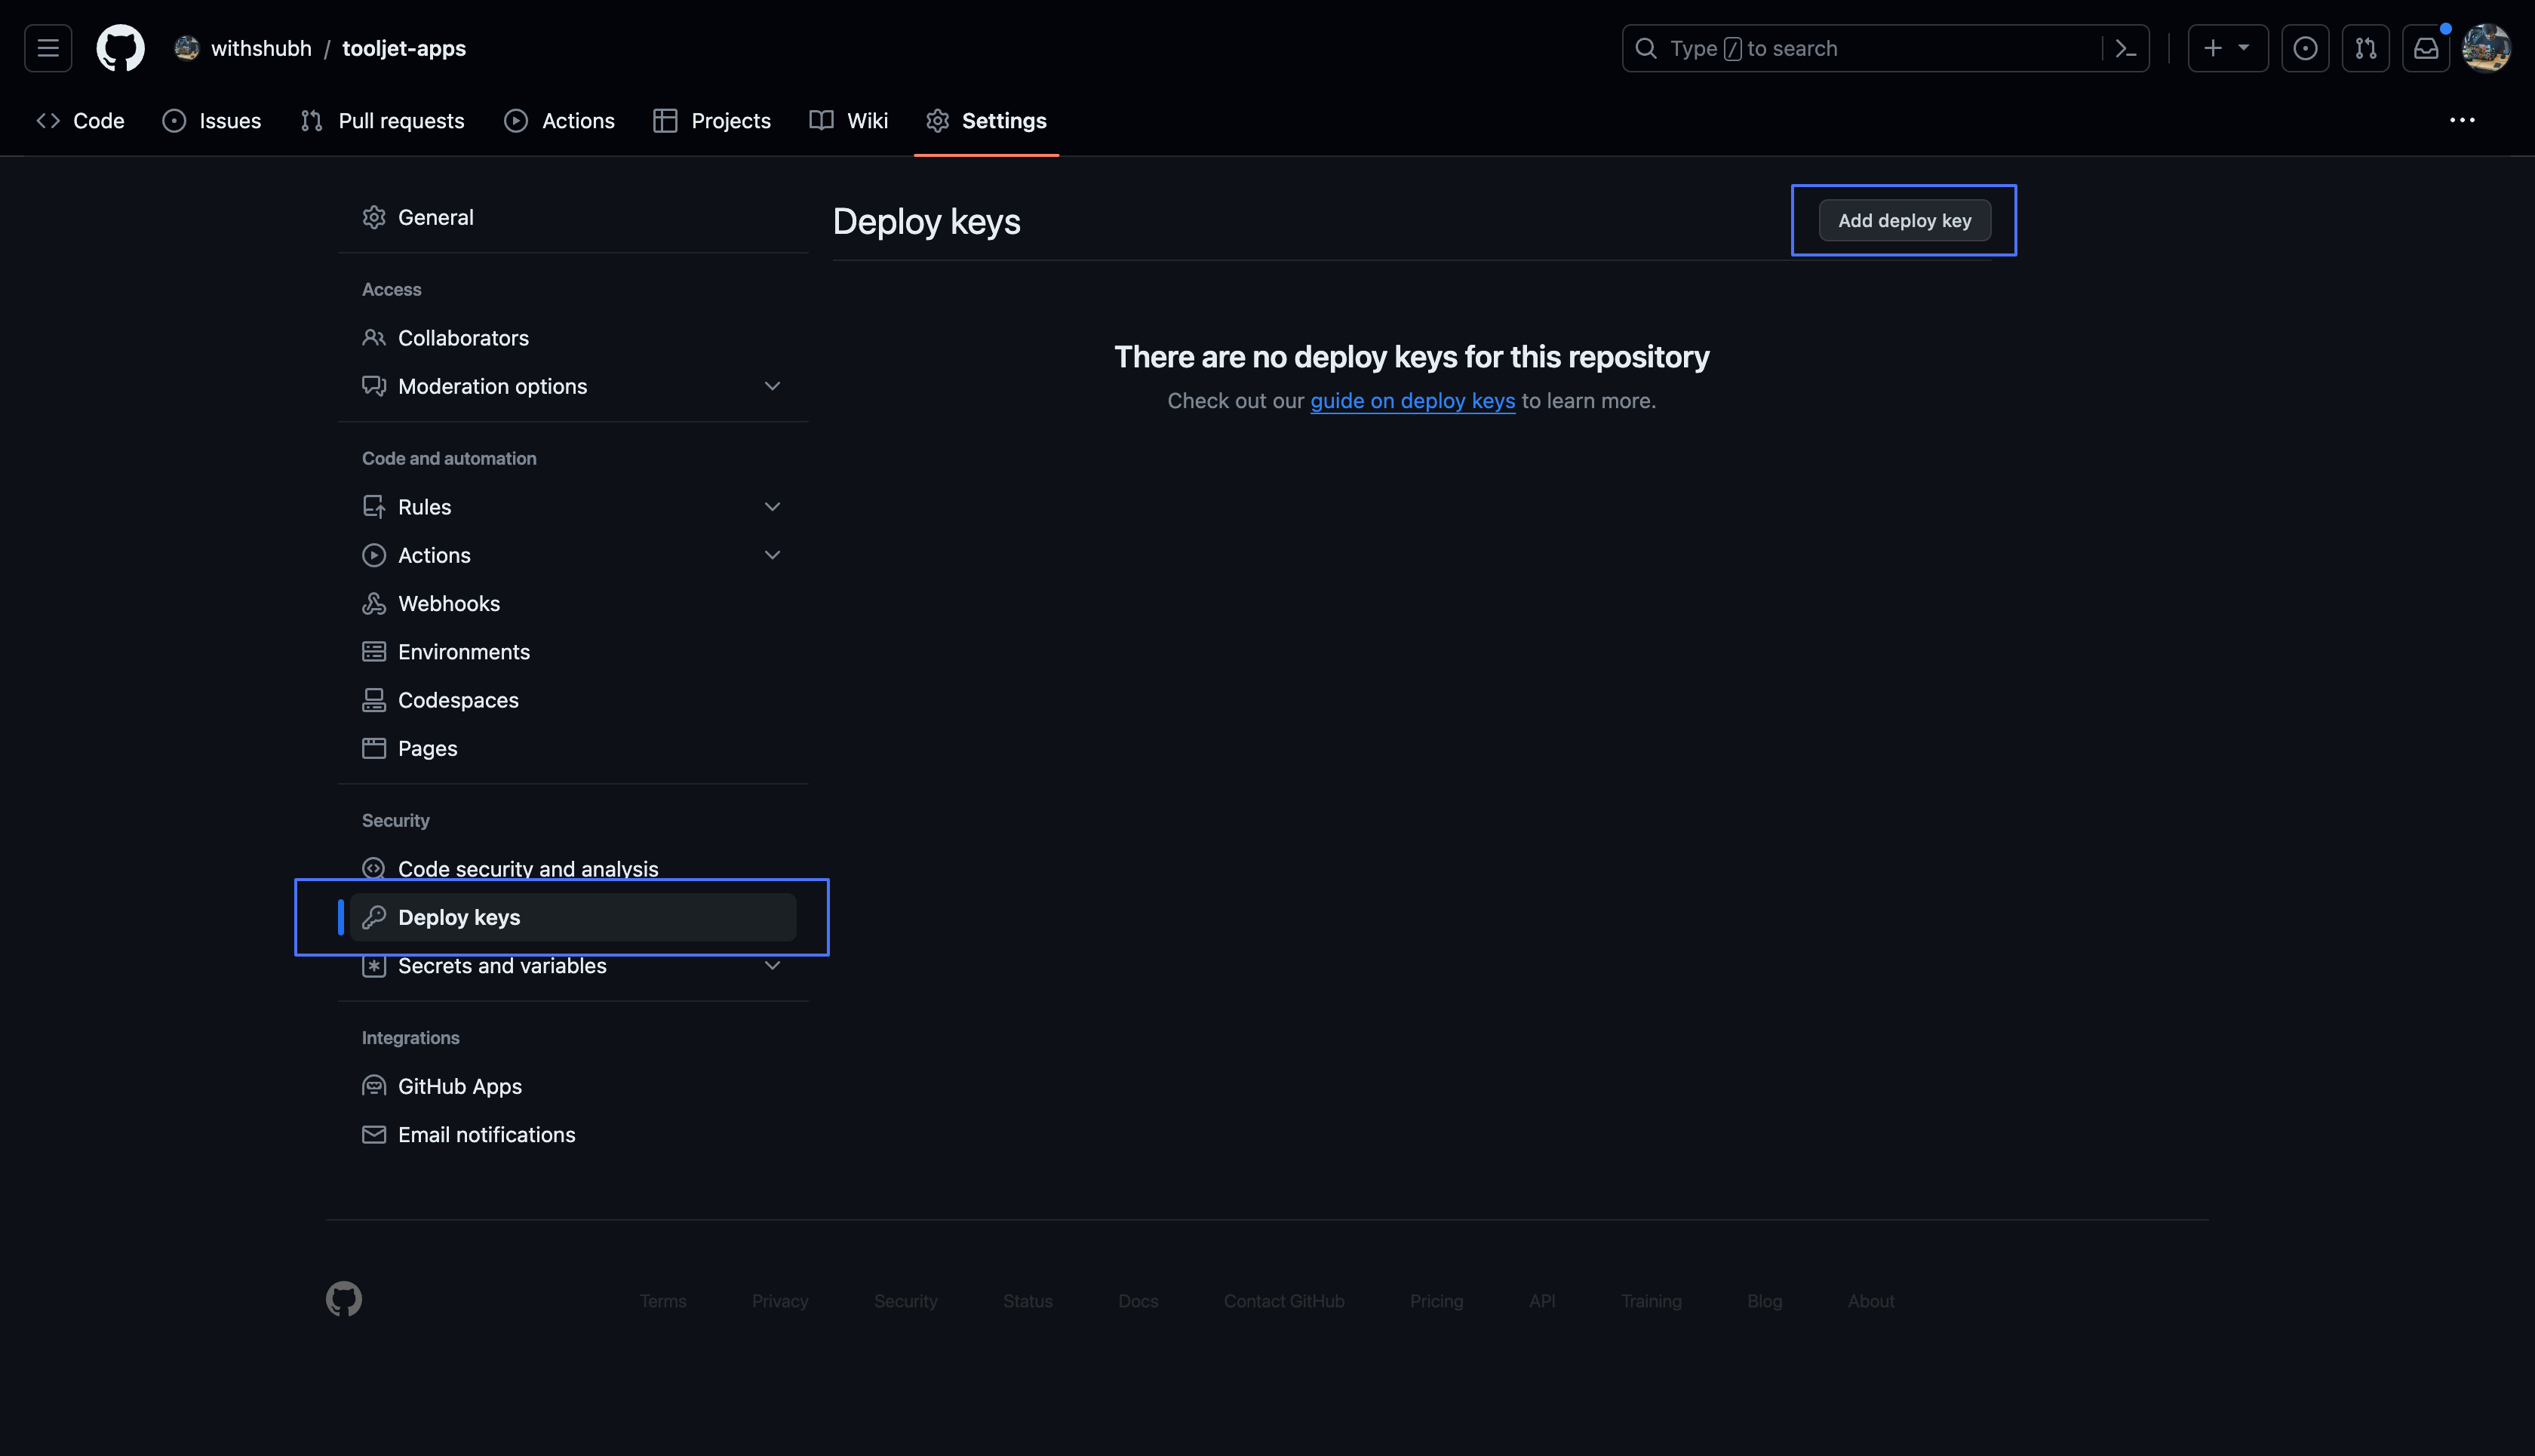
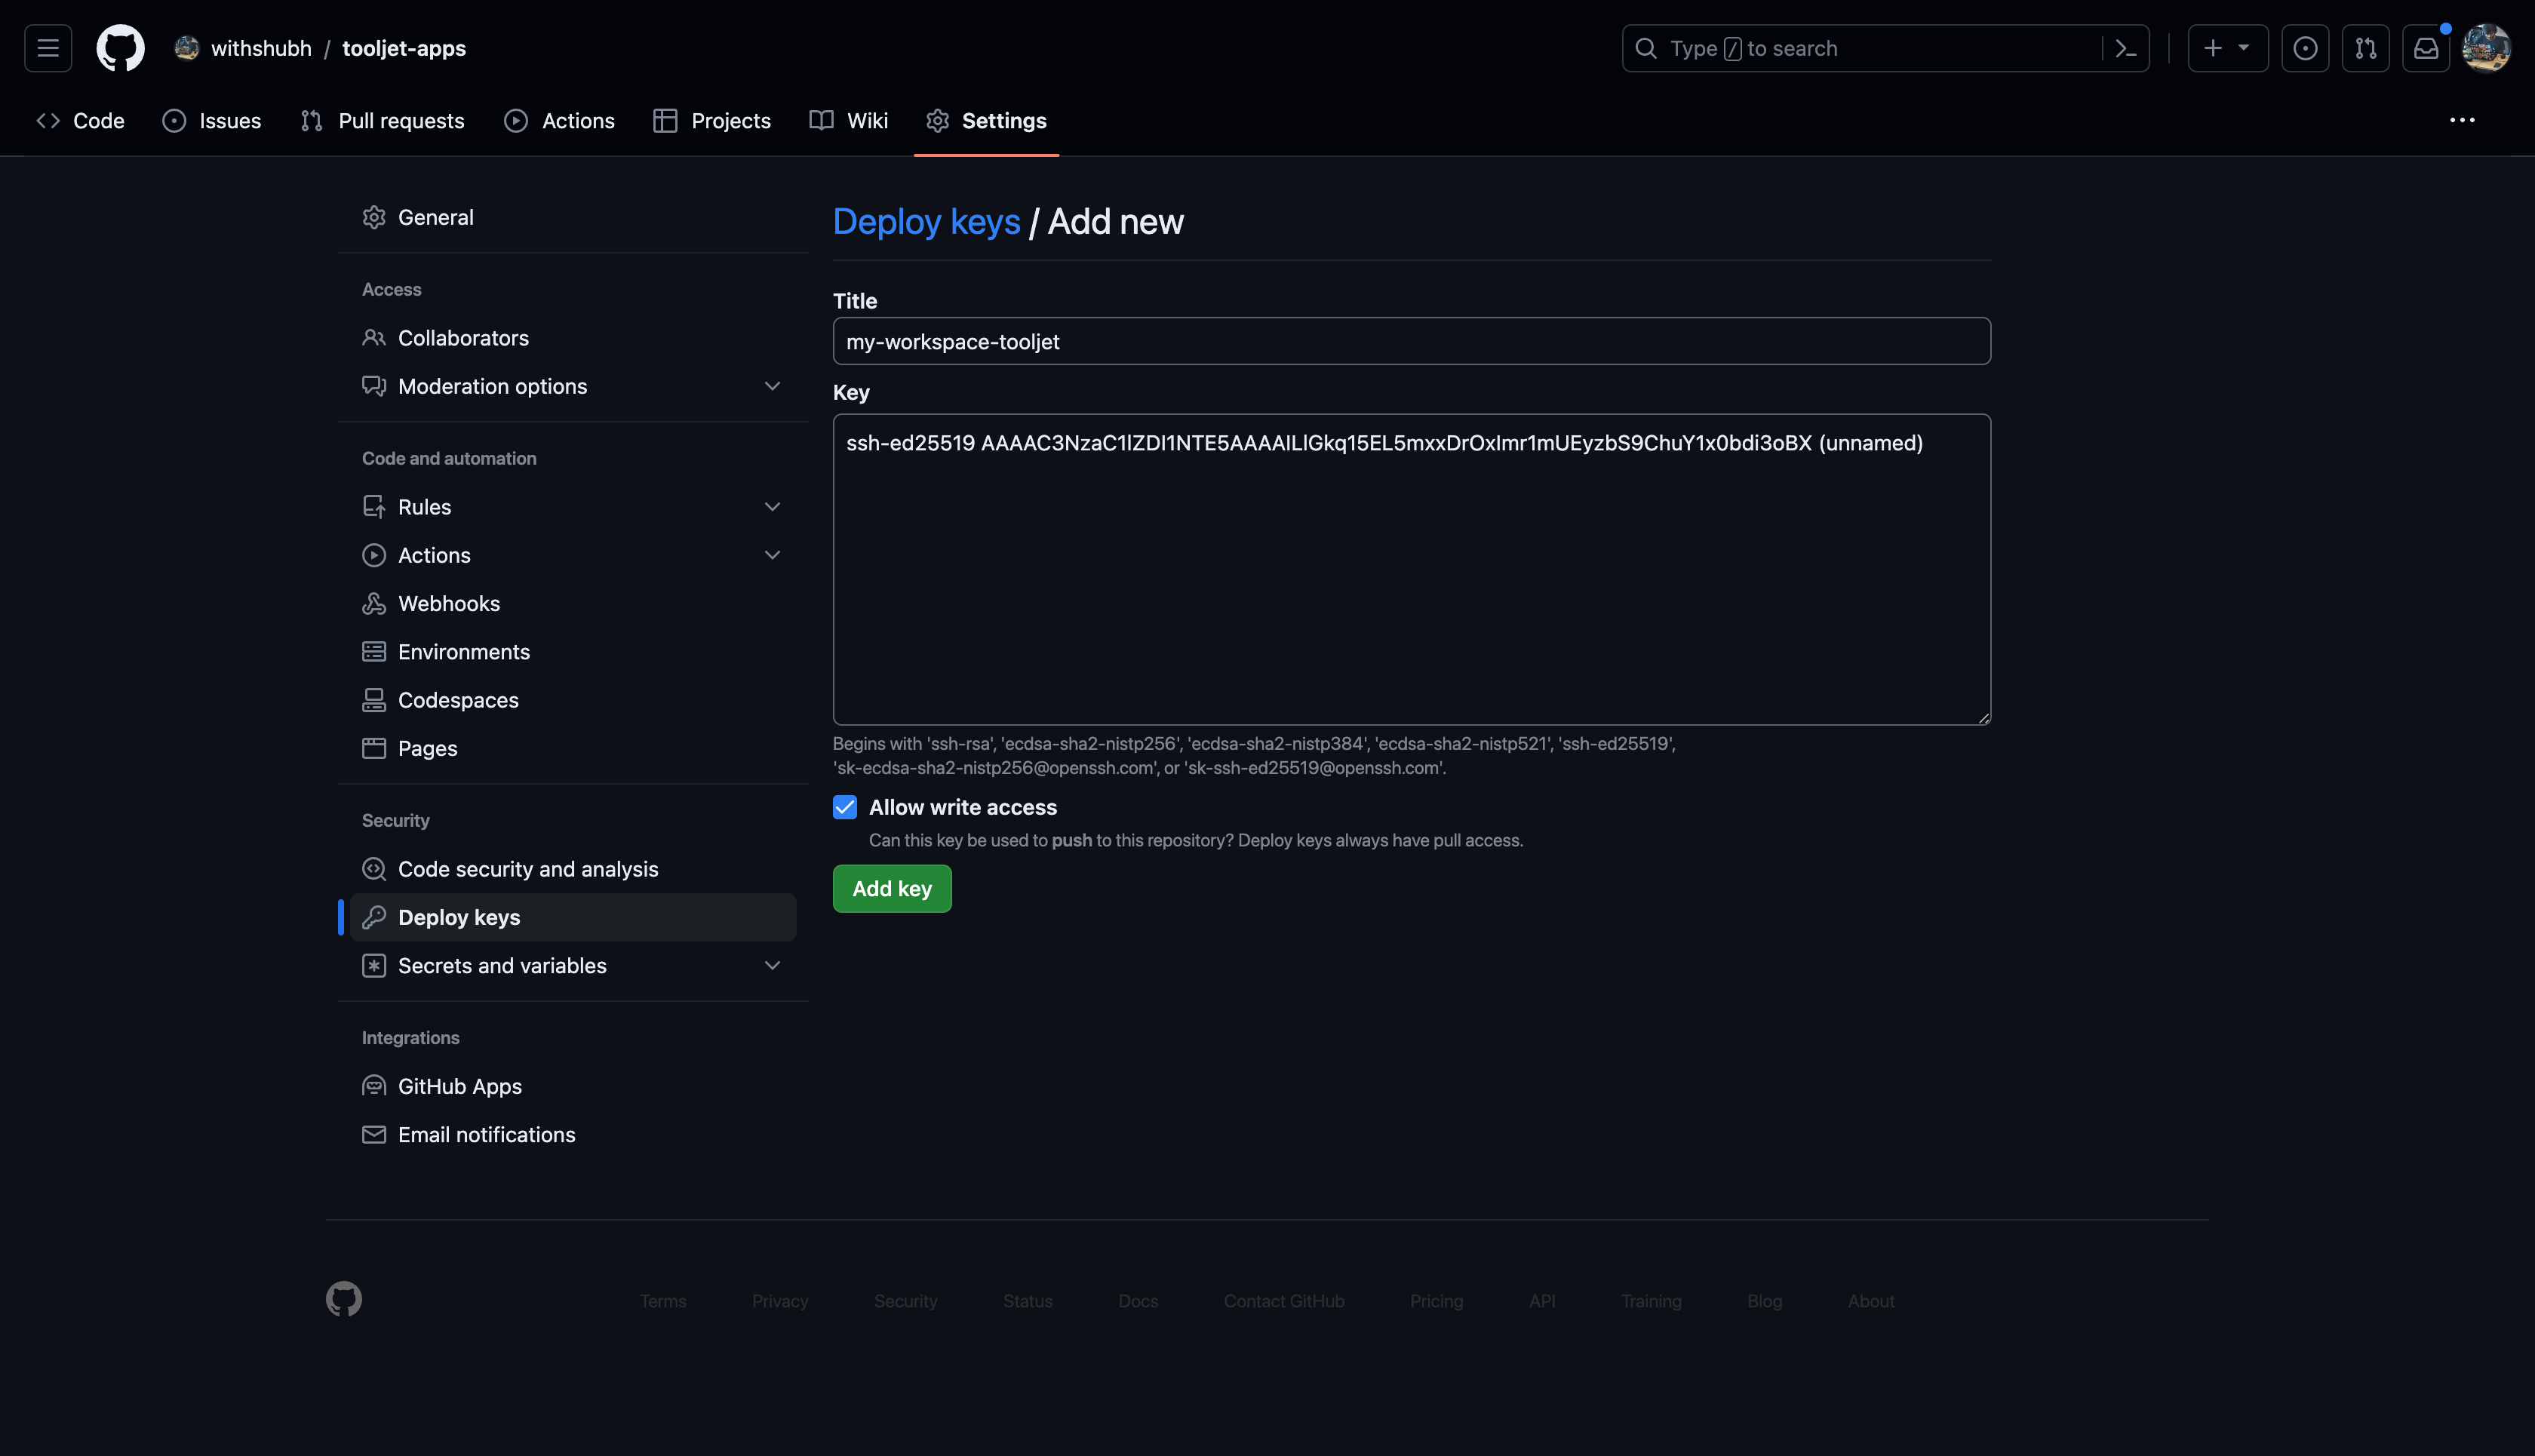
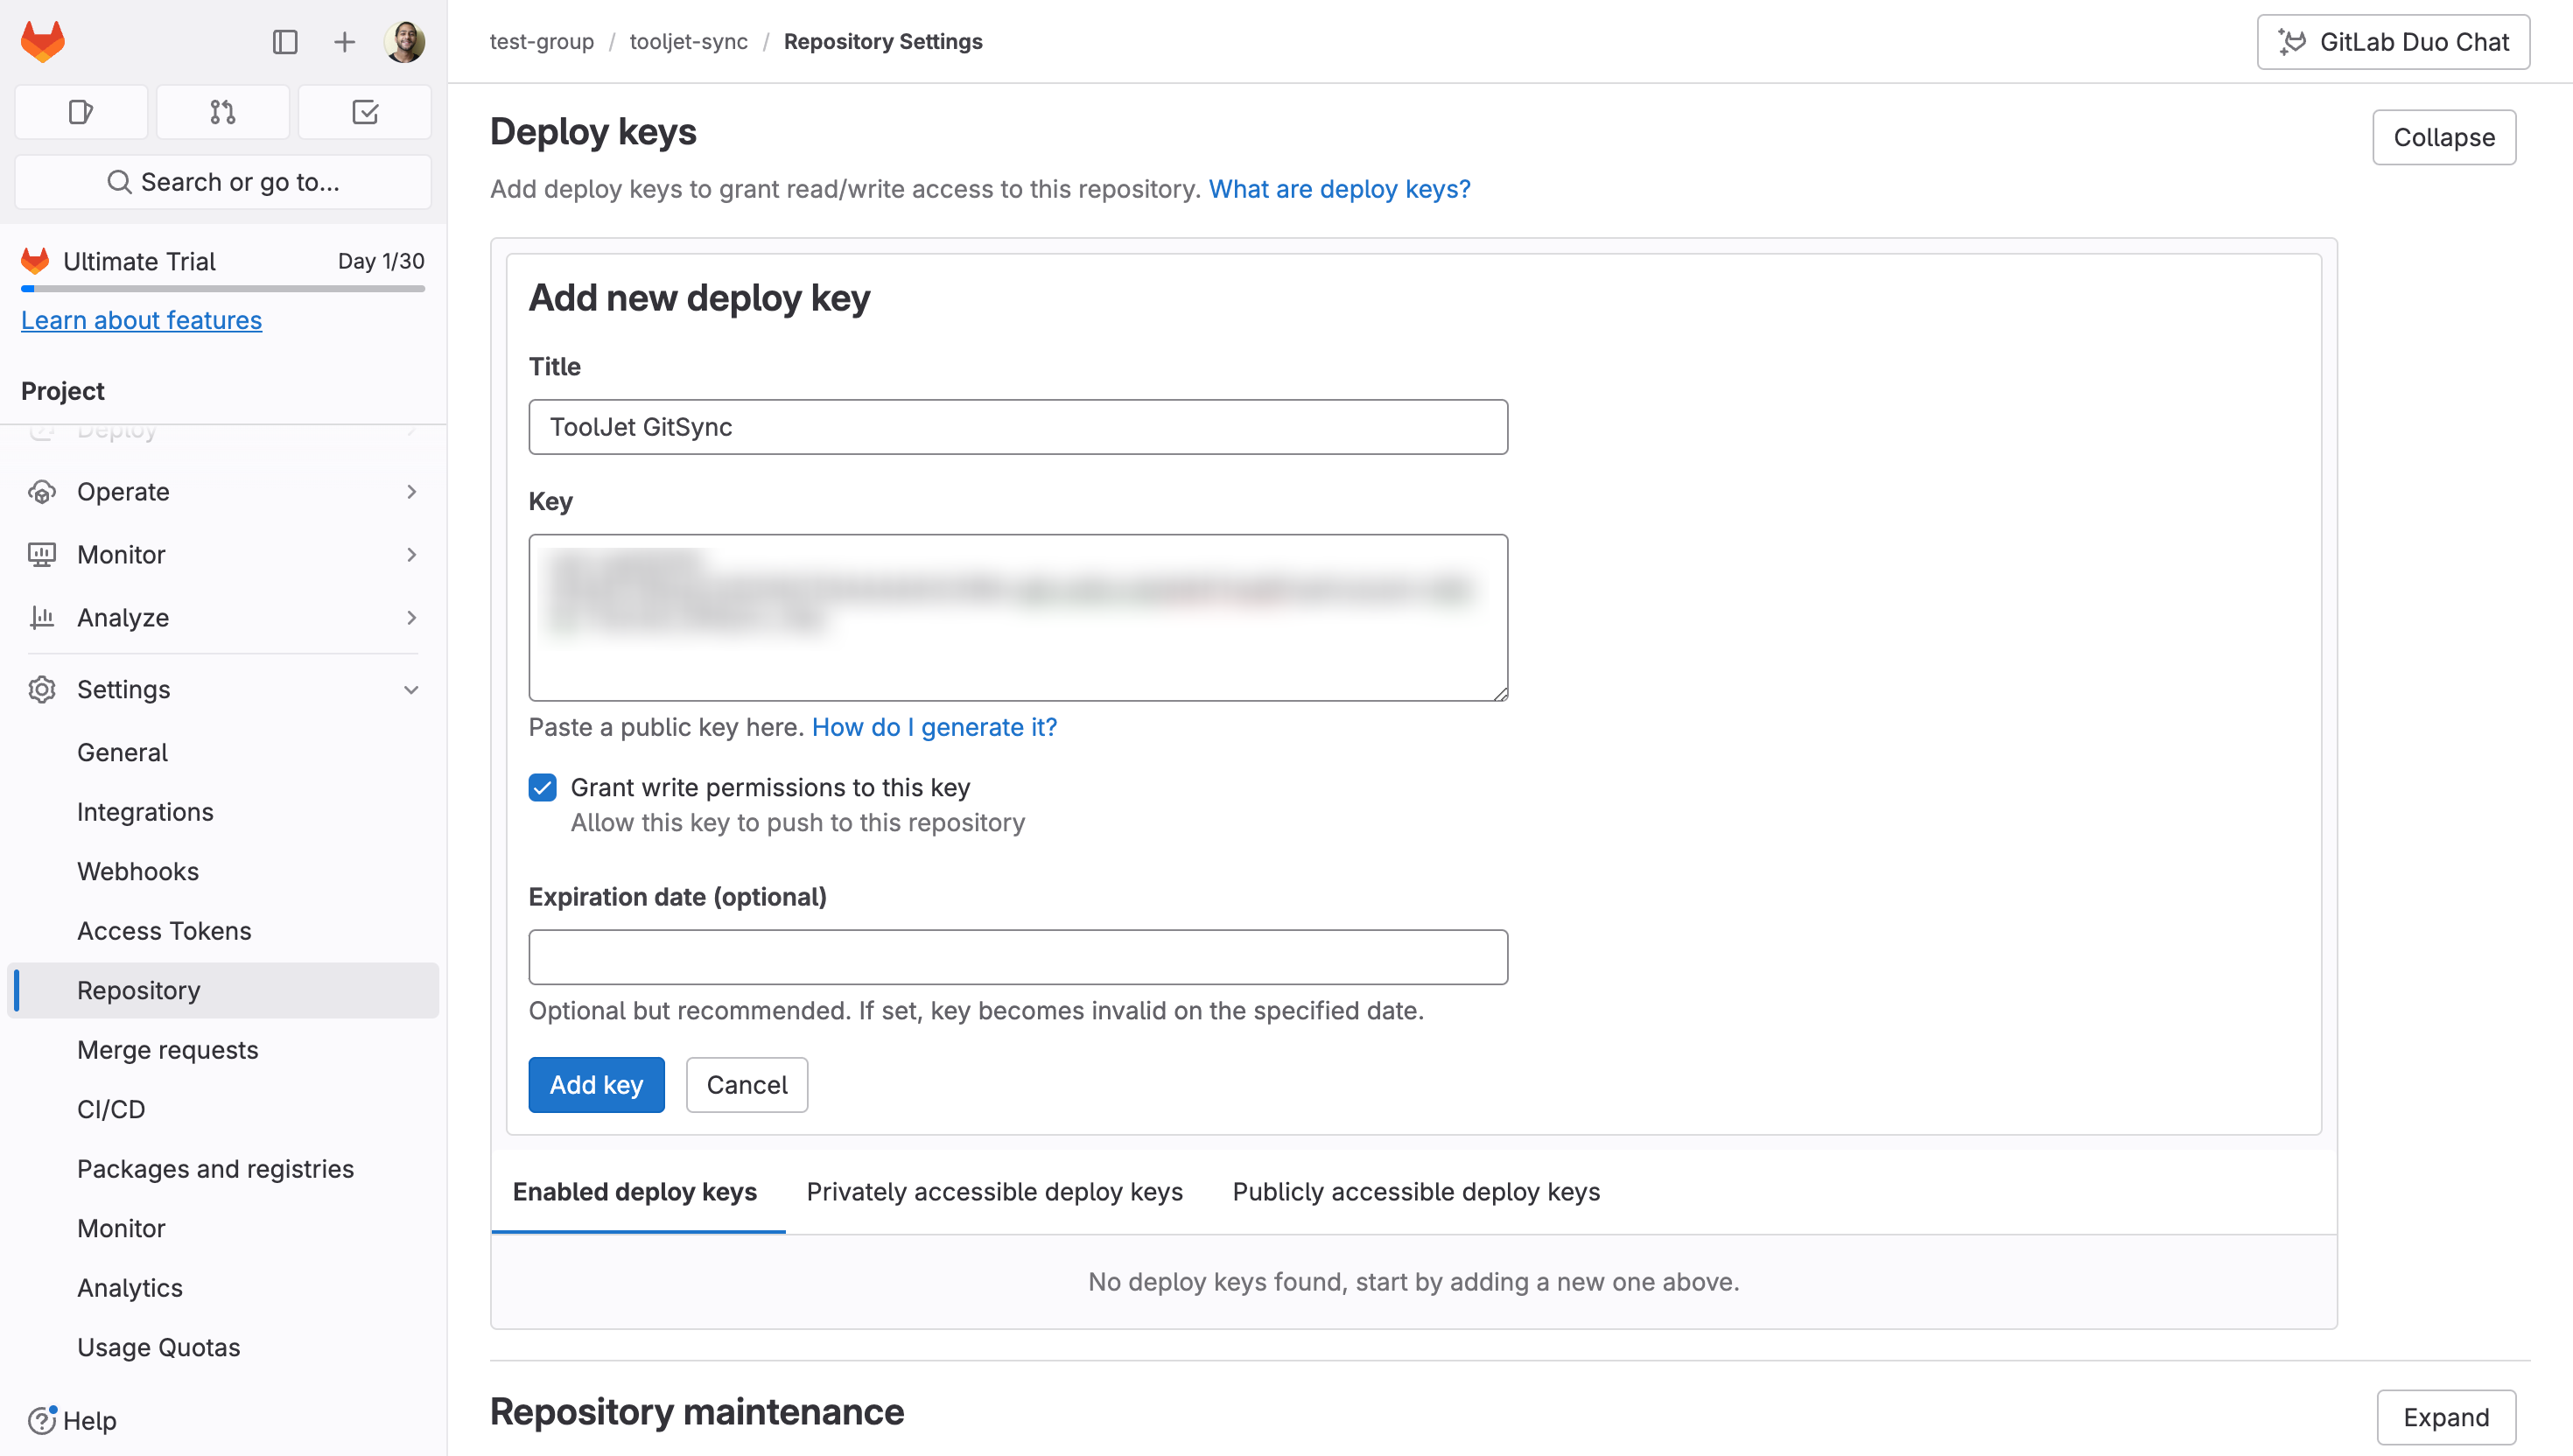
Follow the following steps to deploy the SSH key to GitHub Repository:
- Go to the Settings tab of the GitHub repository that you created in Step 1, and click on the Deploy keys tab. Click on the Add deploy key button.
- Enter a title for the SSH key in the Title field.
- Paste the SSH key that you copied in Step 3 in the Key field.
- Make sure that the Allow write access checkbox is checked, especially when configuring the GitSync feature to push changes to Git. However, it is not mandatory to check this option when setting up the GitSync feature for pulling changes from Git.
- Finally, click on the Add key button.
You have two options to add the SSH key to GitLab, depending on your needs:
Option 1: Add as a User-Wide SSH Key
Use this option for access to all your repositories.
- Click on your avatar in the top-left corner and select Edit Profile.
- Navigate to the SSH Keys tab and click the Add new key button.
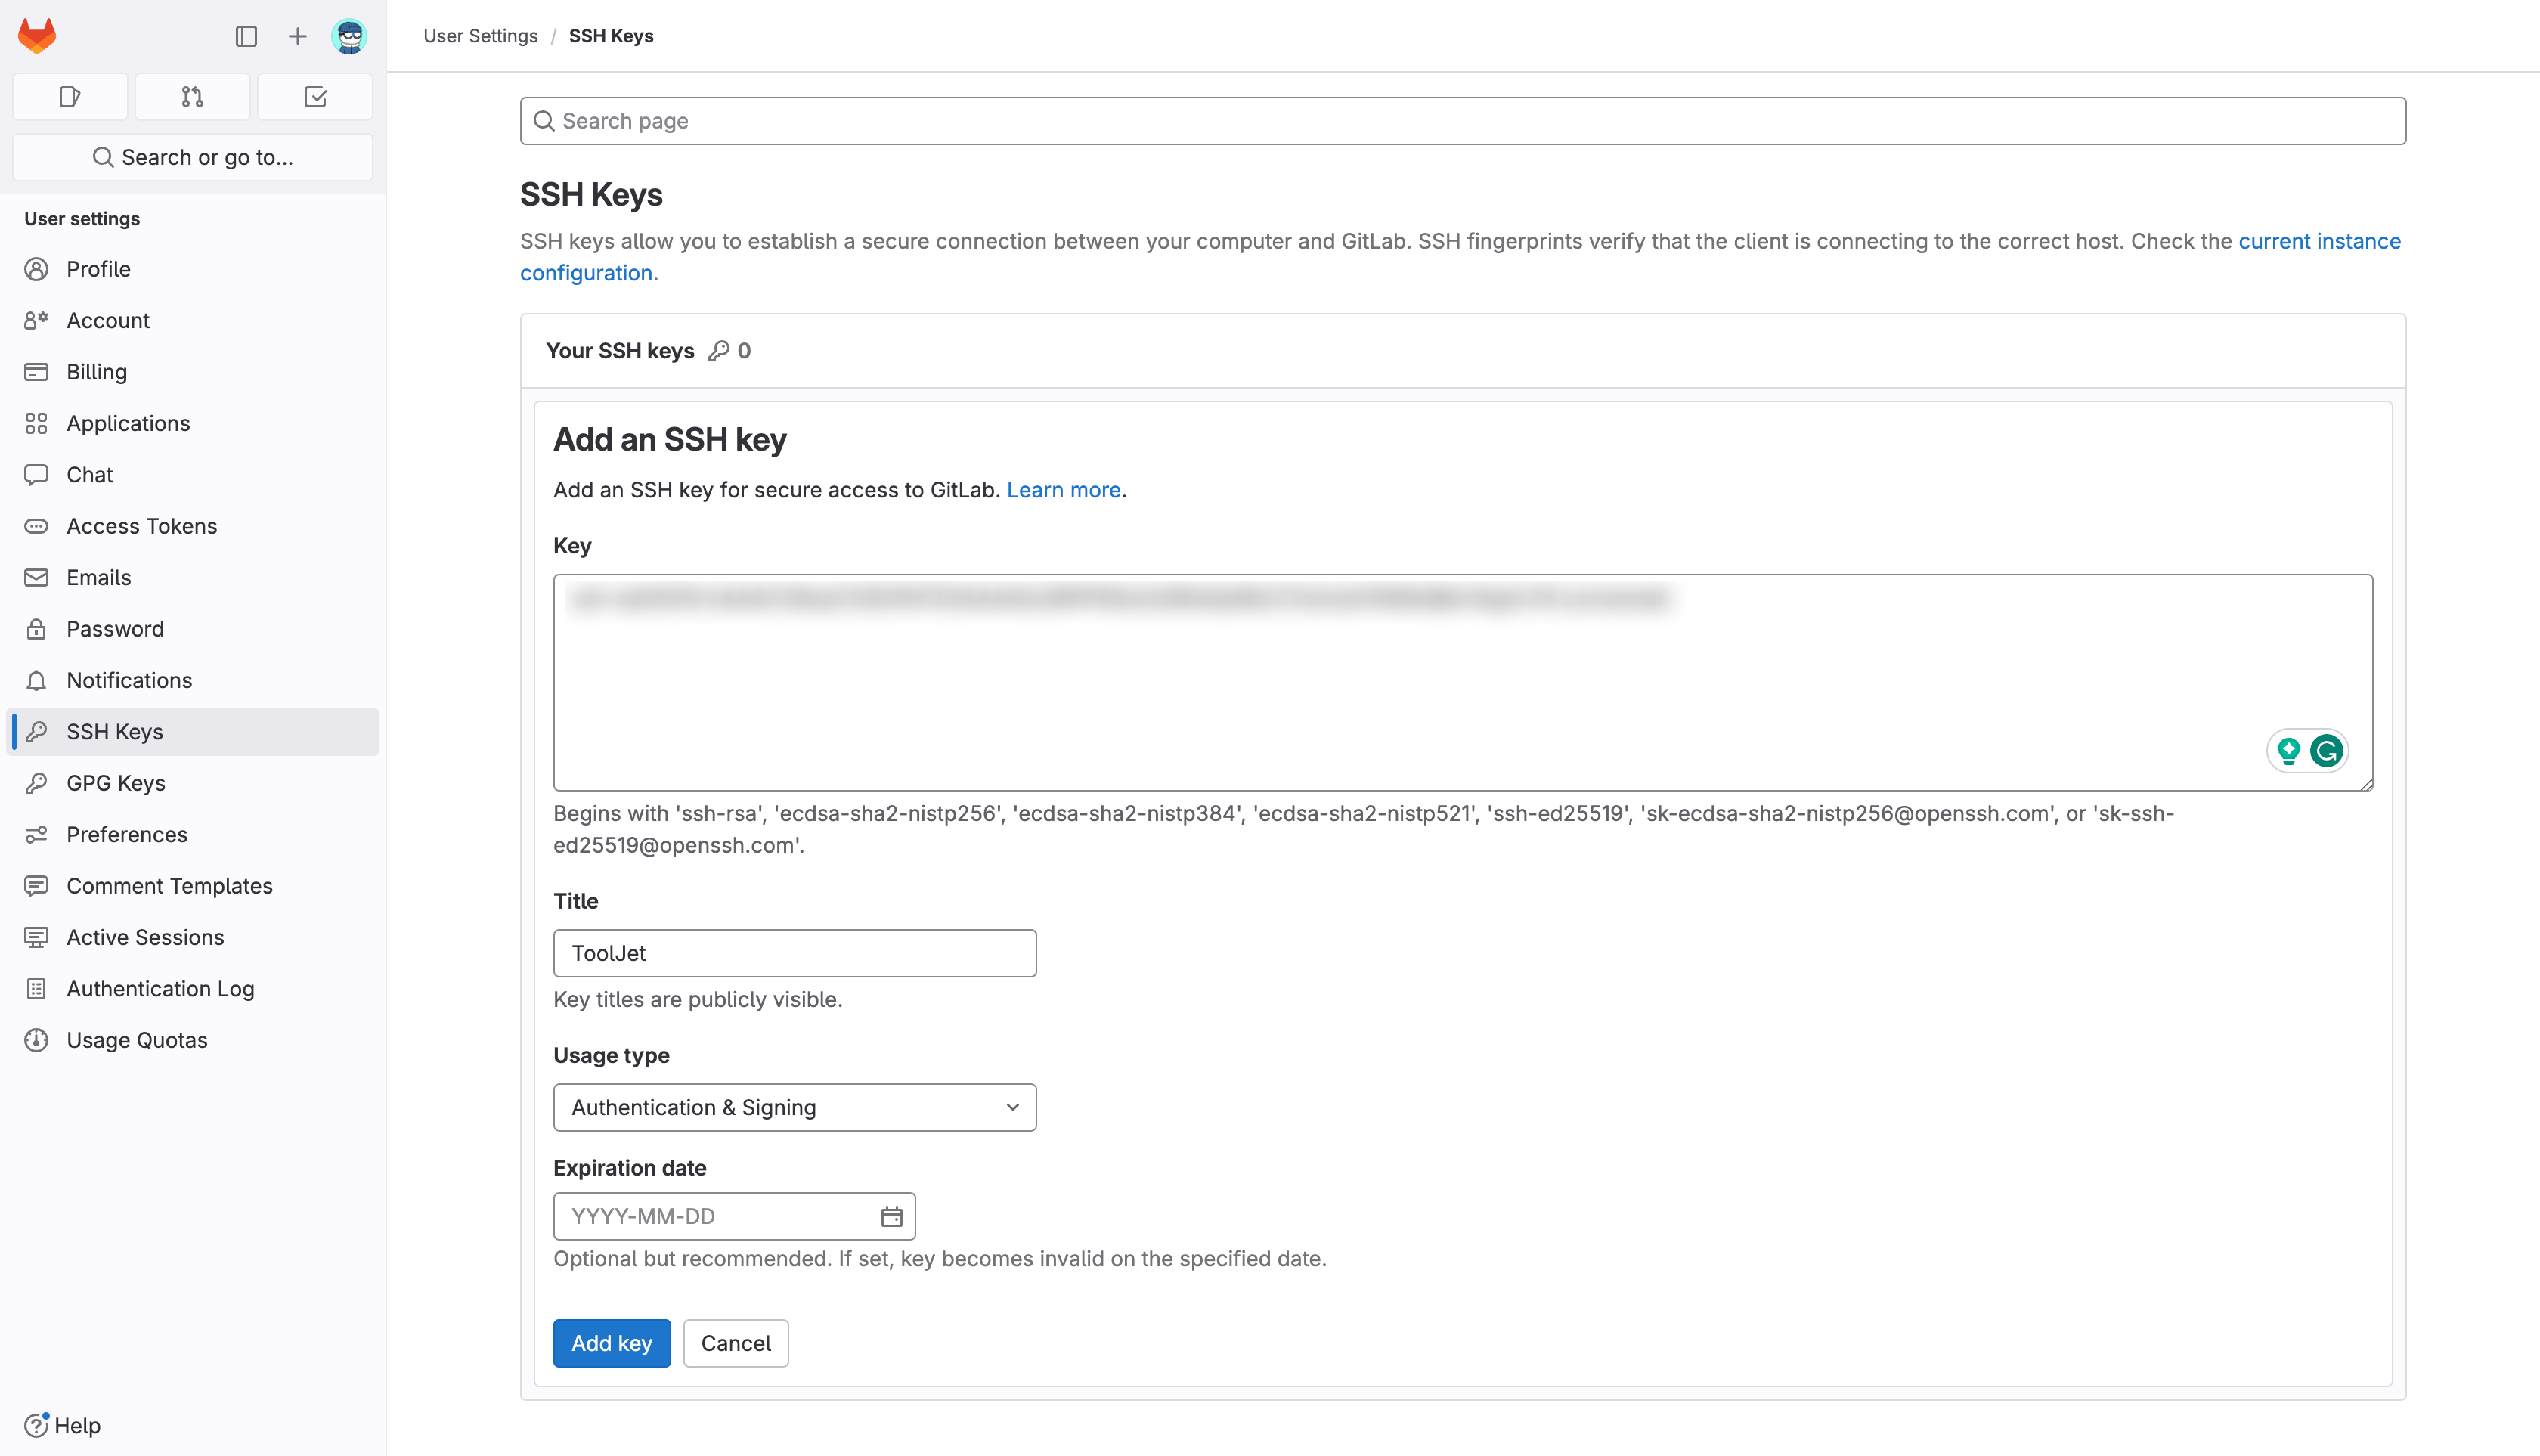
- In the Key field, paste the SSH key you generated in Step 3.
- Give your key a descriptive title.
- Set Usage type to Authentication & signing.
- Optionally, set an expiration date.
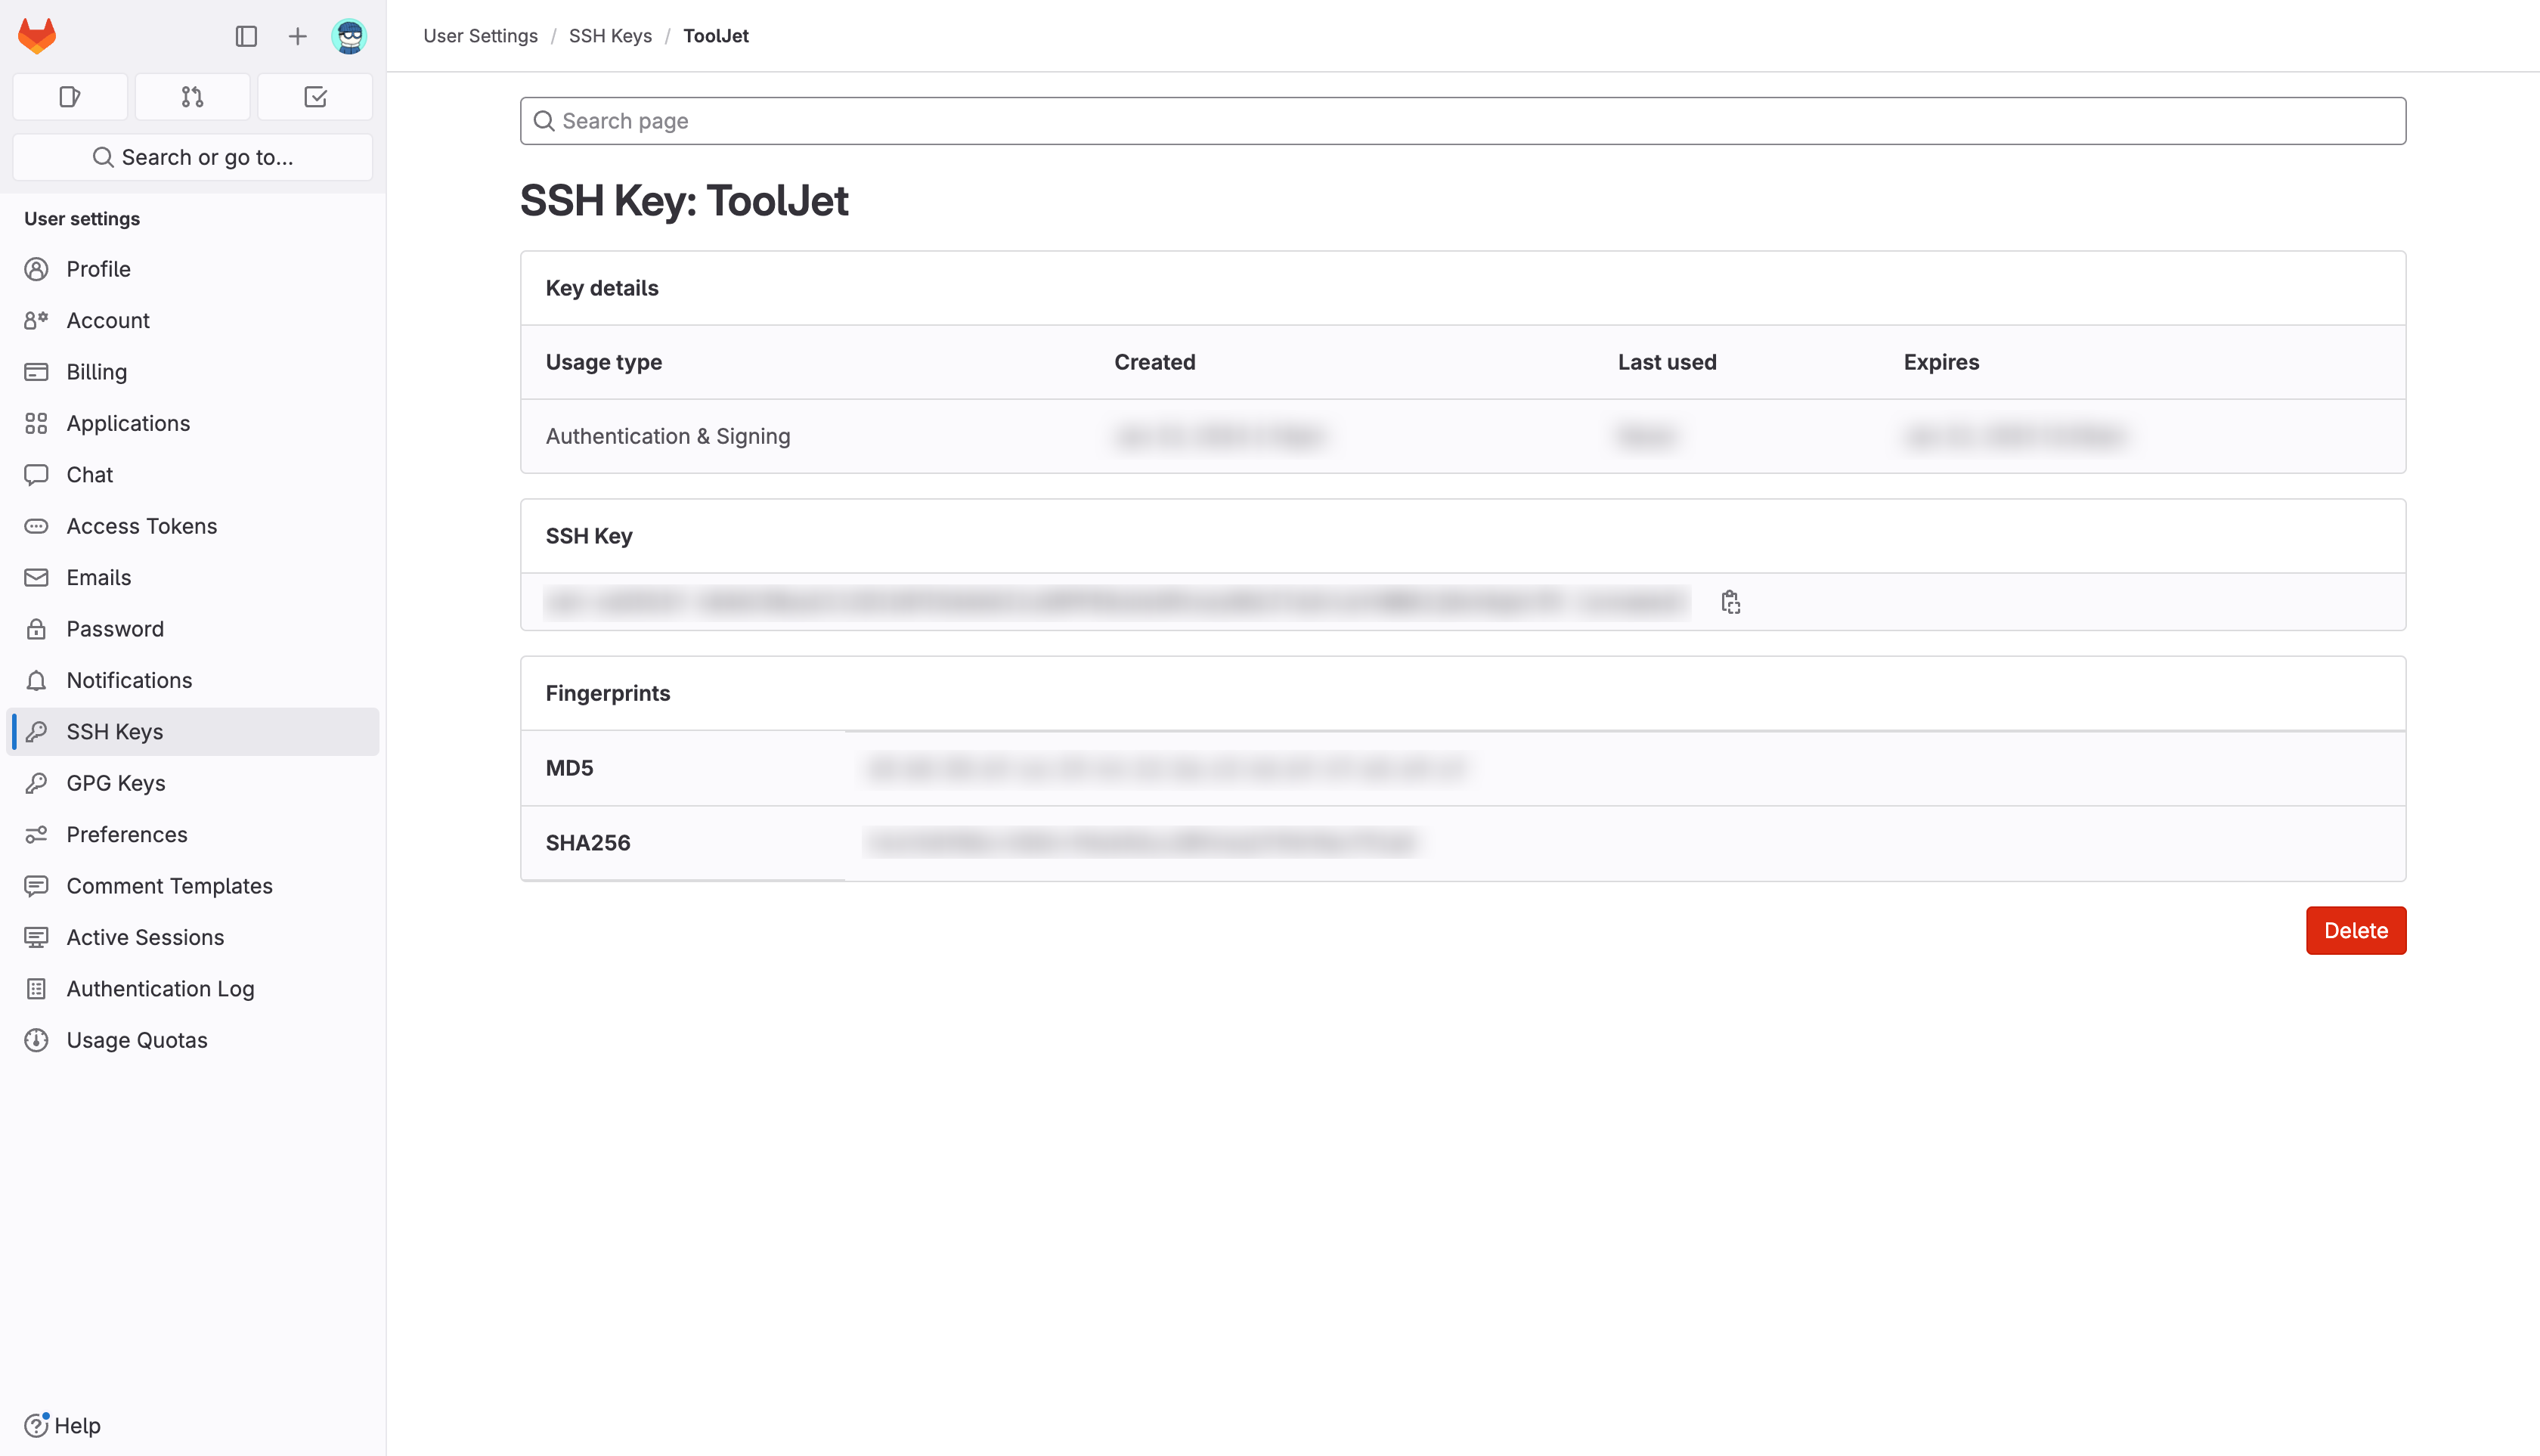
- Click Add key to save.
Option 2: Add as a Deploy Key
Use this option for access to a specific repository only.
- Navigate to the repository you want to add the key to.
- Click on the Settings tab and select Repository.
- Once you are in the Repository Settings, expand the Deploy Keys section.
- Click on the Add new deploy key button.
- Give your key a descriptive title.
- In the Key field, paste the SSH key you generated in ToolJet's Configure Git tab during the previous step.
- Enable the Grant write permissions to this key checkbox. We need this permission to push changes to the repository.
- Click Add key to save.
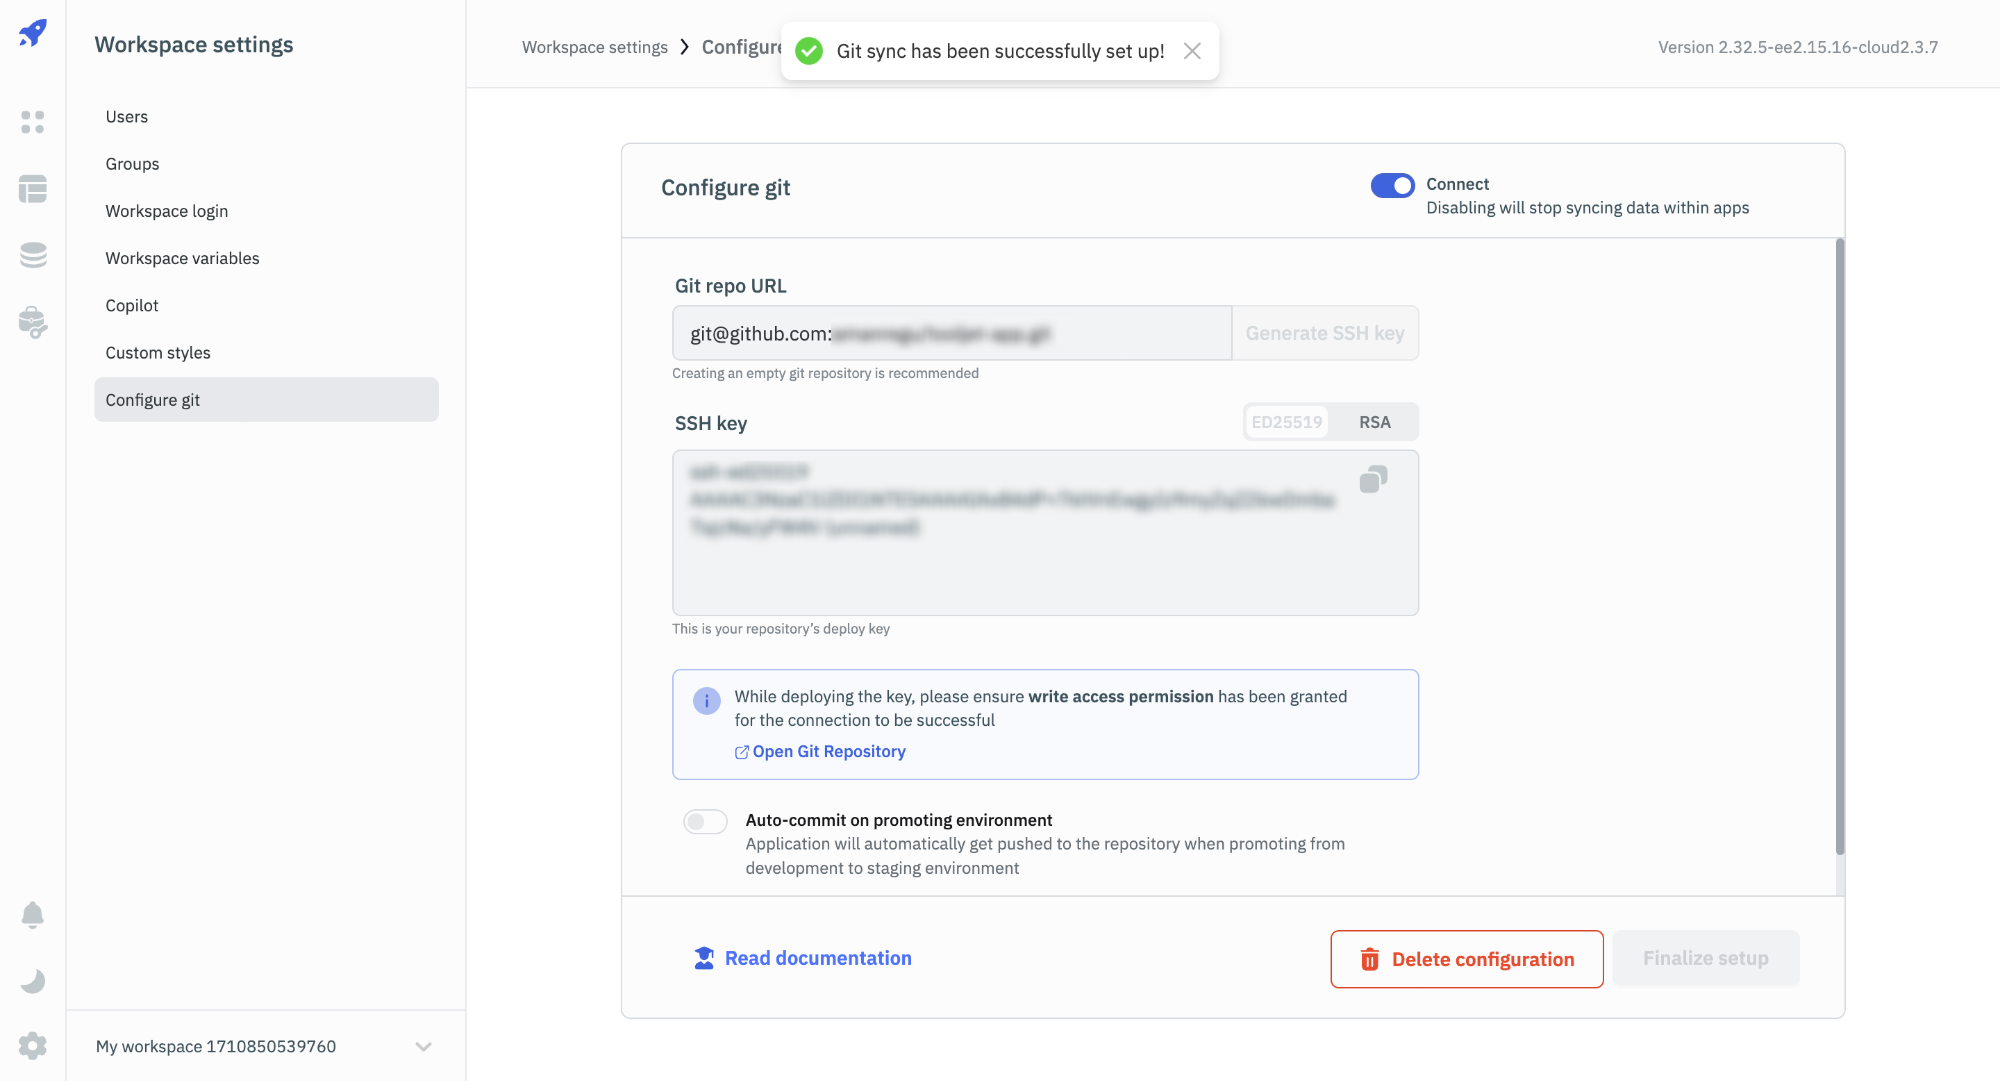
5. Finish the GitSync Configuration on ToolJet
Go back to the Configure git tab on ToolJet, and click on the Finalize setup button. If the SSH key is configured correctly, you will see a success message.
Auto-commit on Promoting Environment
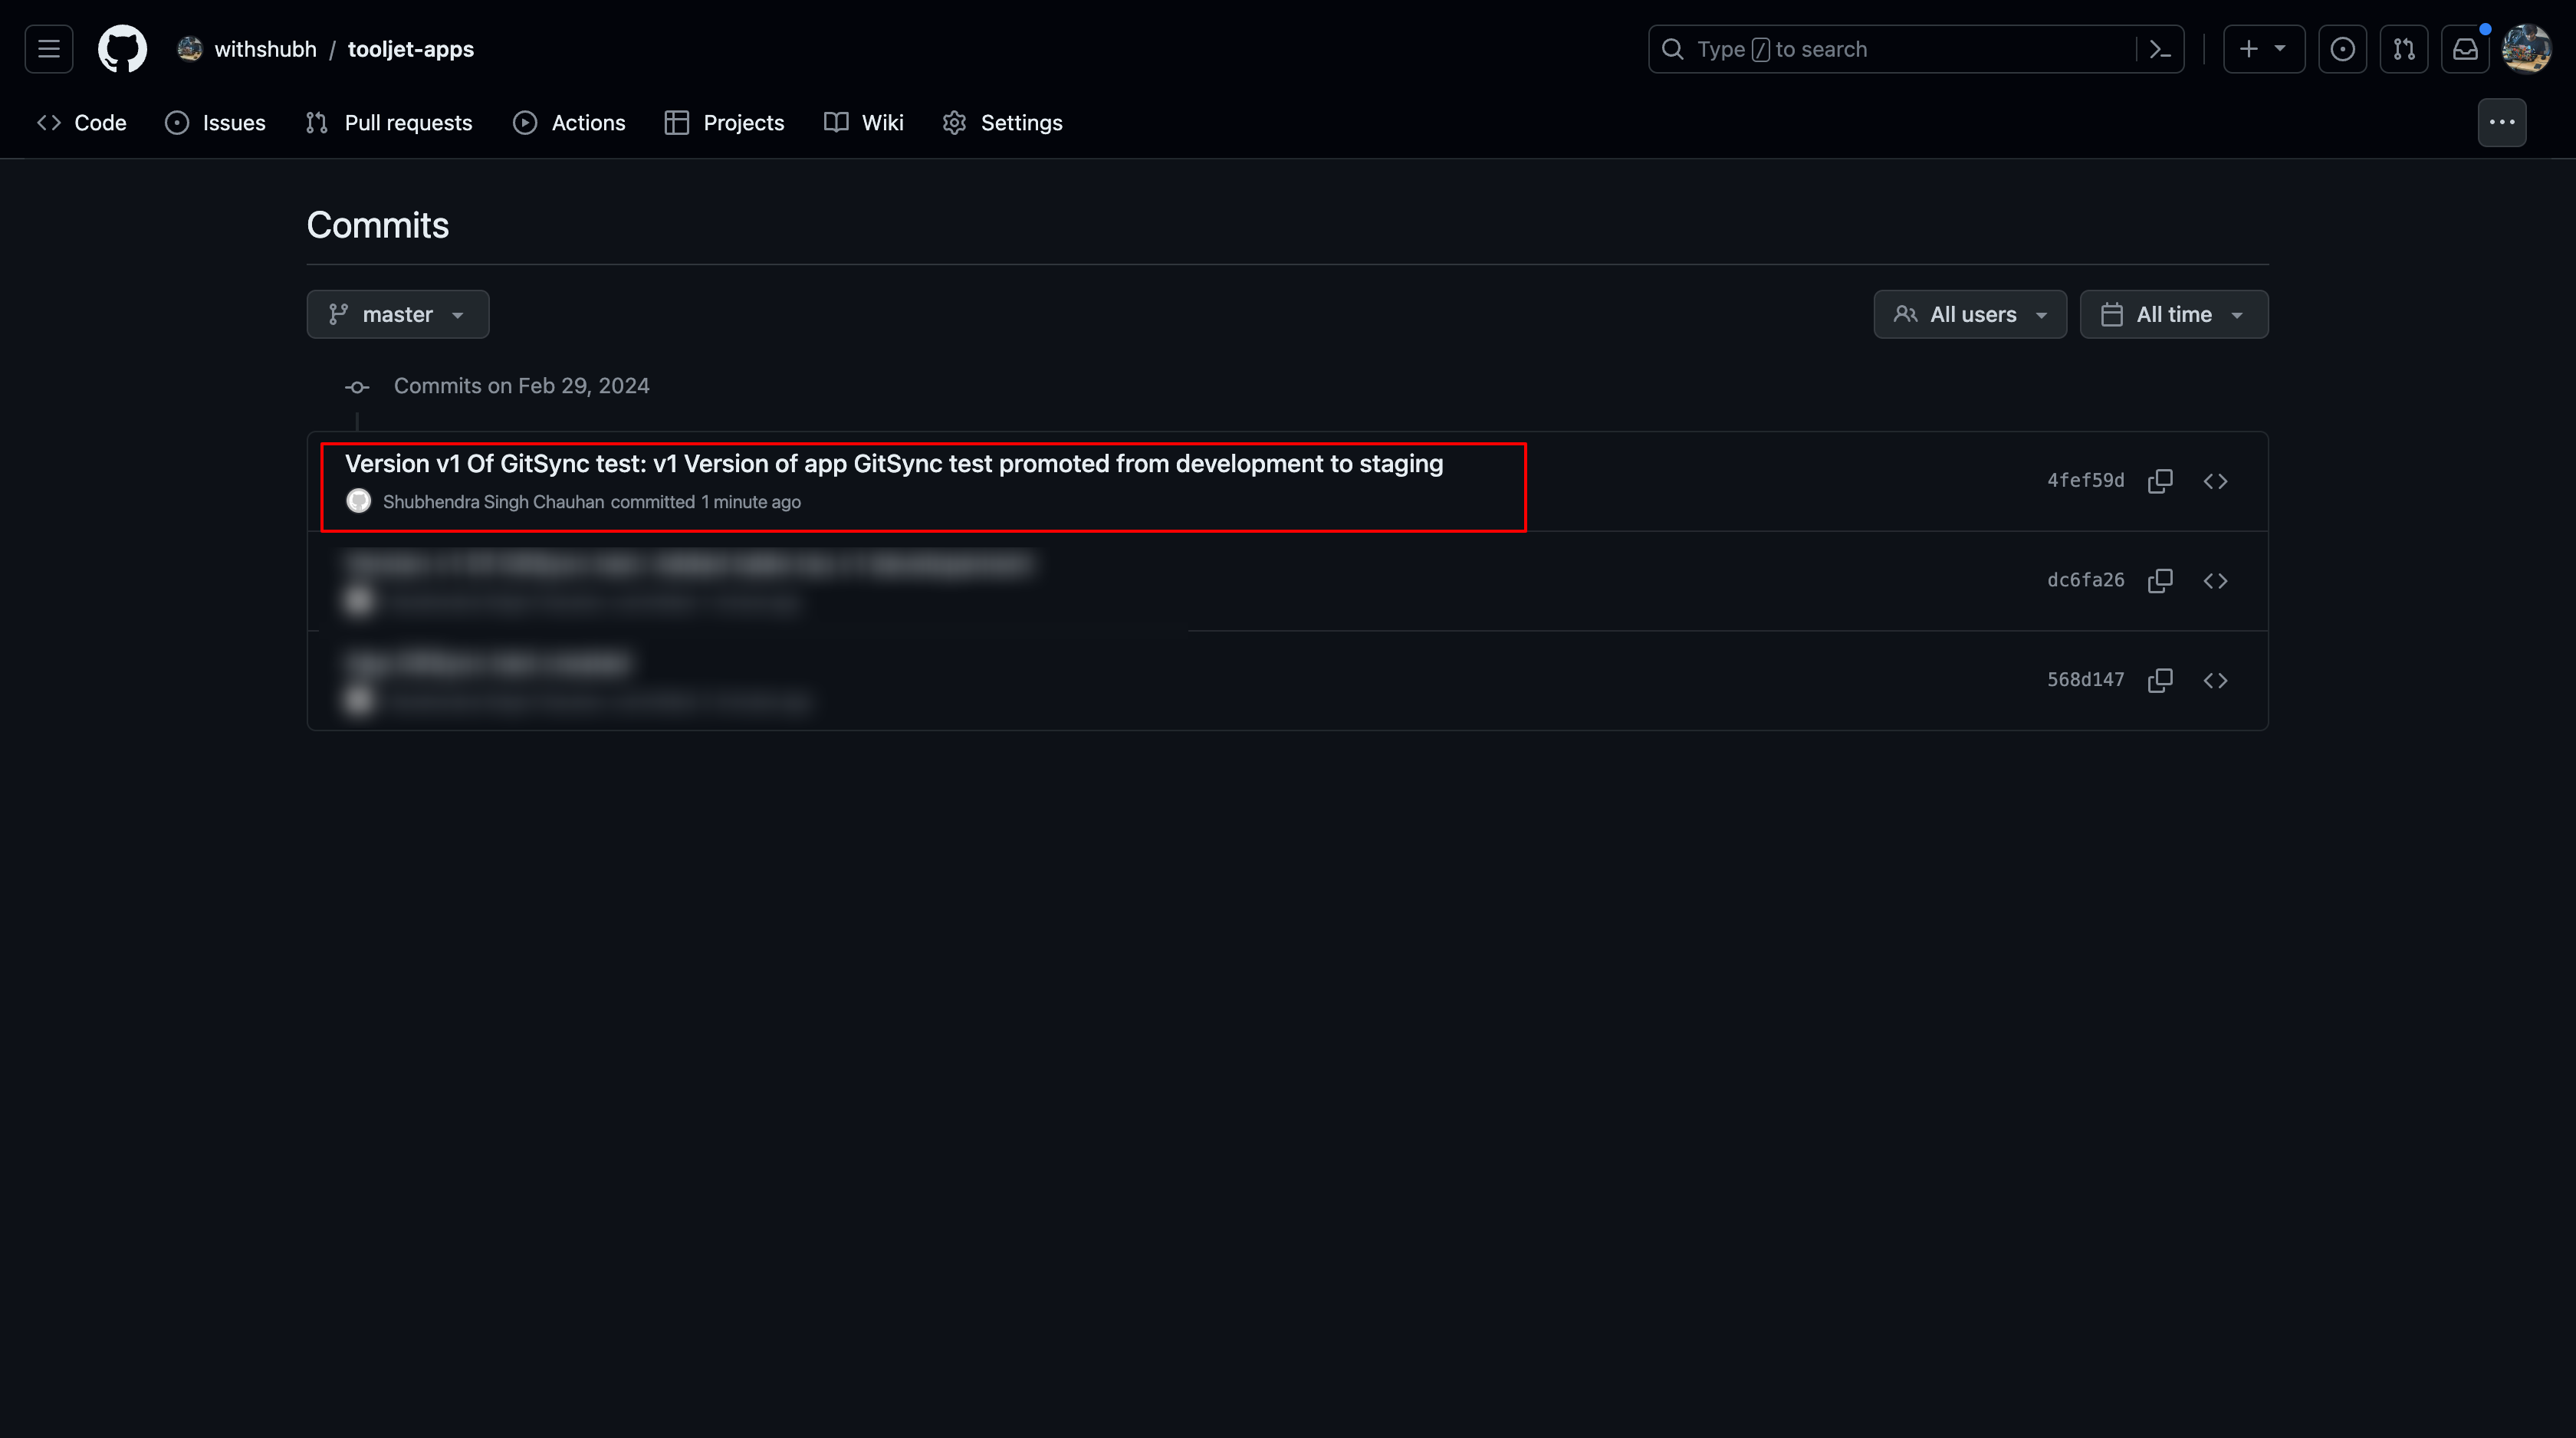
When you promote an environment, from Developement to Staging, the changes will be automatically committed to the git repository. The commit message will be <version_number> Version of <app_name> promoted from <source_environment> to <destination_environment>. The author will be the user who promoted the environment. When you promote an environment, from Staging to Production, no changes will be committed to the git repository.
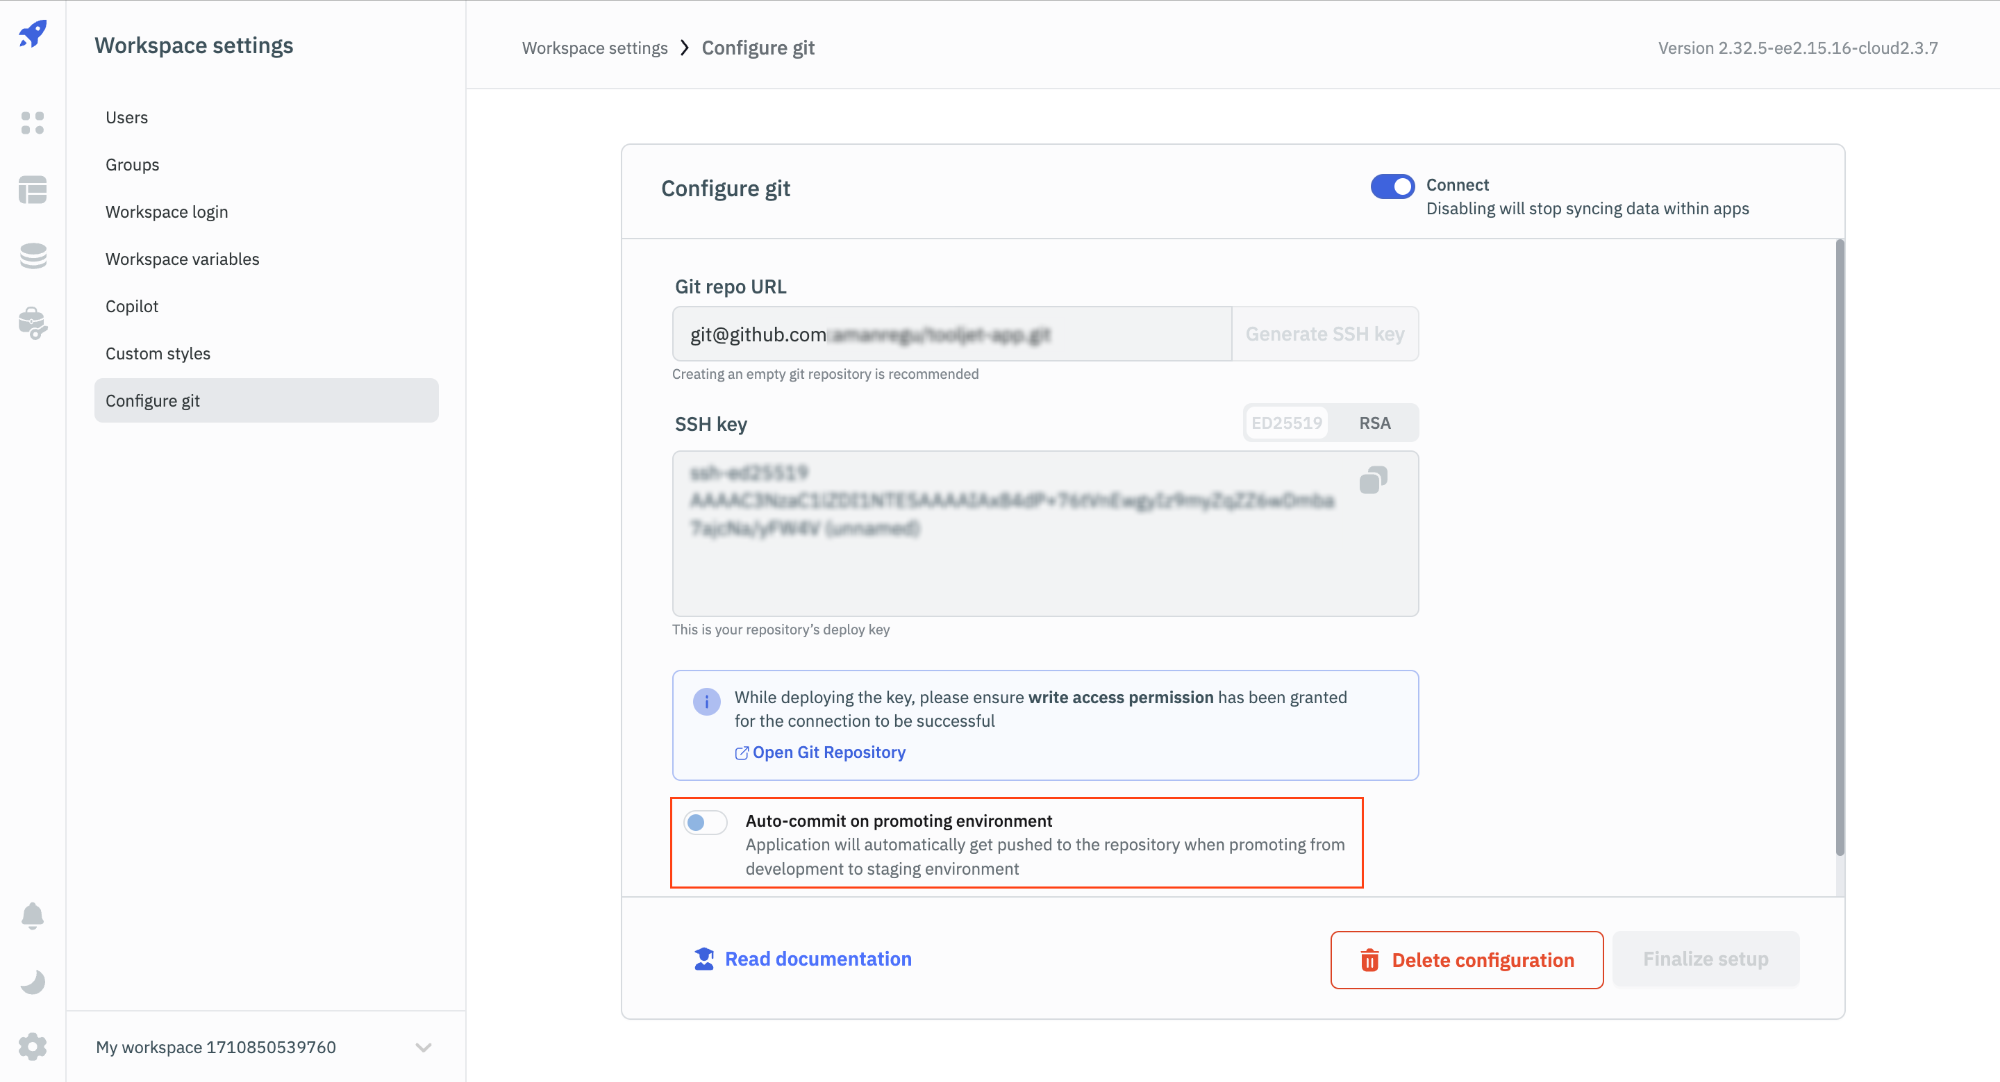
This option can be enabled or disabled from the Configure git tab on the Workspace settings page. By default, this option is disabled.
Enable/Disable GitSync
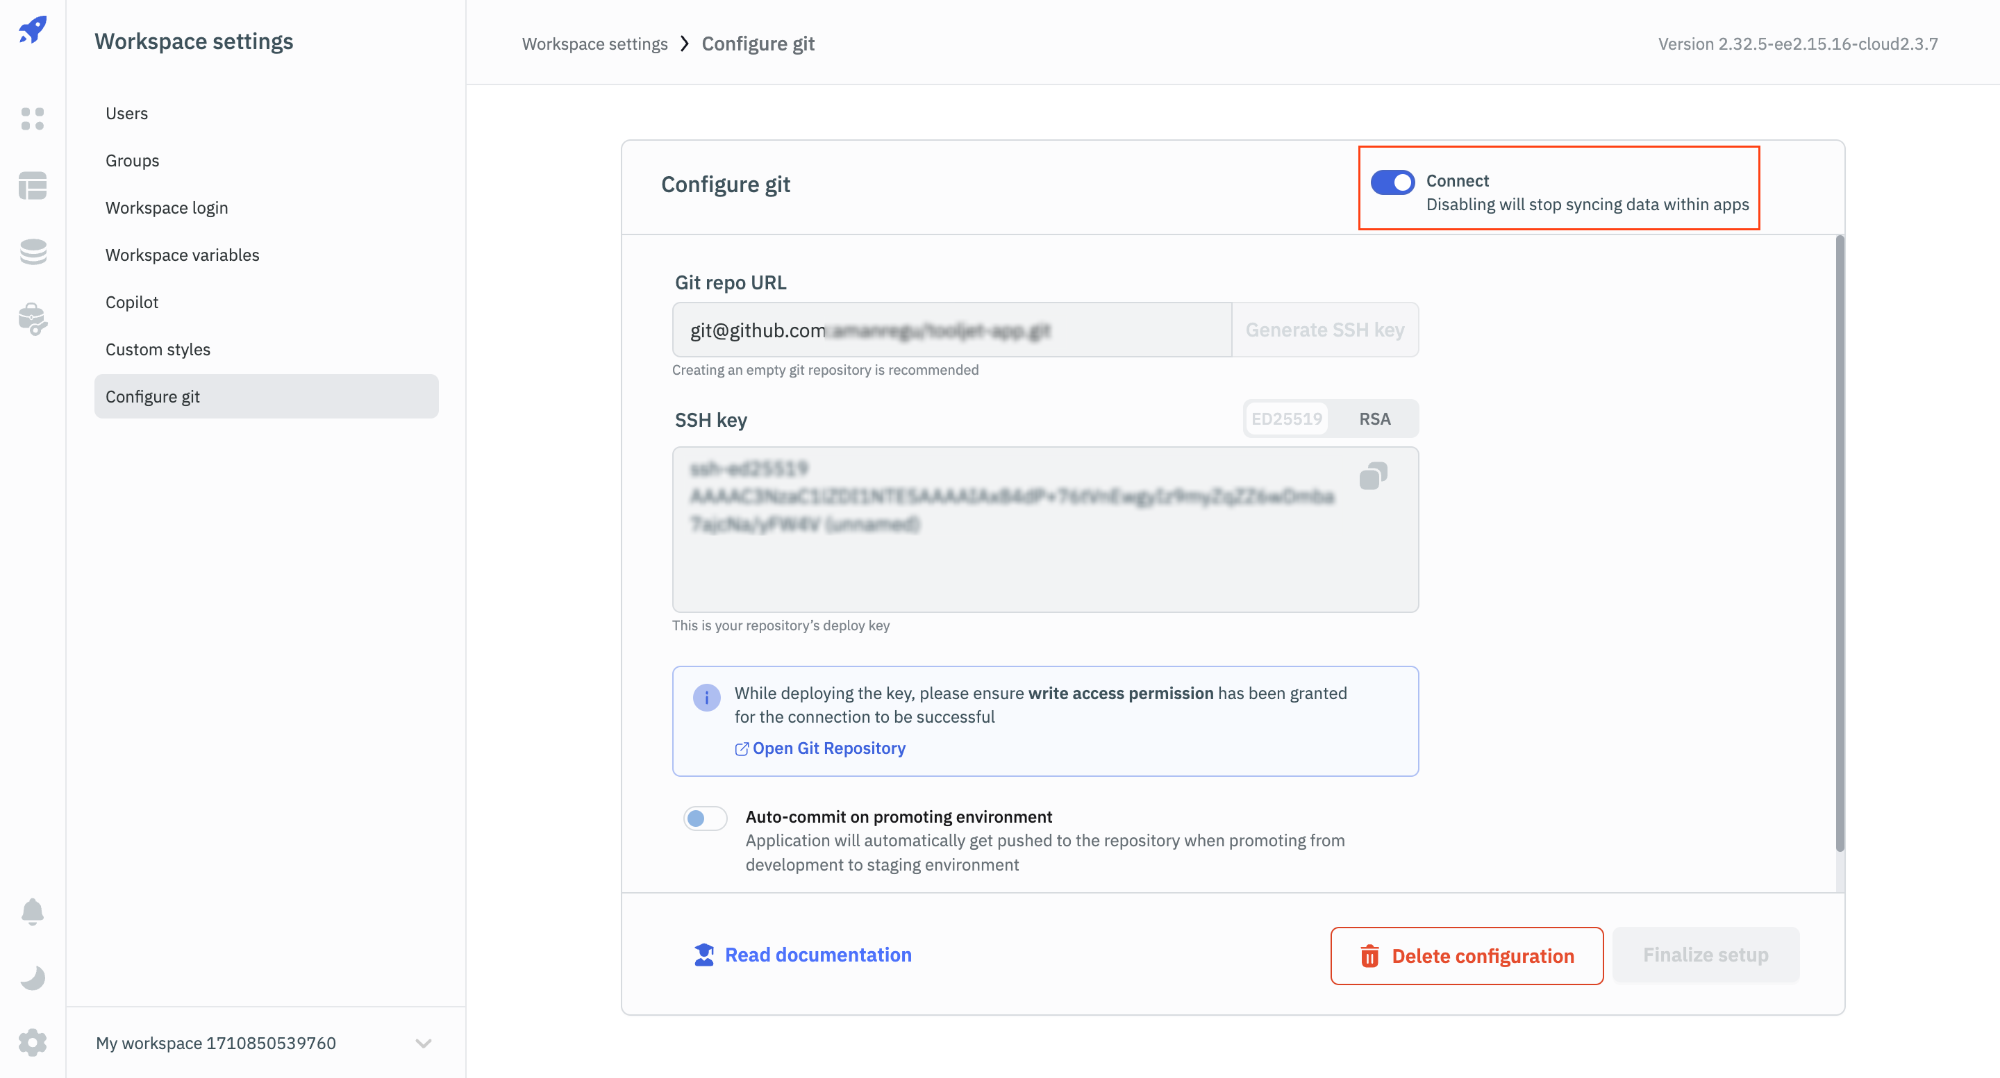
To enable or disable the GitSync feature, go to the Configure git tab on the Workspace settings page, and toggle on/off the Connect switch. This is only available if the GitSync feature is configured.
When Enabled
On clicking the GitSync button, the users will be able to commit changes to the git repository.
When Disabled
- For non-admin users: The users will not be able to commit changes to the git repository. They will see a dialogue box that the GitSync feature is not configured and they need to contact the admin to configure it.
- For admin users: The users will see a dialogue box with a link to configure the GitSync feature.
Delete GitSync Configuration
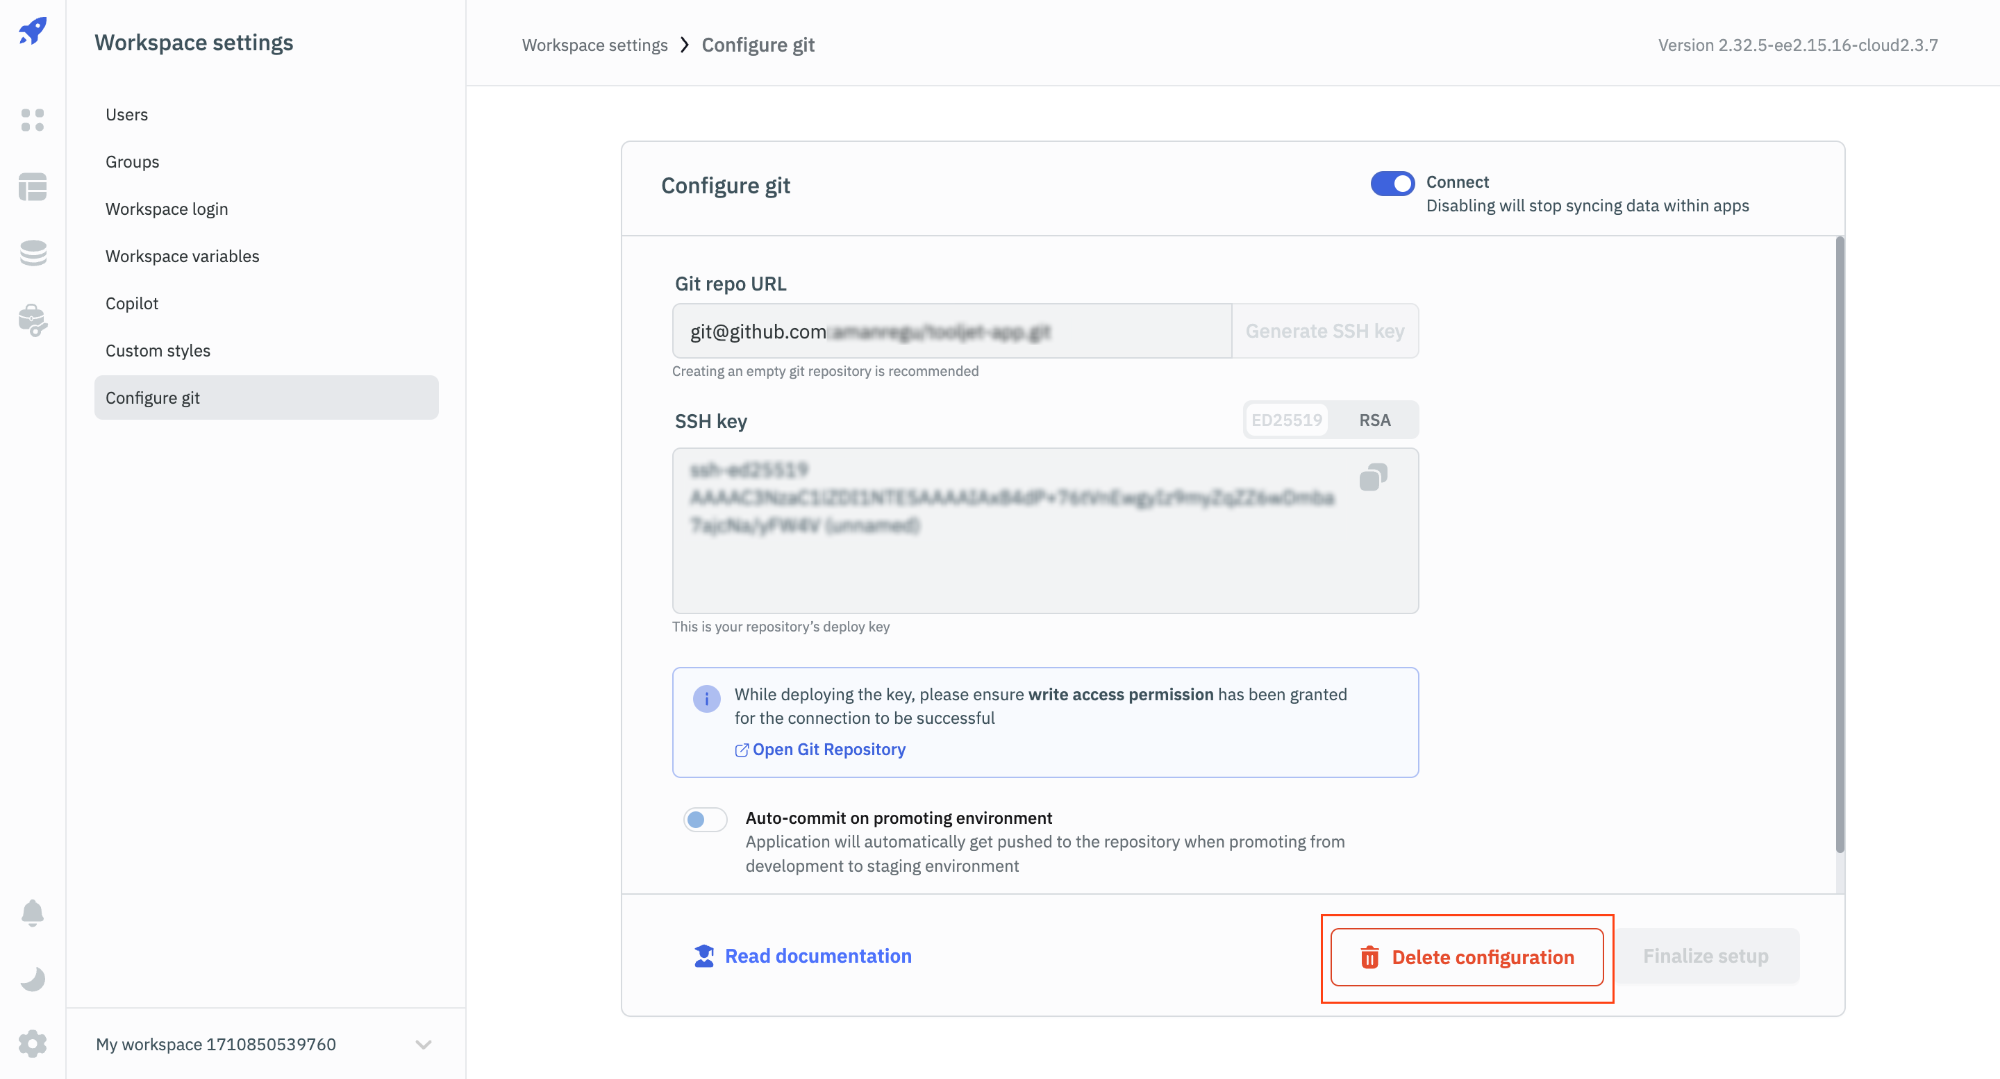
To delete the GitSync configuration, go to the Configure git tab on the Workspace settings page, and click on the Delete configuration button. This will delete the SSH key from the ToolJet configuration and the GitSync feature will be disabled.
Note: Deleting the GitSync configuration will not delete the apps from the git repository. The apps will still be available in the git repository in the same state as they were before the GitSync configuration was deleted.
Git Repo
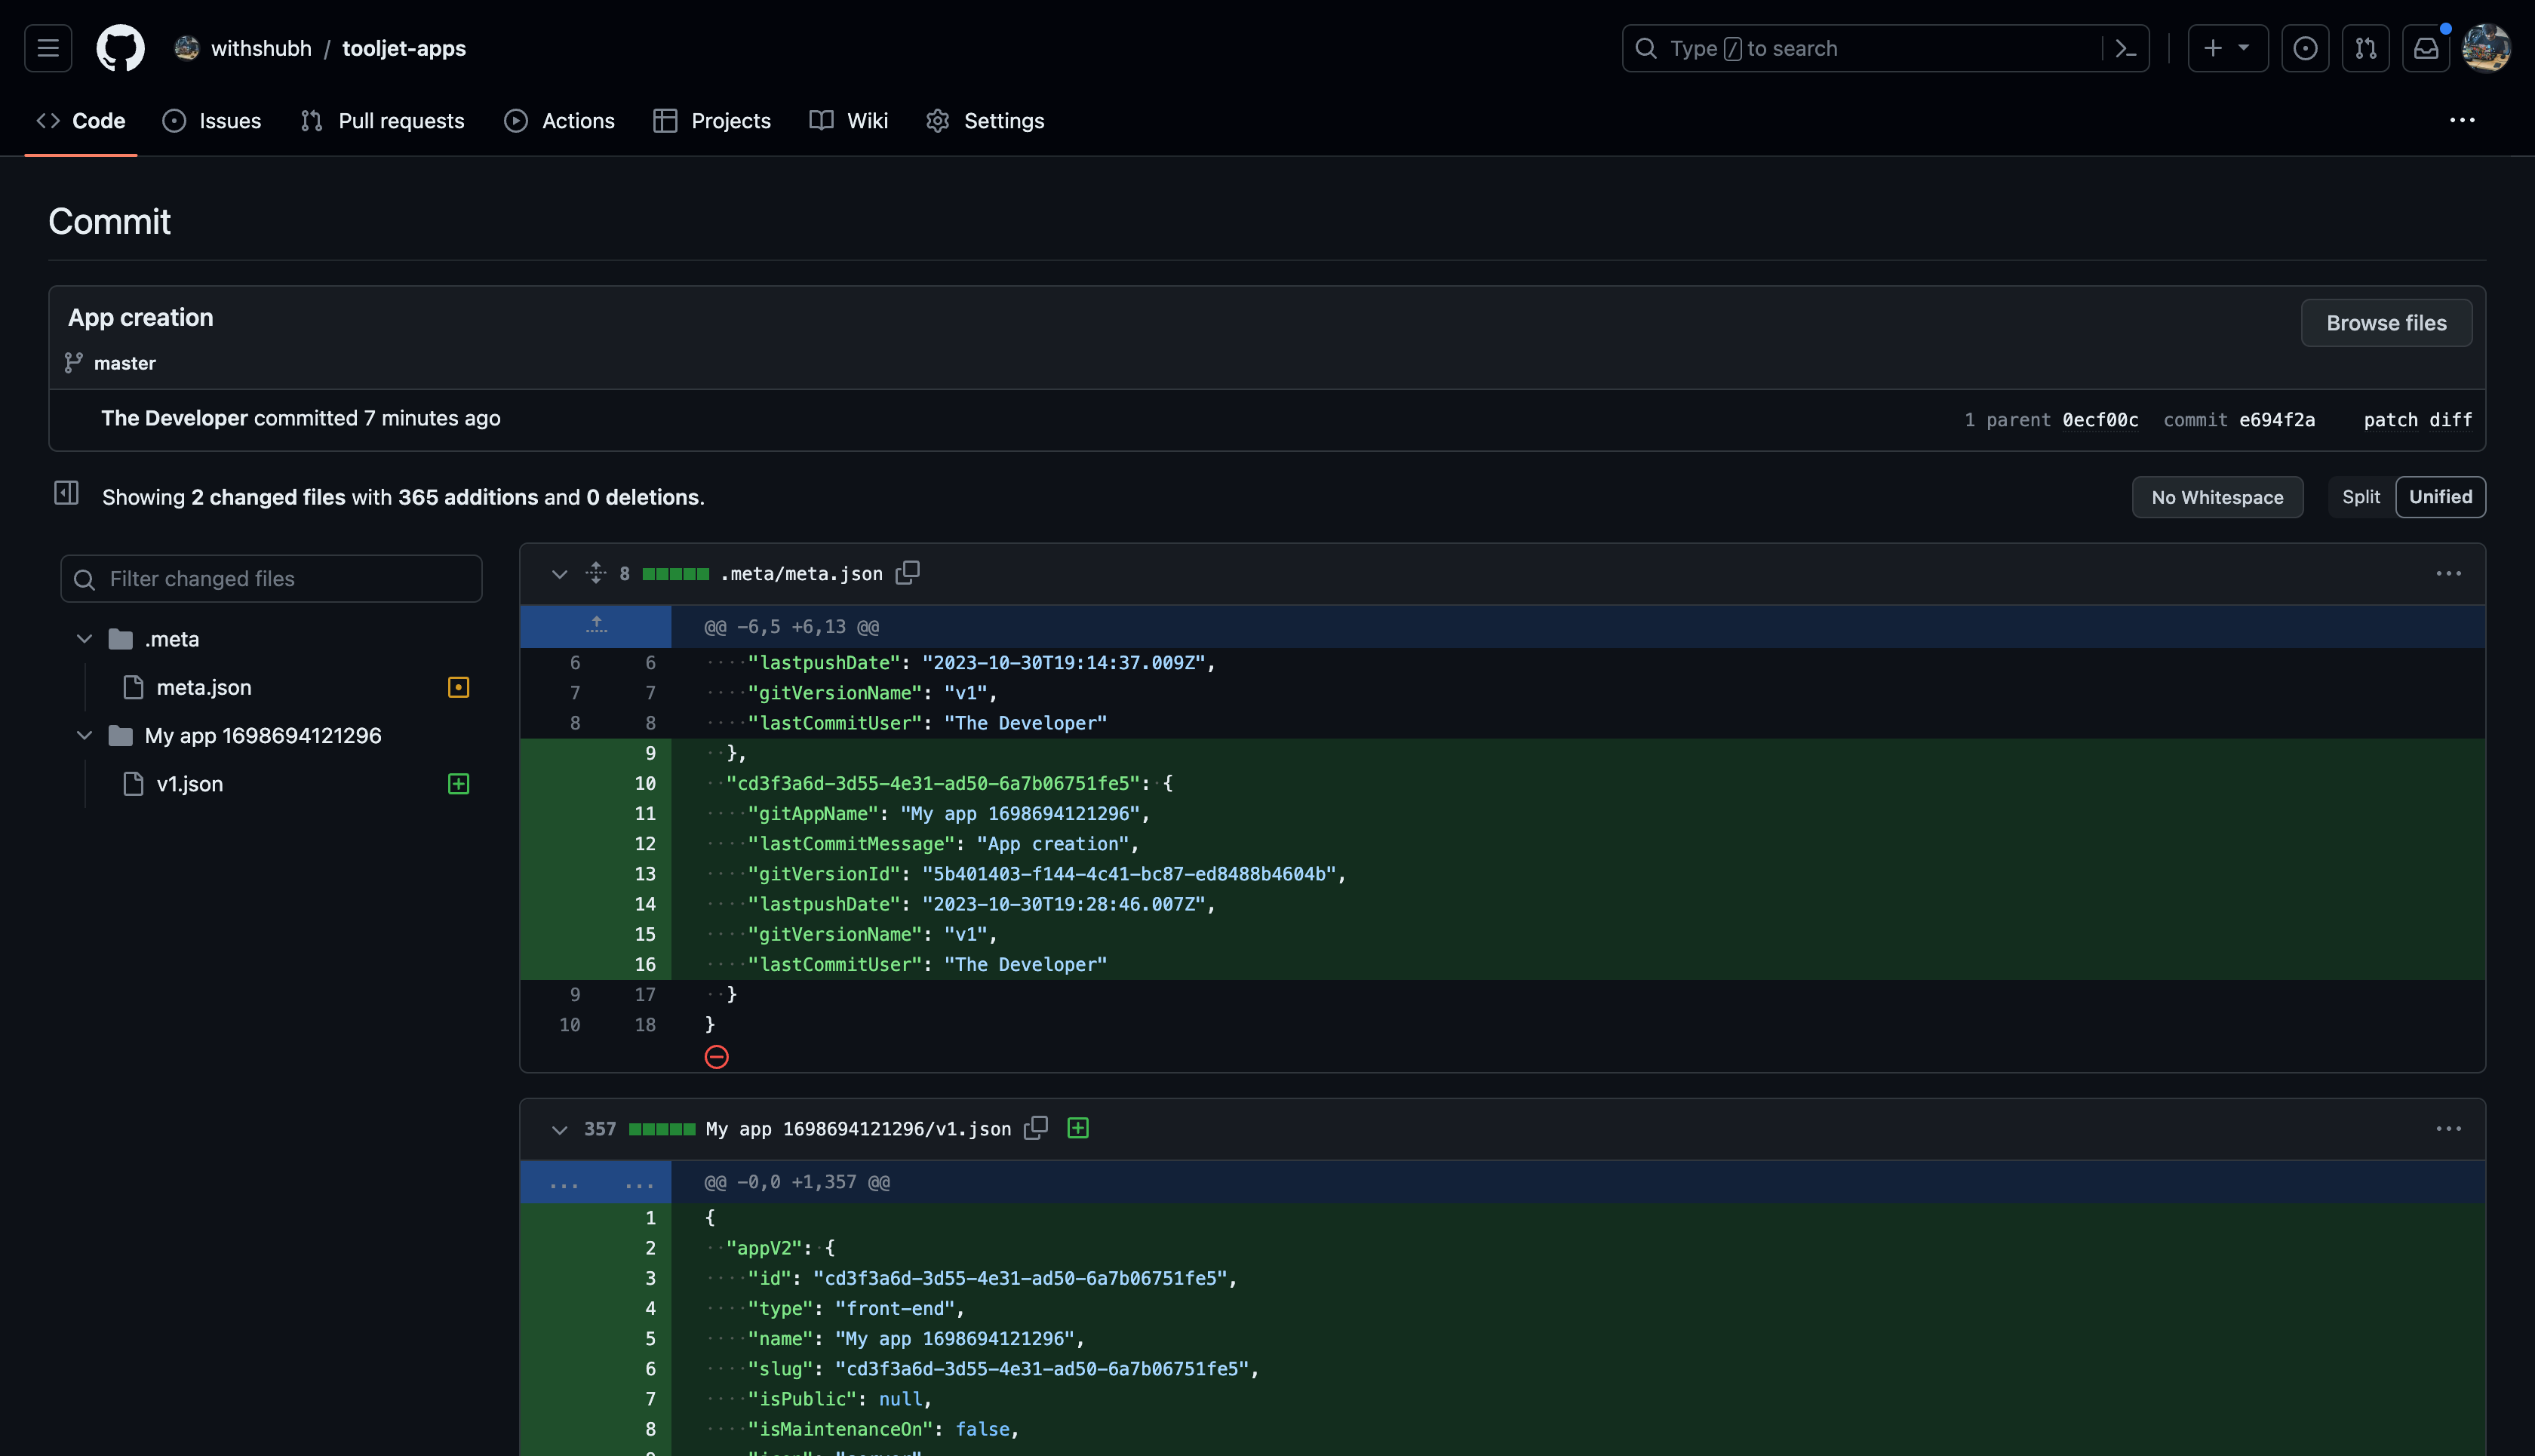
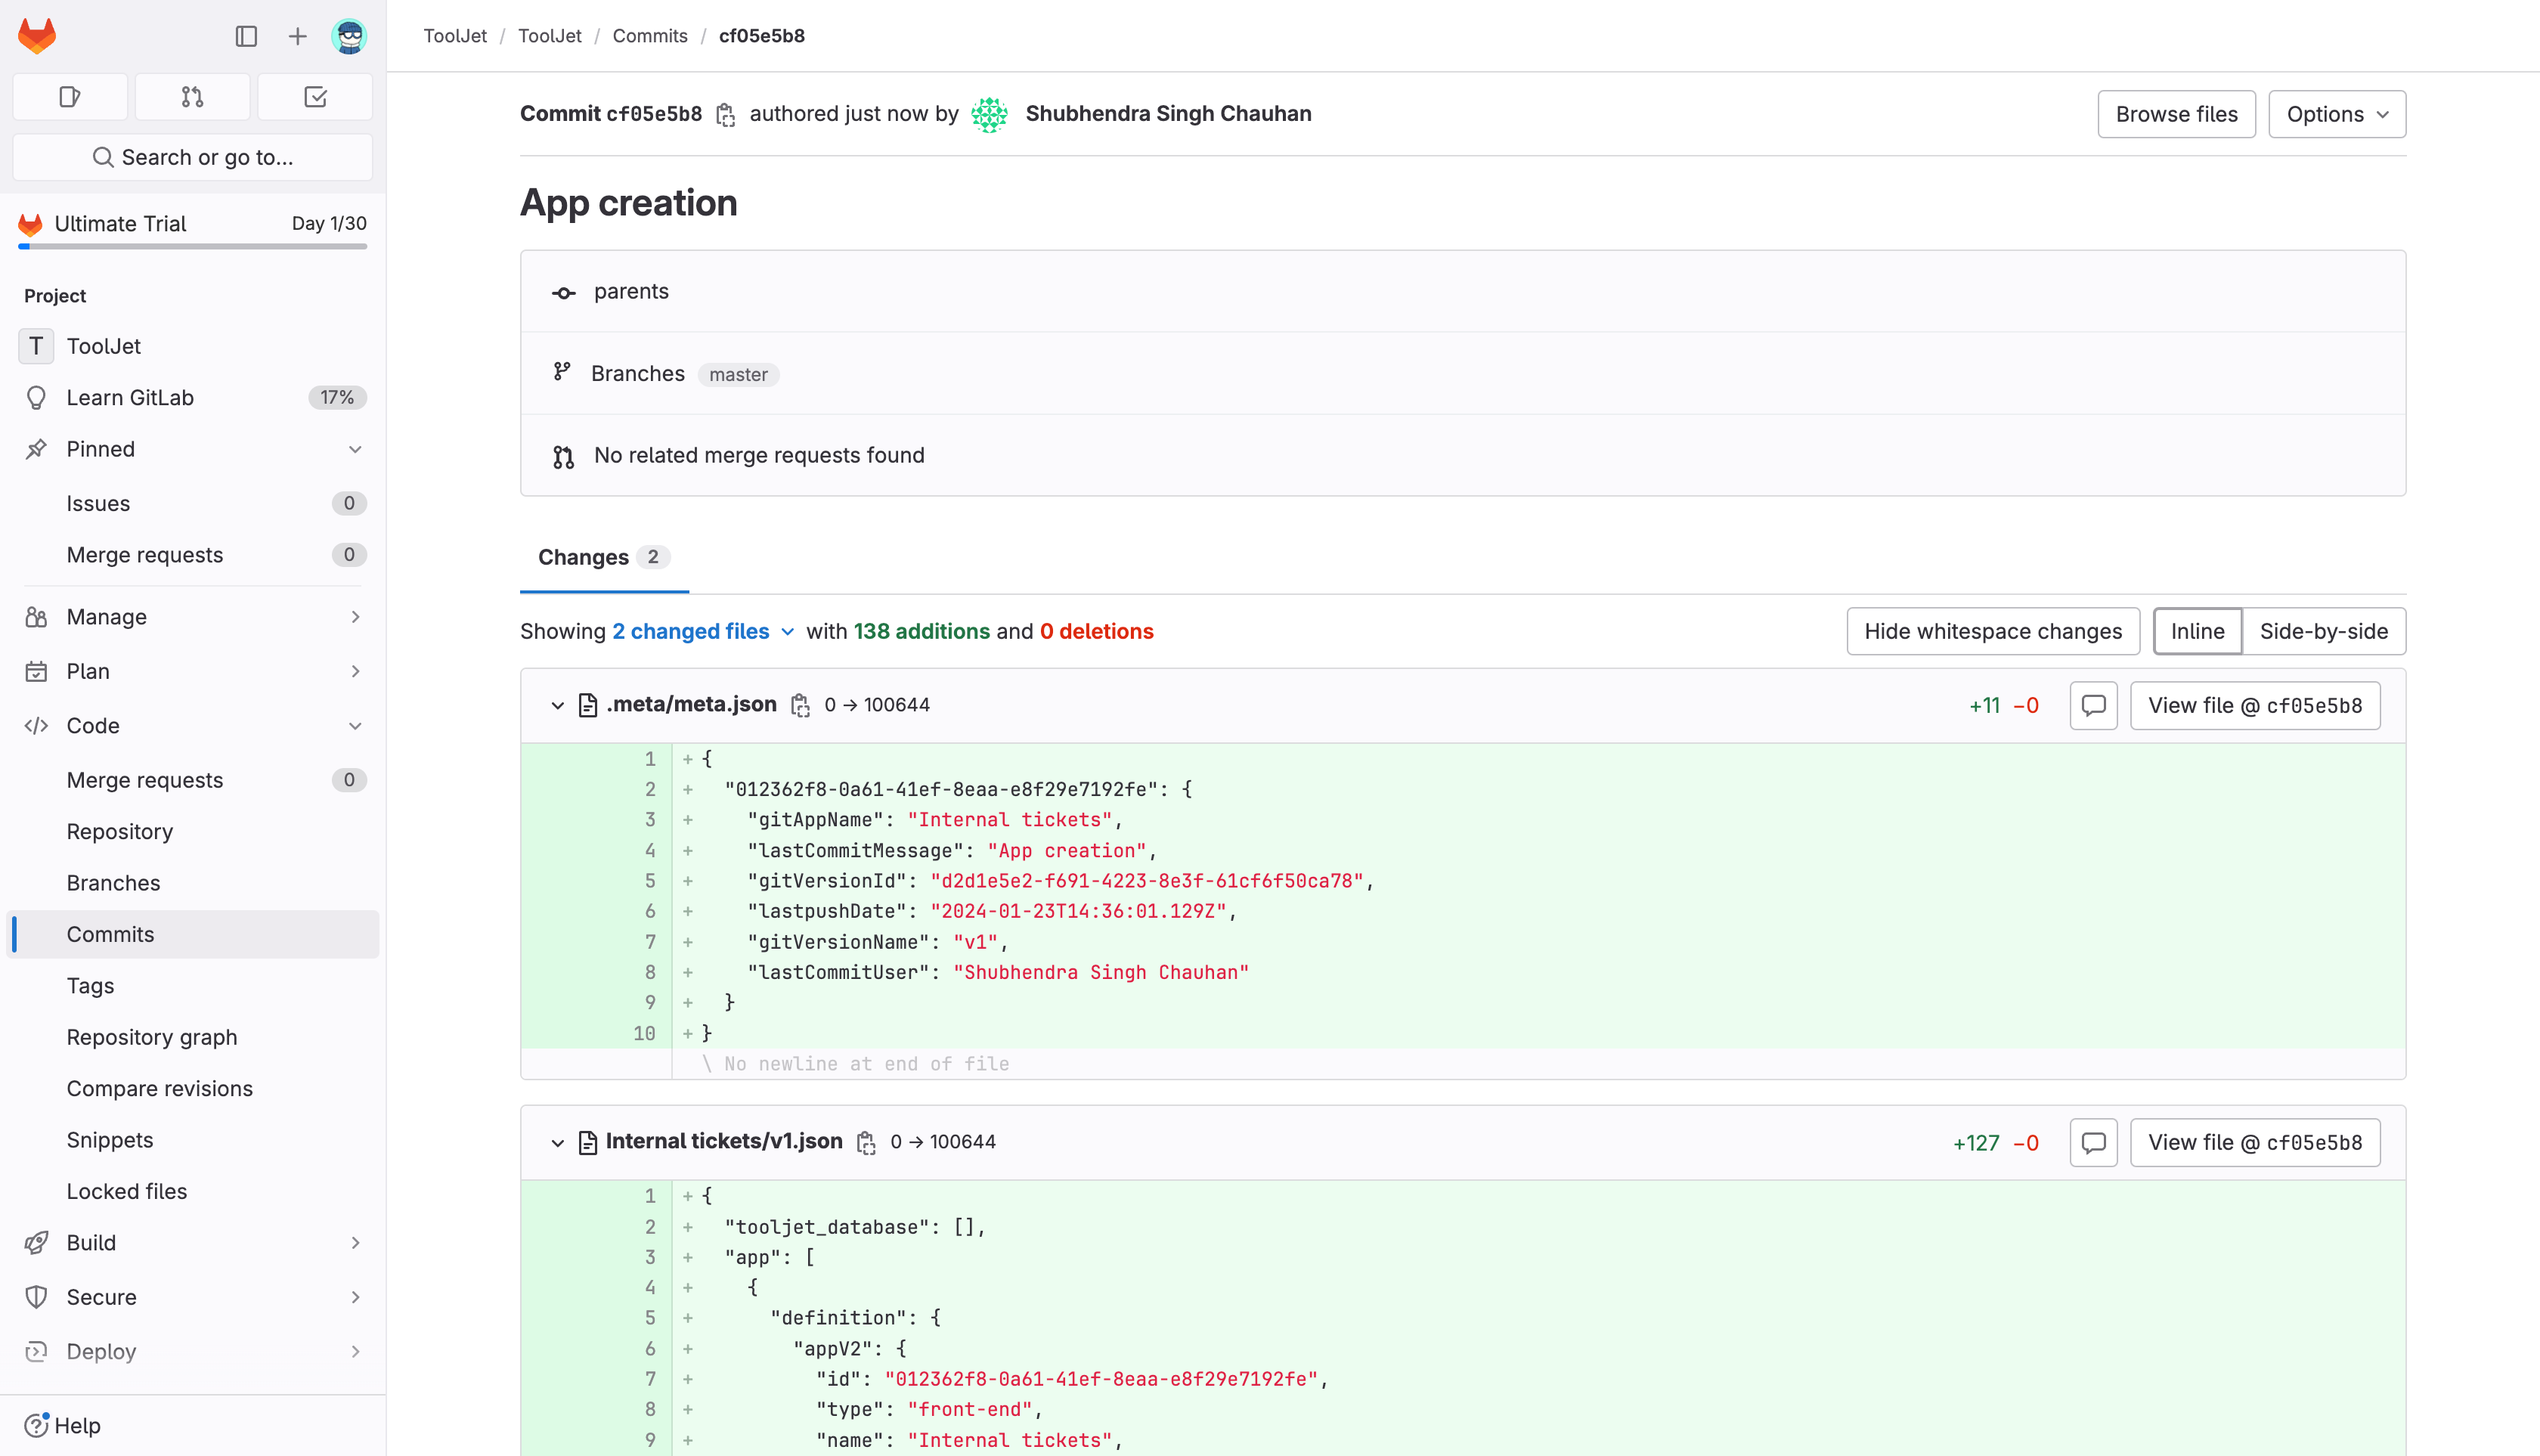
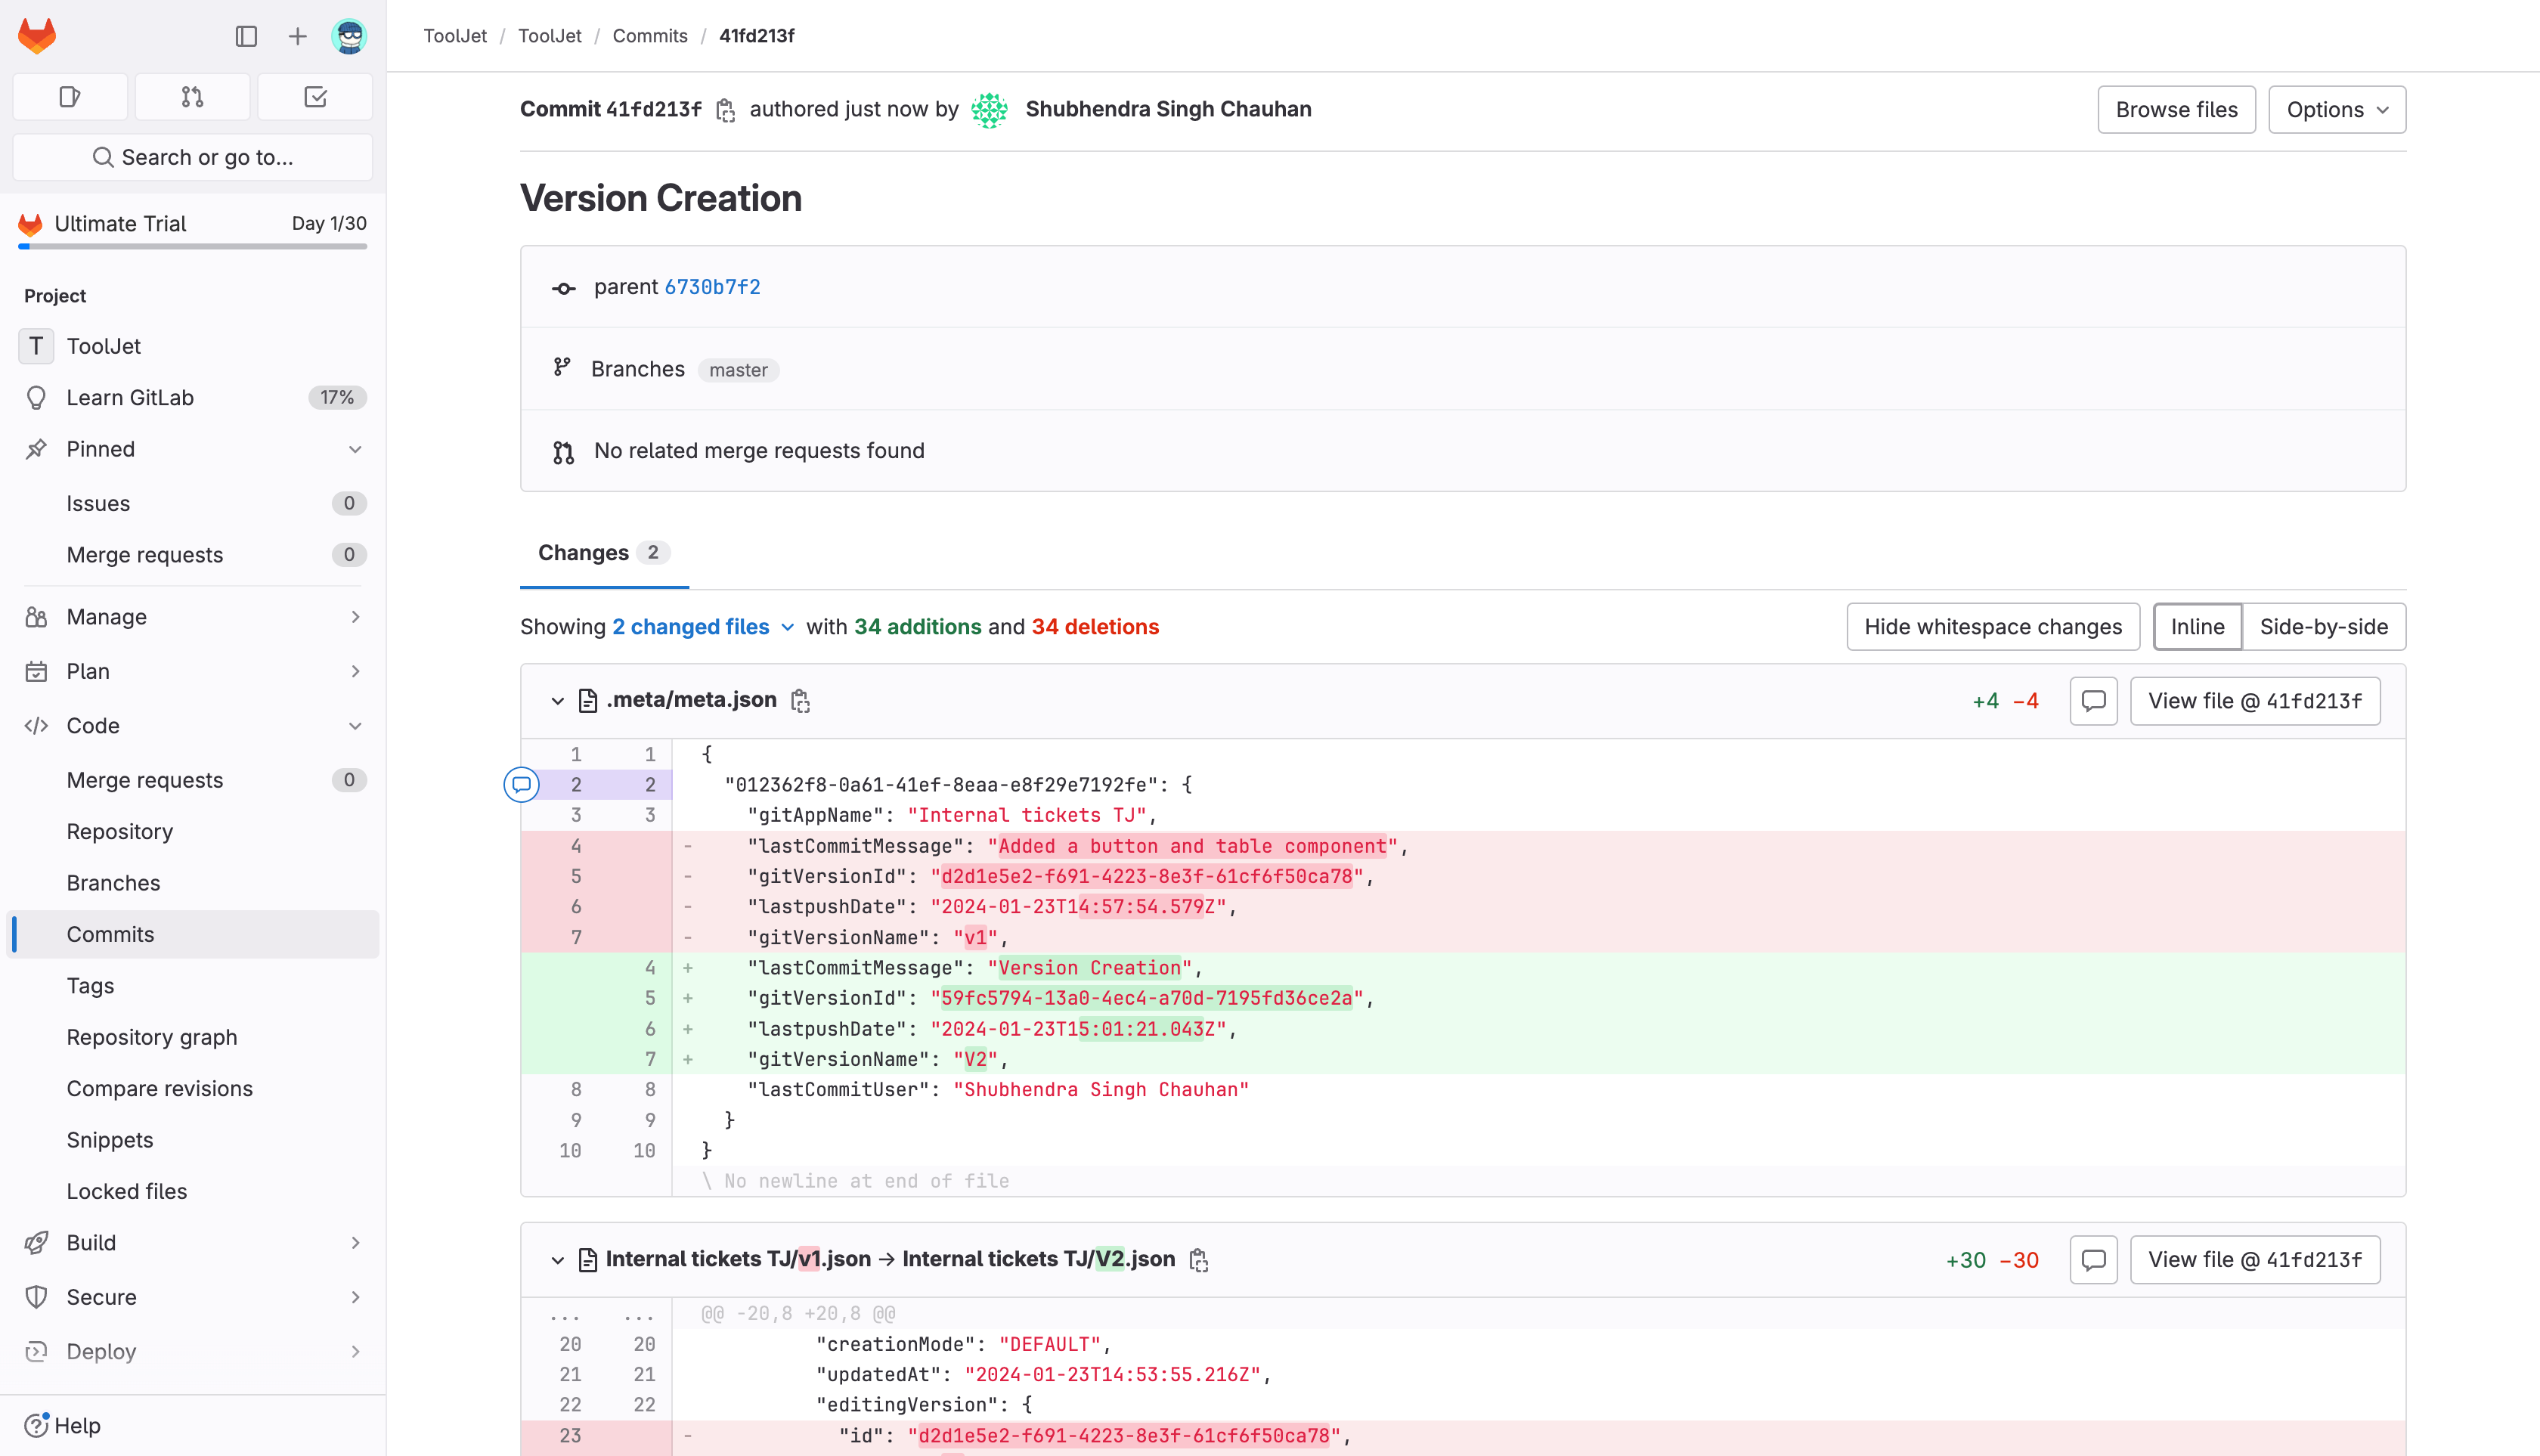
Once the initial commit is made, you can see the app files in the git repository. The repository will have the individual app folders and a .meta folder. The app folders will be named as the app name and will have the respective JSON file of the application. The .meta folder will have the meta.json file that contains the meta information of each application synced to git repo.
The meta.json file holds information about apps such as the App name, last commit message, last commit user, last commit date, version name, and version id.
- GitHub
- GitLab
Pushing Changes to Git Repo
Once the GitSync feature is configured, you can start pushing changes to the git repository.
App Creation
When you create a new app, you will see an option to select the Commit changes. If you select the commit changes option, the changes will be committed to the git repository.
If the app name is same as the name of the existing app in the git repo, it will overwrite the existing app in the git repo.
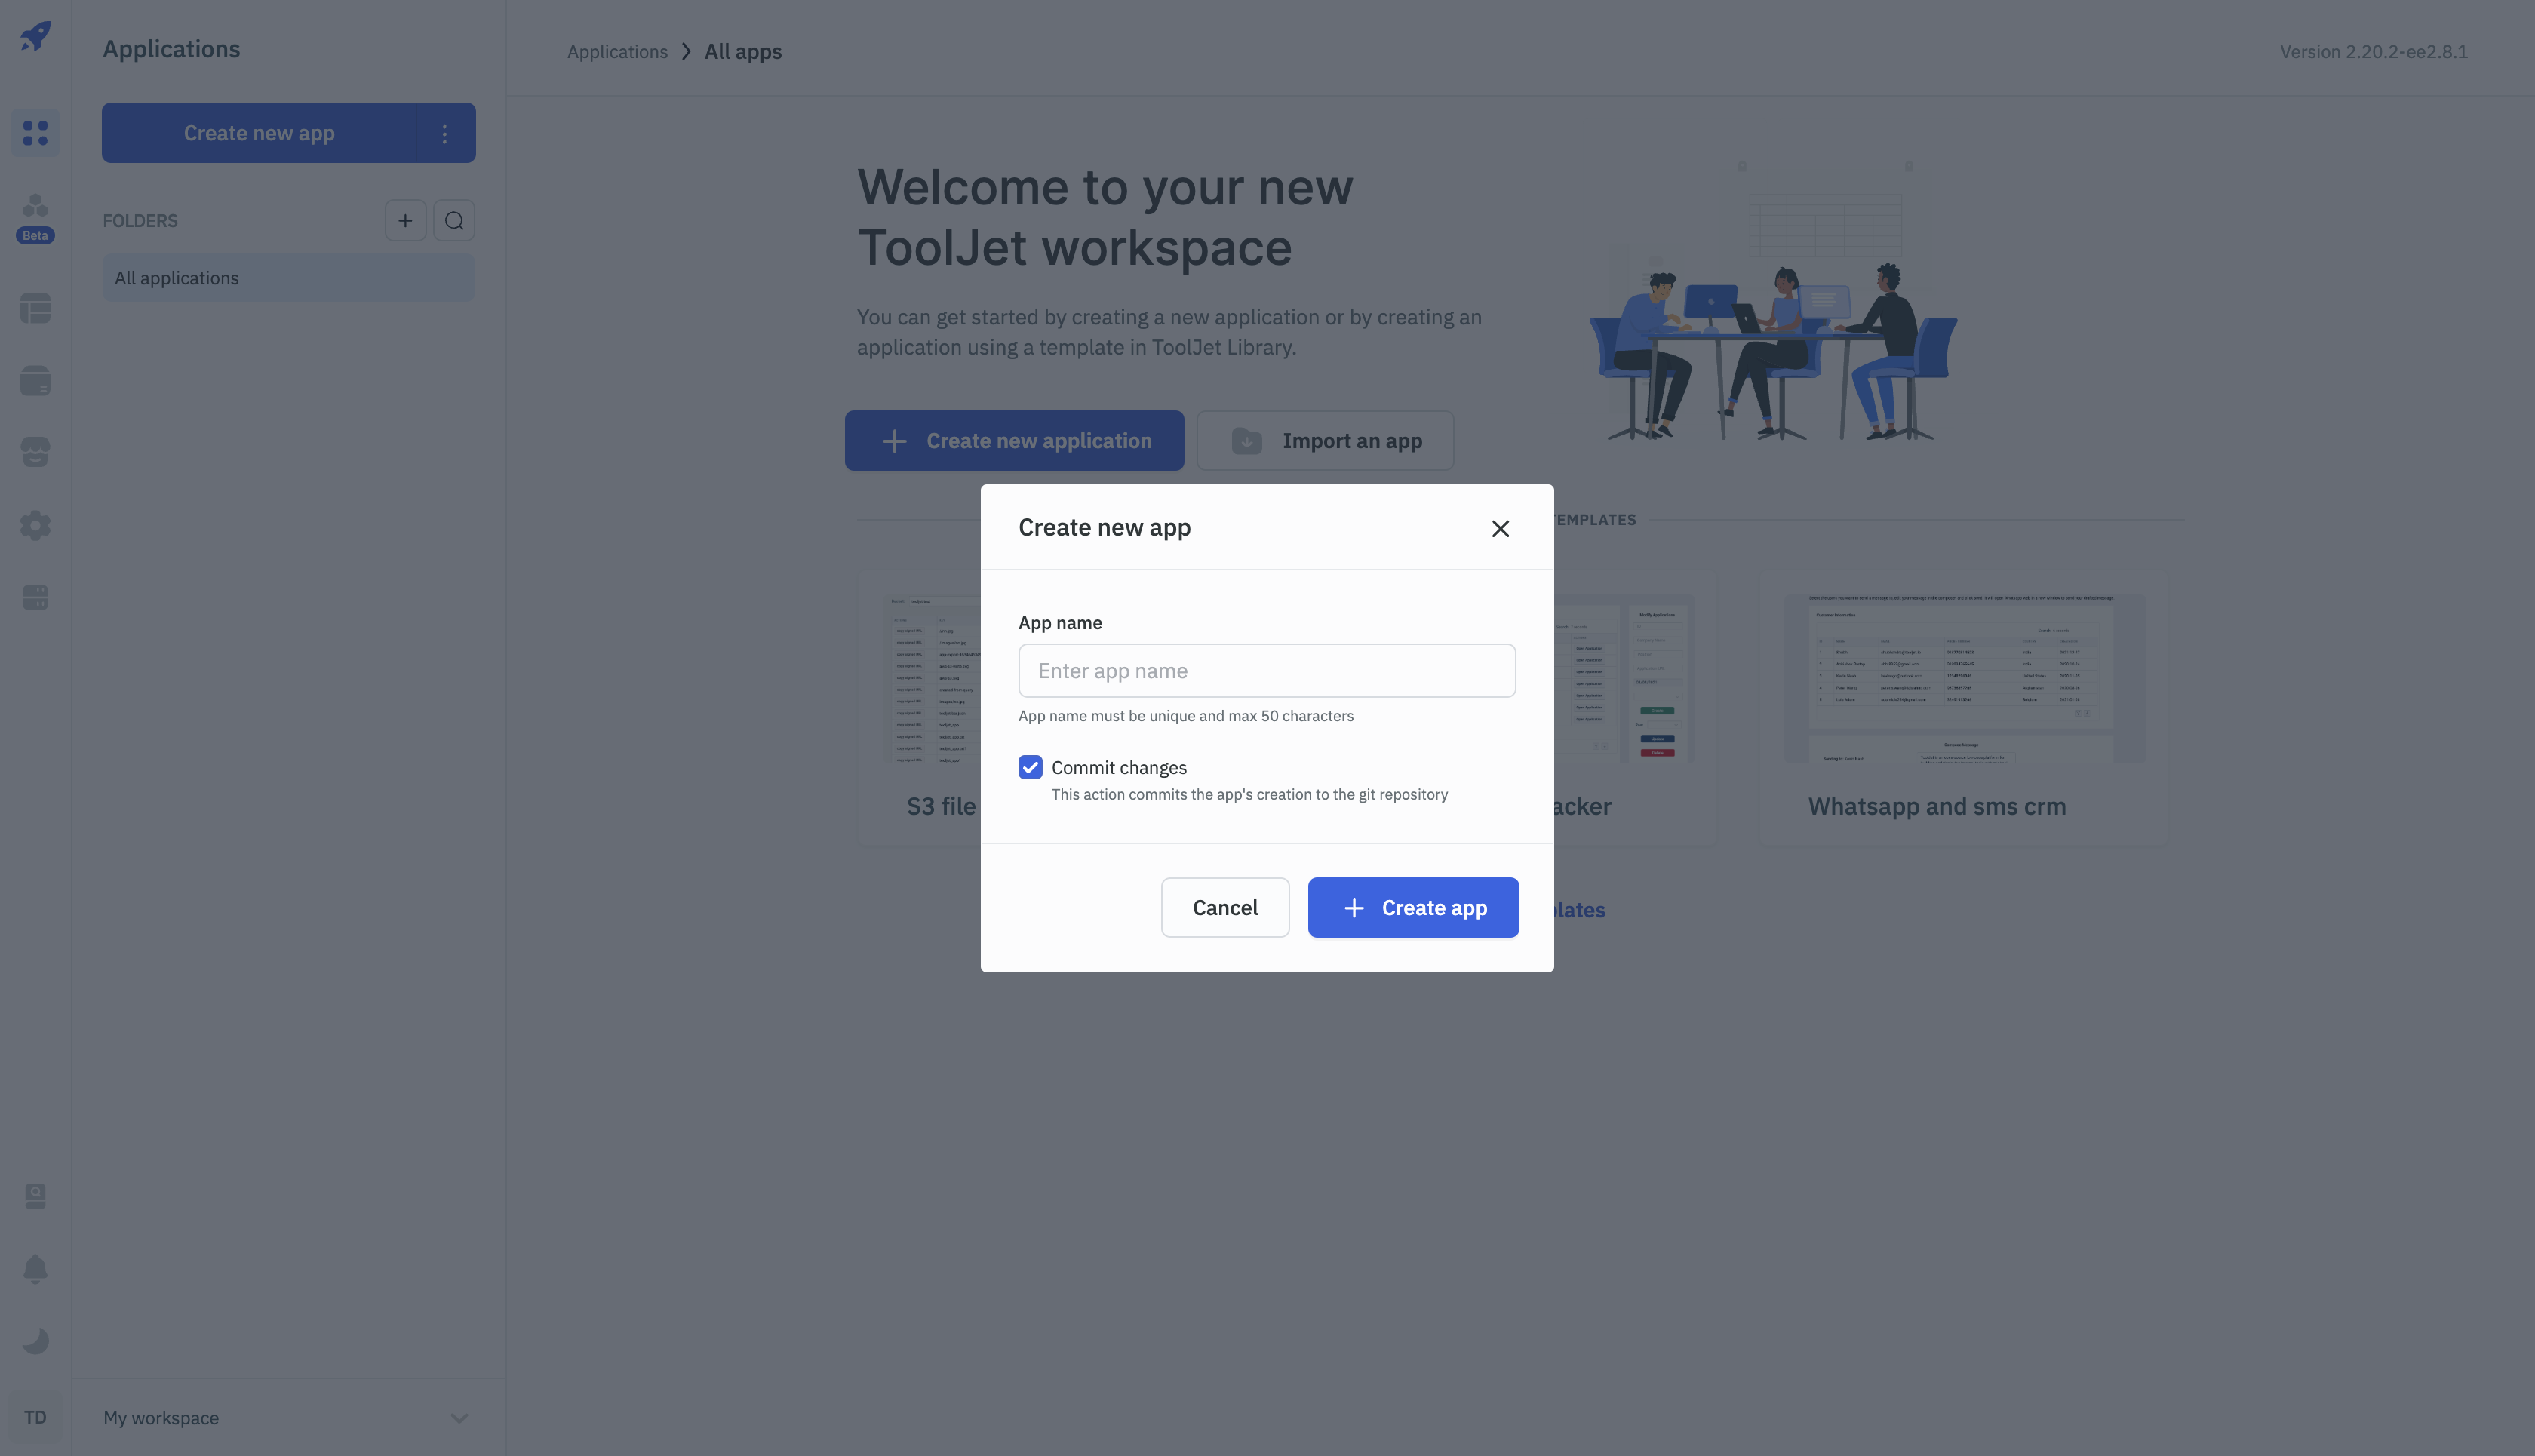
Selecting the Commit changes option will create a new commit in the git repository. The commit message will be App creation and the author will be the user who created the app.
- GitHub
- GitLab


App Rename
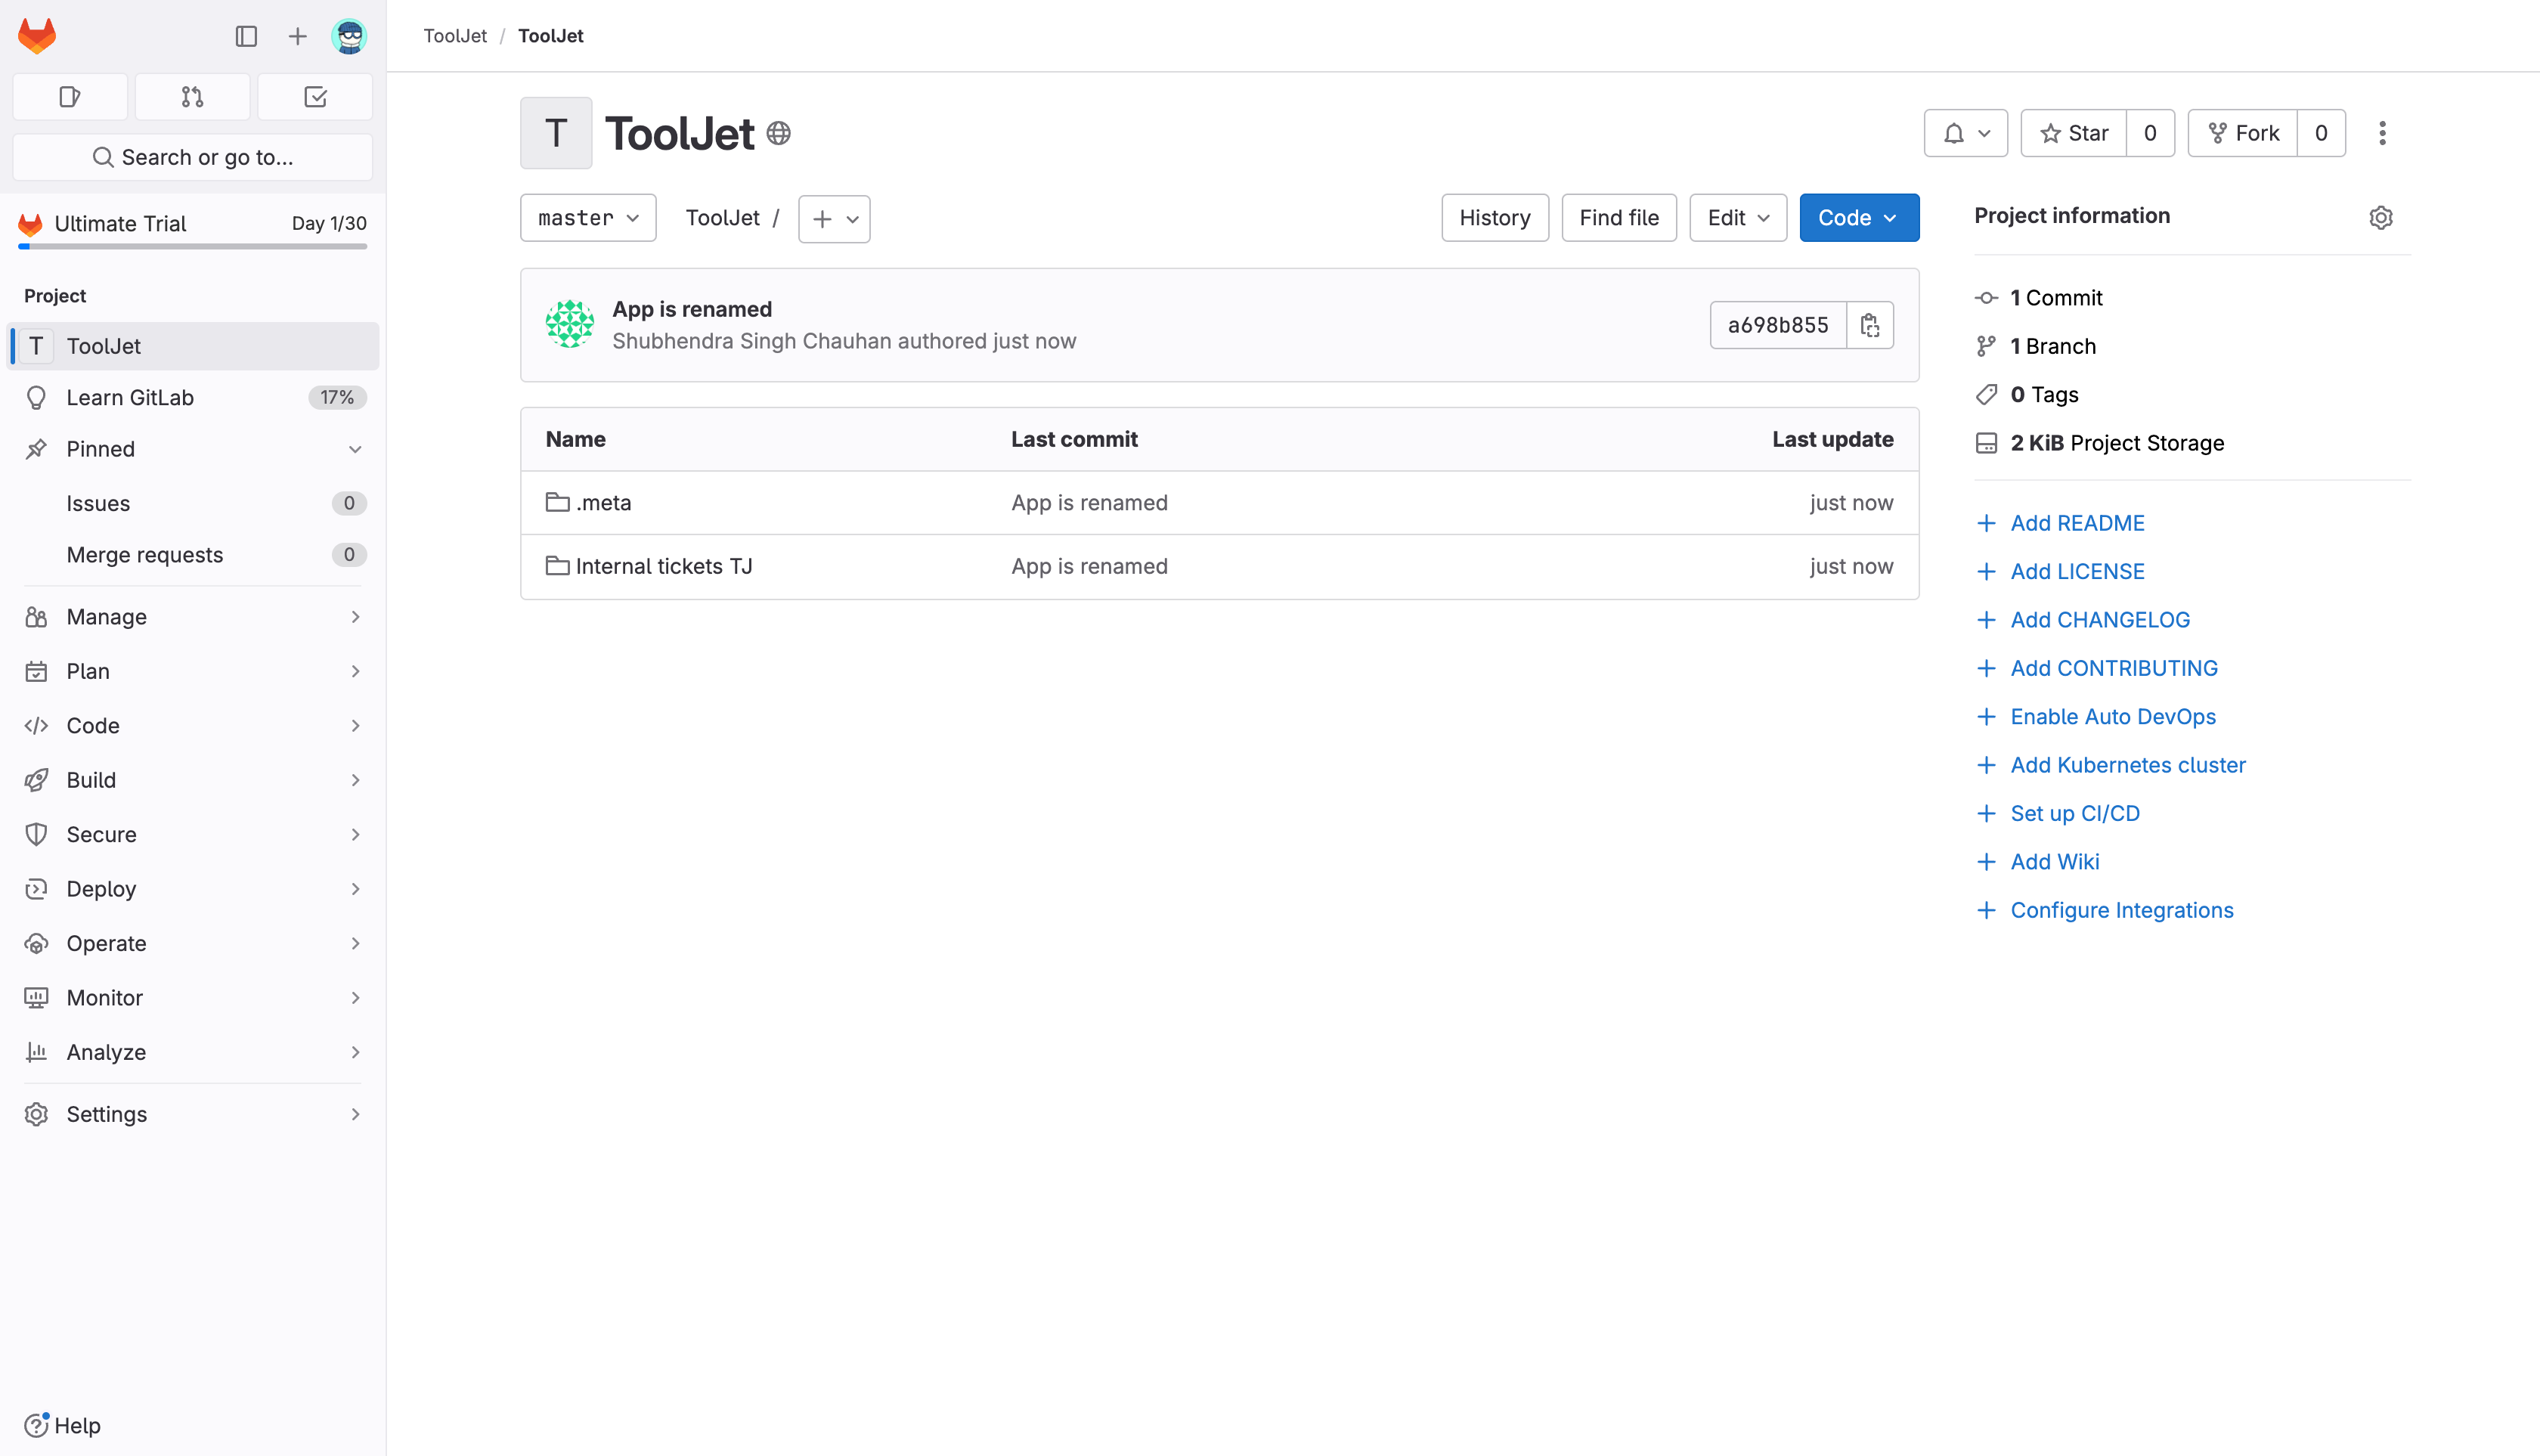
Whenever an app is renamed, the changes will be automatically committed to the git repository. The commit message will be App is renamed and the author will be the user who renamed the app.
- GitHub
- GitLab

App Updates
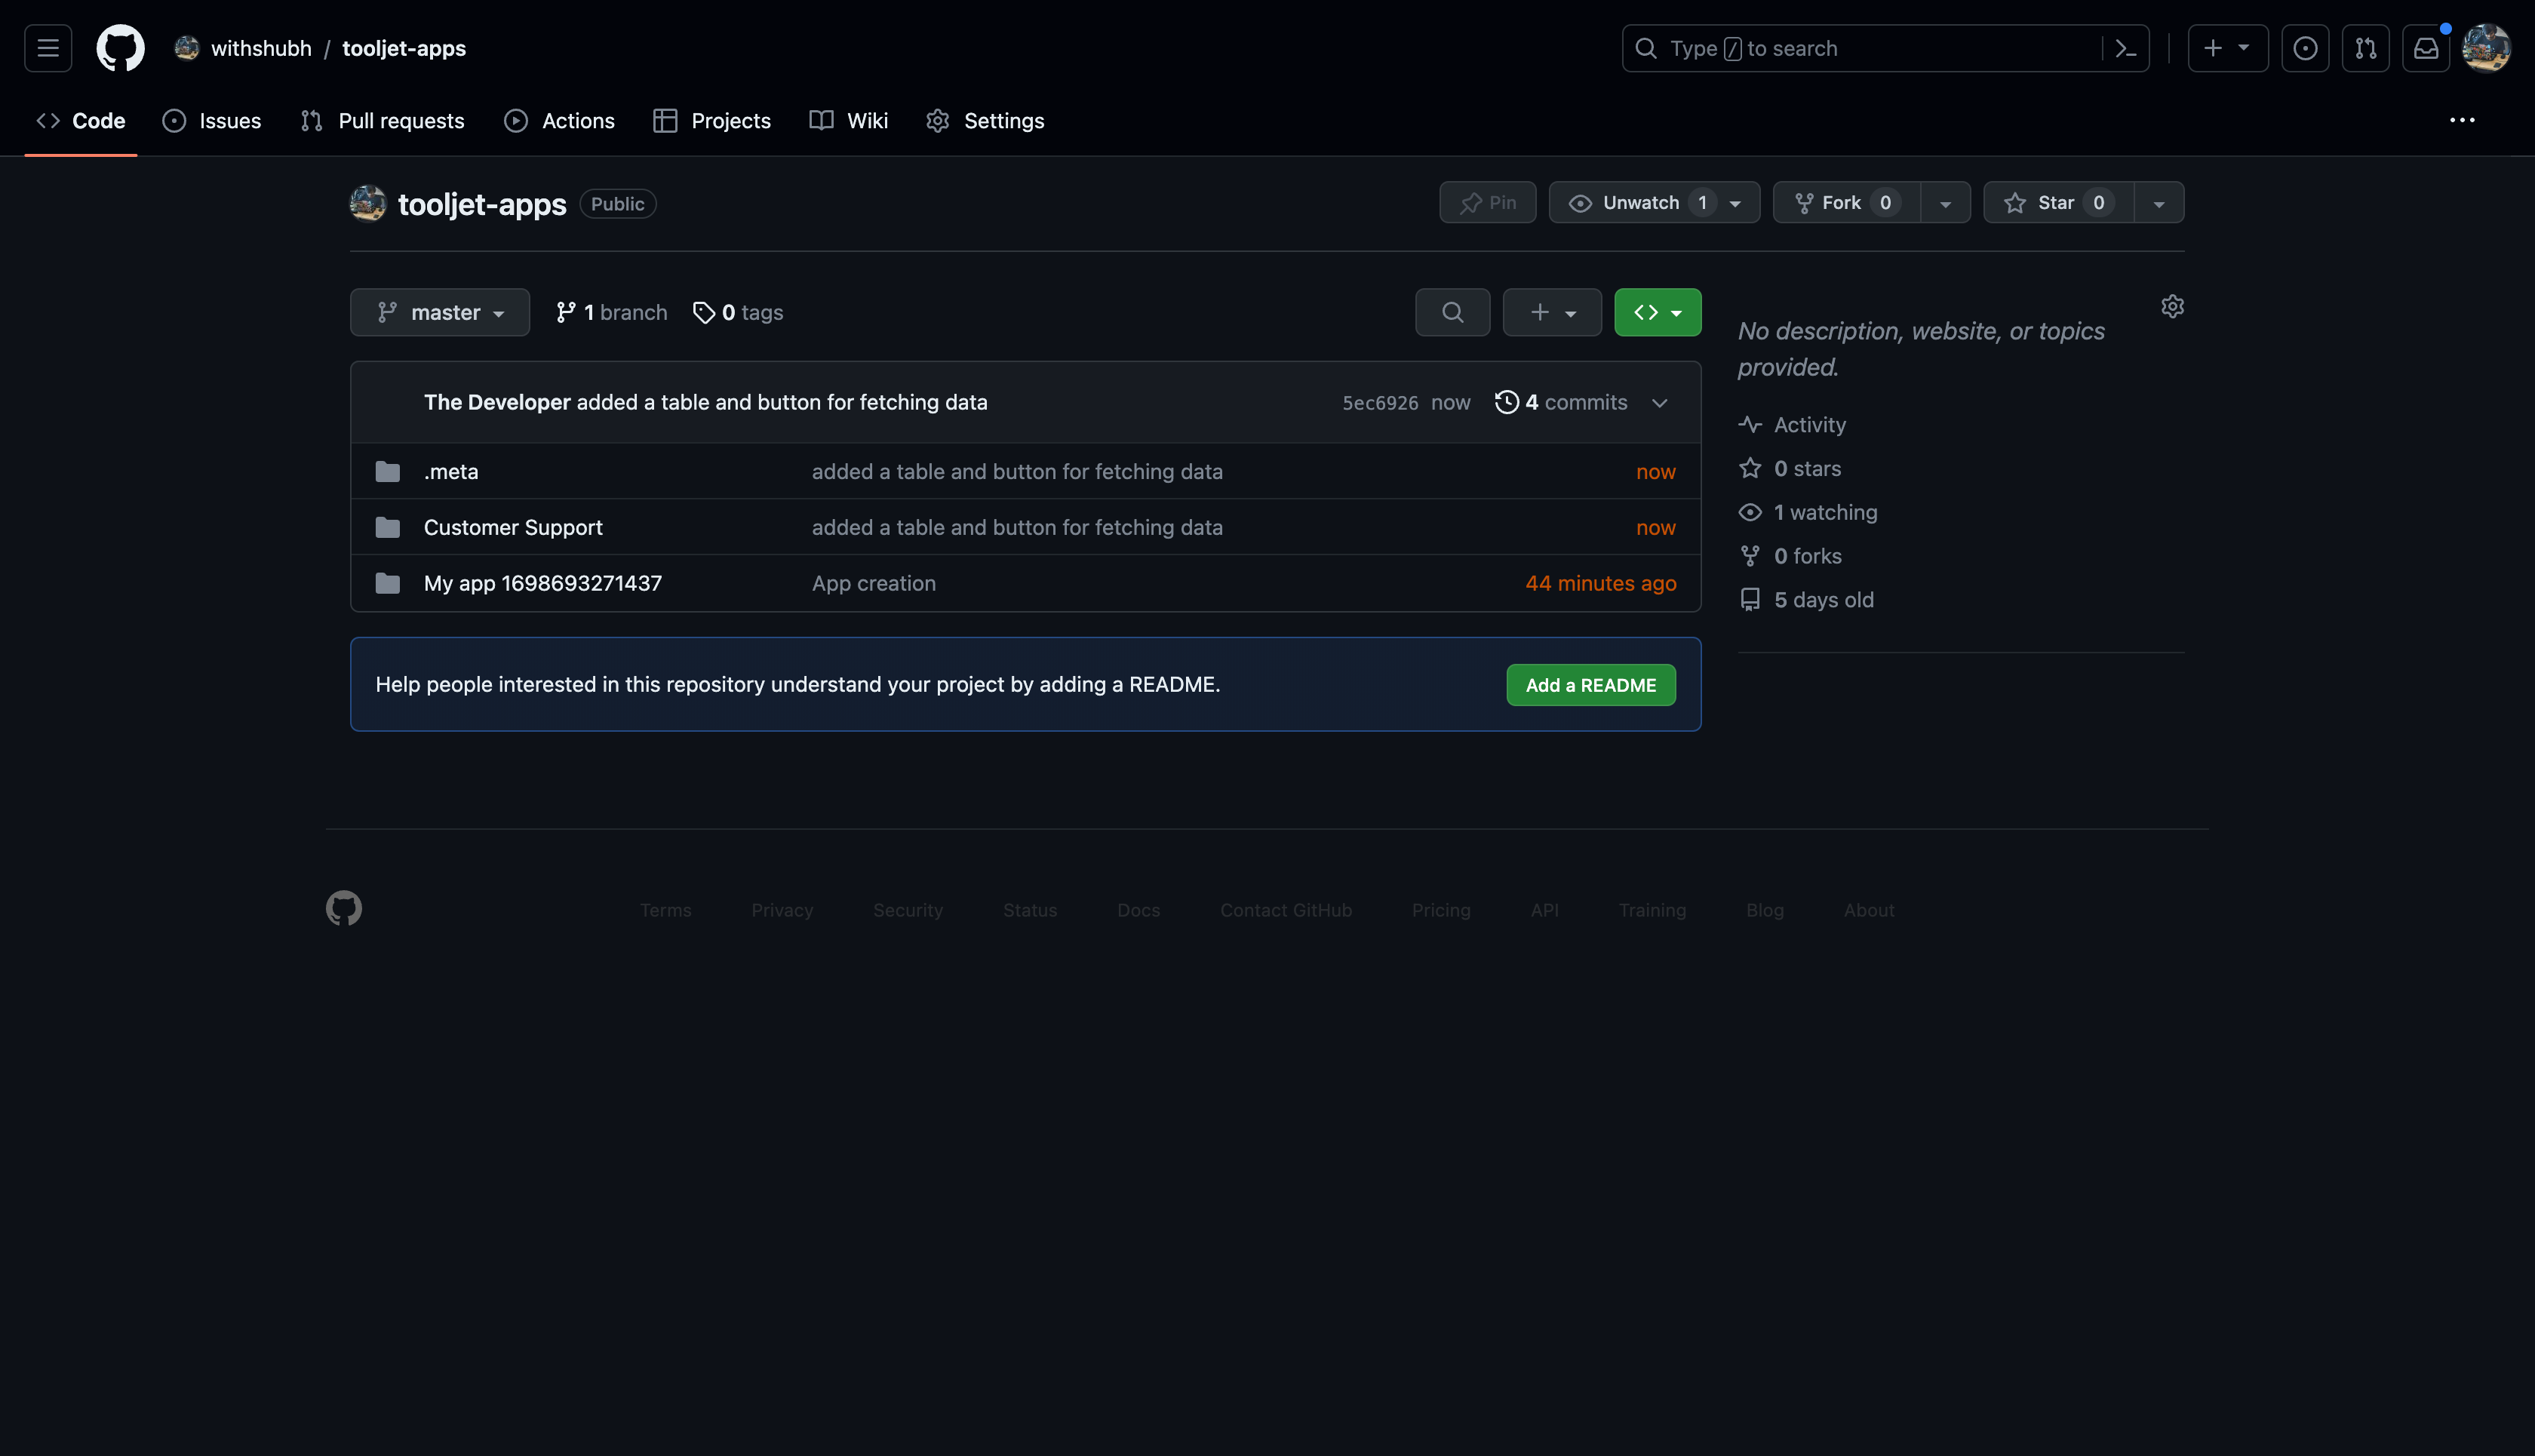
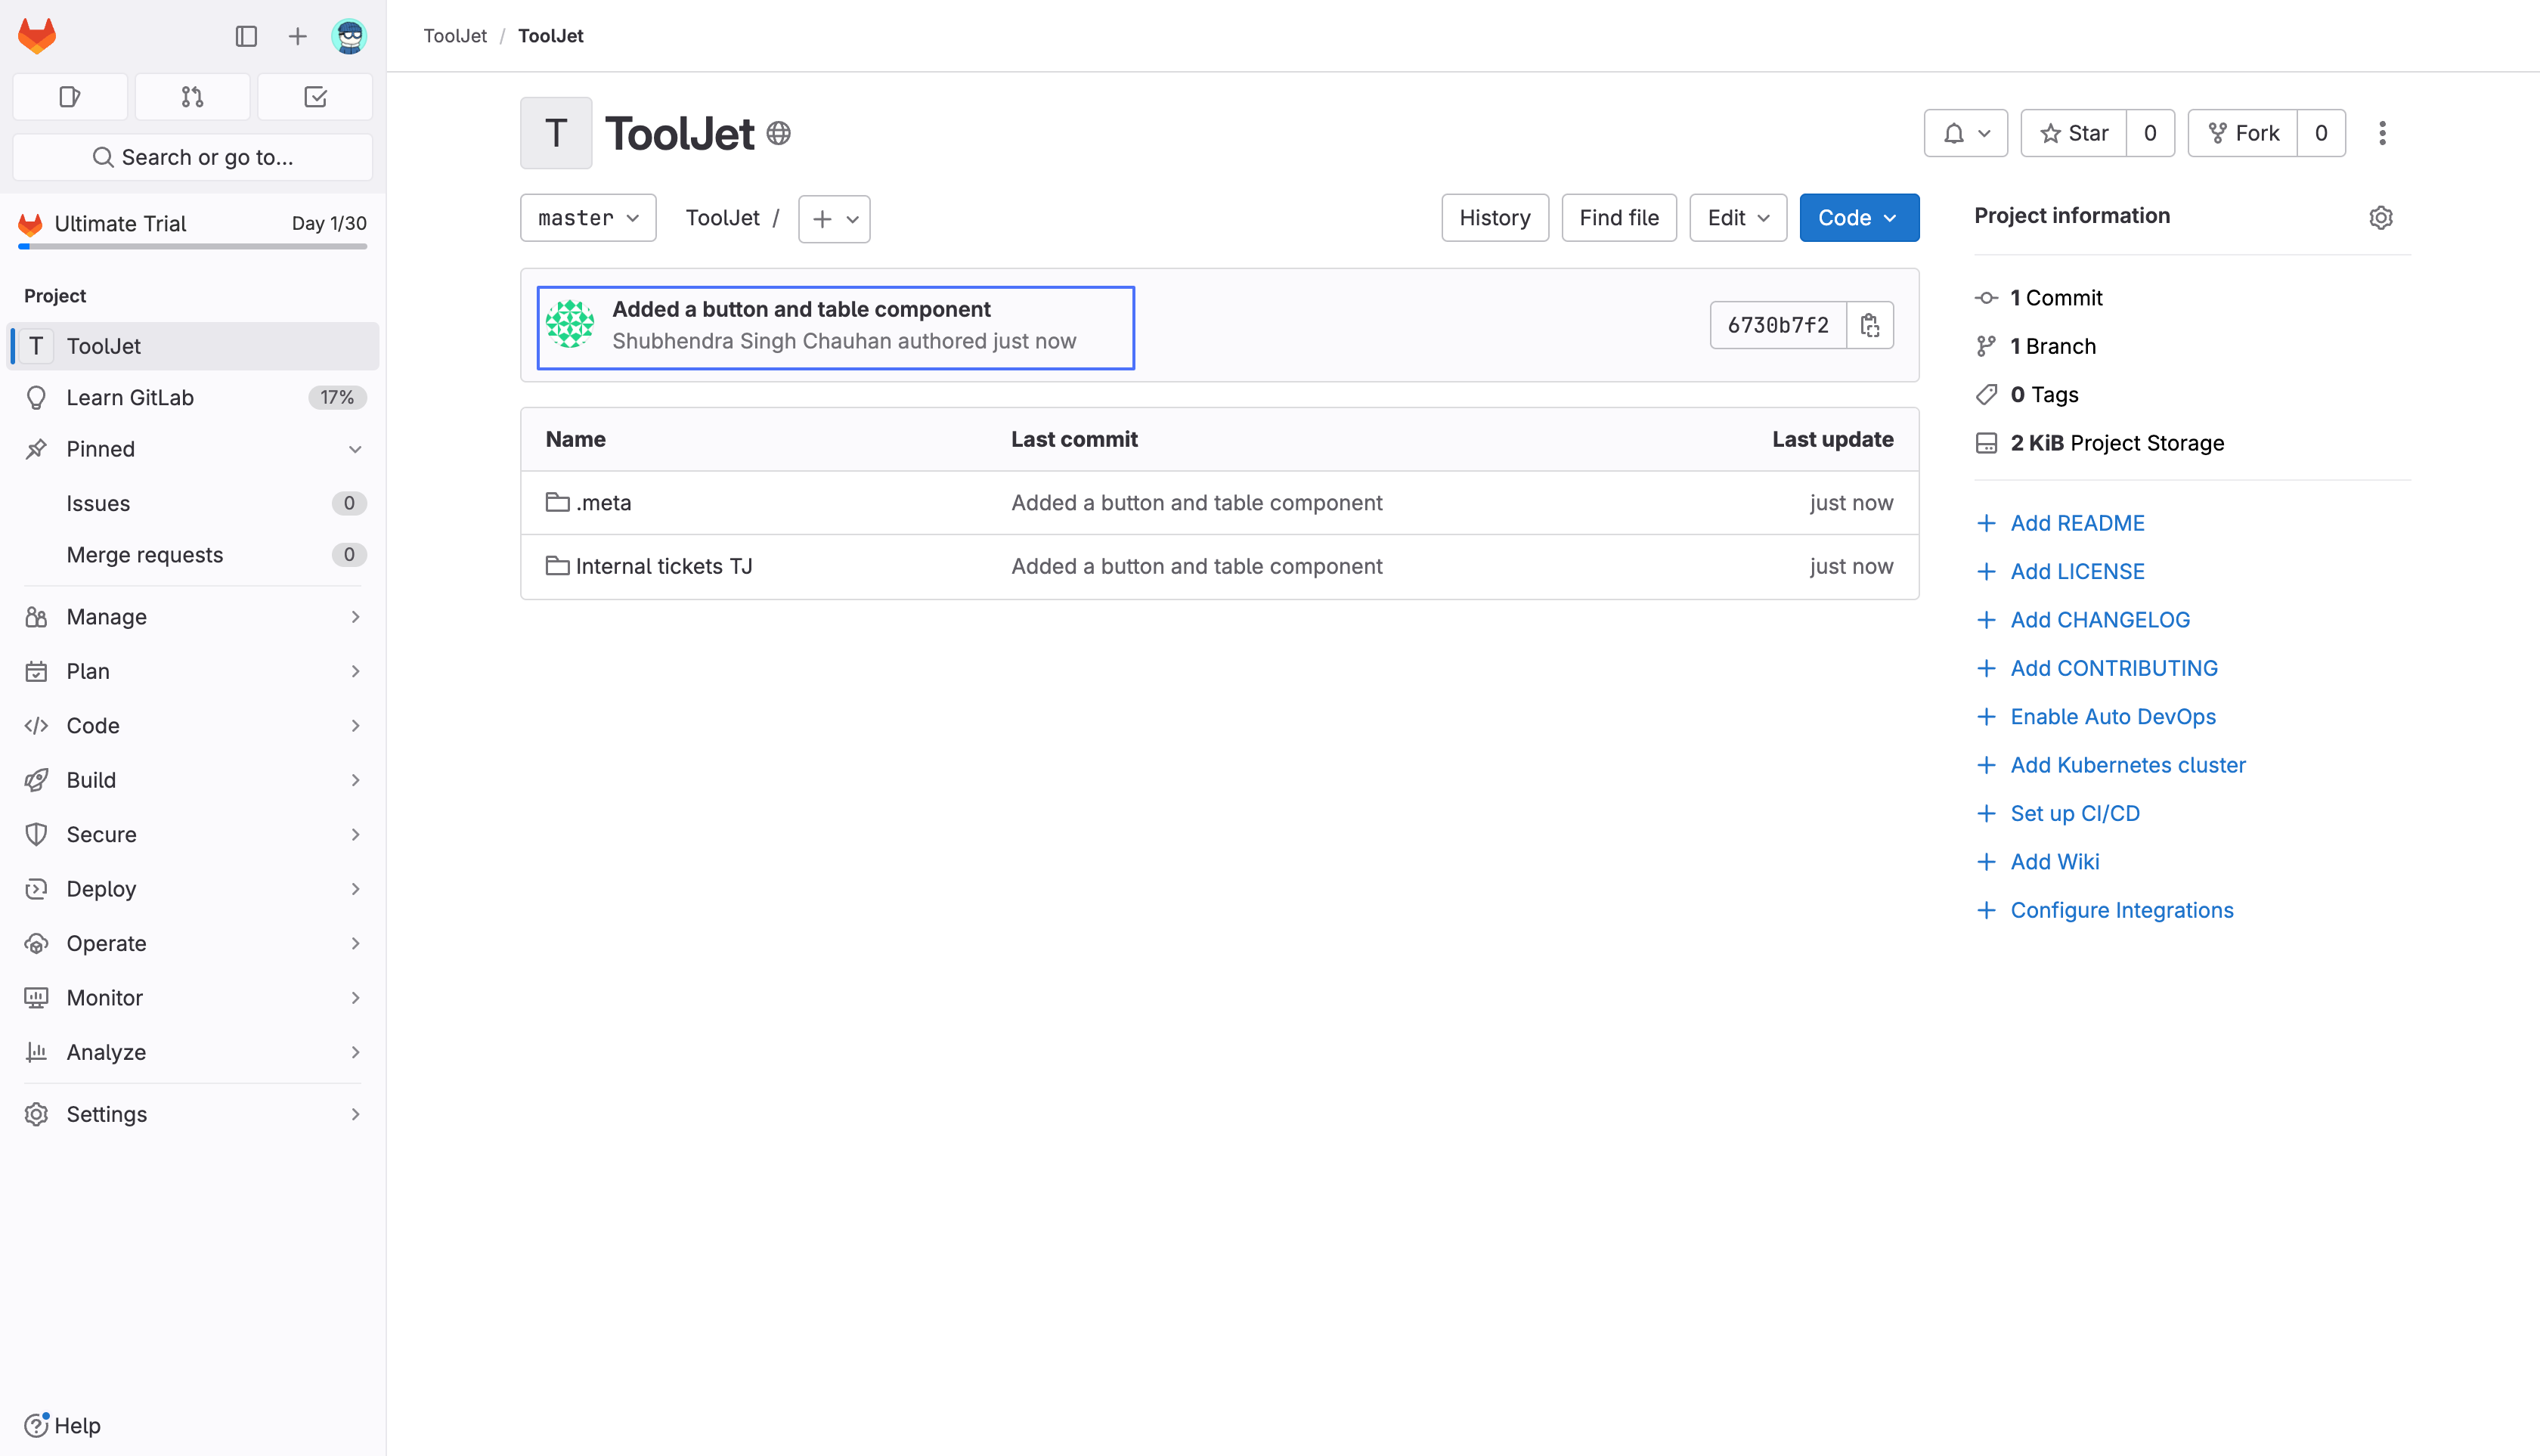
Whenever a user makes a change in an app, they can make a commit to the git repository by clicking on the GitSync button on the topbar. On clicking the GitSync button, a modal will open with the option to enter the commit message. The user can enter the commit message and click on the Commit changes button to commit the changes to the git repository. Along with the commit message, the user can also see the connnected Git repo URL and the last commit details.
Last commit details helps the user to know the last commit message, author, date, and time. This helps the user to know the last commit details and make the commit message accordingly.

Once the changes are committed, the user can see the commit message, author, and date in the git repository.
- GitHub
- GitLab
App Deletion
Whenever a user deleted an app from the workspace, the app will not be deleted from the git repository. The app will be available in the git repository in the same state as it was before the app was deleted.
App Version Update
When a user creates a new version of an app, there will be an option to select the Commit changes. If you select the commit changes option, the new version of the app will be committed to the git repository.
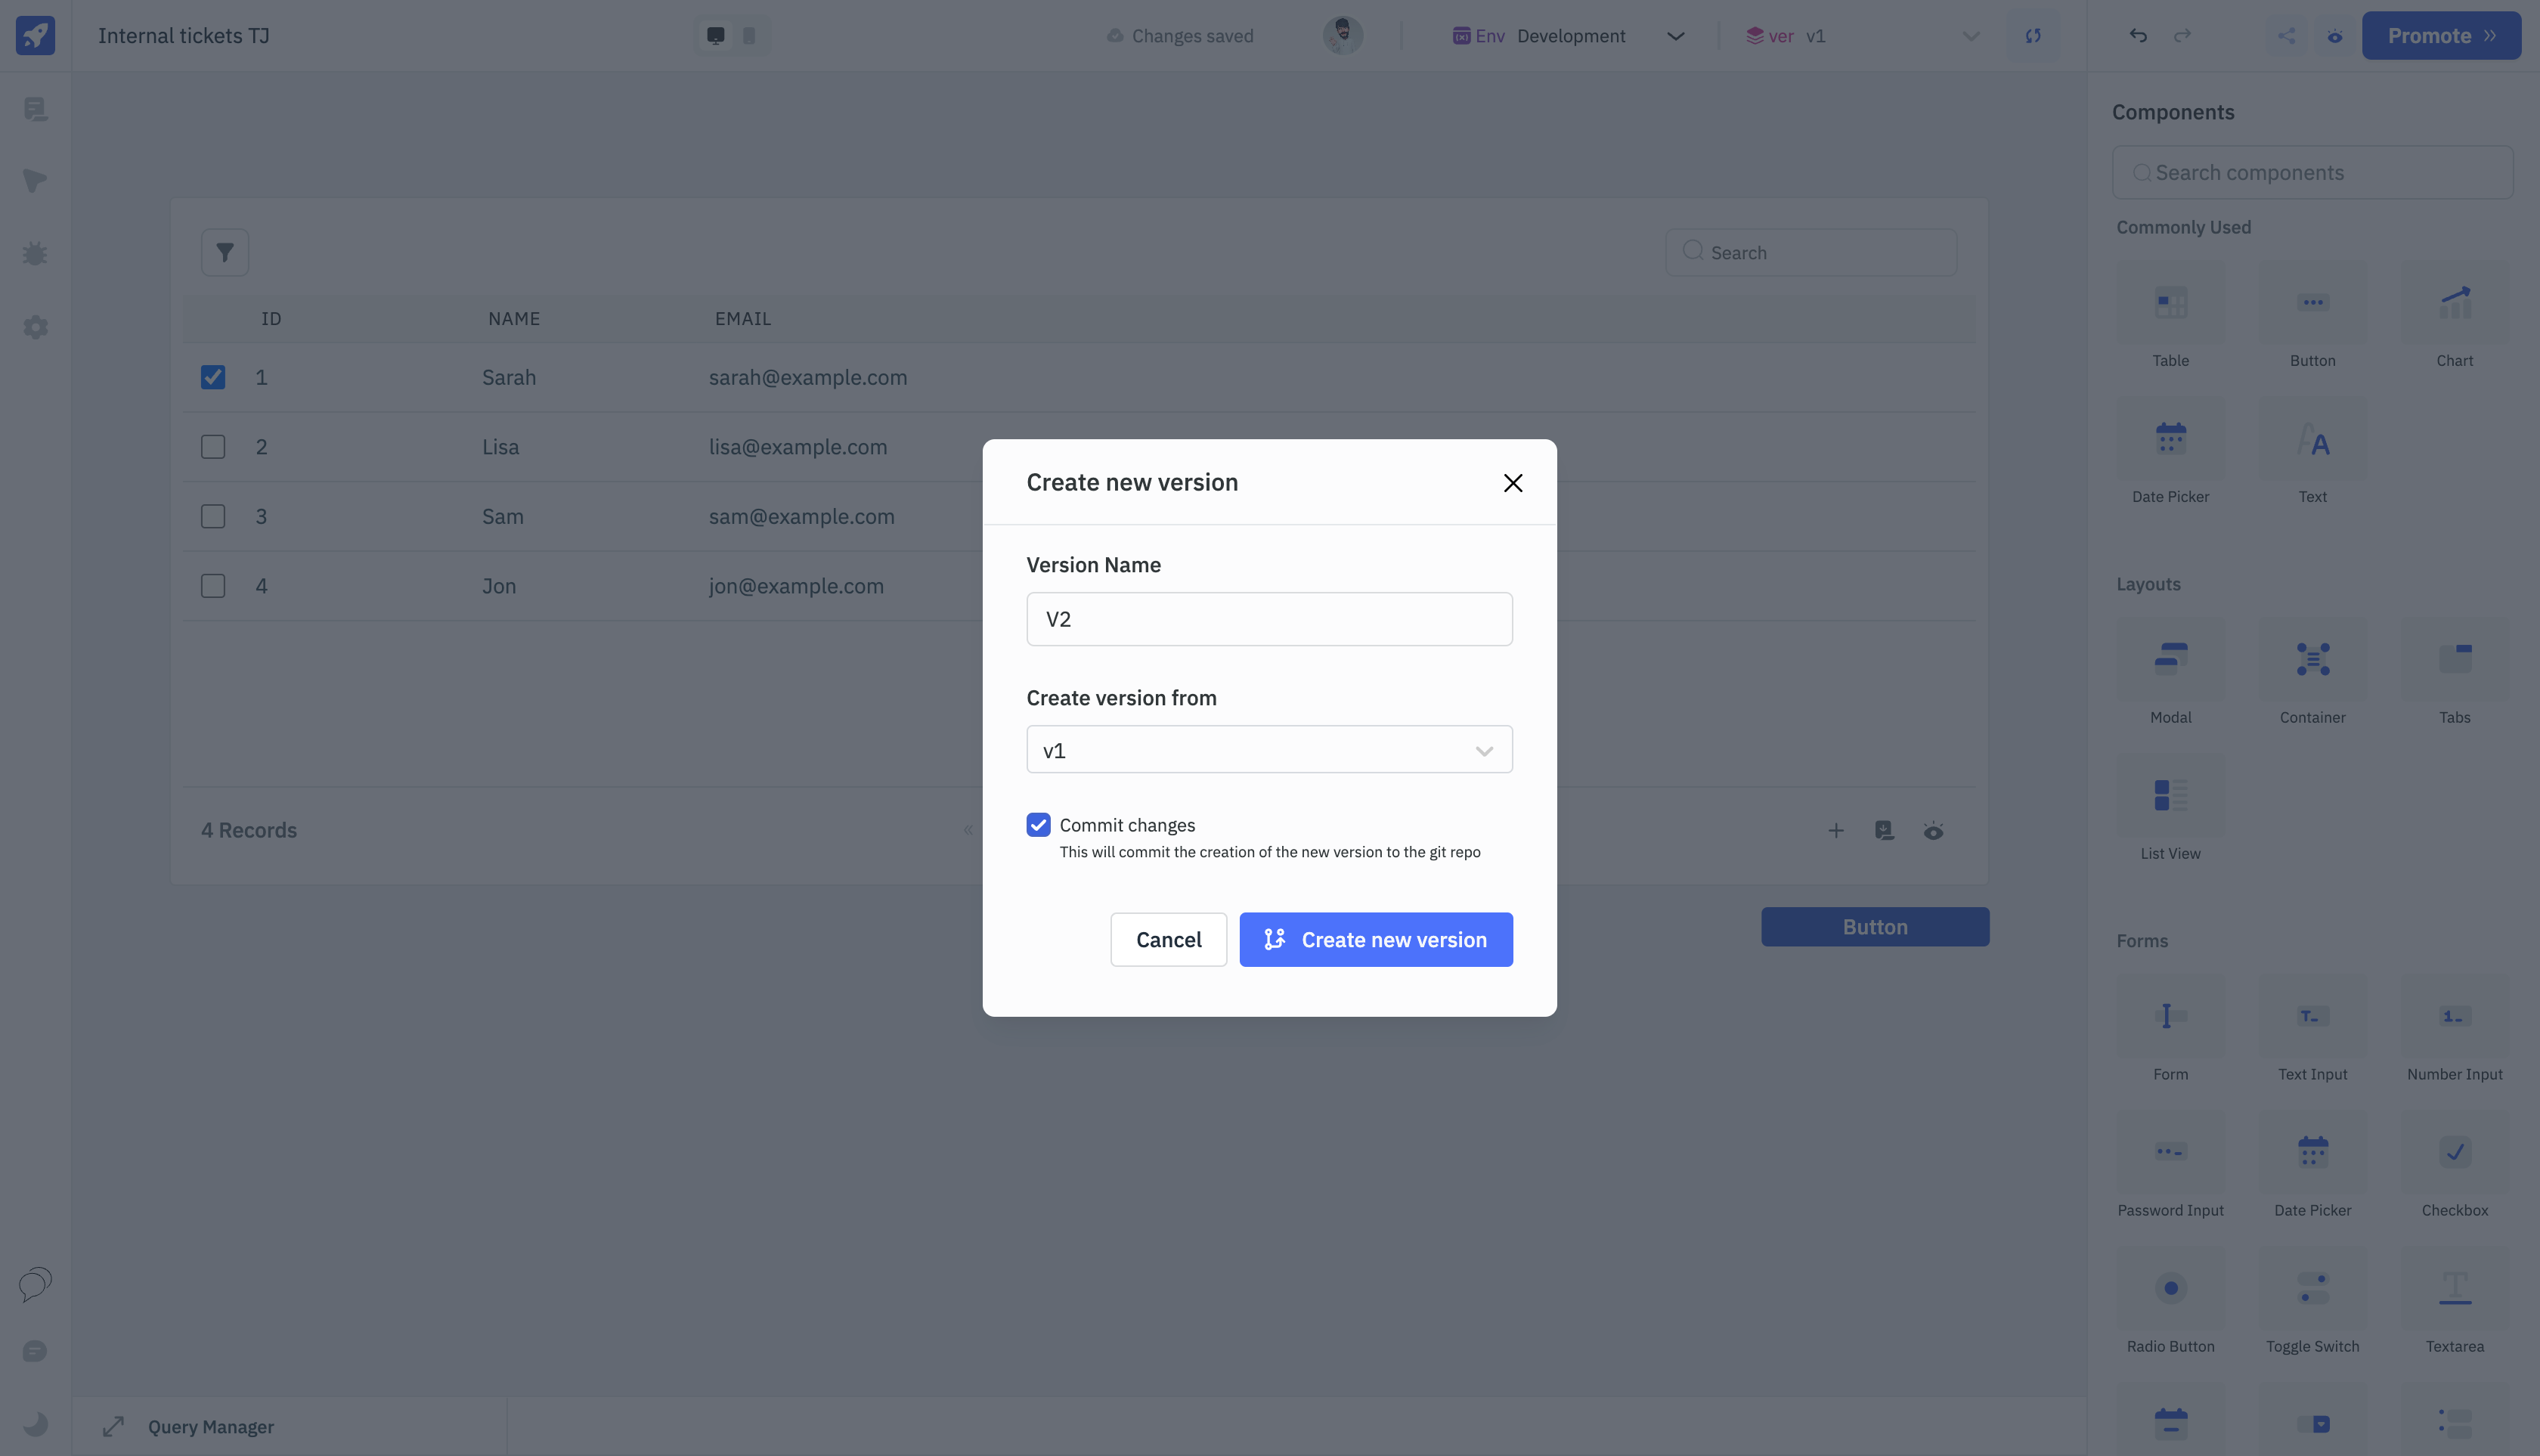
The JSON file in the app folder will be replaced with the new version of the app, the meta.json file in the .meta folder gets updated with the new version id and version name. The commit message will be Version creation and the author will be the user who created the new version of the app.
- GitHub
- GitLab

Pulling Changes from Git Repo
You can configure the GitSync feature on another workspace to pull the changes from the git repository. To configure the GitSync feature on another workspace, follow the steps mentioned in the Setting up GitSync section.
Once the GitSync feature is configured, go to the ToolJet dashboard and click on the three dots on the right side of the Create new app button. Click on the Import from git repository option.
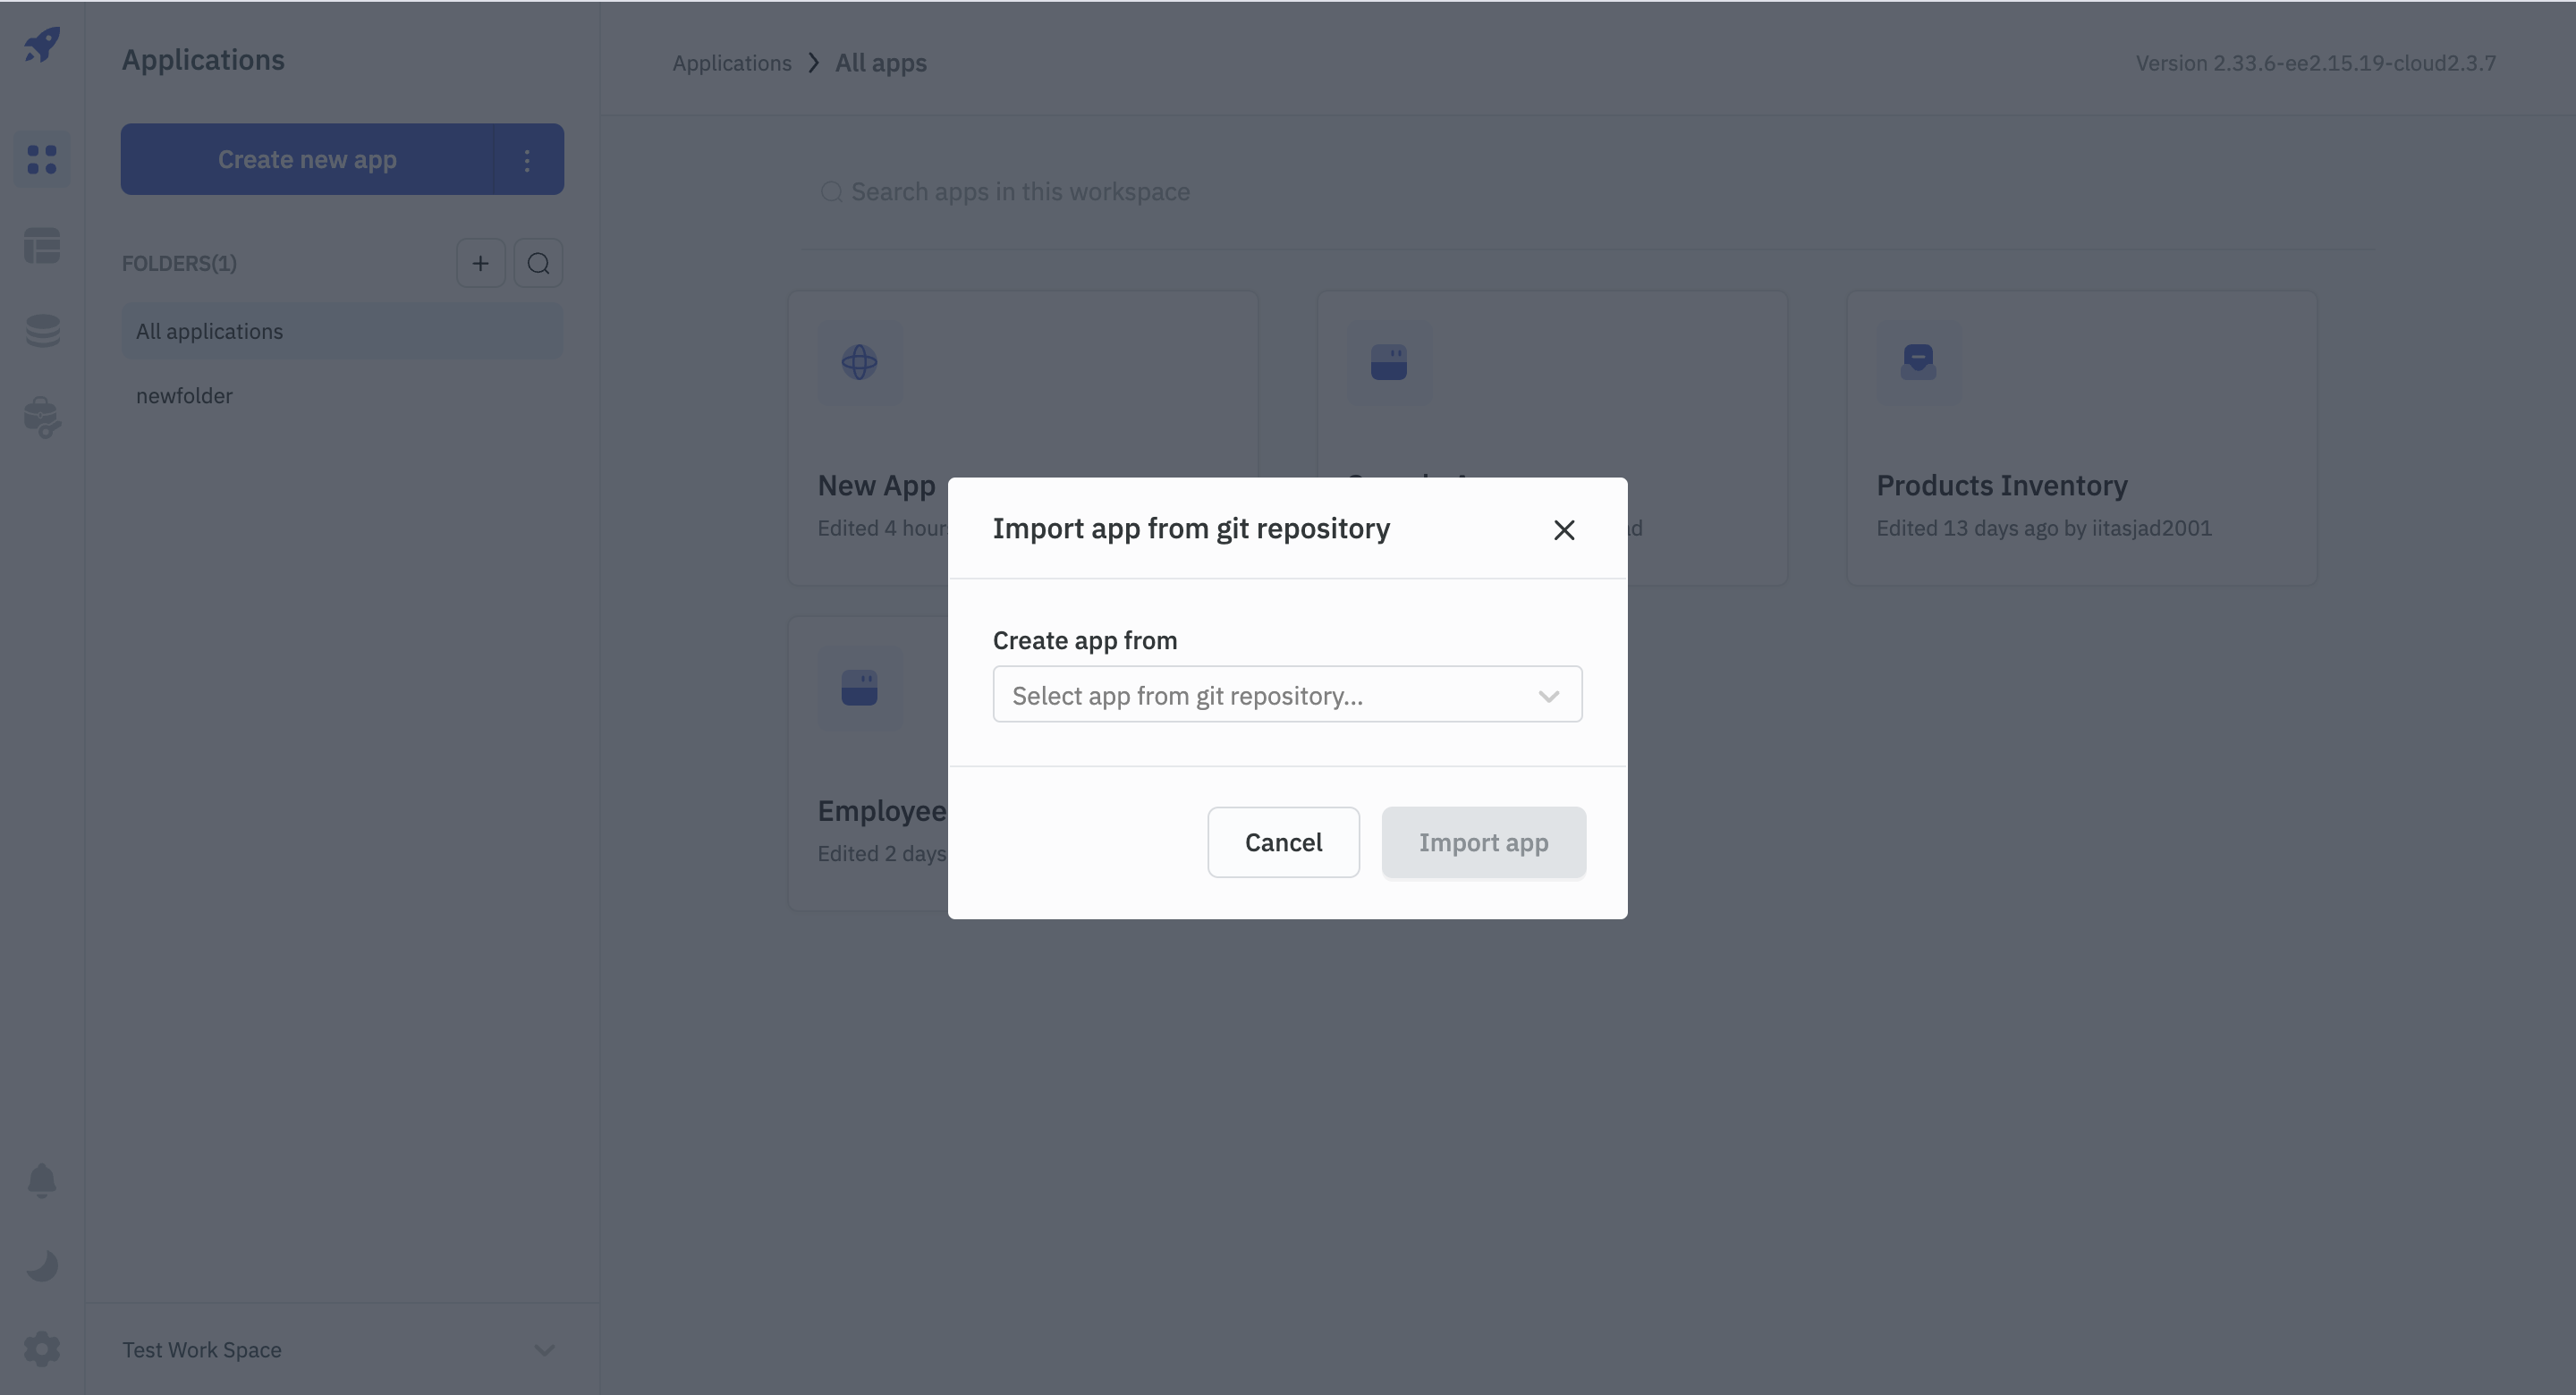
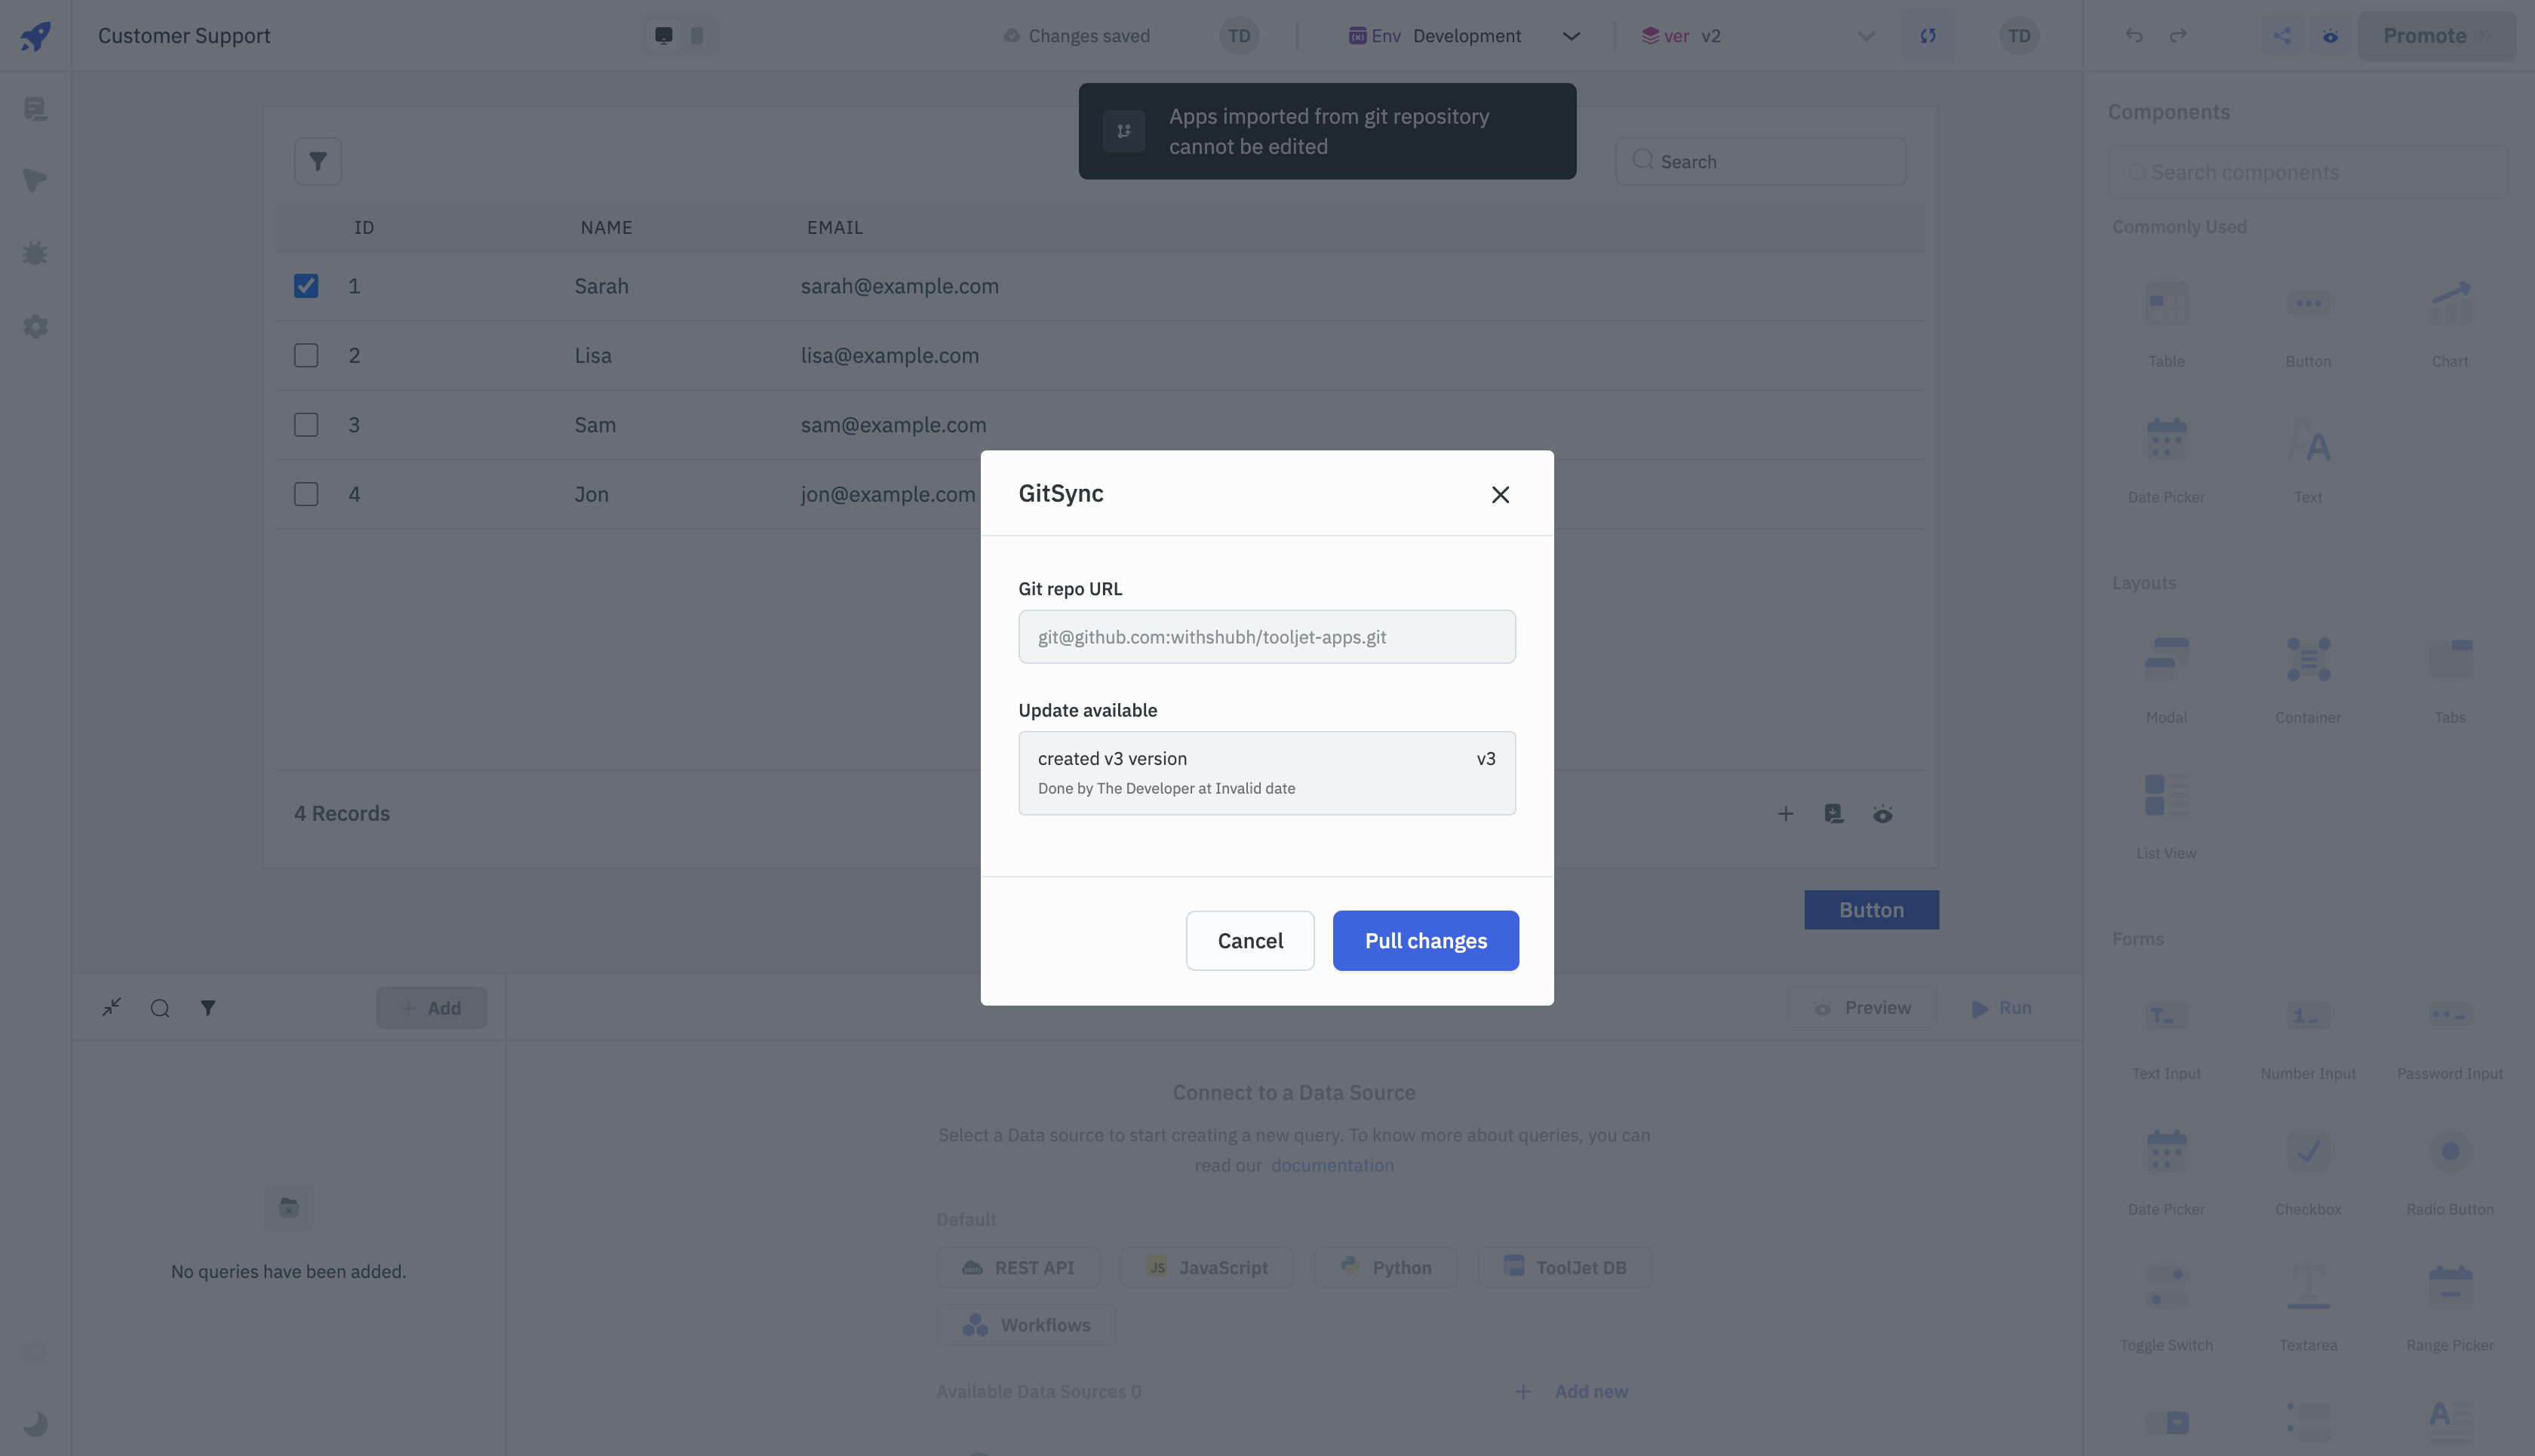
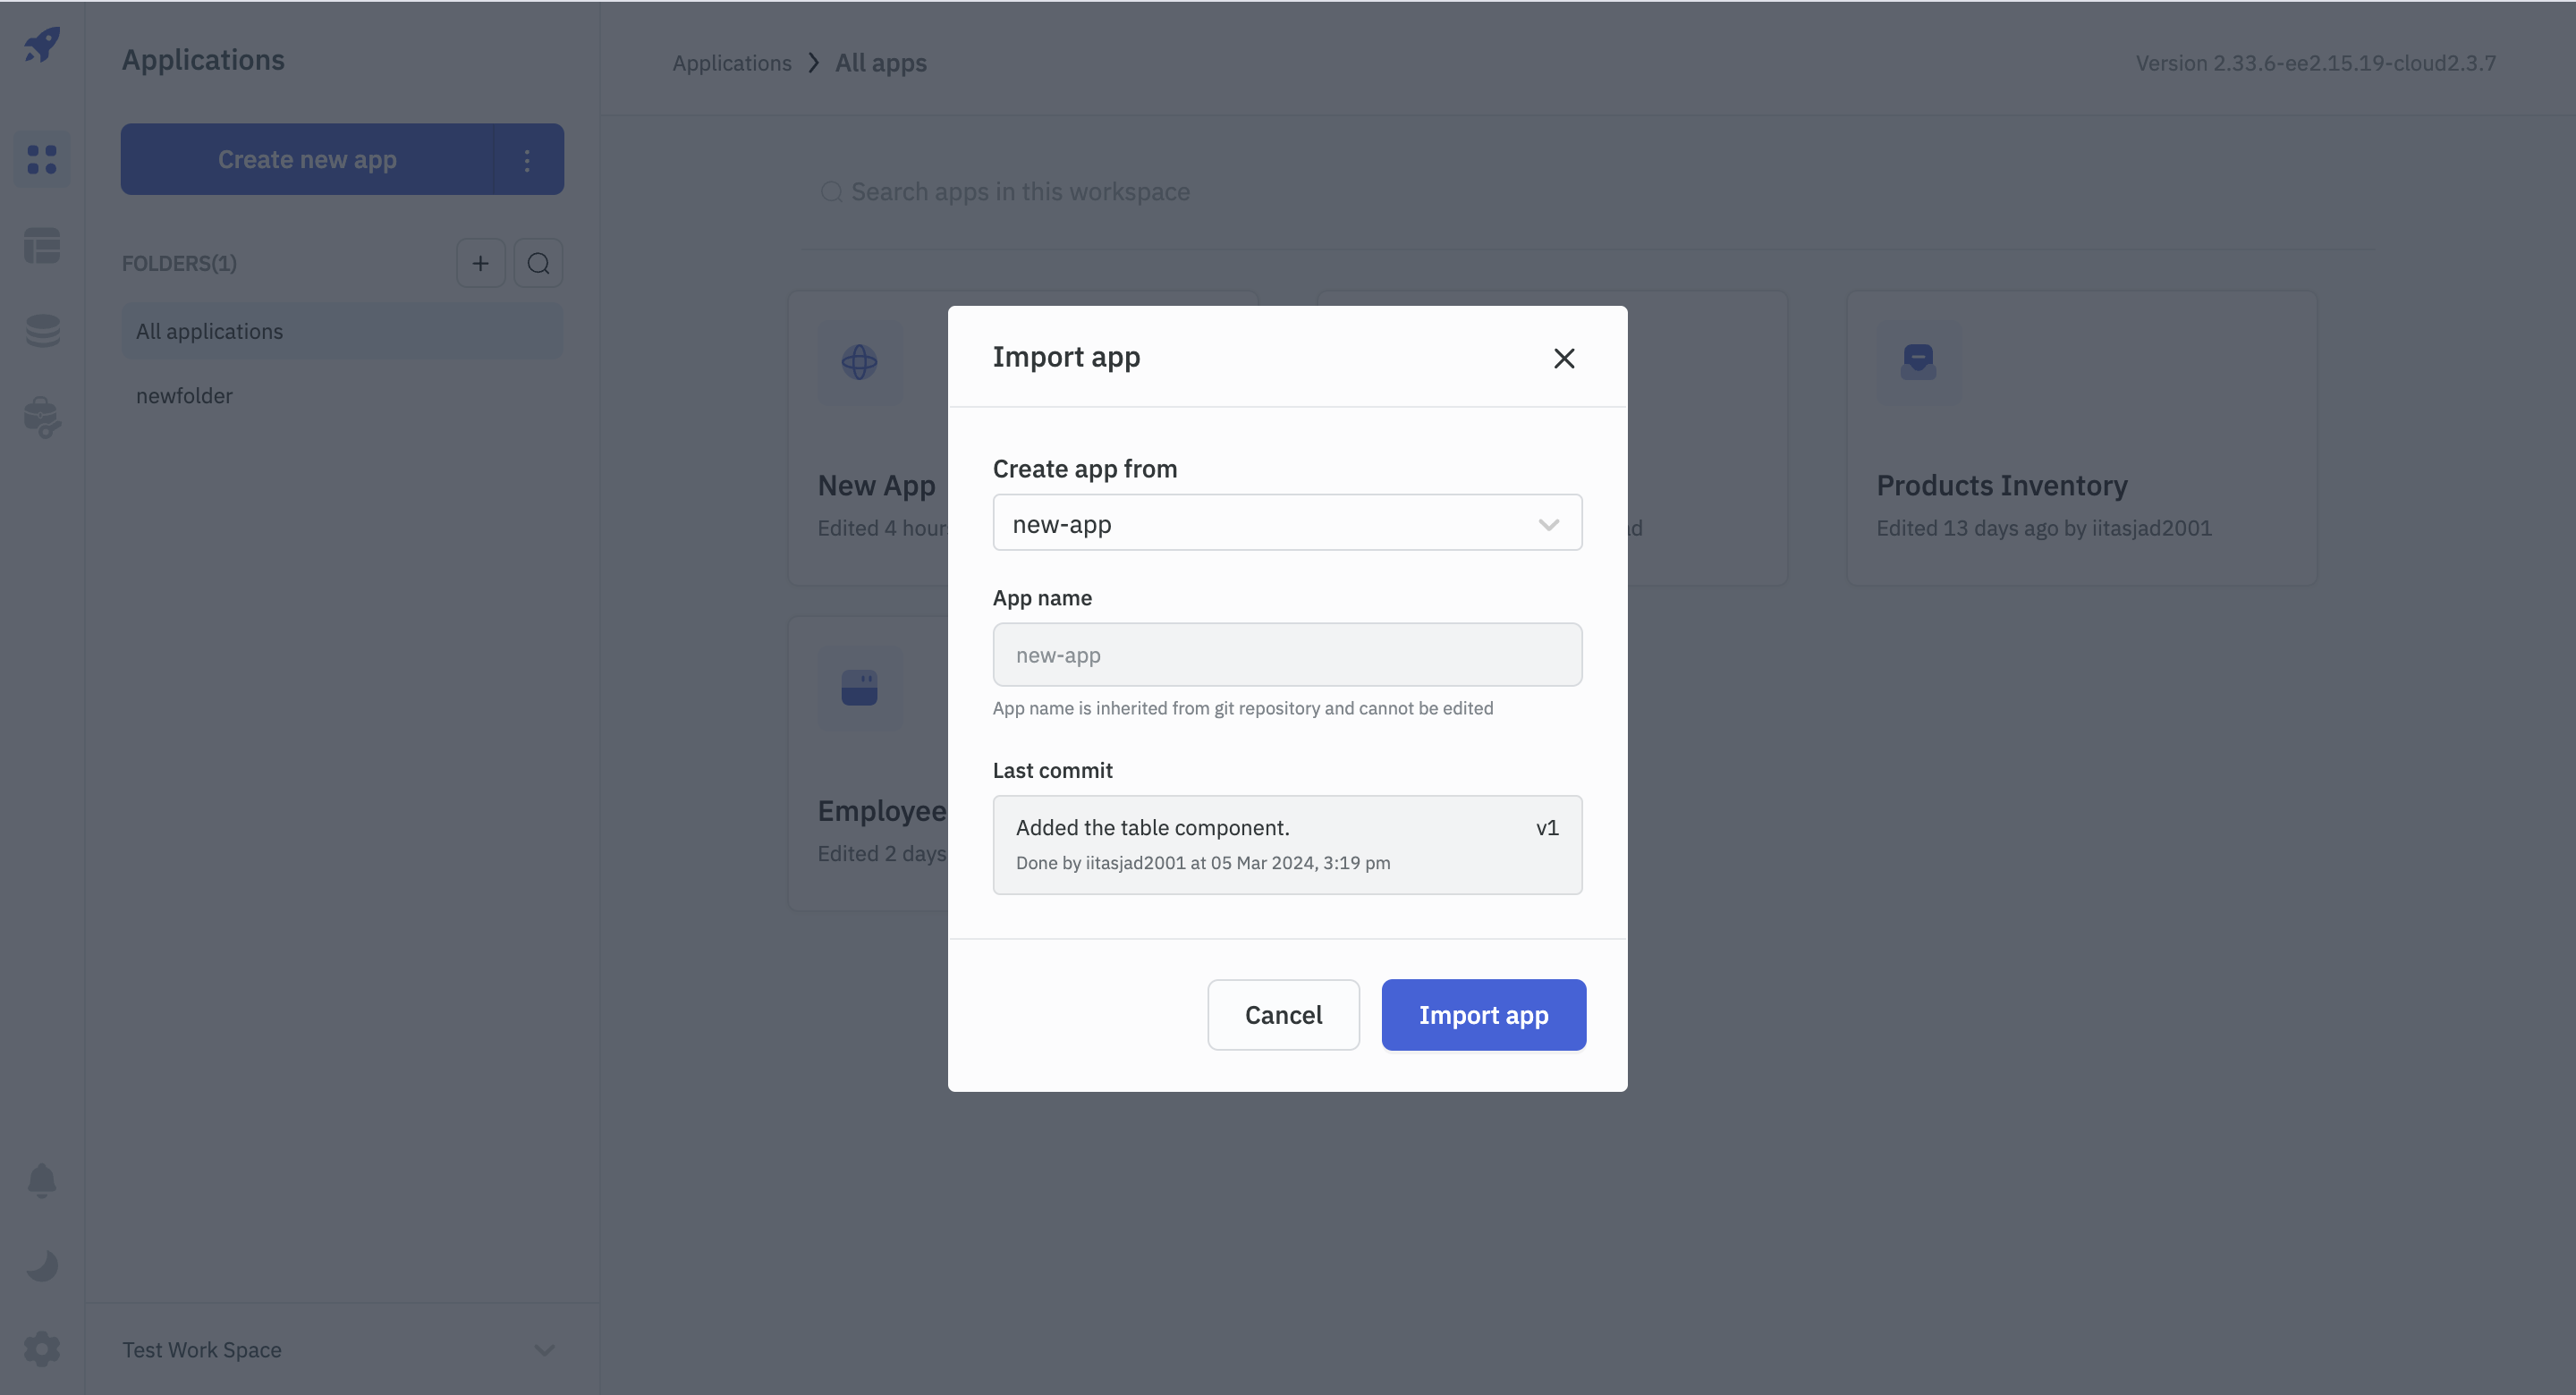
On clicking the Import from git repository option, a modal will open with the dropdown to select the app to be imported from the git repository. Once the app is selected, the app name and the last commit will be displayed. Click on the Import app button to import the app from the git repository.
- The app imported from the git repository cannot be edited.
- The app imported from the Git repository should have a unique name. If the app's name is the same as that of an existing app in the workspace, the user will need to either rename the existing app or delete it to successfully import another app with the same name.
- Workspace constants are not synced with the git repository. After pulling the app, if the app throws an error, the user will need to manually add the workspace constants.
Checking for Updates
You can check for updates in the git repository by clicking on the GitSync button on the topbar. On clicking the GitSync button, a modal will open with the option to Check for updates. Click on the Check for updates button to check for updates in the git repository. If there are any updates, you will see the details of the updates such as commit message, author, and the date in the modal. Click on the Pull changes button to pull the changes from the git repository.
