Creating Queries
The Query Panel at the bottom of the app-builder enables the creation and management of queries for interacting with connected data sources. This includes performing API requests, querying databases, and applying transformations or data manipulations using JavaScript and Python.
The Query Panel consists of two sections:
- Query Manager on the left, which displays a list of all the created queries.
- Query Editor on the right, which is used to configure the selected query.
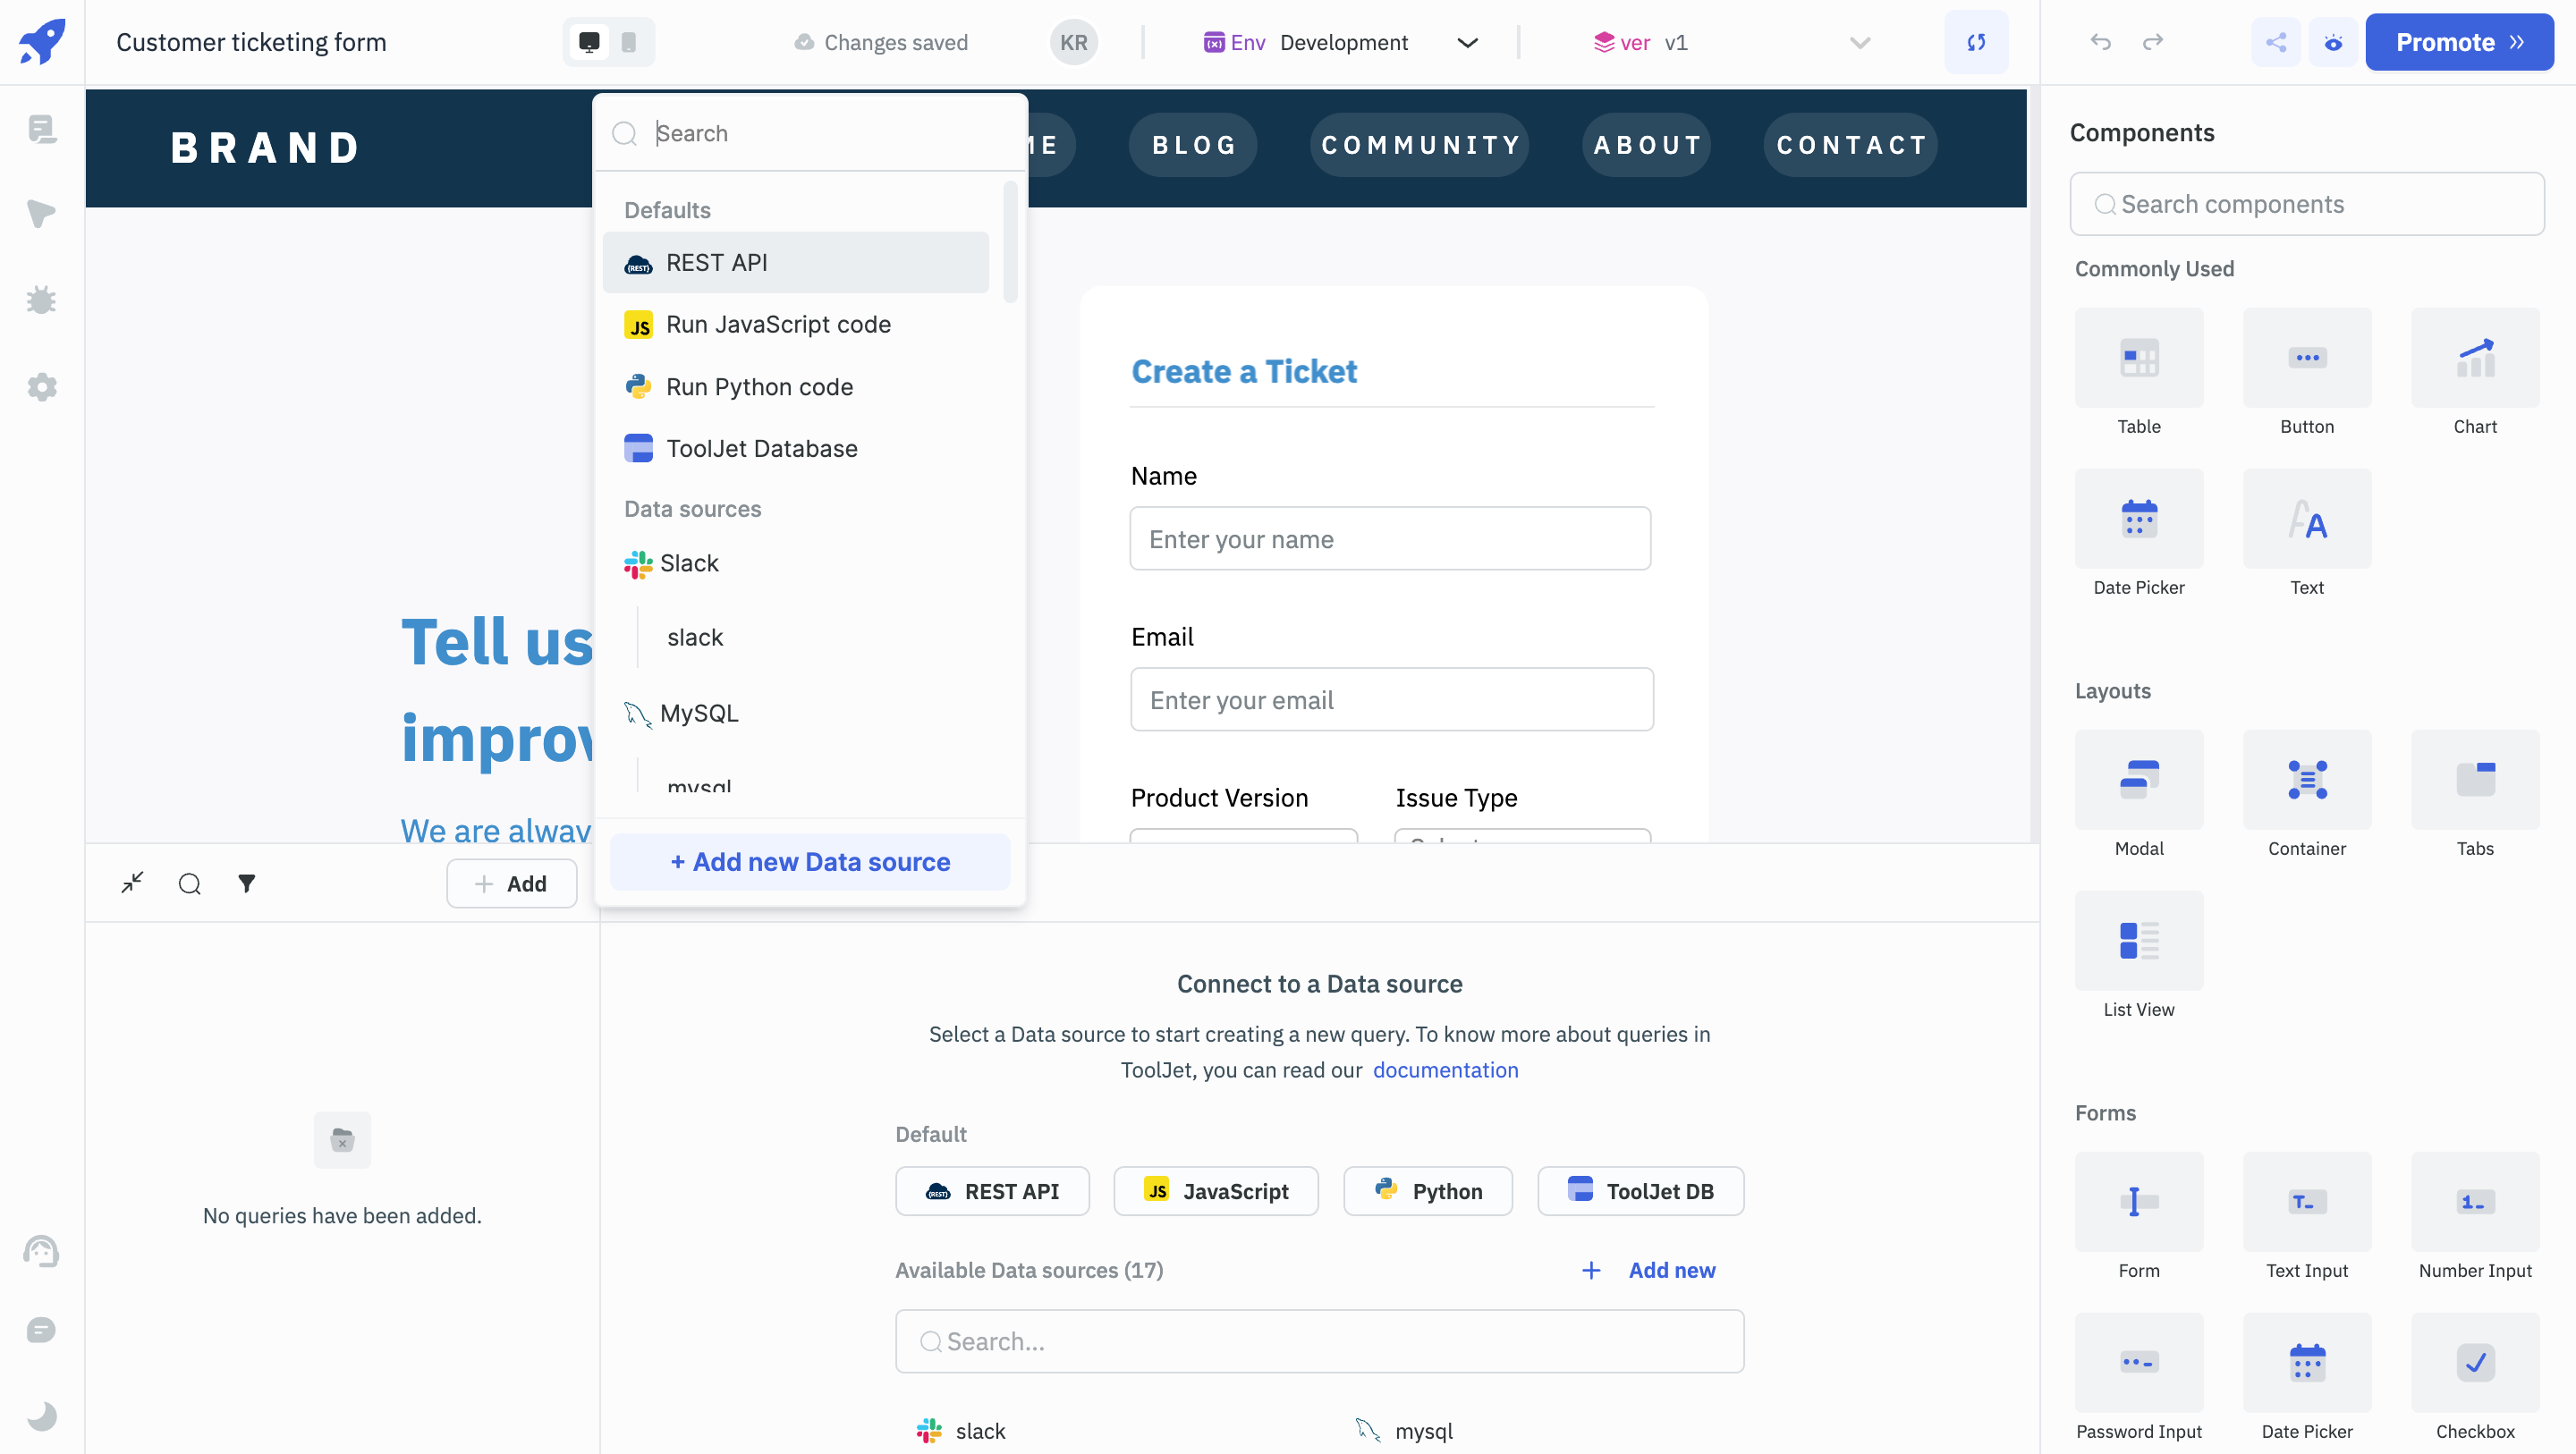
Creating a New Query
- Click on the + Add button in the Query Panel to open a menu listing the available data sources.
- Choose a data source to set the context for the new query.
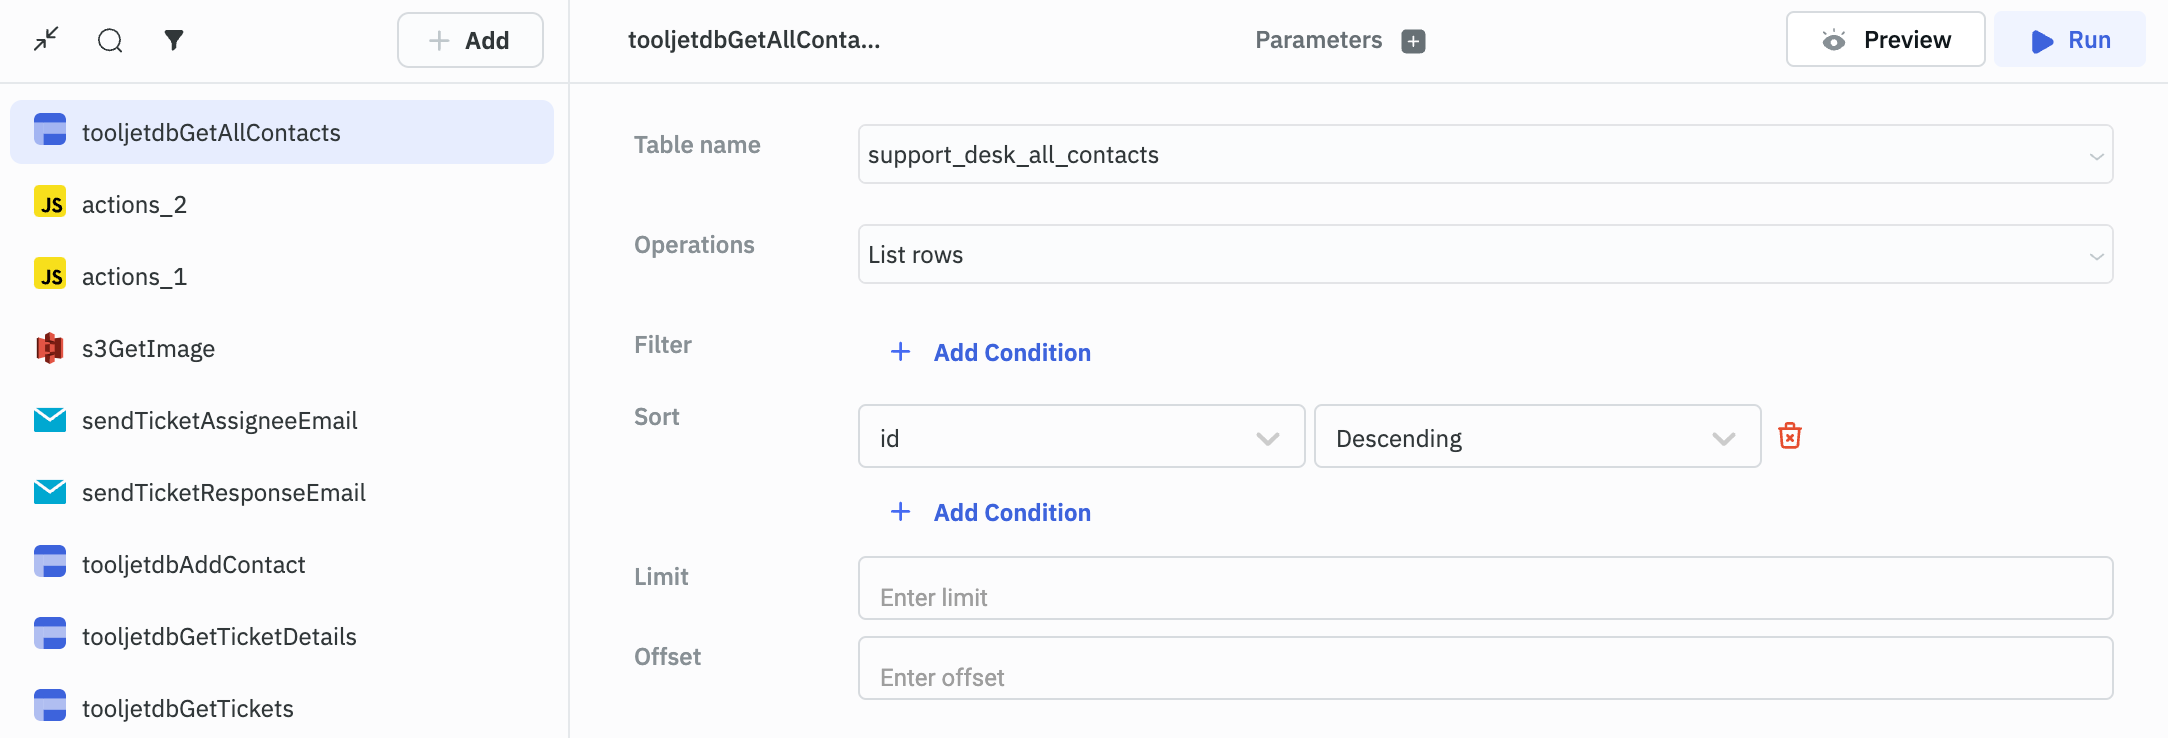
Configuring the Query
-
You can choose from low-code operations or write an SQL statement, depending on the data source.
-
For instance, you will have to choose the Table name and Operations (List Rows, Create Row, Update Rows, Delete Rows, Join Tables) for a ToolJet Database.
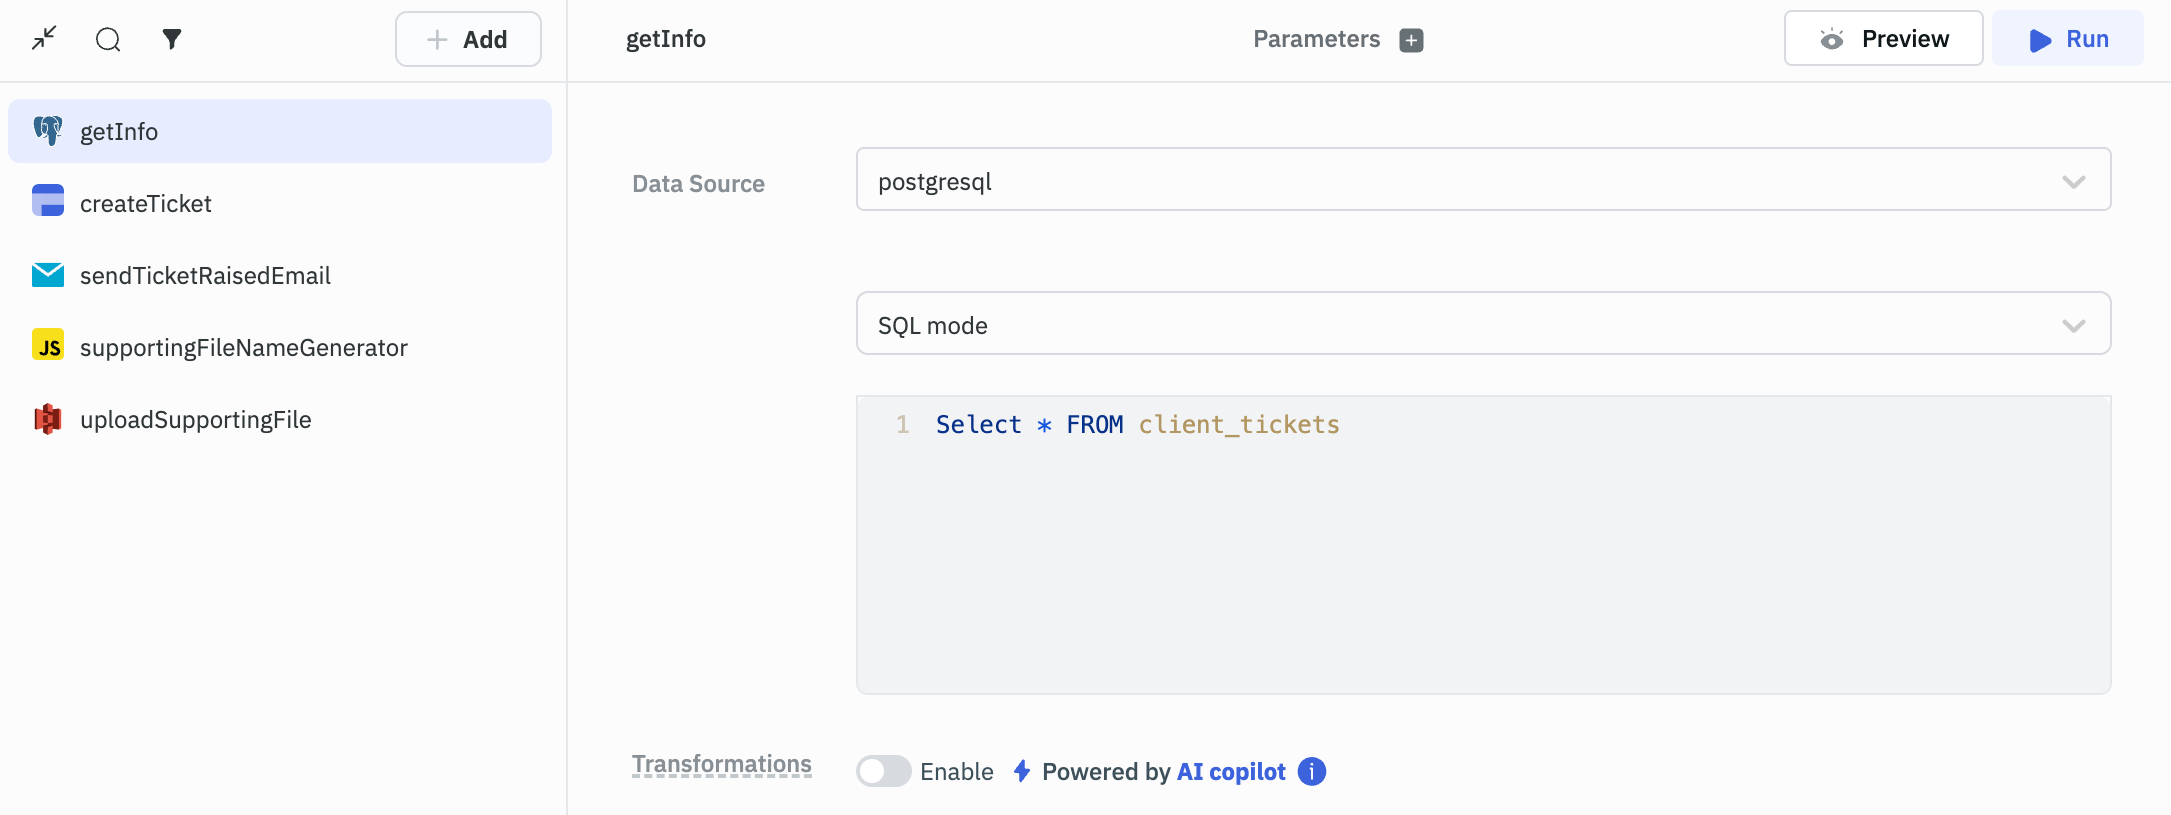
- And for PostgreSQL, you will have to choose between SQL mode or GUI mode to craft your query.
-
At the top of the Query Editor, you can click on the query name area to input a descriptive name, like
fetchUsers. -
If your query requires parameters, add them using the
+button near the Parameters label.
Example: For a PostgreSQL query named fetchUsers that is fetching data from the allUsers table, you might set a parameter to a single user by passing in the id parameter.
SELECT * FROM allUsers WHERE id = {{parameters.id}}
Here, {{parameters.id}} is a parameter that you can define by clicking on the + icon on the Query Panel header next to the Parameters label.
Query Examples
Let's look at some examples with a PostgreSQL data source with a database table named feature_requests.
Reading Data
- Create a query named getAllRequests that selects all records from the
feature_requeststable.
SELECT * FROM feature_requests;
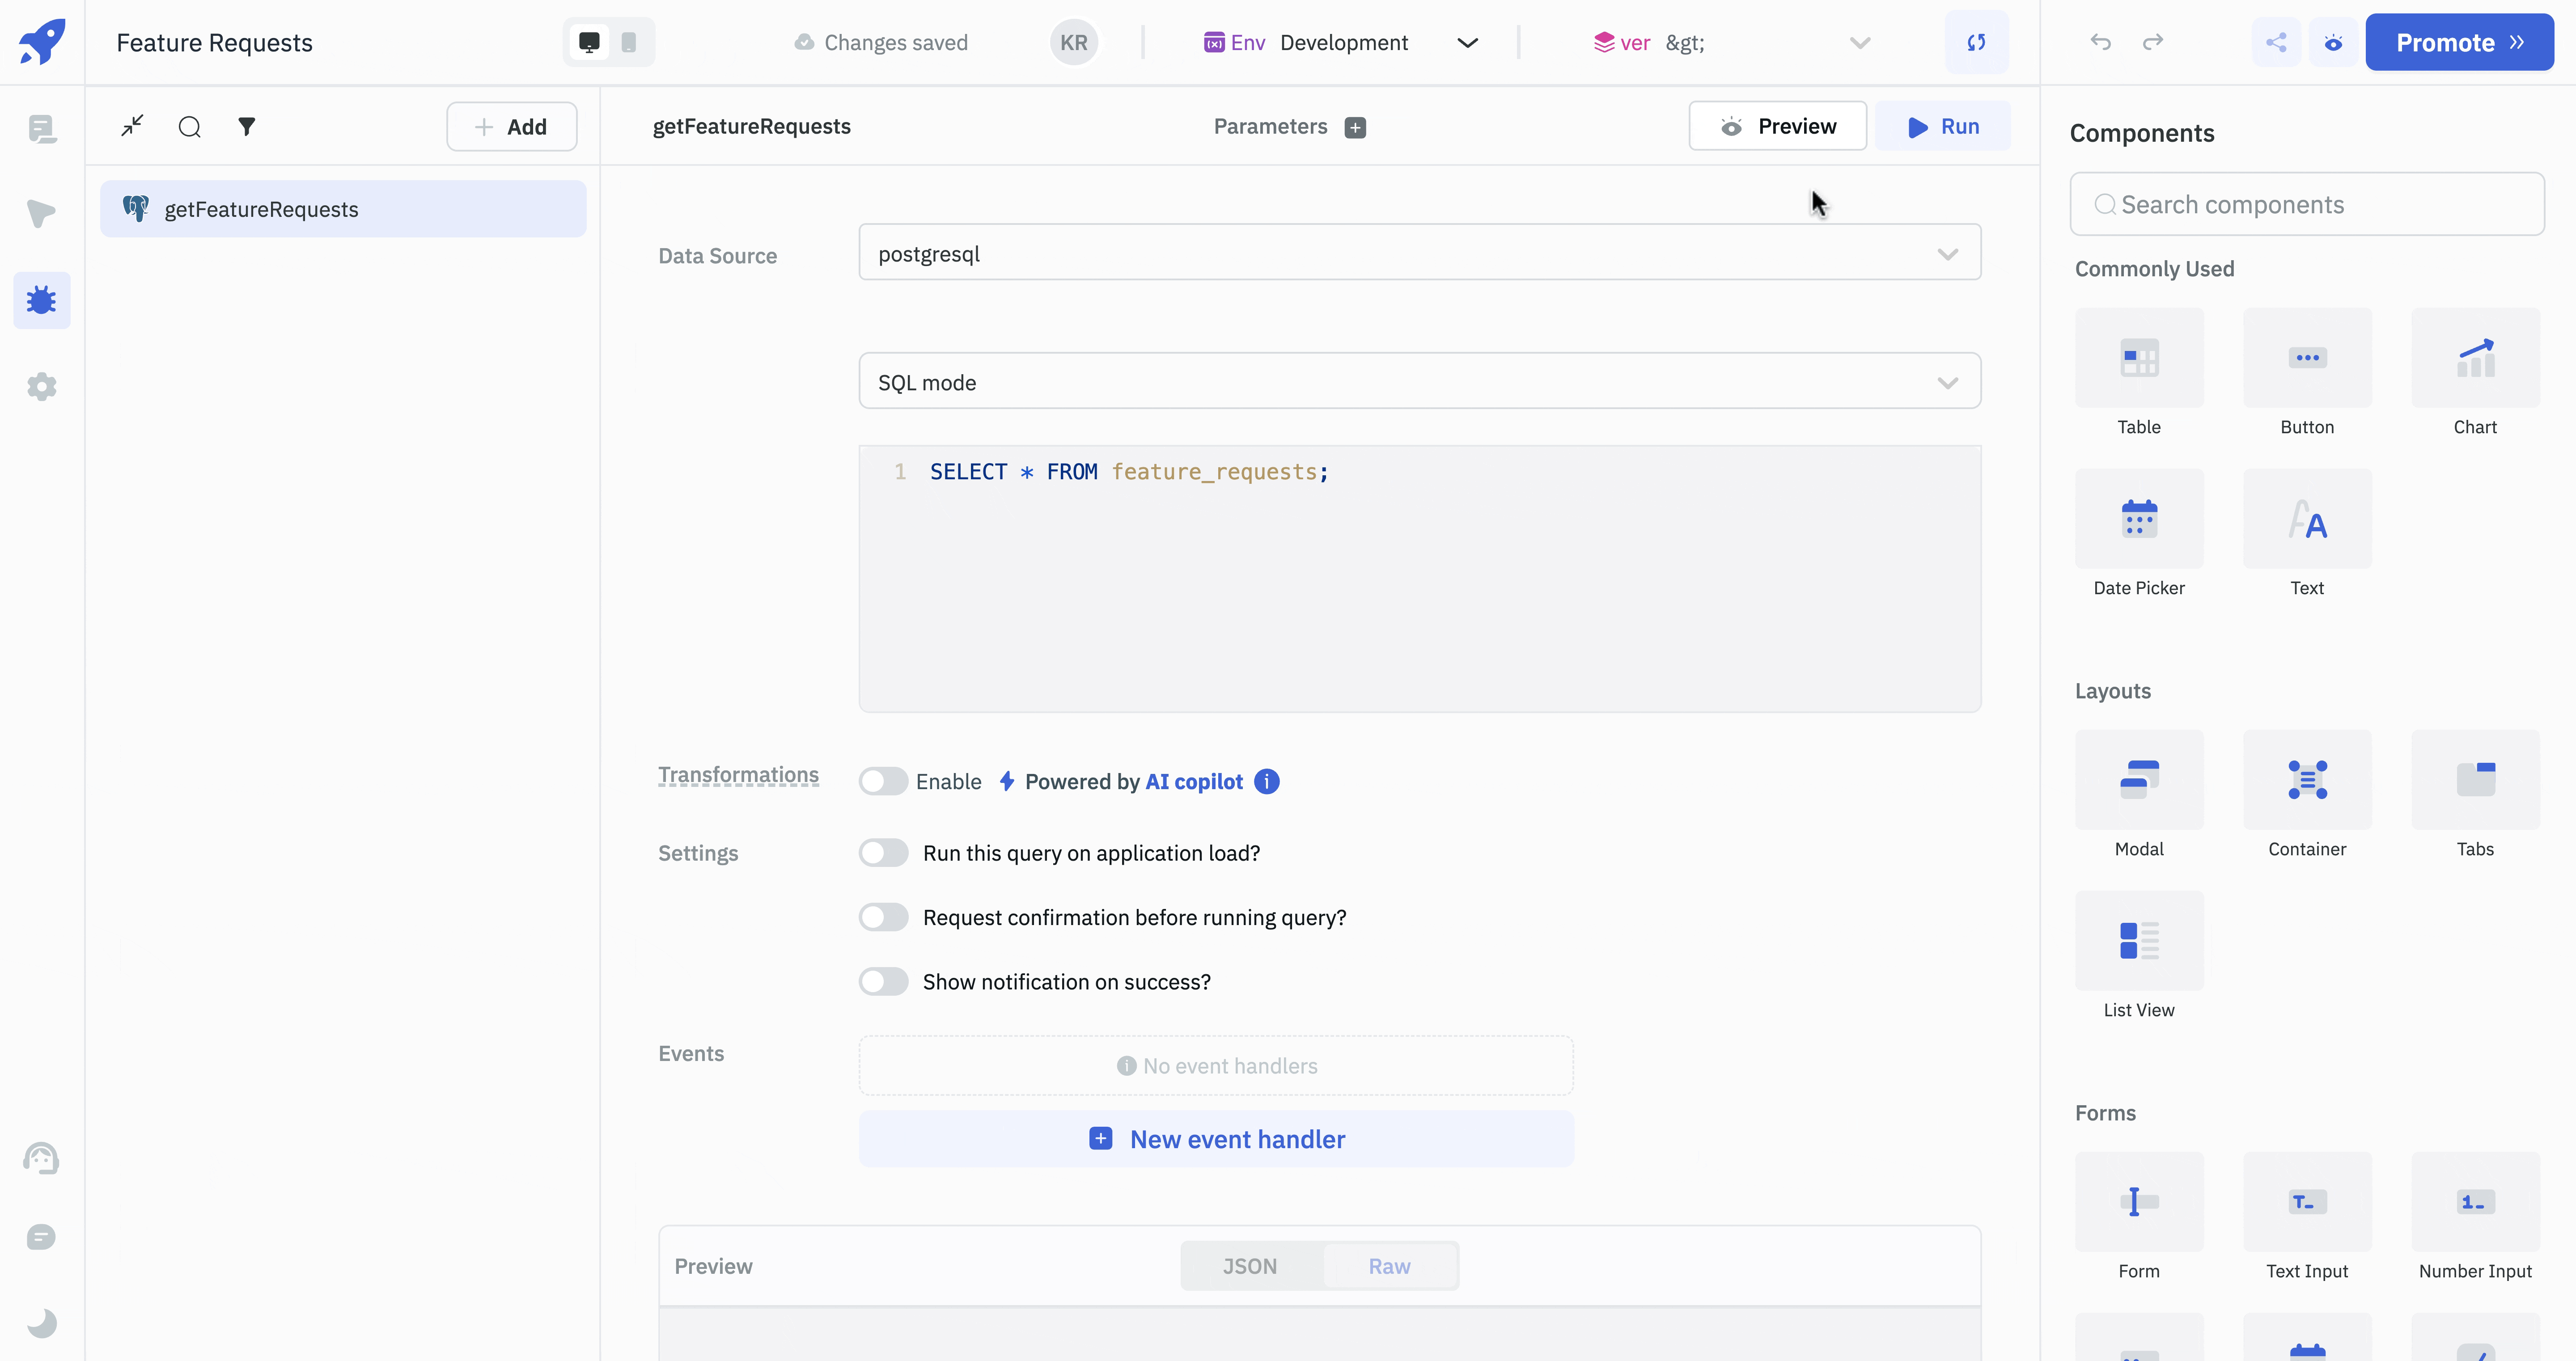
-
You can scroll down and see the returned data in the Preview section.
-
Binding the returned data to components is a straightforward process. For instance, to add the returned data of the getAllRequests query to a Table, simply reference the query in the
Dataproperty of the Table component:
{{queries.getAllRequests.data}}
Inserting Data
- Define a query
addNewRequestto insert a new item into thefeature_requeststable.
INSERT INTO feature_requests (id, title, description, votes, priority)
VALUES (10, 'Toggle Component', 'We need a toggle component in future release.', 0, 2);
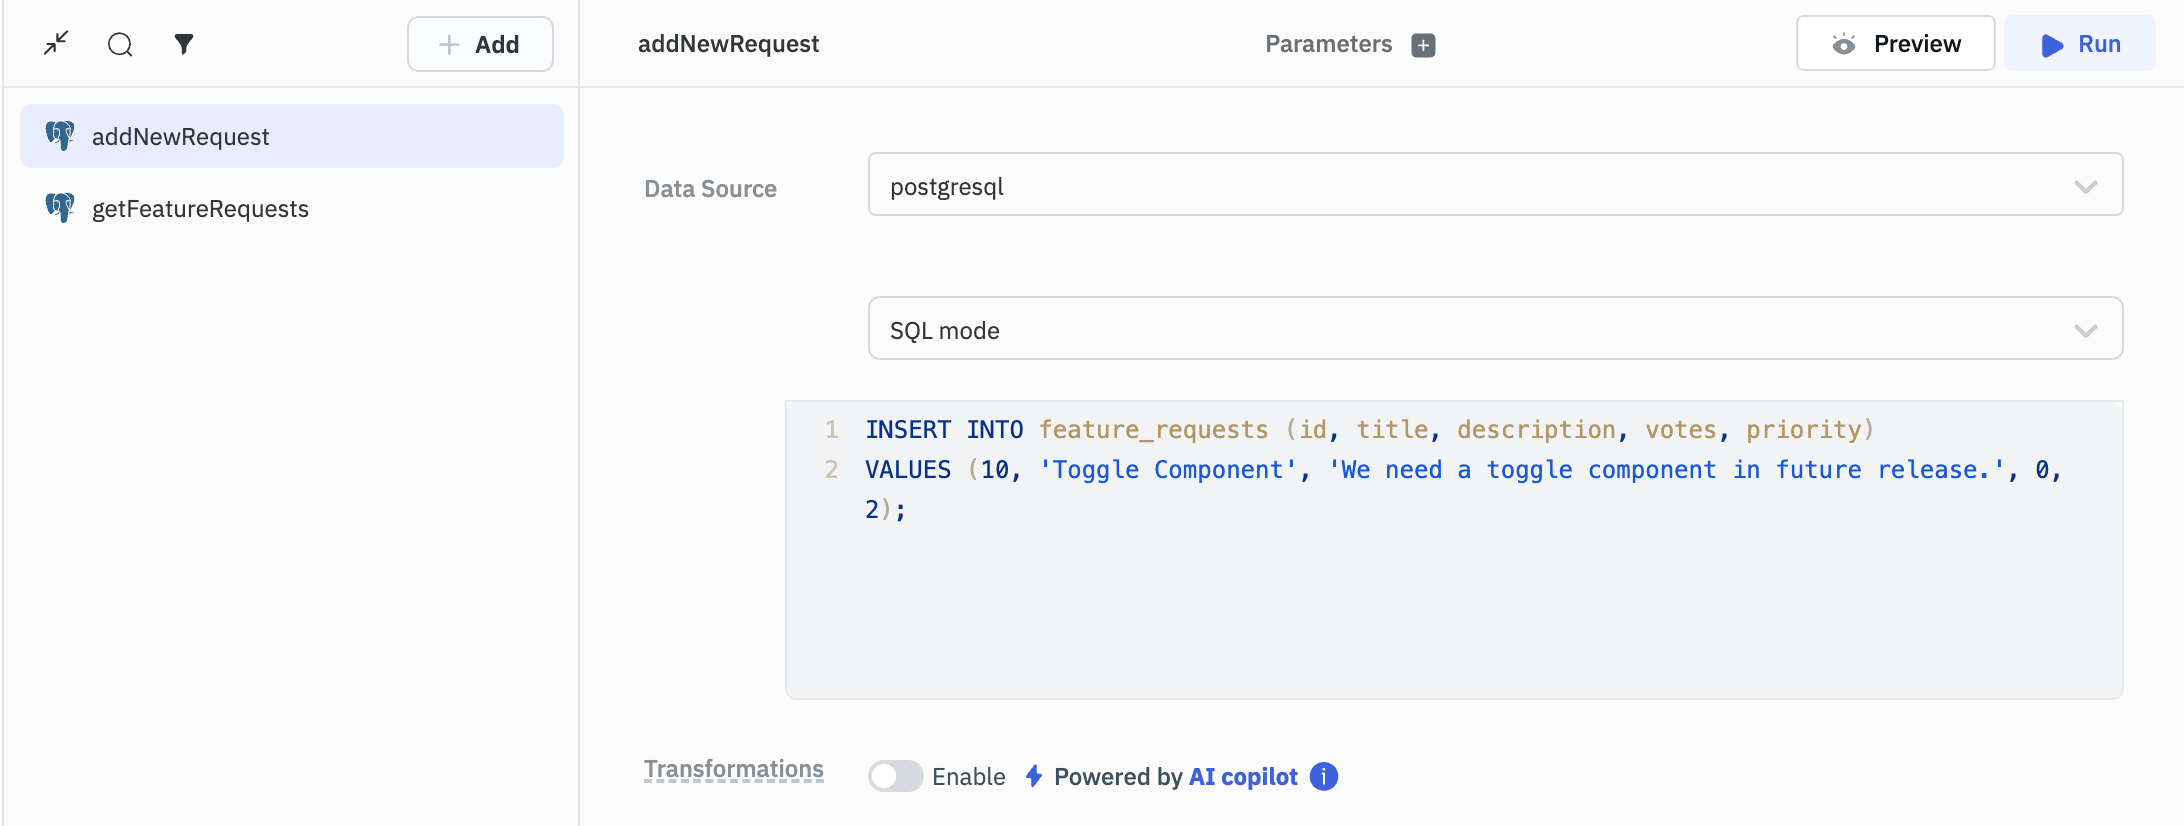
You can insert values from the components in queries. For instance, the above code can be updated to pick values from the components by using the double curly braces to pass the component values:
INSERT INTO feature_requests (id, title, description, votes, priority)
VALUES (10, `{{components.textinput1.value}}`, `{{components.textinput2.value}}`, 0, 2);
You can apply the same principles to upcoming examples.
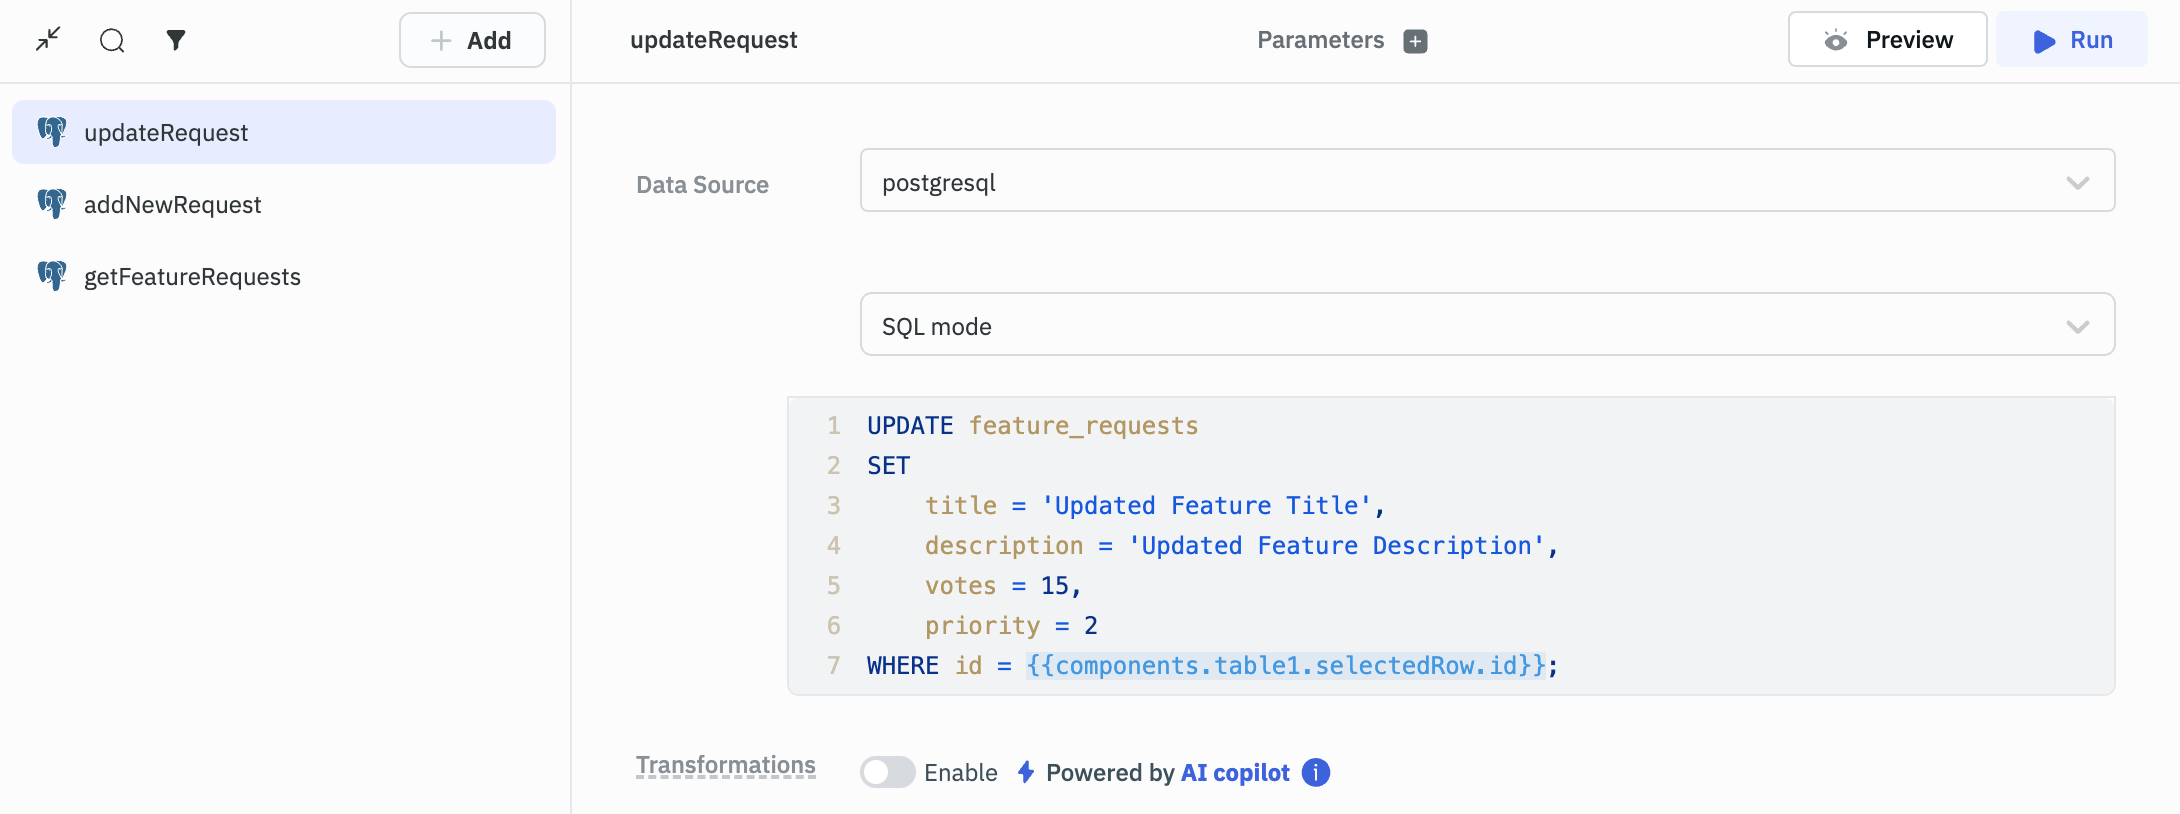
Updating Data
To update existing data:
Example: Set up a query updateRequest to modify details of an existing product based on the id of the selected product in the Table component.
UPDATE feature_requests
SET
    title = 'Updated Feature Title',
    description = 'Updated Feature Description',
    votes = 15,
    priority = 2
WHERE id = `{{components.table1.selectedRow.id}}`;
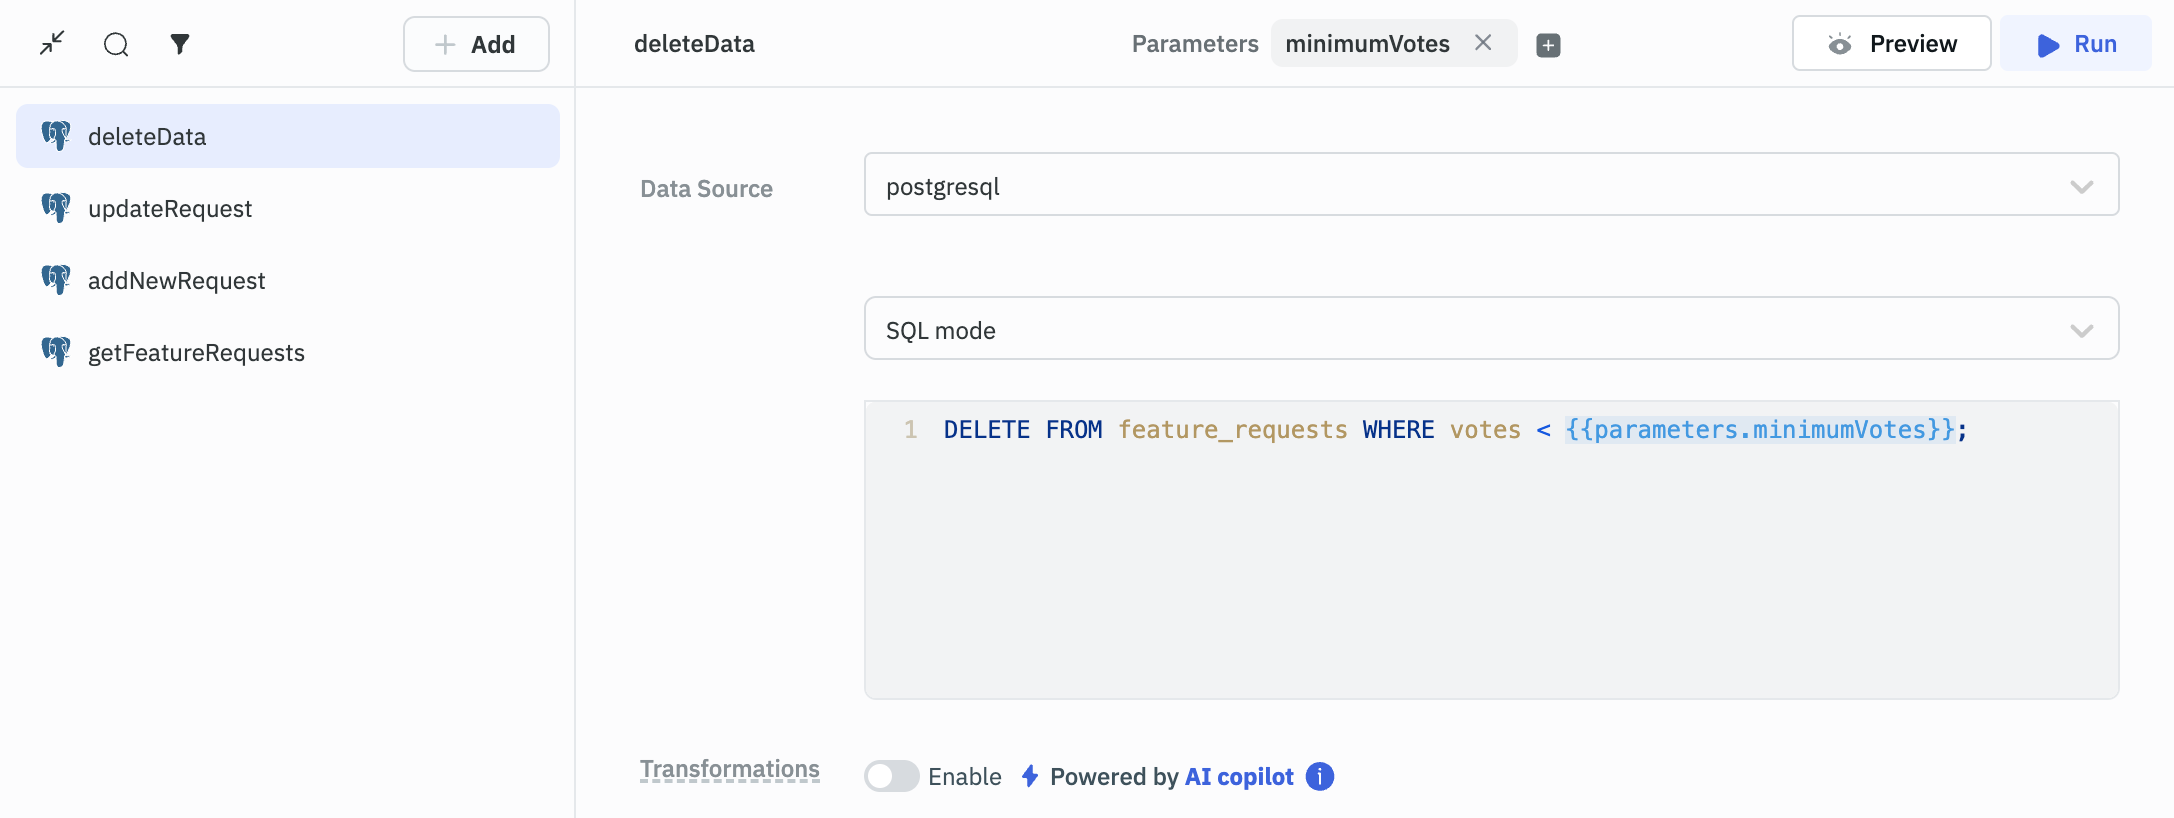
Deleting Data
To delete data:
Example: Craft a query deleteRequest that removes a product from the database based on a parameter.
DELETE FROM feature_requests WHERE votes < {{parameters.minimumVotes}};
Using Transformations and Events
Transformations: After fetching data, you might want to format it (e.g., filtering out unnecessary fields or converting data types). ToolJet allows using JavaScript or Python for these transformations.
Event Handling: Link queries with application events for dynamic interactions. For example, in the updateRequest query, you can set up an event to automatically run the getAllRequests query right after updateRequest. This ensures that the application retrieves and displays the updated data in the relevant components.
Advanced Settings and Debugging
Preview and Run: Use the Preview button to test queries and view results in raw or JSON format before executing them within the app using the Run button.
Configuration Settings:
- Run this query on application load?: Decide if the query should execute automatically when the app loads.
- Request confirmation before running query?: Set up confirmations for query operations to prevent accidental data changes.
- Show notification on success?: Configure notifications to inform users of successful operations. You can customize this property's notification message content and display duration.