Super Admin
A Super Admin is the user who has full access to all the Workspaces, Users, and Groups of an instance. An instance can have more than one Super Admin. A Super Admin has full control over other users' workspaces and can create users, groups, and other super admins.
The user details entered while setting up ToolJet will have Super Admin privileges.
How Super Admin is Different from Admin
Super Admin features
Access any workspace
If a user is a Super Admin, they can switch to any workspace created by any user within the instance using the Workspace Switcher located in the bottom left corner of the screen.
The dropdown will display all workspaces, including those created by both Super Admins and any other users.

Create, Edit or Delete apps from any user's personal workspace
Once the Super Admin access the workspace of any other user, they can create, edit or delete app on the workspace.
This also includes - modifying folders and importing, exporting, or cloning apps to any user's workspace.
Archive/Unarchive Users
Super Admin can not only archive/unarchive users/admins on their workspace but also from the workspaces of any other user.
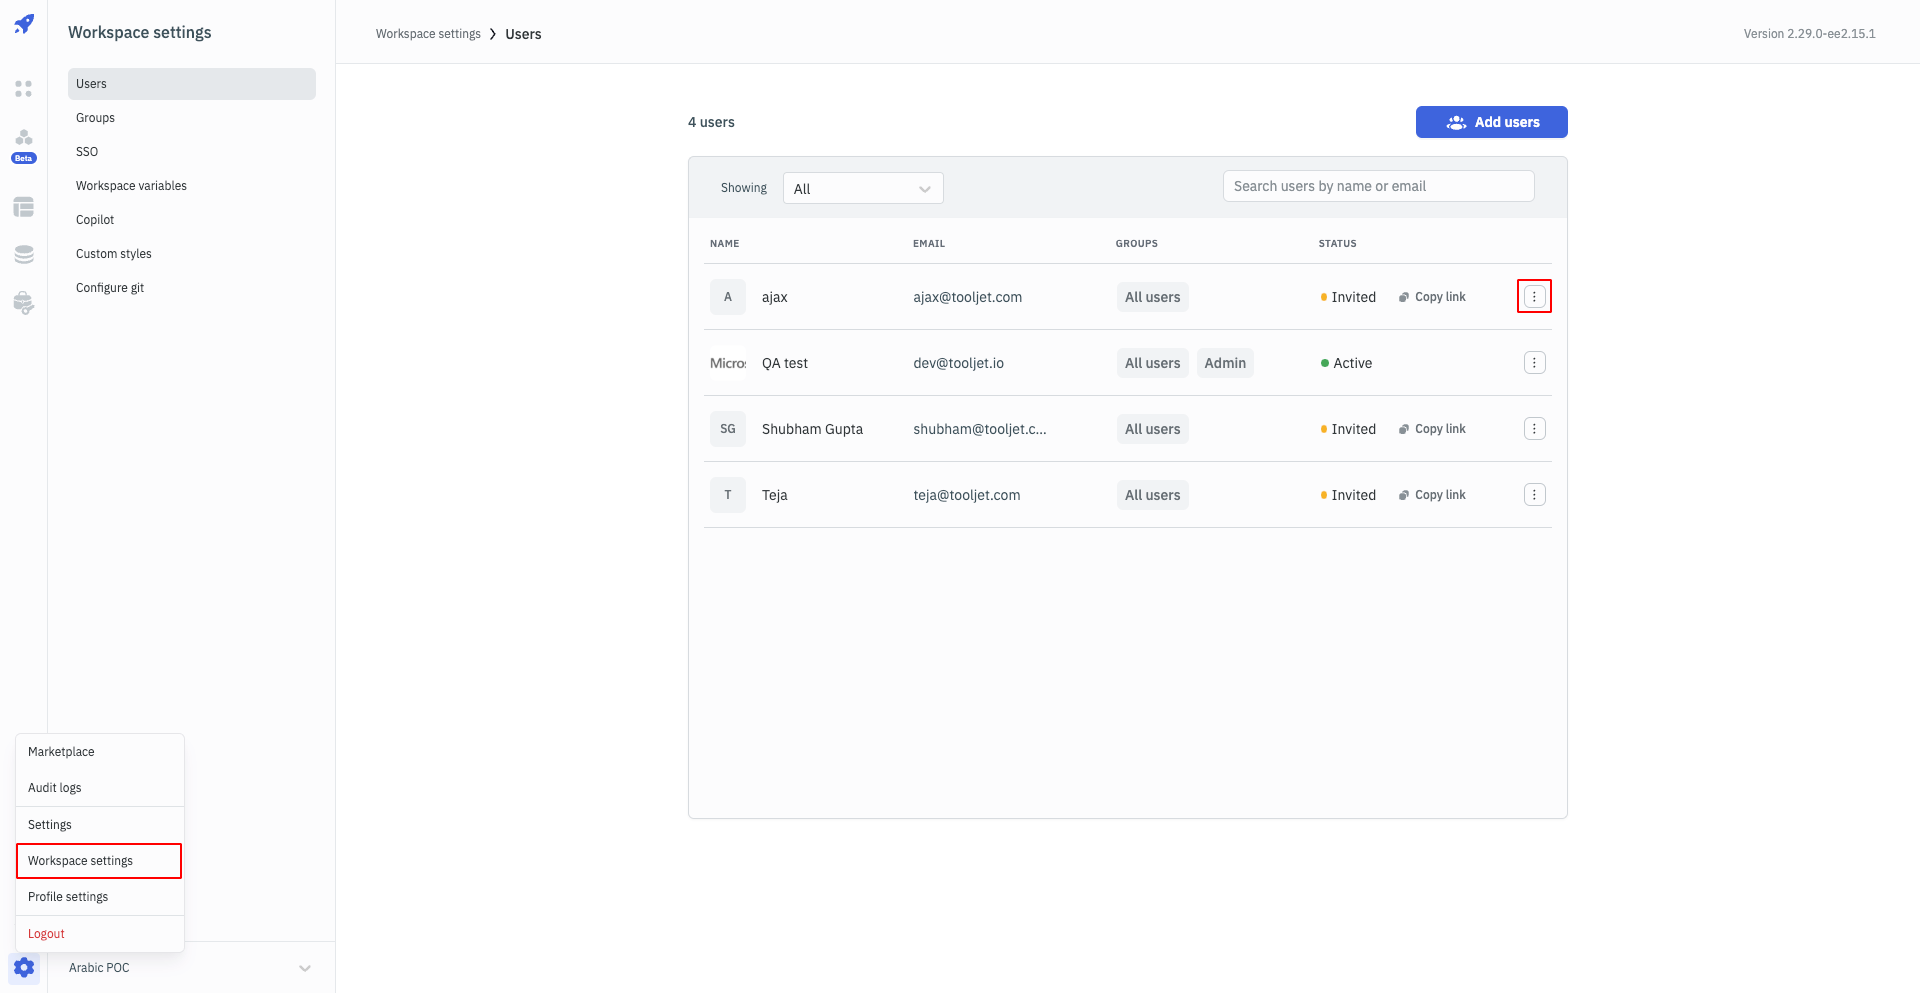
If a user is Super Admin, they just need to open the workspace in which they want to archive or unarchive a user. Then go to the Workspace Settings from the sidebar -> Manage Users -> Archive/Unarchive any user/admin
Access ToolJet DB in any workspace
Super Admins have access to the database of any user's workspace - just like Super Admins can access any application in any workspace. They have full access to modify or create any table in the ToolJet DB of any workspace.
Manage Workspace Settings (Groups/SSO/Workspace constants)
Super Admins have all the privileges that an Admin of a workspace have, Super Admins can:
- ✅ Manage Groups: Creating/Deleting/Updating a Group in any workspace
- ✅ Manage SSO: Full control over General Settings, Password login and other SSO options
- ✅ Workspace Variables: Adding, updating or deleting workspace variables
- ✅ Workspace Constants: Adding, updating or deleting workspace constants
- ✅ Copilot: Enabling or disabling Copilot
- ✅ Custom Styles: Adding or modifying custom styles
Settings
Only Super Admins can access the Settings. To access the Settings page, click on the ⚙️ button and select Settings from the dropdown.

All Users
Manage all Users in the Instance
All Users settings can be used to check the list of all the users available on all the workspaces in the instance. Super Admins can also promote/demote any user to/from Super Admin from this page. They can also archive/unarchive any user at an instance level from this setting.
Archiving a User from all the Workspaces (Instance Level)
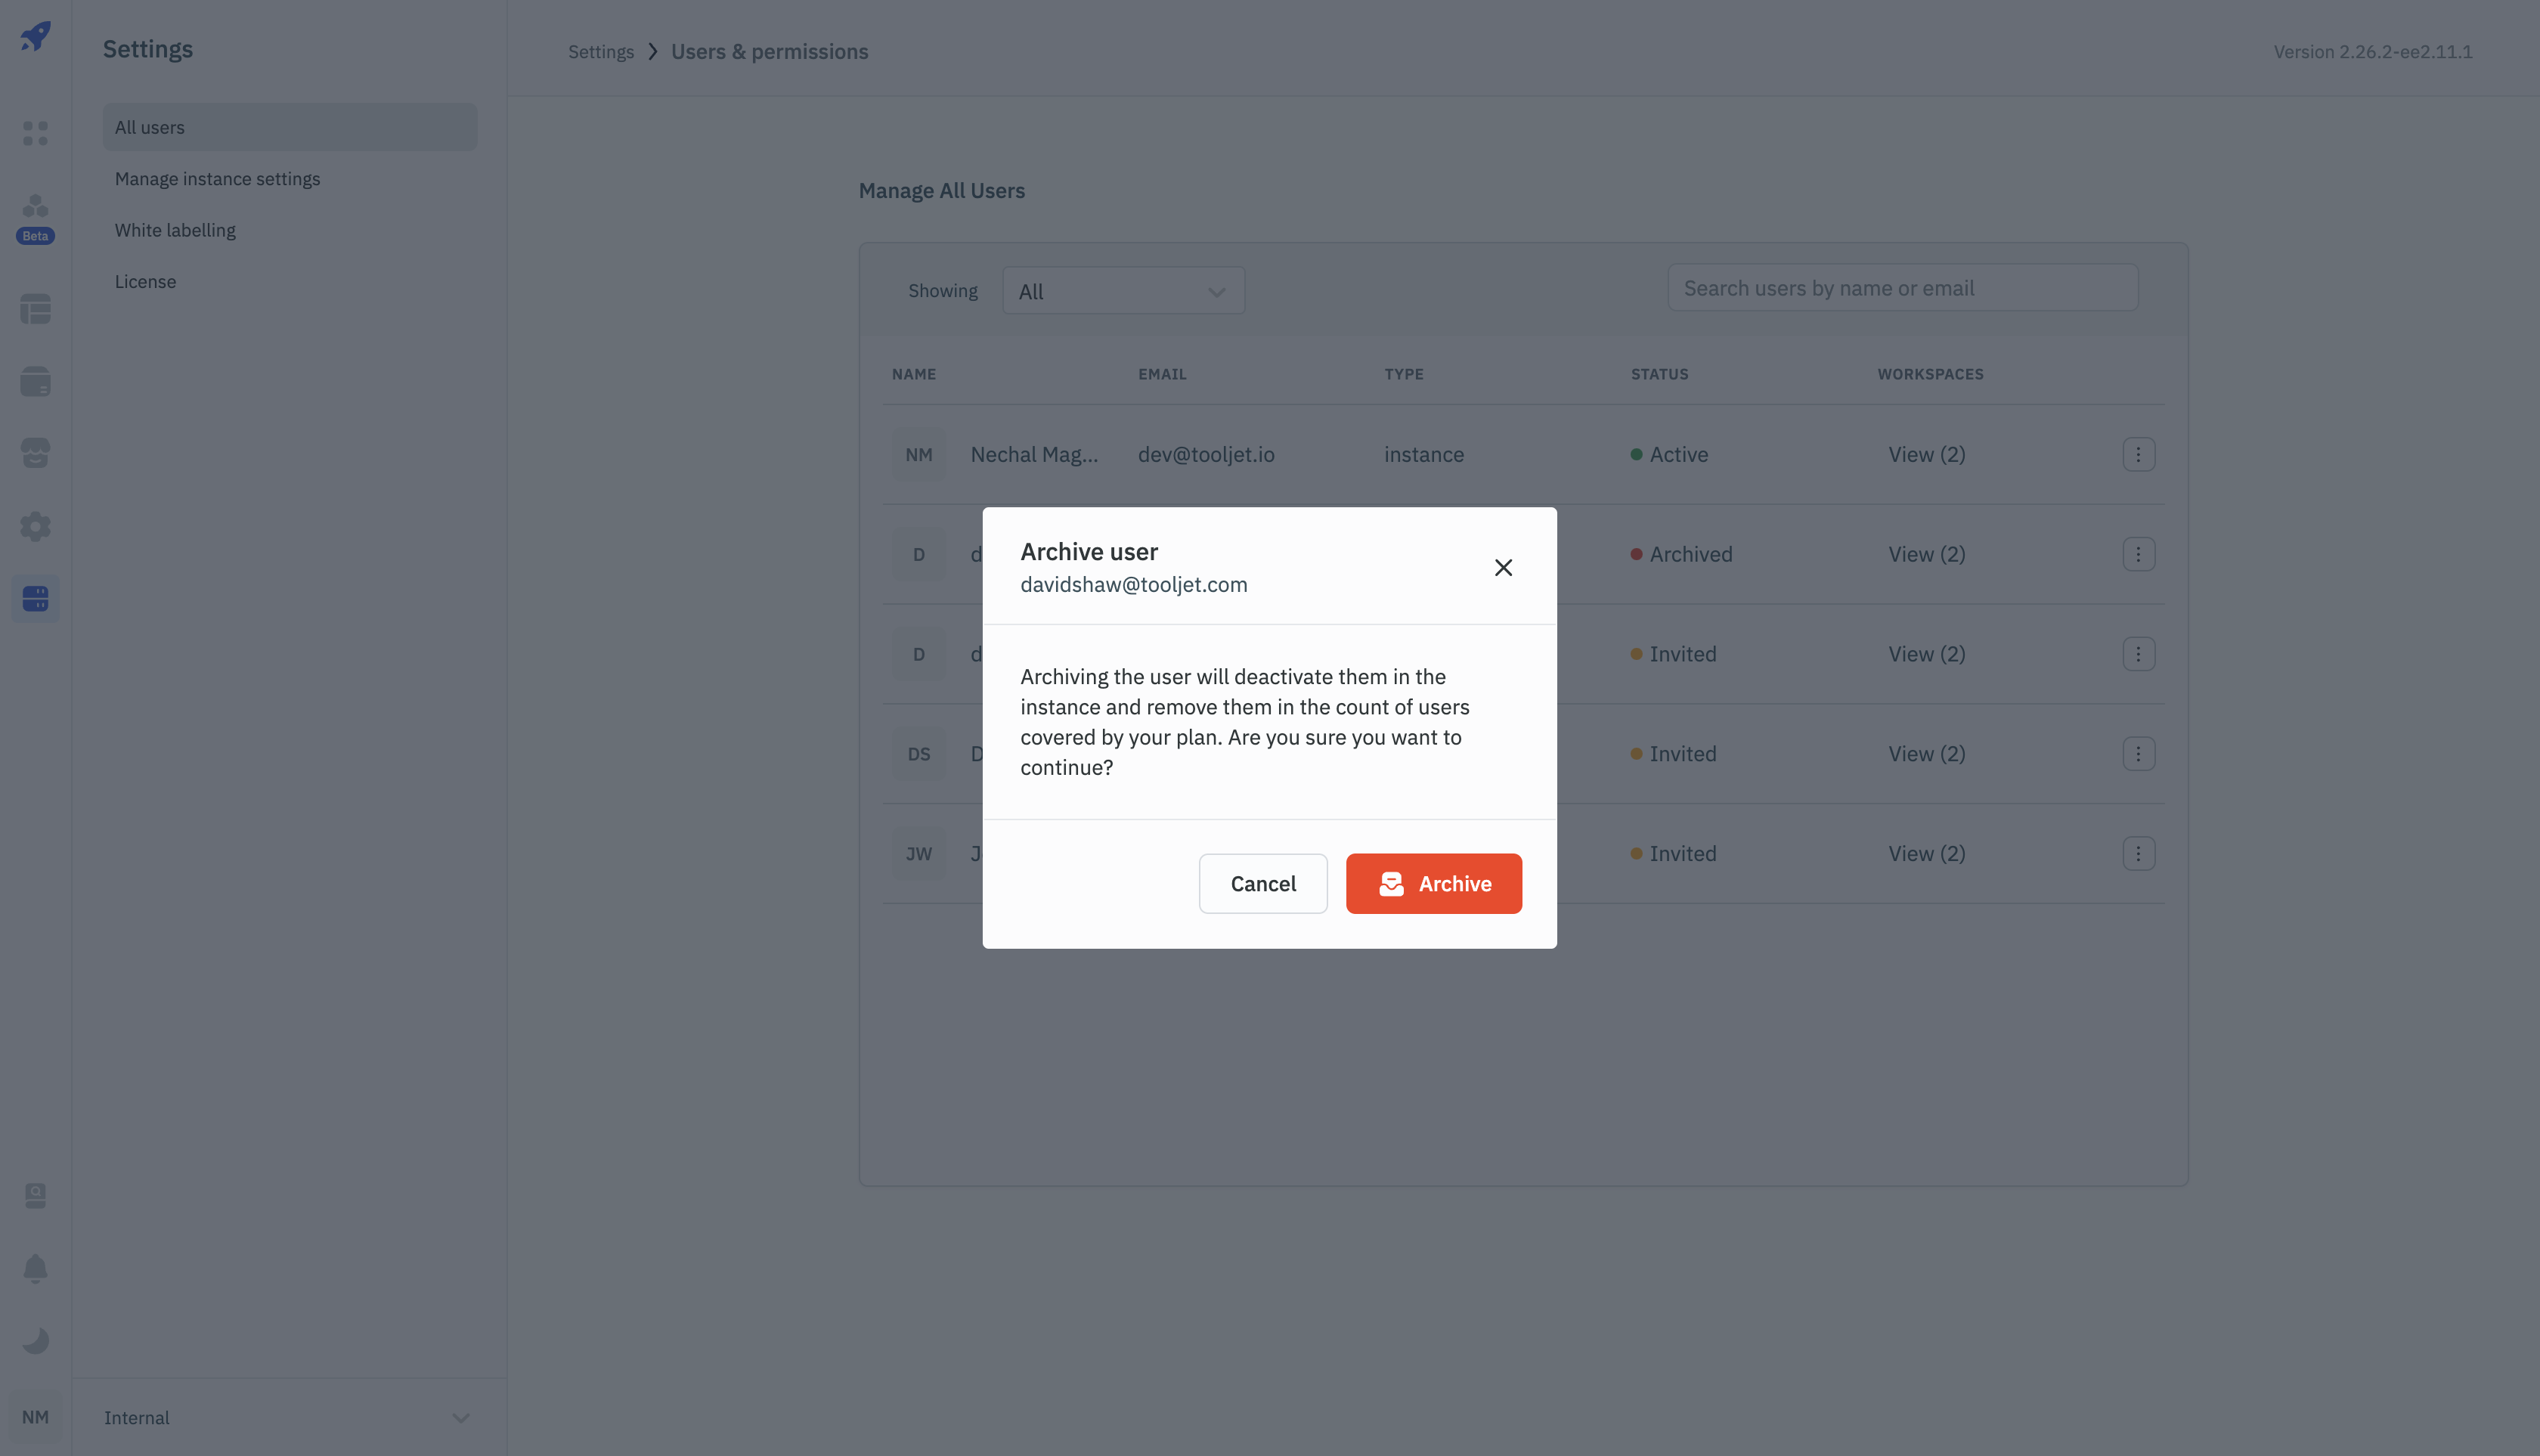
Super Admins have the authority to deactivate any user at instance level. This will remove the user from all the workspaces in the instance.
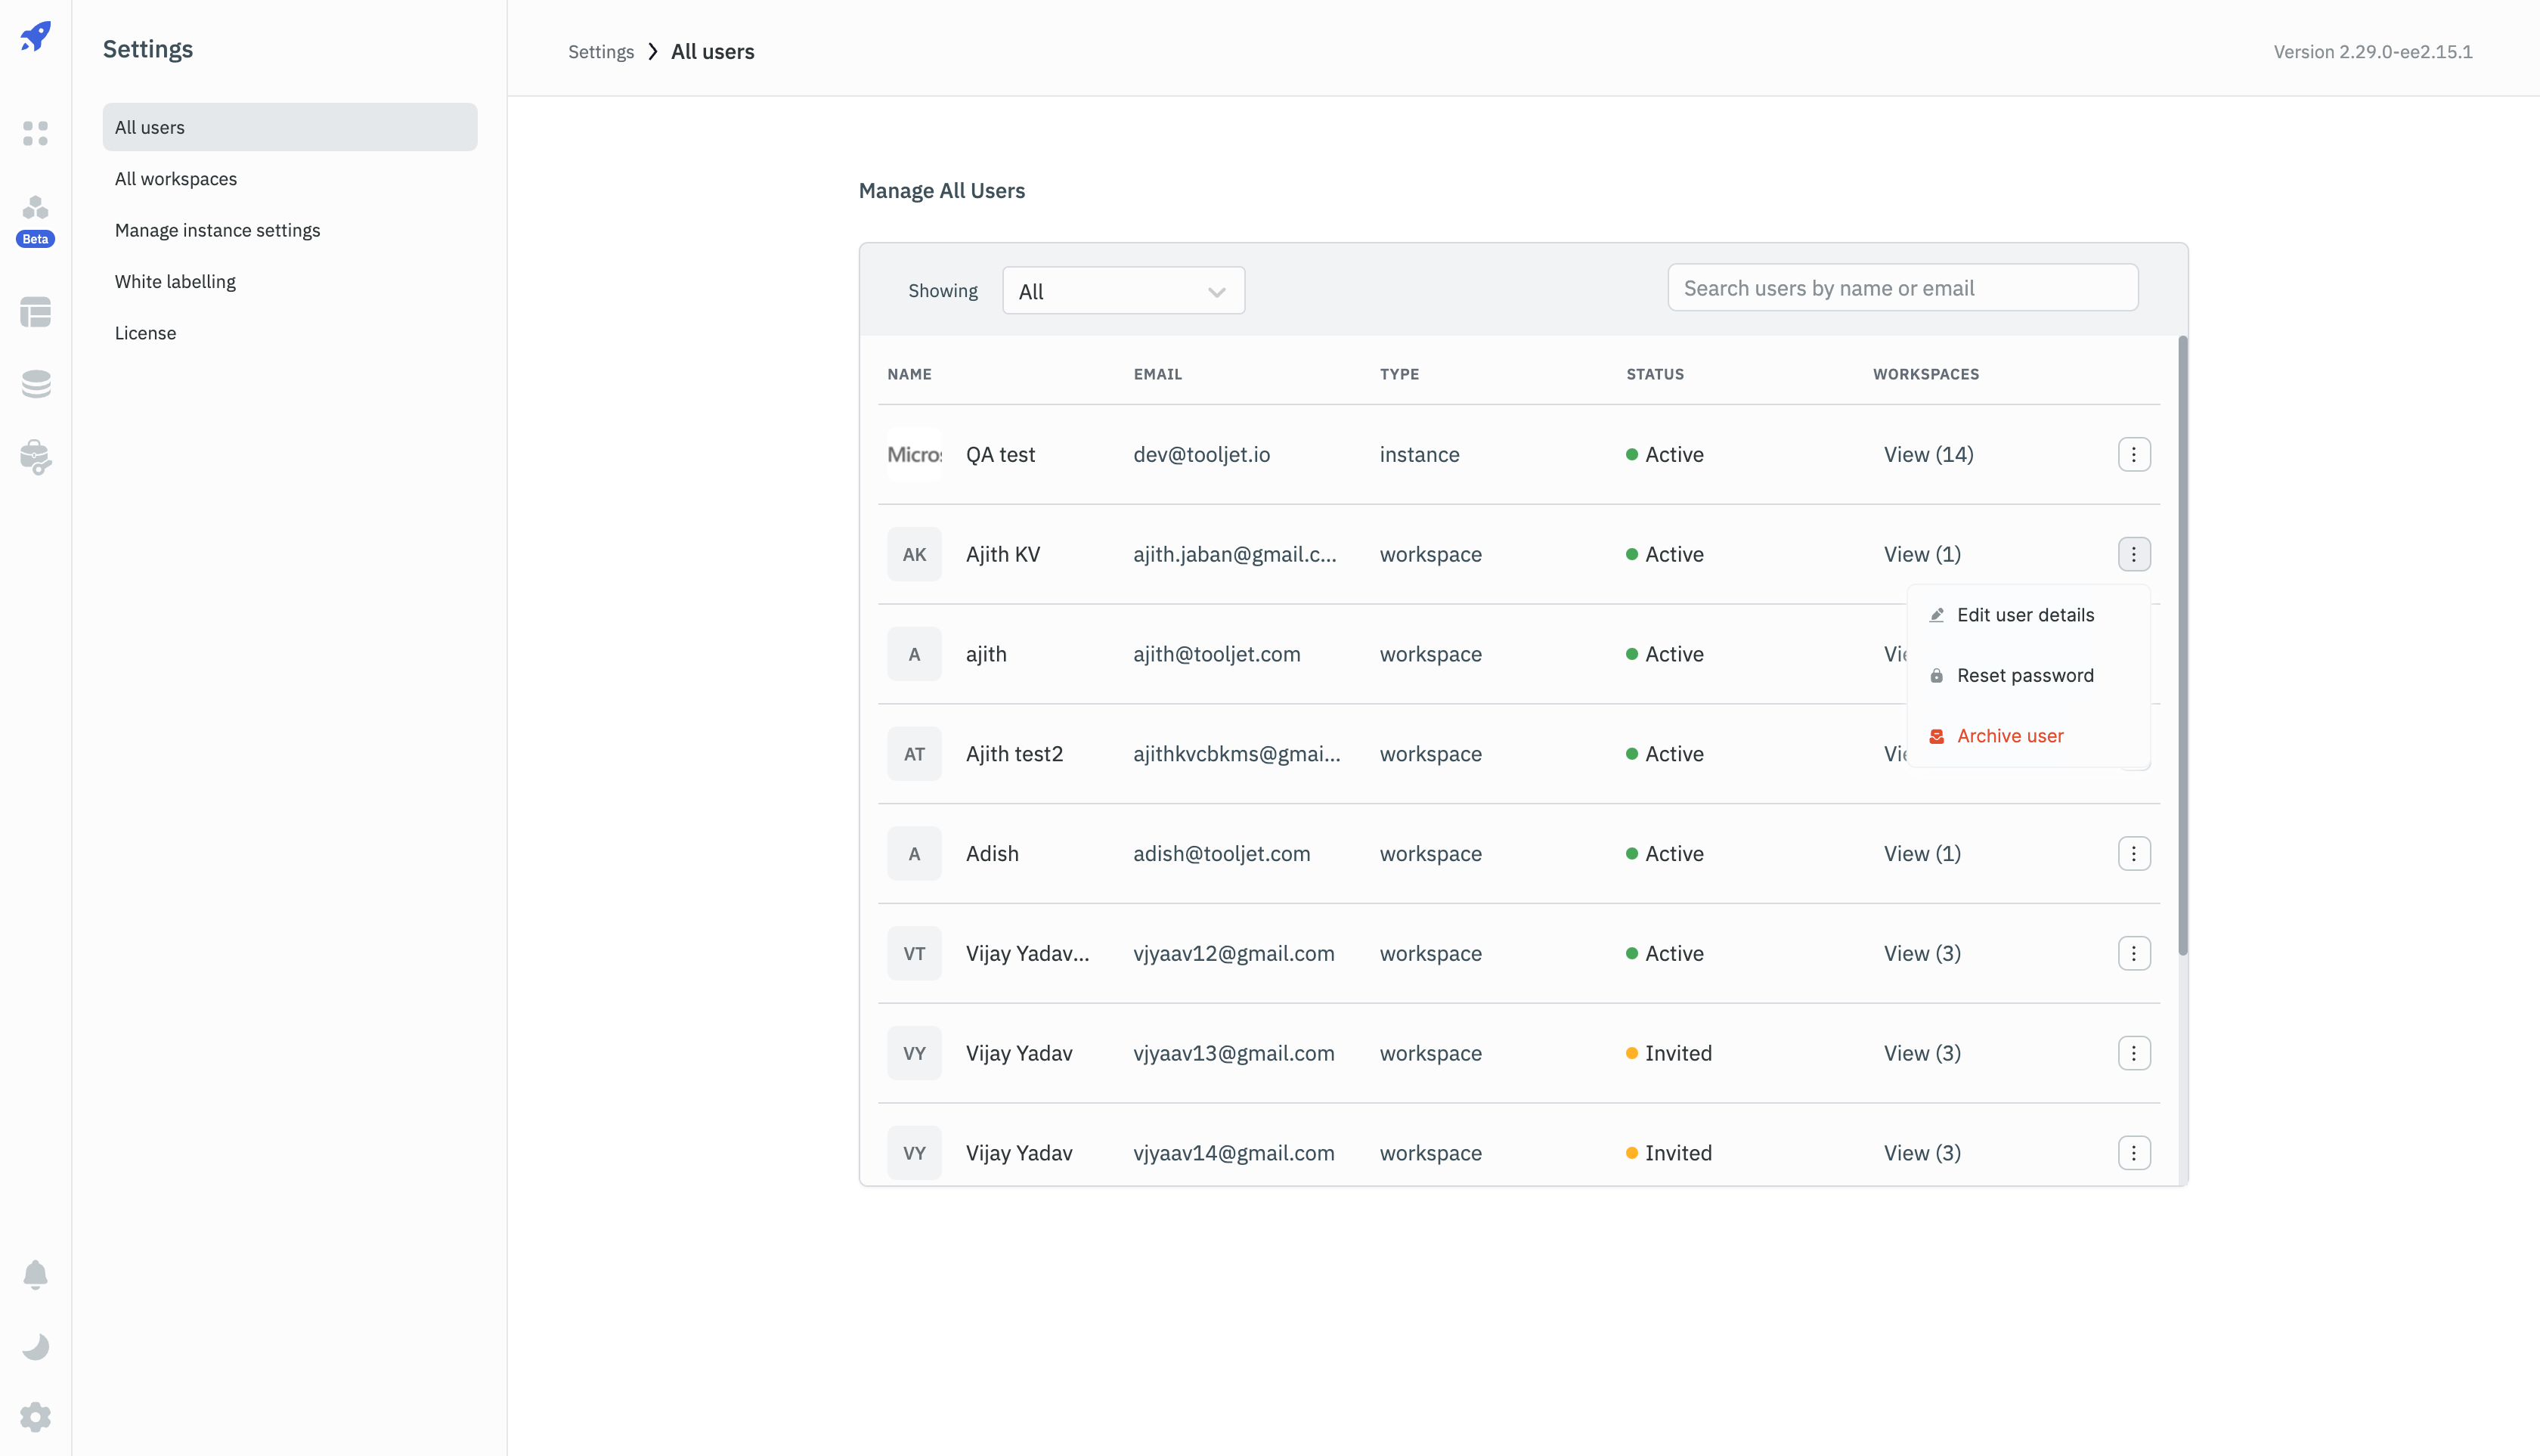
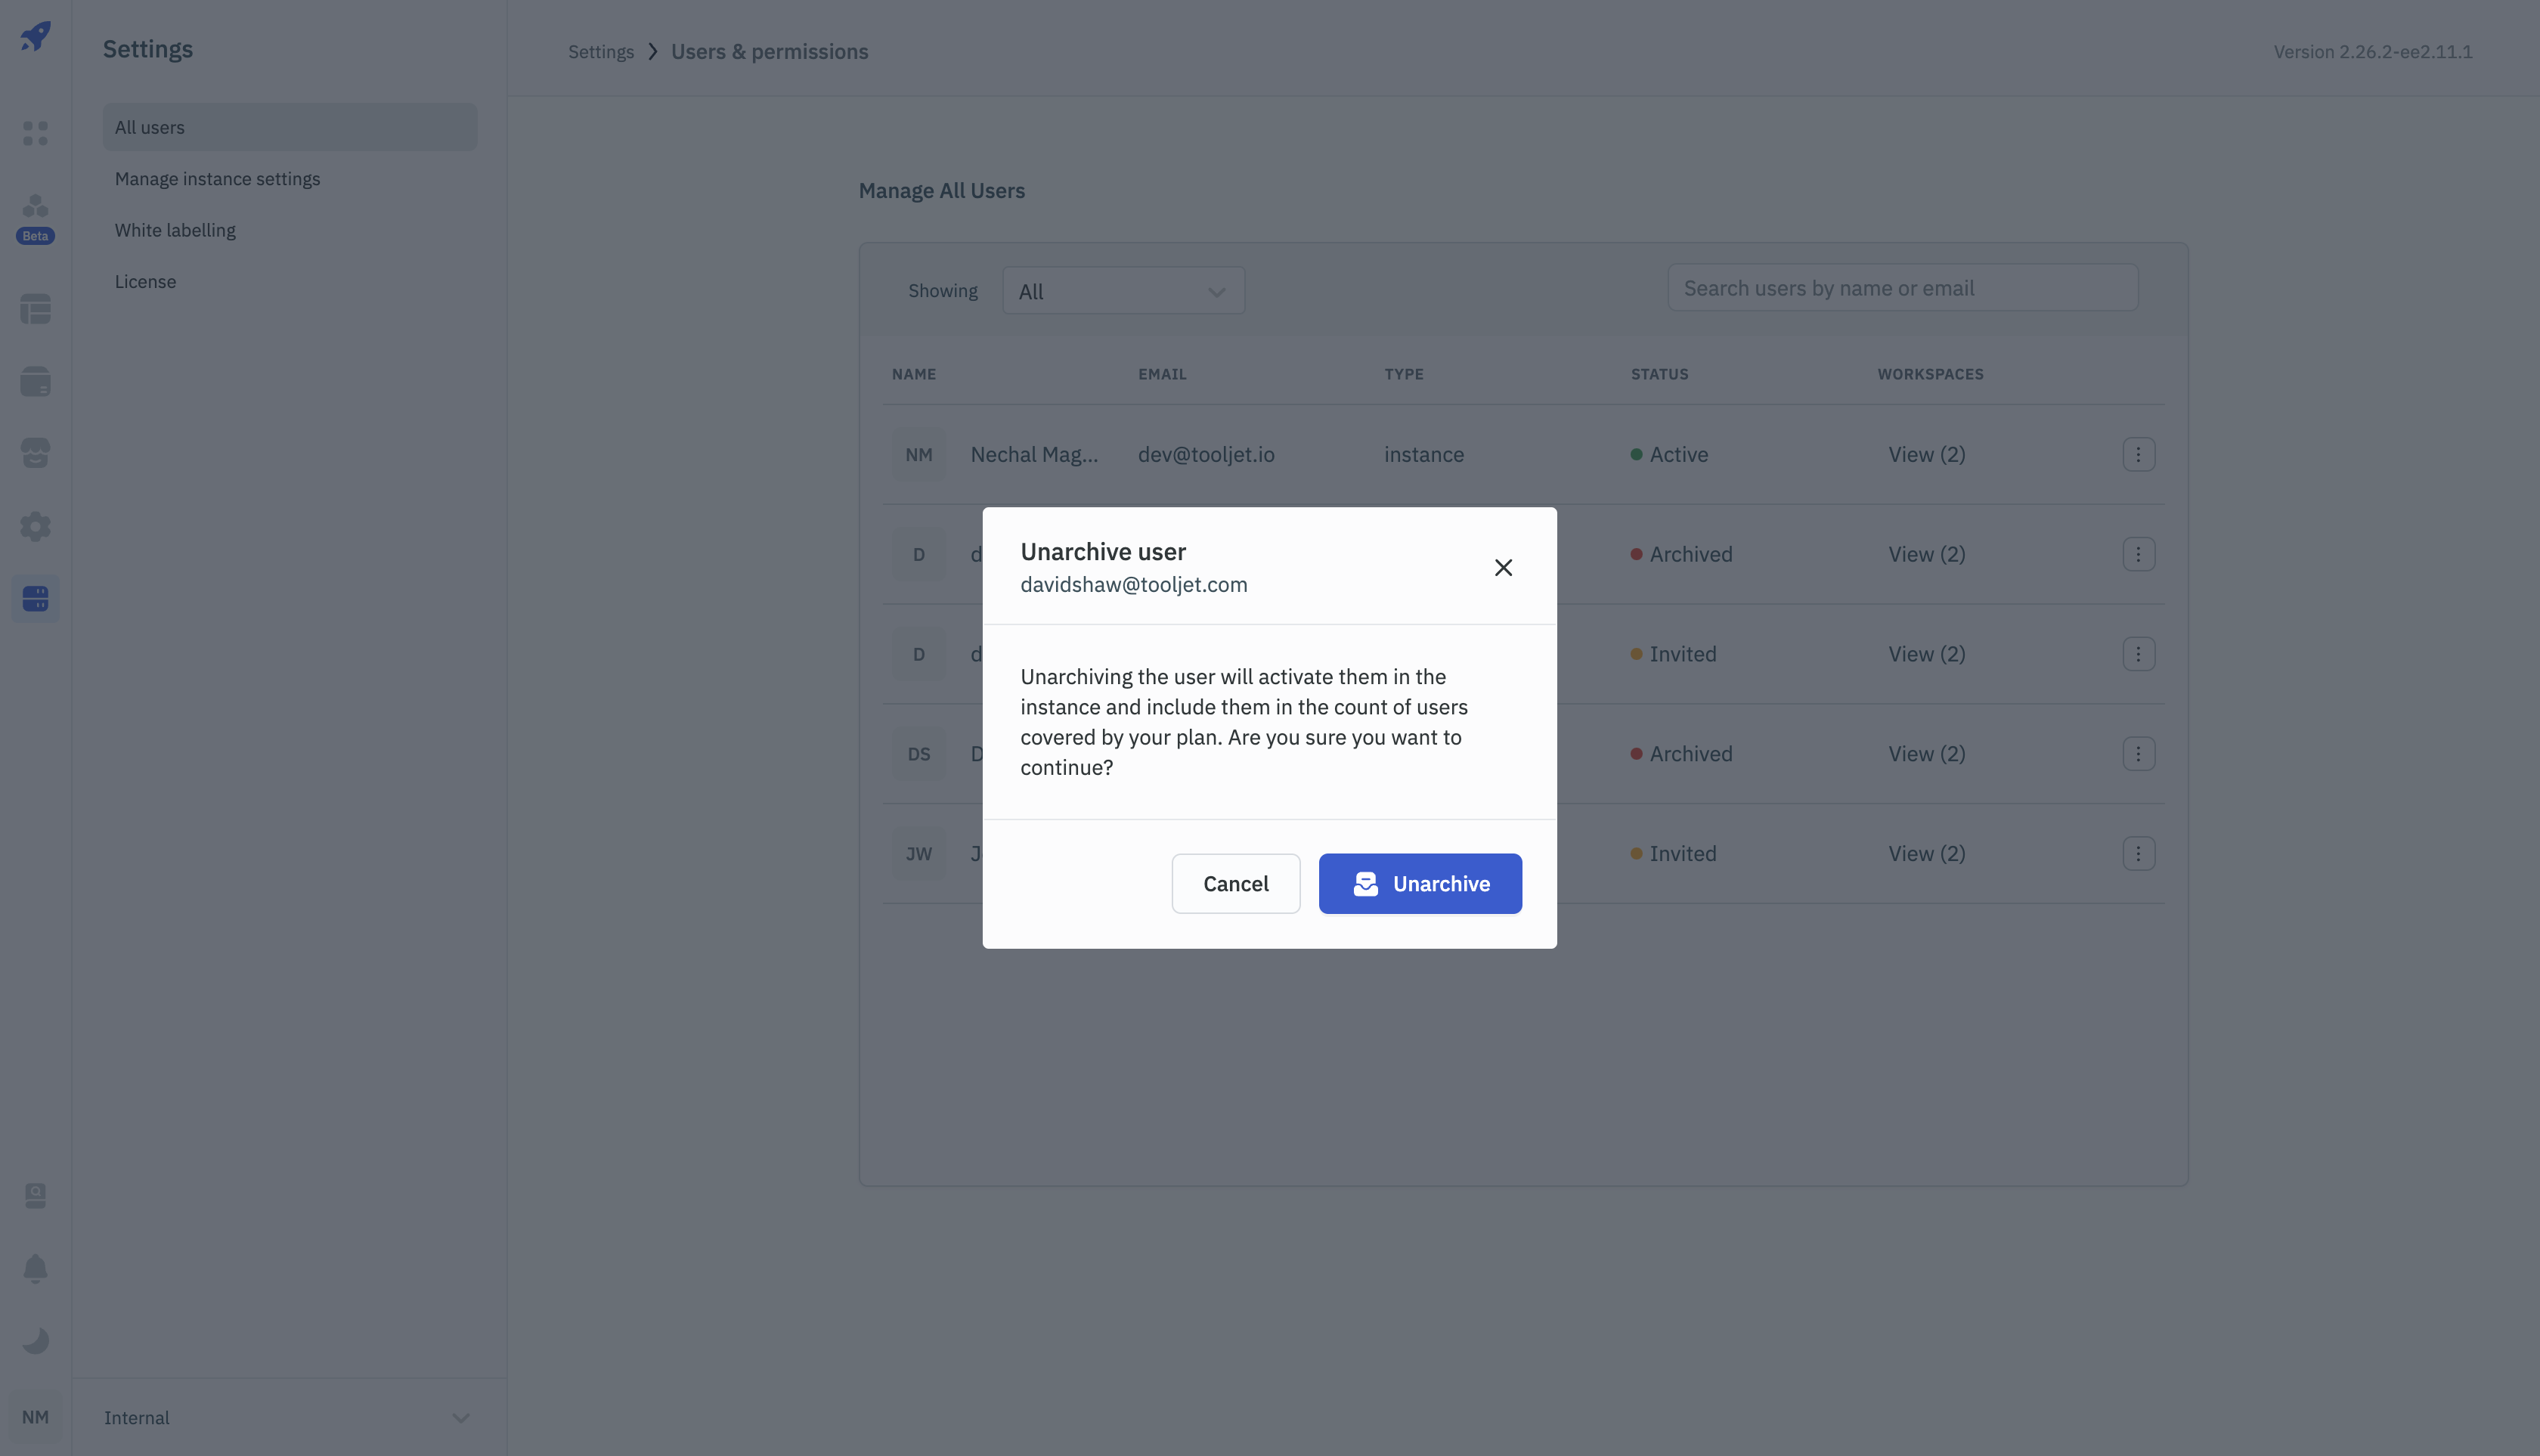
To archive a user, go to the All Users settings, click on the kebab menu next to the user that is to be archived and select Archive option. Once the user is archived, the status will change from Active to Archived. The user will not be able to login to any workspace in the instance.
Unarchiving a user from All Users settings will unarchive the user from the instance and not at workspace level.
Info: The user will be unarchived from instance level automatically if a workspace admin unarchives the user from their workspace.
Reset Password of any User
Super Admins can reset the password of any user from the All Users settings. To reset the password, click on the kebab menu next to the user and select Reset Password option. A pop-up will appear asking either to auto-generate a password or to enter a new password.
Edit User Details
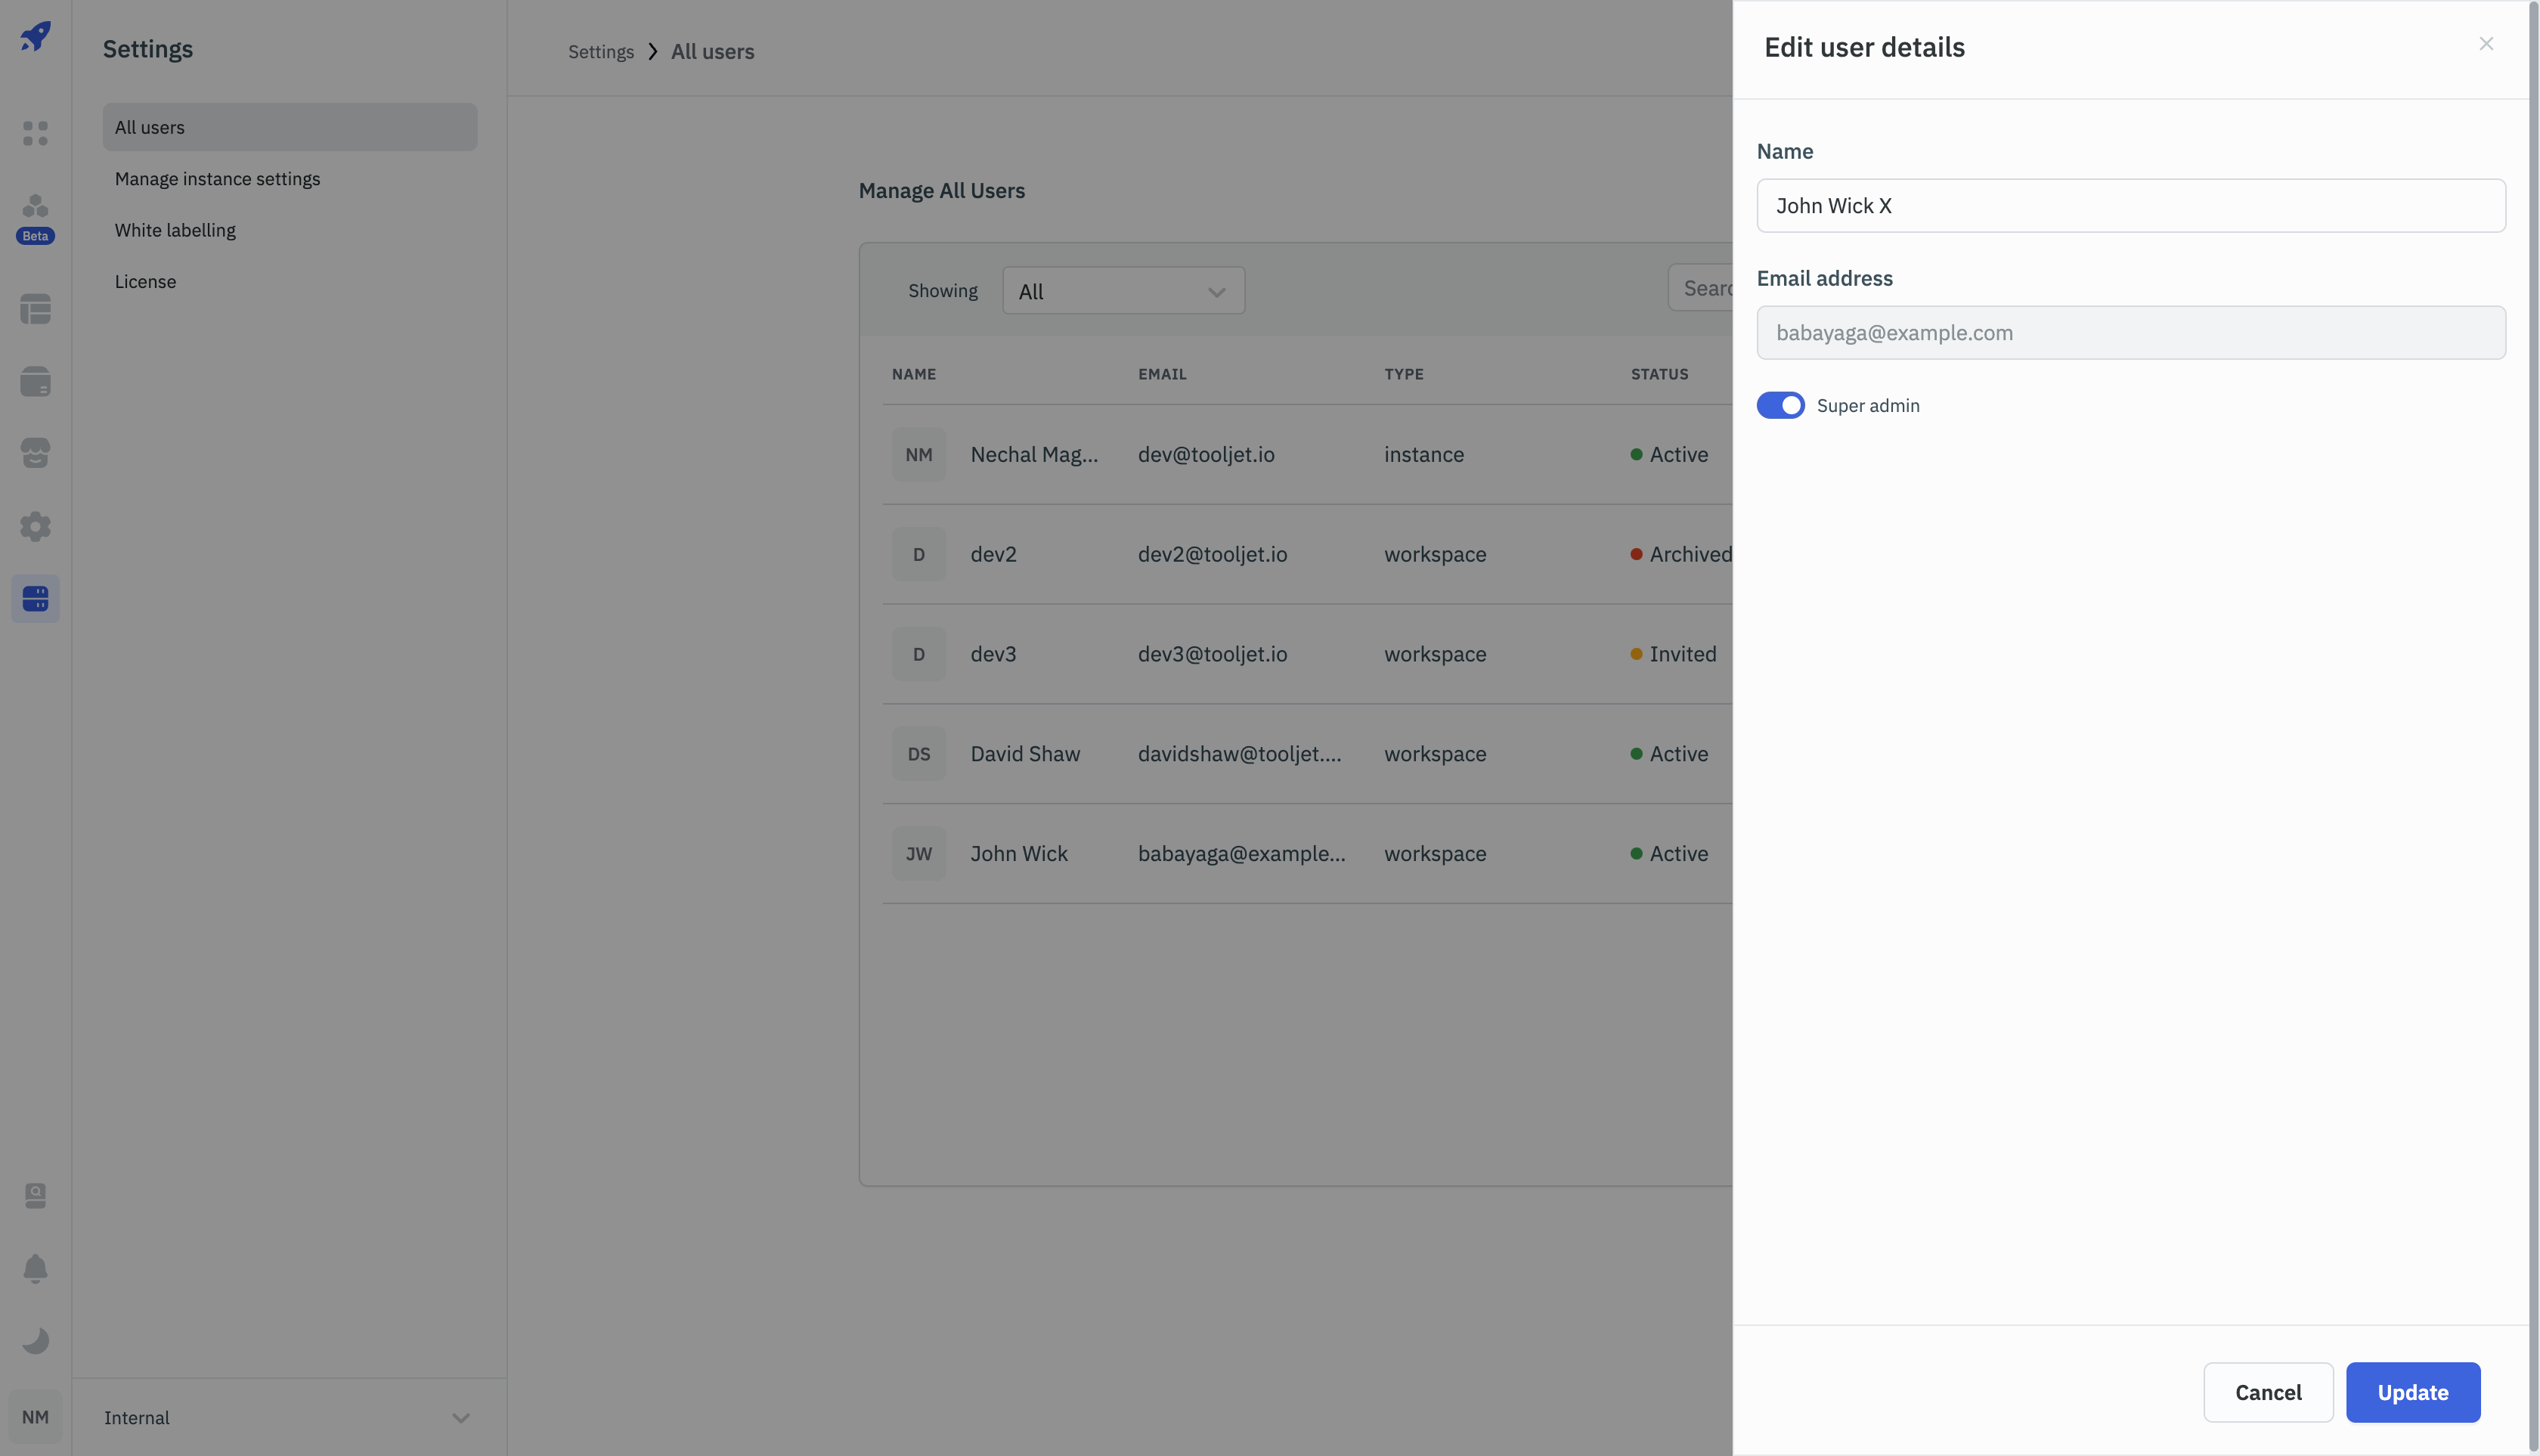
Super Admins can edit the details of any user from the All Users settings. To edit the details, click on the kebab menu next to the user and select Edit user details option.
Edit name
On selecting the Edit user details option, a drawer will open from the right. Super Admins can edit the name of the user from this drawer. Once the changes are made, click on the Update button.
Make the user Super Admin
From the Edit user details drawer, Super Admins can make any user as Super Admin or remove any Super Admin from the All Users settings. To make a user Super Admin, toggle on the Super Admin radio button. The user will become Super Admin and the Type column will update from Workspace to Instance.
All Workspaces
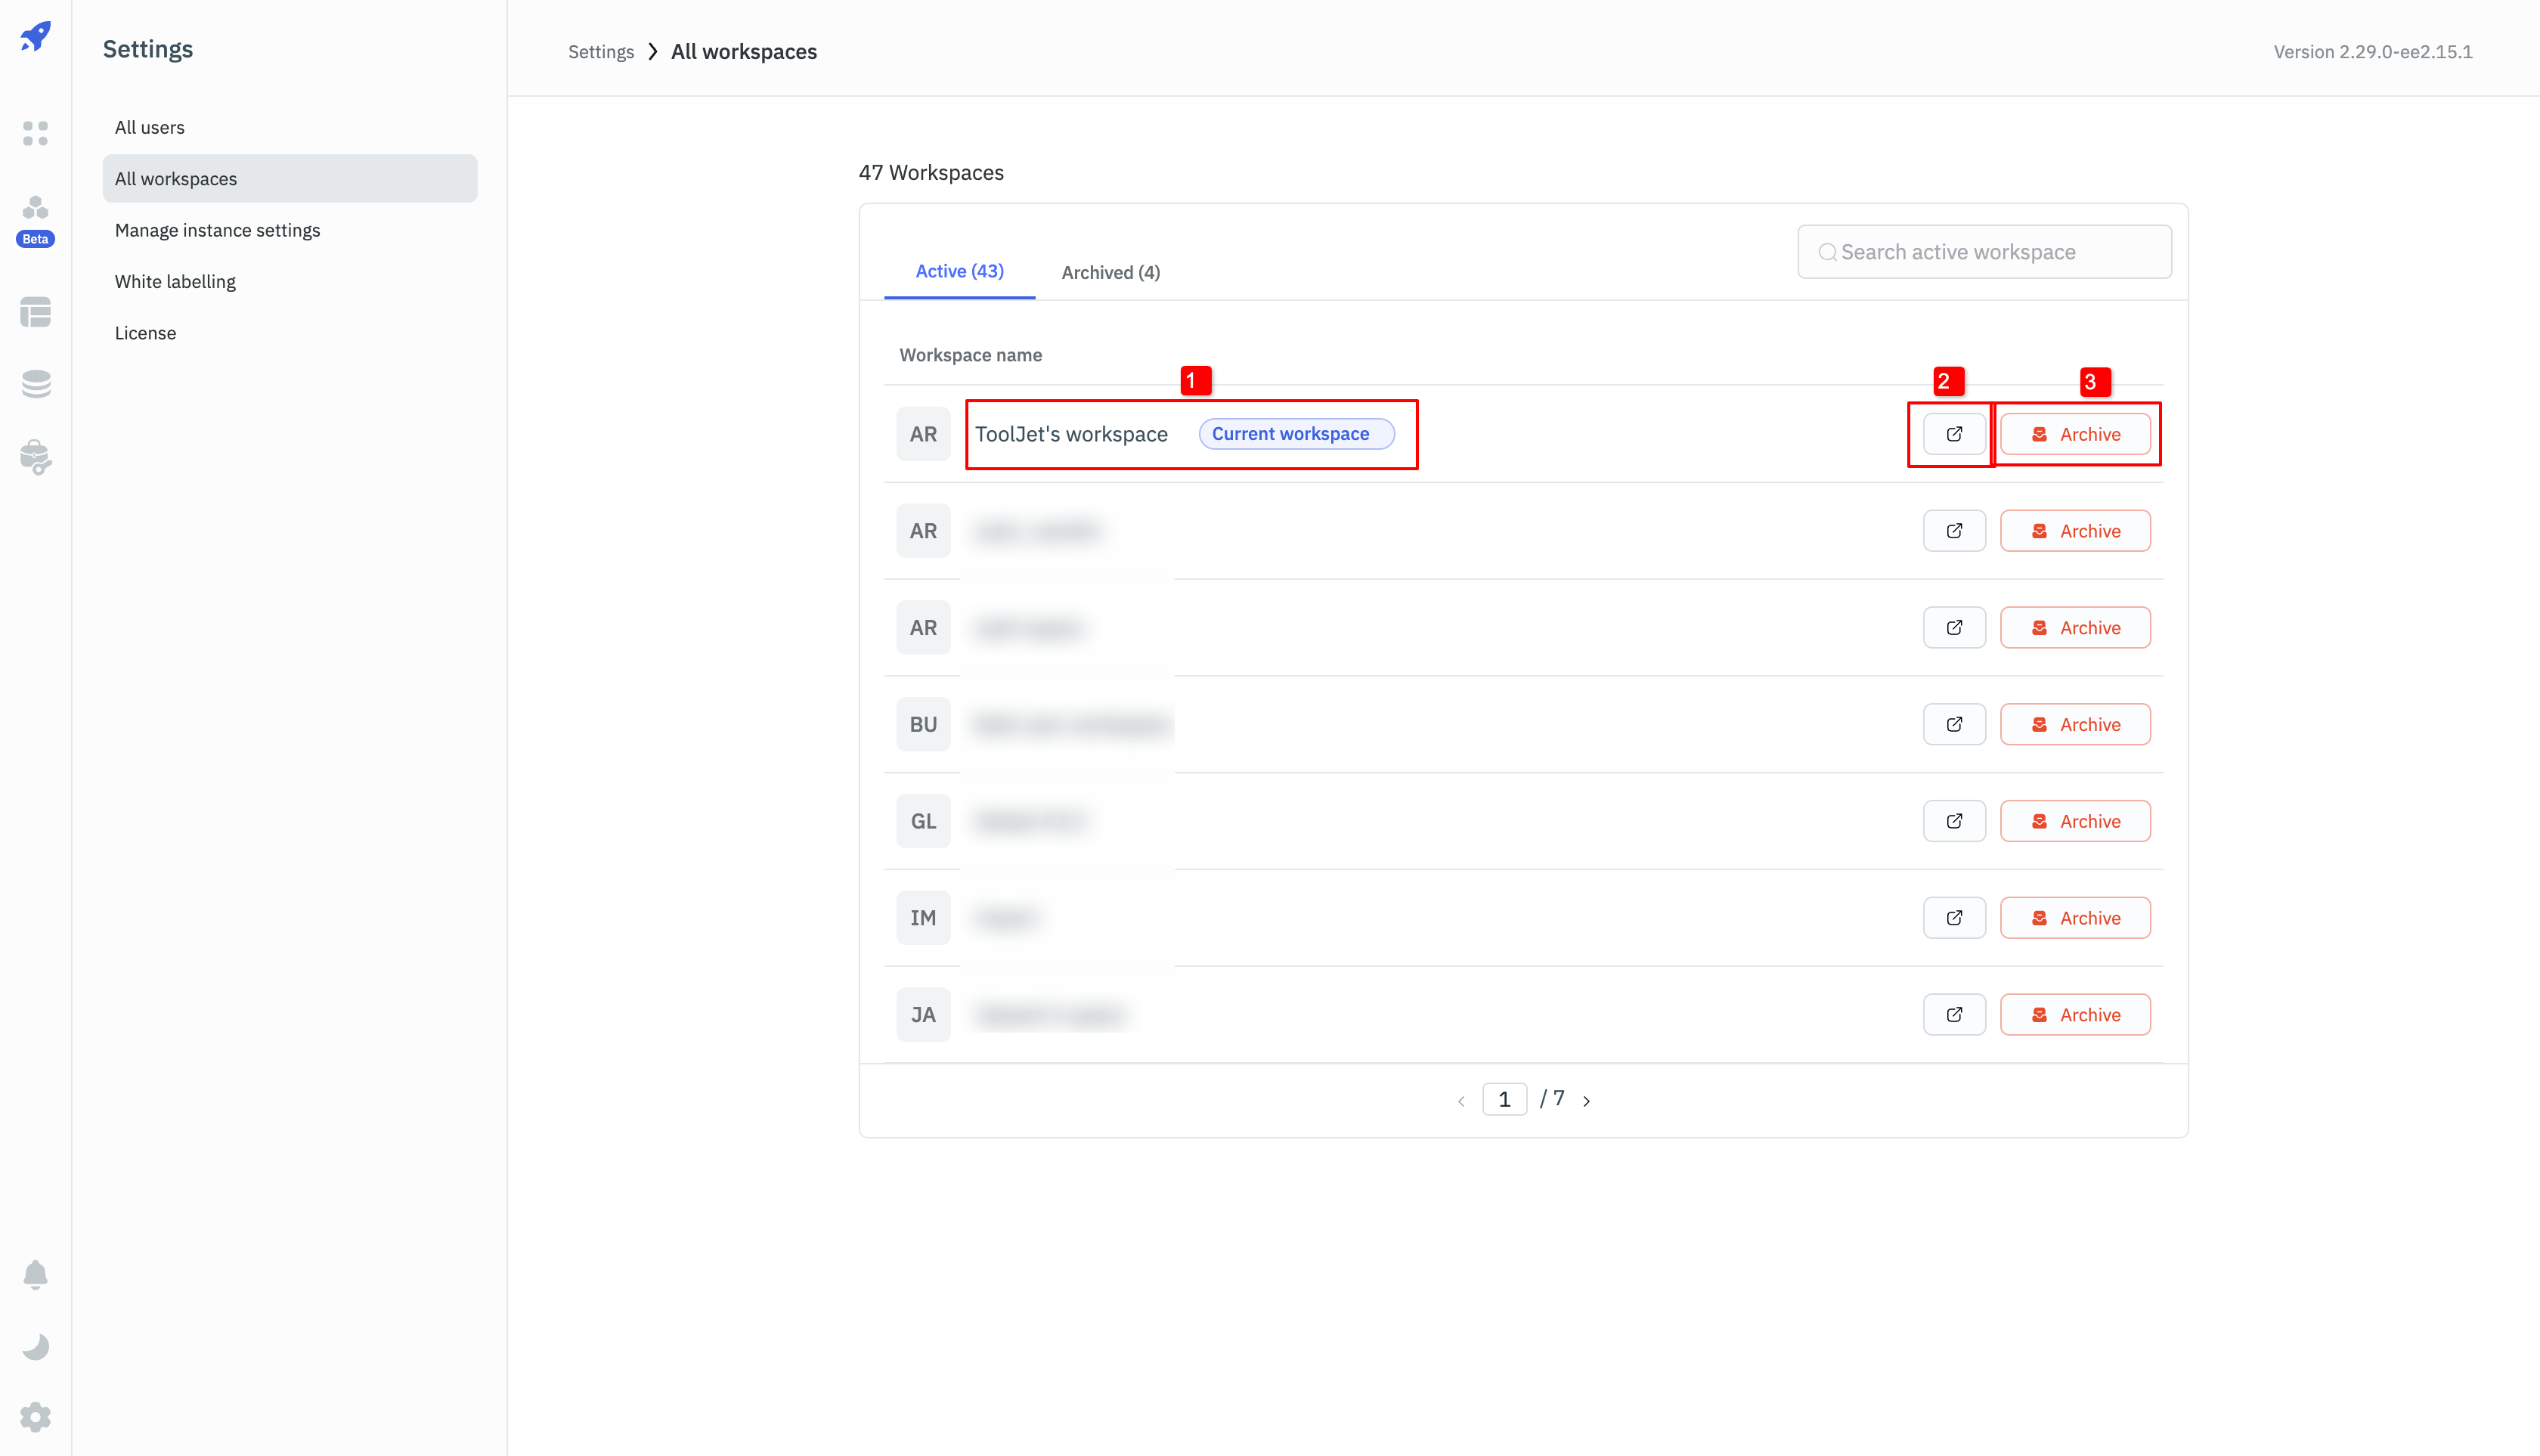
The All Workspaces tab provides a comprehensive view of all workspaces within the ToolJet instance. Super Admins can use this functionality to monitor and manage workspaces collectively, ensuring efficient administration and organization-wide oversight.
Super Admins have the authority to archive or unarchive workspaces of any user in the instance as needed. Archiving a workspace essentially sets it to an inactive state, removing it from active use. Conversely, unarchiving reactivates a previously archived workspace, making it accessible once again.
Current Workspace
The Current Workspace label will be displayed next to the workspace that the Super Admin has currently opened. If the Super Admin archives the current workspace, they will be prompted to switch to another active workspace to ensure continuous accessibility.
Open Active Workspaces
In the list of active workspaces, there is an option to open the workspace directly. This feature helps superadmins to quickly navigate to the workspace on the new tab of the browser and manage the workspace.
Archive Workspaces
The Archive button on the right of the workspace name allows Super Admins to archive the workspace. Once archived, the workspace will be moved to the Archived Workspaces section.
Impact:
- The apps on the archived workspace won't be accessable through the URL
- Users will be logged out if they don't have access to any active workspace
Archived Workspaces
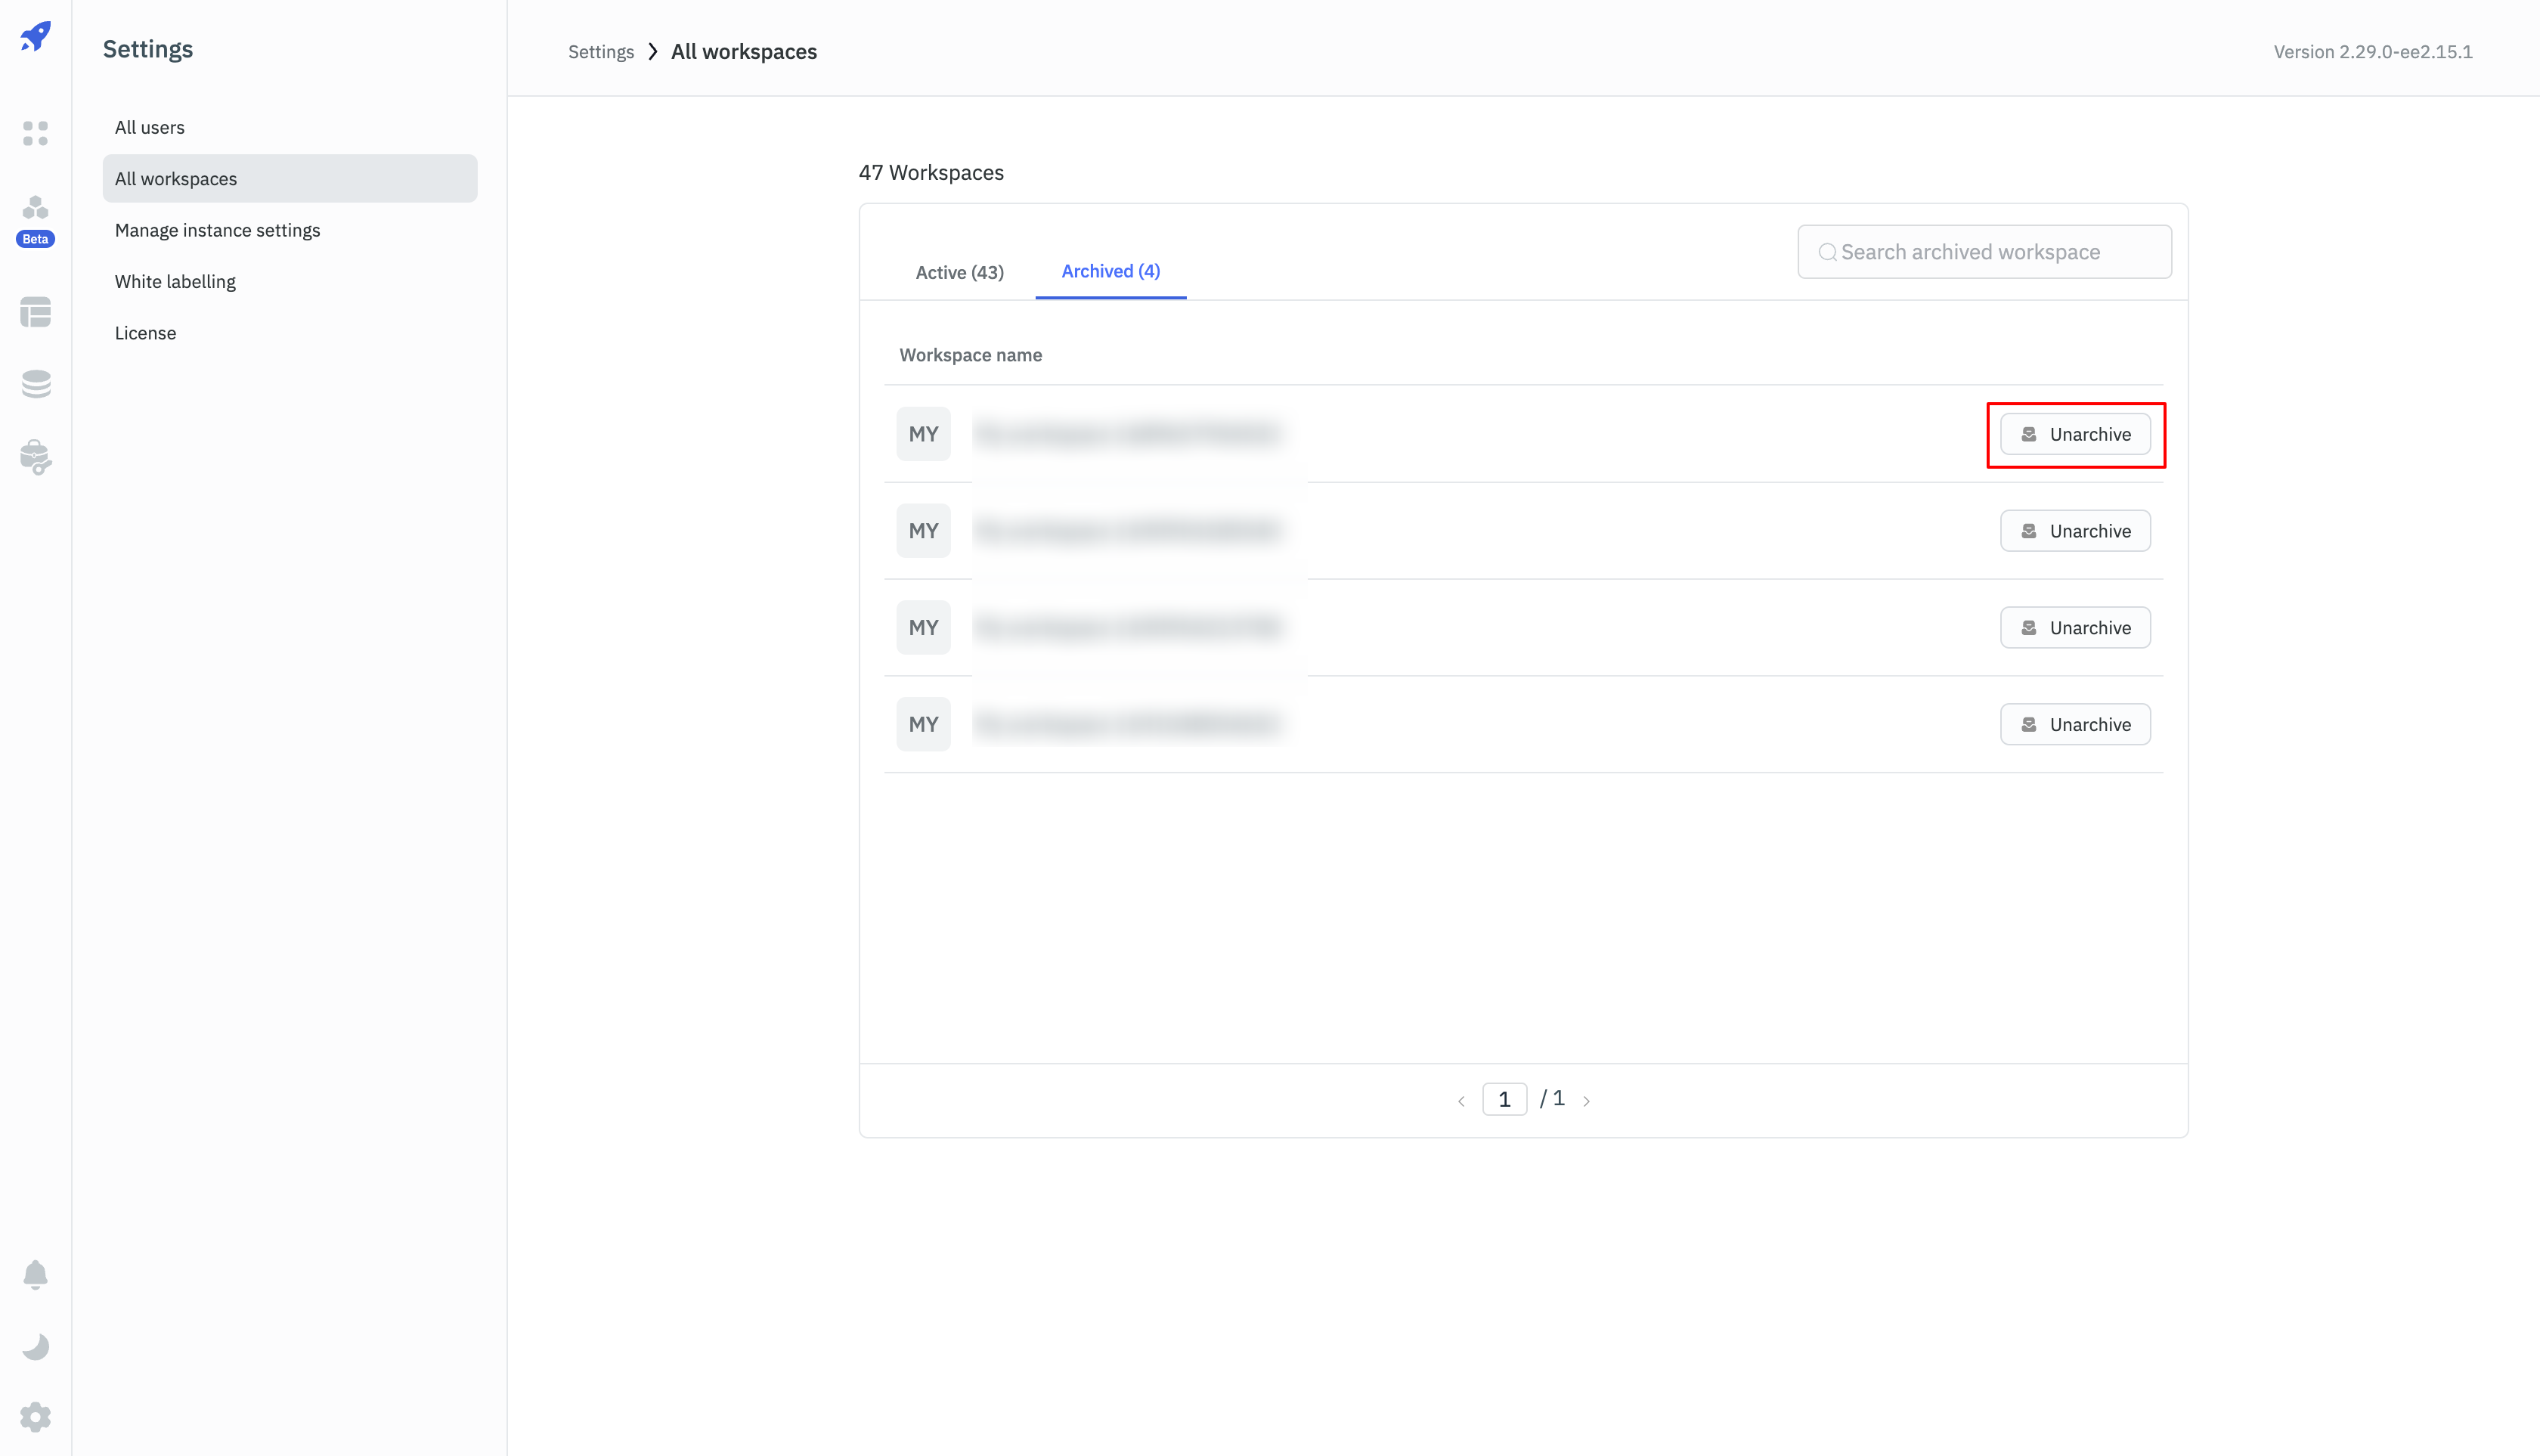
The Archived section displays a list of all archived workspaces. Super Admins can unarchive any workspace from this section by clicking the Unarchive button.
Manage Instance Settings

Restrict Creation of Personal Workspace of Users
When a user joins a workspace, they are provided with their own personal workspace and option to create new workspaces.
Super Admins can control this behavior from the Manage Settings page, they can toggle off the option to Allow personal workspace. Now whenever a user joins a workspace they won't be provided a personal workspace nor they will be able to create a new workspace in the instance.
Enable Multiplayer Editing
Super Admins can enable multiplayer editing from the Manage Settings page. Once enabled, users will be able to edit the same app simultaneously resulting in real-time collaboration.
Comments
Super Admins can enable comments from the Manage Settings page. Once enabled, users will be able to collaborate by adding comments anywhere on the canvas.
White Labelling
This feature allows you to customize the ToolJet instance with your own branding. You can change the logo, favicon, and the name of the instance.
Check out the White labelling page for more details.
Instance Login
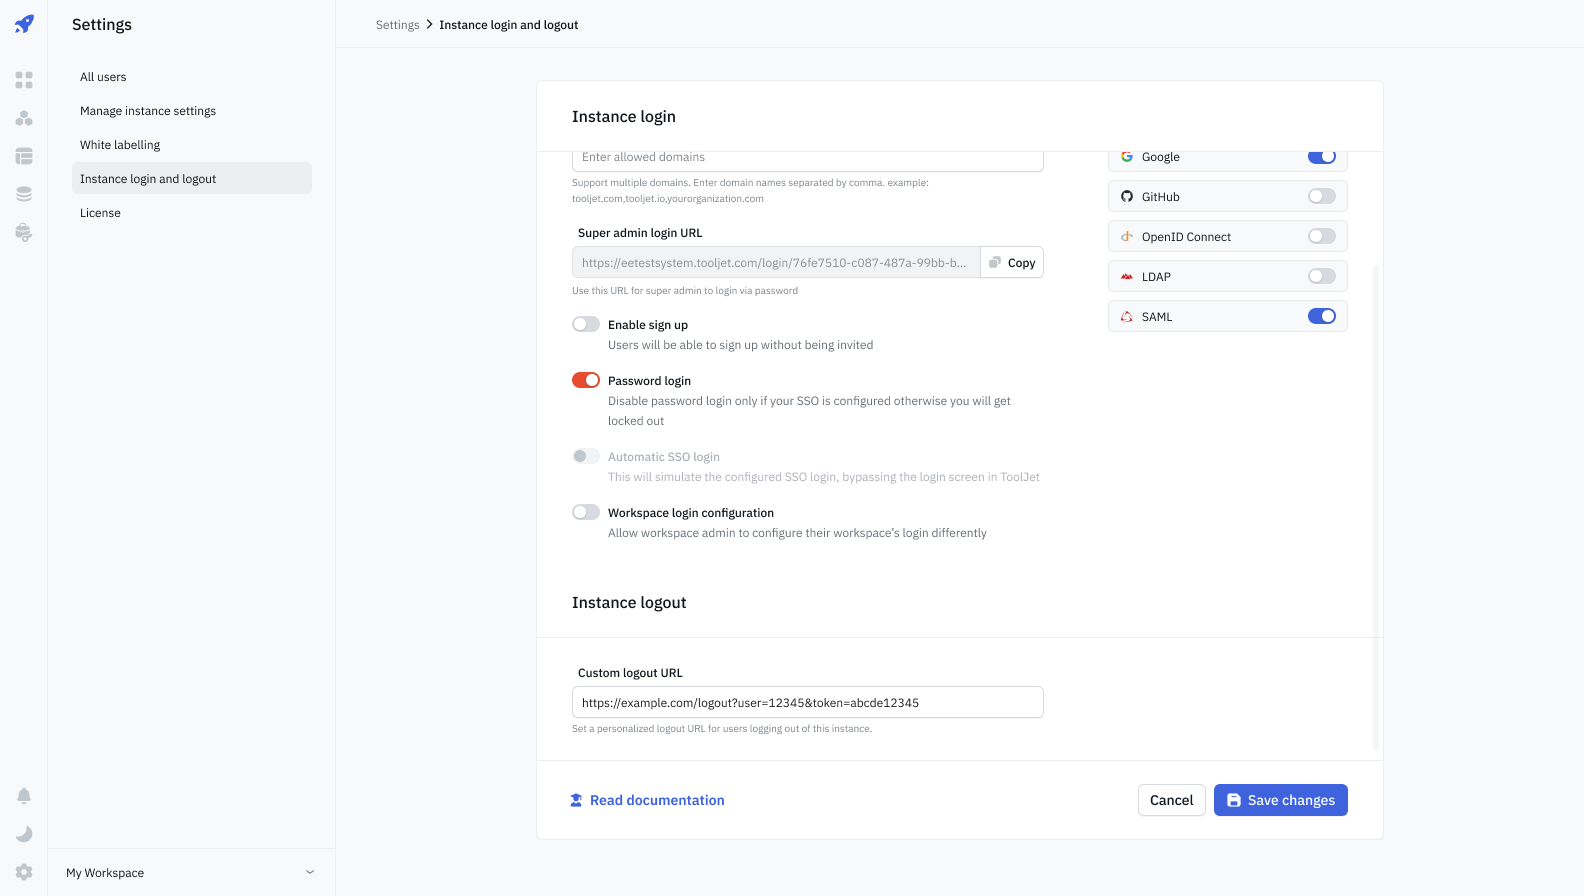
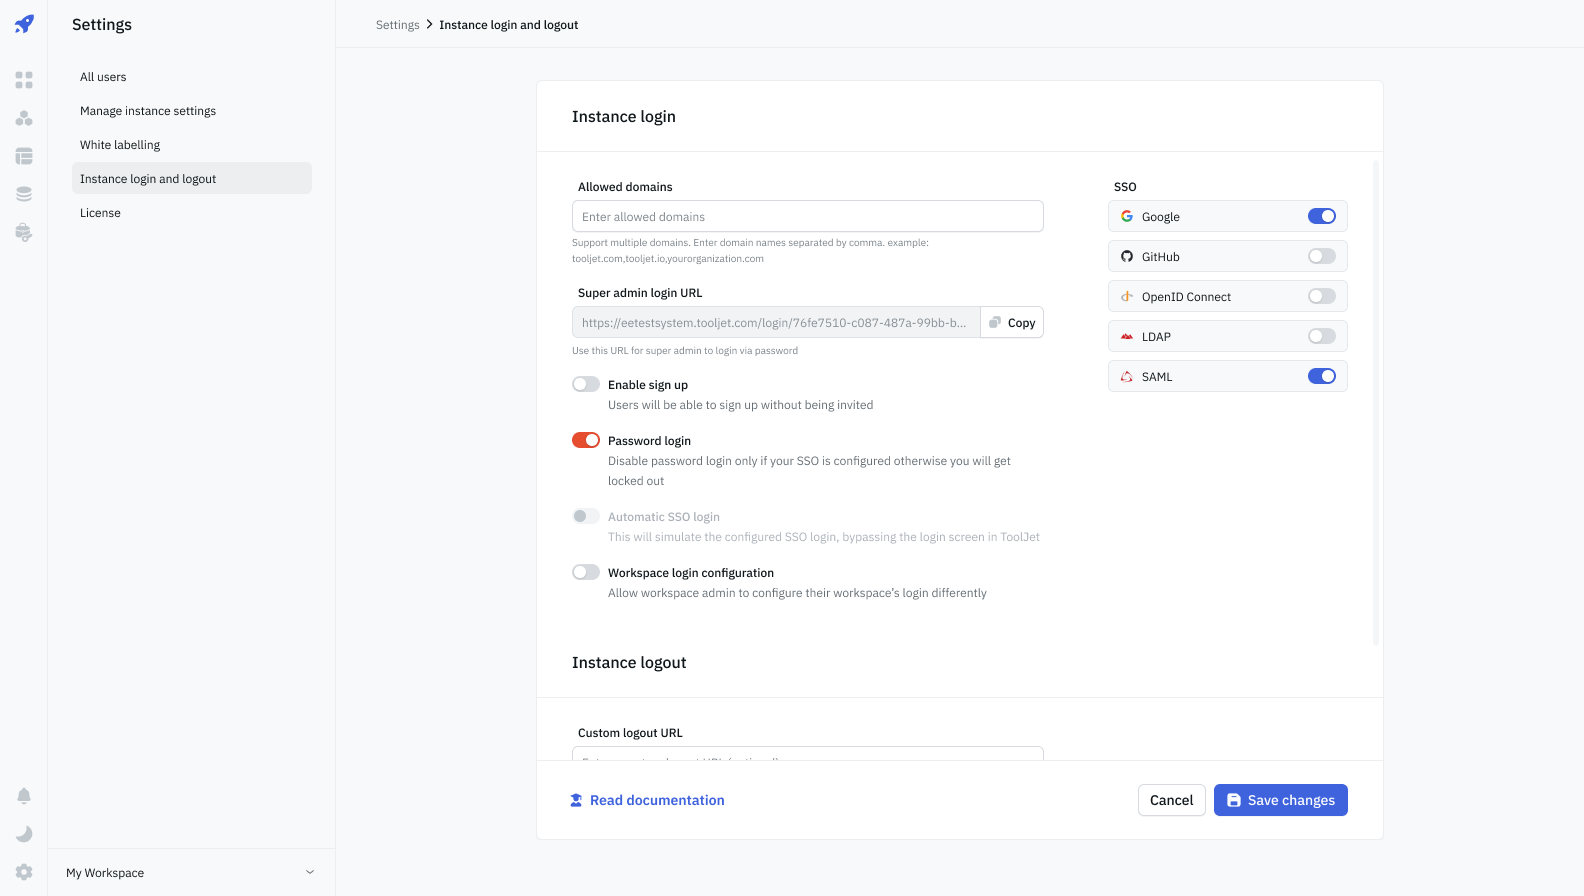
Instance login configuration at the Settings level allows super admins to set up and manage the default login and logout behavior for all workspaces within the instance. This ensures a standardized login experience unless individual workspace admins choose to configure a different method for their specific workspace.
Access and Permissions
Only super admins have the authority to configure Instance login settings. This ensures centralized control over the default login method across the entire instance.
Super Admin URL
This URL serves as a fail-safe in scenarios where password login is disabled, SSO is not configured, or a paid plan expires. Importantly, this URL exclusively supports password login and is accessible only by the super admin, preventing any unauthorized access.
The default URL for super admin login is https://<domain>/login/super-admin. This URL can be accessed by the super admin to log in to the instance and manage the settings.
Enable sign-up
The "Enable Sign Up" option allows users to sign up without being invited. It is important to note that this feature includes both password login and SSO, providing a seamless onboarding experience for users.
Password login
Super admins can enable or disable password login for the entire instance. This setting ensures that all workspaces within the instance adhere to the same login method, unless individual workspace admins choose to configure a different method for their specific workspace.
Enable Workspace Configuration
Turning off this option restricts workspace admins from configuring the login method for their workspace. This configuration hides the Workspace Login option from the workspace settings tab.
Custom Logout URL
Super admins can now set a Custom Logout URL. This URL redirects users to a specific page when they log out of the ToolJet instance.
If the URL provided is invalid, ToolJet will redirect users to the default logout page.
