Components: Overview
Components are used to build the UI of the applications. They can be dragged onto the canvas from the Component Library and can be modified from the Properties Panel without needing to write any code. Event Handlers in Components allow end users to trigger queries and other application events to perform the Actions.
Adding components
Components can be dragged and dropped from the Component Library(from the right side on app builder) on to the canvas. Components can be moved by simply click and hold, and can be resized from edges or borders.
Select multiple components
For moving the multiple components at once, simply shift+click, to select multiple components. Once grouped, the components can be moved on the canvas while maintaining their relative positions.
You can also create a selection triangle and move multiple components together by click and drag
You can also use many other Keyboard Shortcuts in ToolJet to copy, cut, paste components to the canvas.
Component properties
Each Component can be modified and styled from the Properties Panel such as the data field, a toggle for disabling the component, or stylings like a background color. Properties can be modified directly or programmatically by using Bindings, which enables you to write JavaScript code.
Component Event Handlers
Event Handlers can be found in the Component's Property Panel or in the Advanced section of the Query. Event handlers can be used to trigger Actions such as executing the queries, perform Component Specific Actions(CSA) or for setting a variable.
Event handlers for components have the following properties:
-
Event: Each component has its own set of exclusive events. You can refer to the component reference to find the specific events available for each component. These events are triggered by user interactions or other actions within the application.
-
Action: Actions are the operations that can be performed when an event is triggered. There is a comprehensive list of available actions, which can be found in the actions reference documentation. In addition to general actions, each component may also have its own set of Component Specific Actions (CSA) that are specific to that particular component. The CSA can be found in the respective component reference.
-
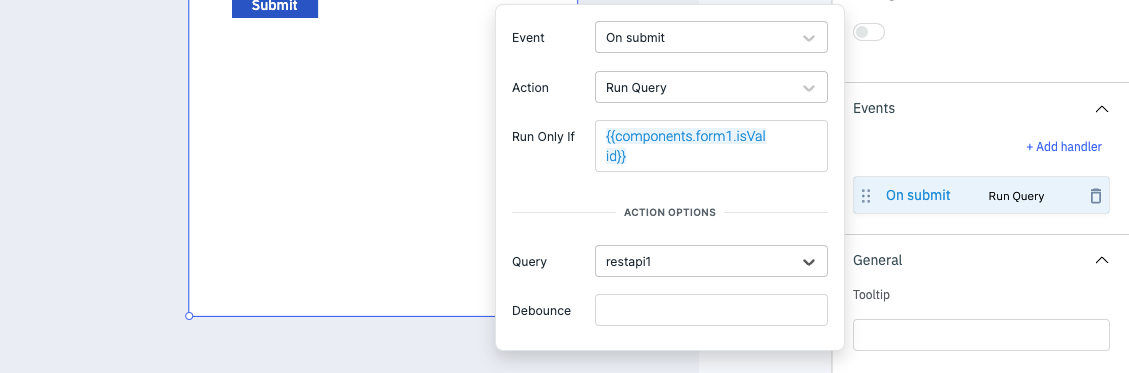
Run Only If: The "Run Only If" property allows you to define a condition that must be satisfied before the event handler's action is executed. By specifying a condition, you can control the flow of execution and ensure that the action is only performed when the condition is met.
Using Run only if
With this option in Event Handlers, users can specify a condition that must be met before the event handler's action is executed. This allows for more fine-grained control over when certain actions should be triggered in response to component events.
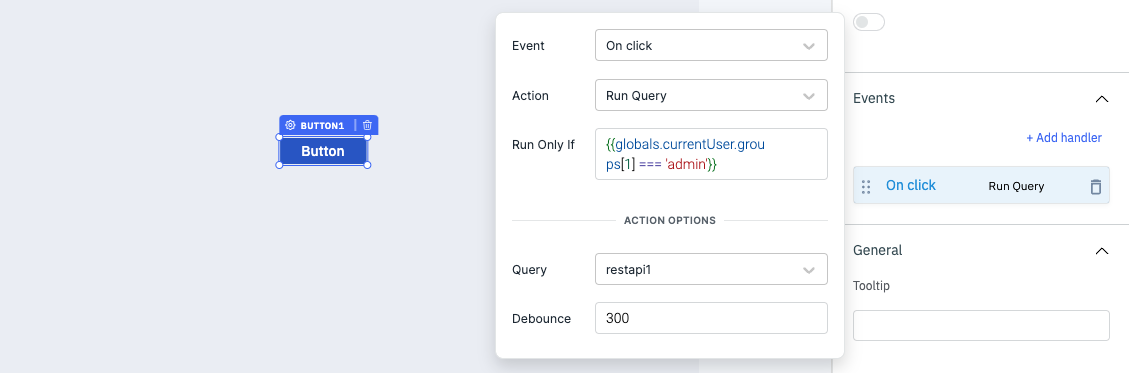
For example, let's consider a button component with an OnClick event handler. By specifying a "Run Only If" condition for the event handler, users can control when the associated action should be executed. Here's an example:
Button Component
  └─ OnClick Event Handler: runQuery()
                      │
                      ├─ Run Only If: expression/condition
In this case, the action runQuery() will only be triggered if the expression/condition is truthy. The expression/condition can utilize the values dynamically from other parts of the application or exposed variables.
Example expressions:
{{globals.currentUser.groups[1] === 'admin'}} // returns true if the current user is admin

or

{{components.form1.isValid}} // isValid holds the boolean value true or false
Bindings
Bindings allow you to get dynamic data into the components. Anything inside of {{}} is evaluated as a JavaScript expression in ToolJet.
Any arbitrary JavaScript code can be written inside {{}}:
{{(function () {
        <your_javascript_code_here>
    })()
}}
or
{{components.xyz.data.key === Sun ?? true : false}}
Check out the How-to guides like changing color of text in table column, Enable/Disable a component using JavaScript, and more.