Use S3 signed URL to upload documents
In this how-to guide, you'll learn to upload documents to S3 buckets using the S3 signed URL from a ToolJet application.
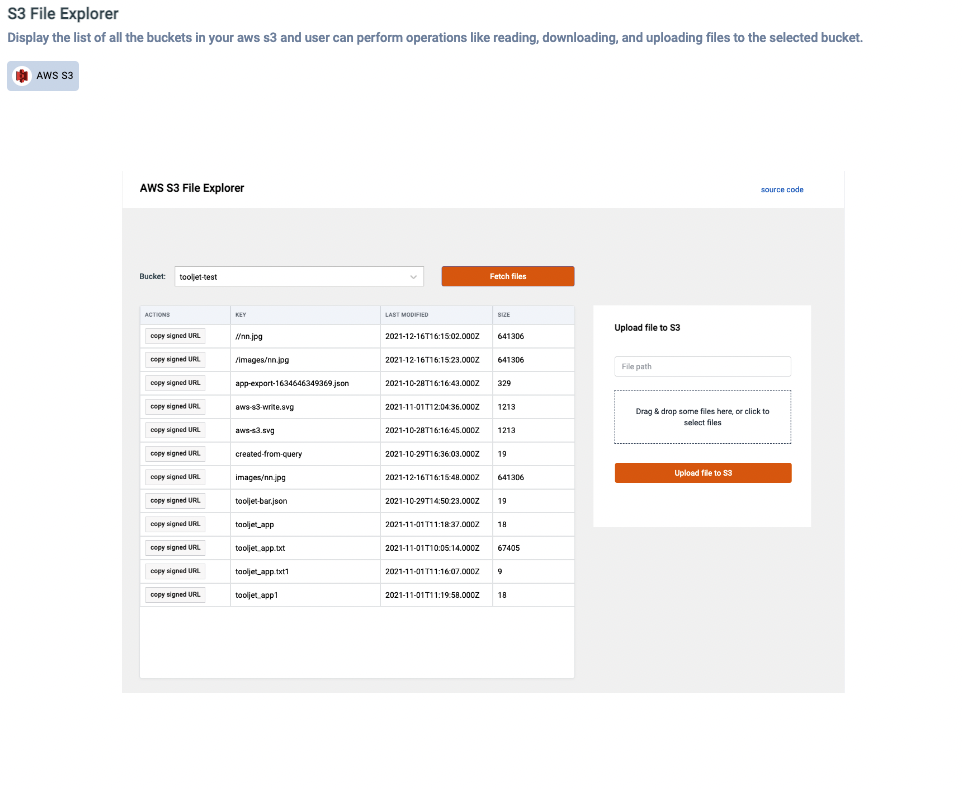
For this guide, We are going to use one of the existing templates on ToolJet: S3 File explorer
On ToolJet Dashboard, Click on the down arrow on the right of the New App button, from the dropdown choose the Choose from template option.
-
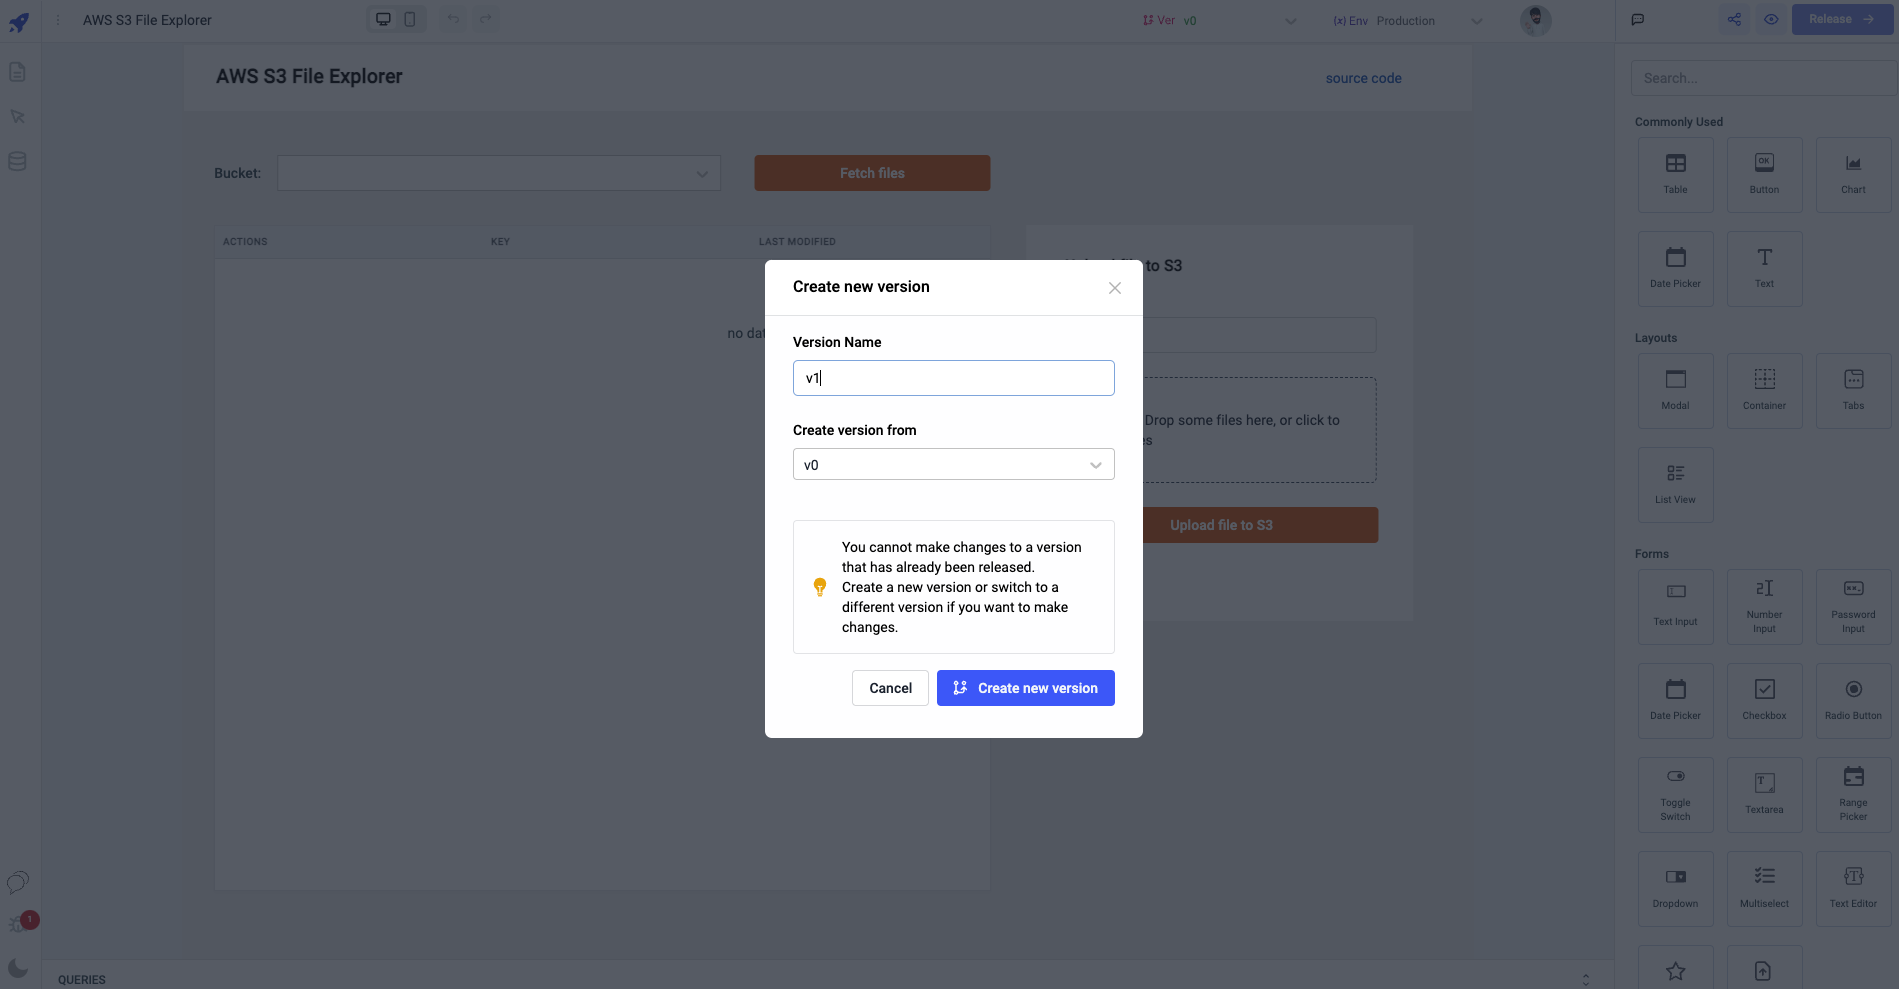
Once you've created a new app using the template, you'll be prompted to create a new version of the existing version. After creating a new version, you'll be able to make changes in the app.
-
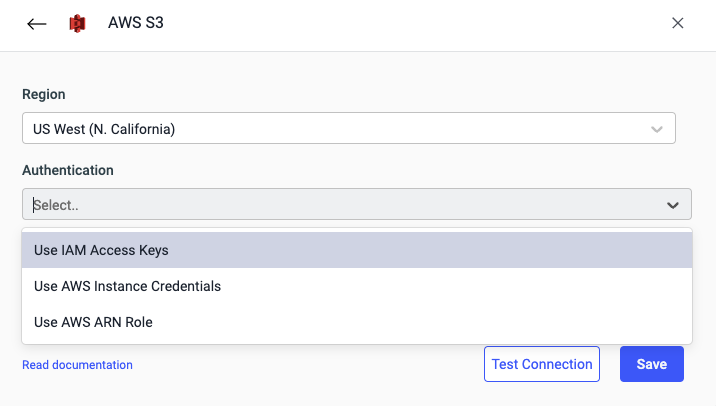
Go to the datasource manager on the left-sidebar, you'll find that the AWS S3 datasource is already added. All you need to do is update the datasource credentials.
tipCheck the AWS S3 datasource reference to learn more about connnection and choosing your preferred authentication method.
-
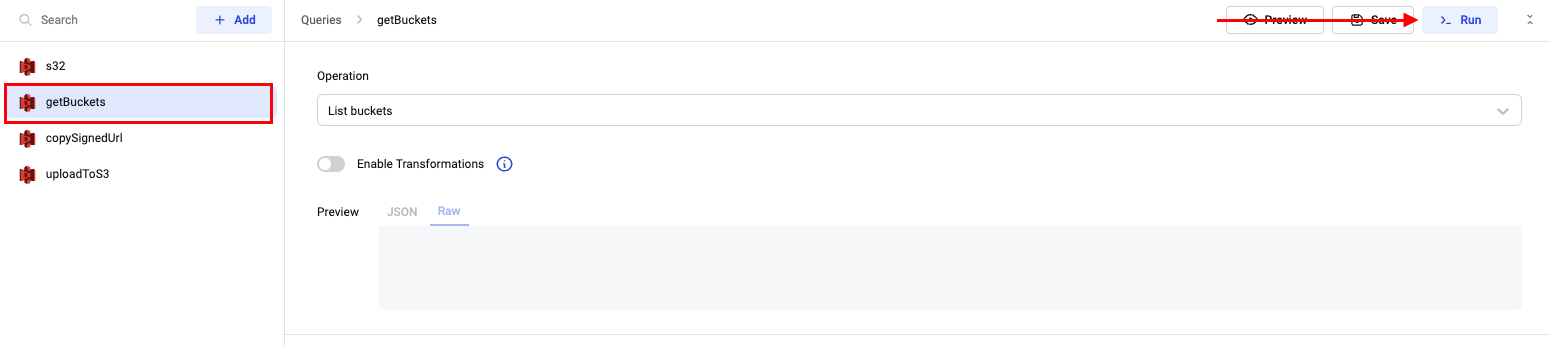
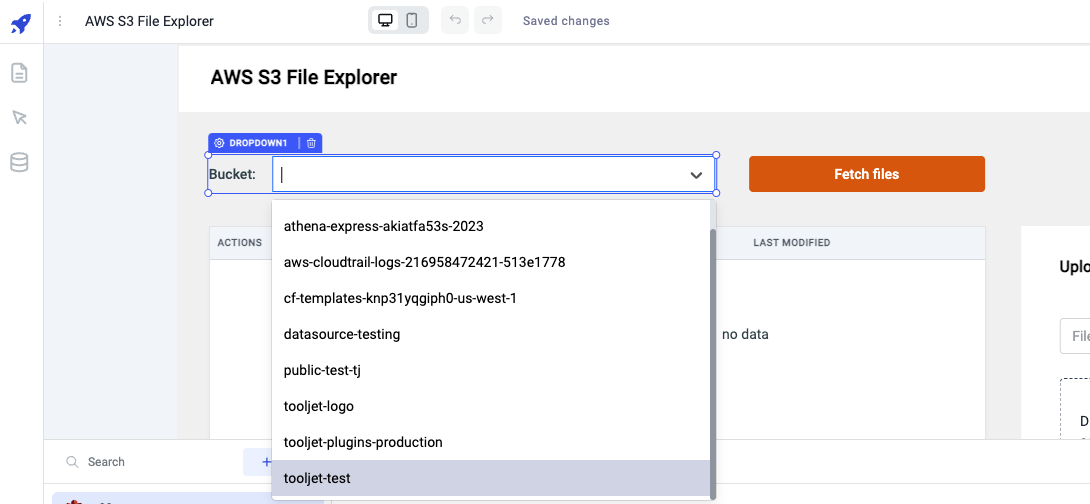
Once the datasource is connected successfully, go to the query manager and Run the getBuckets query. The operation selected in the getBuckets query is List Buckets which will fetch an array of all the buckets.
-
Running the getBuckets query will load all the buckets in the dropdown in the app.
-
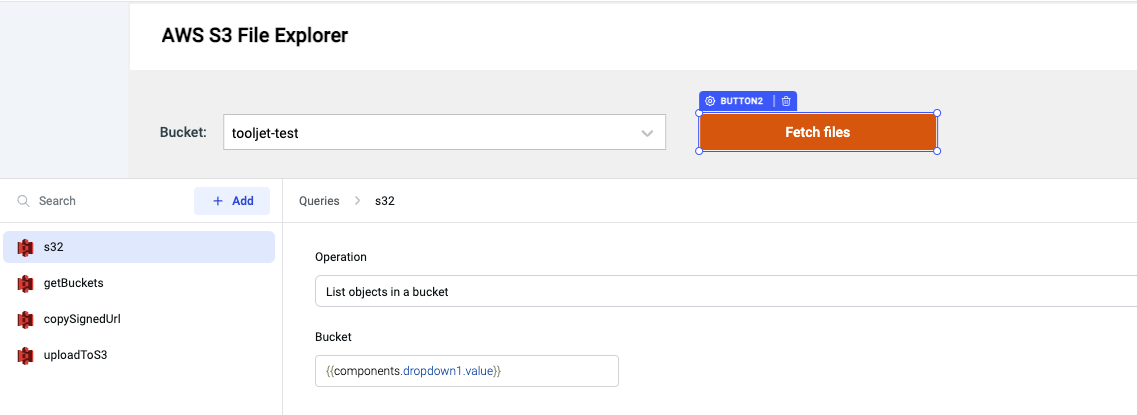
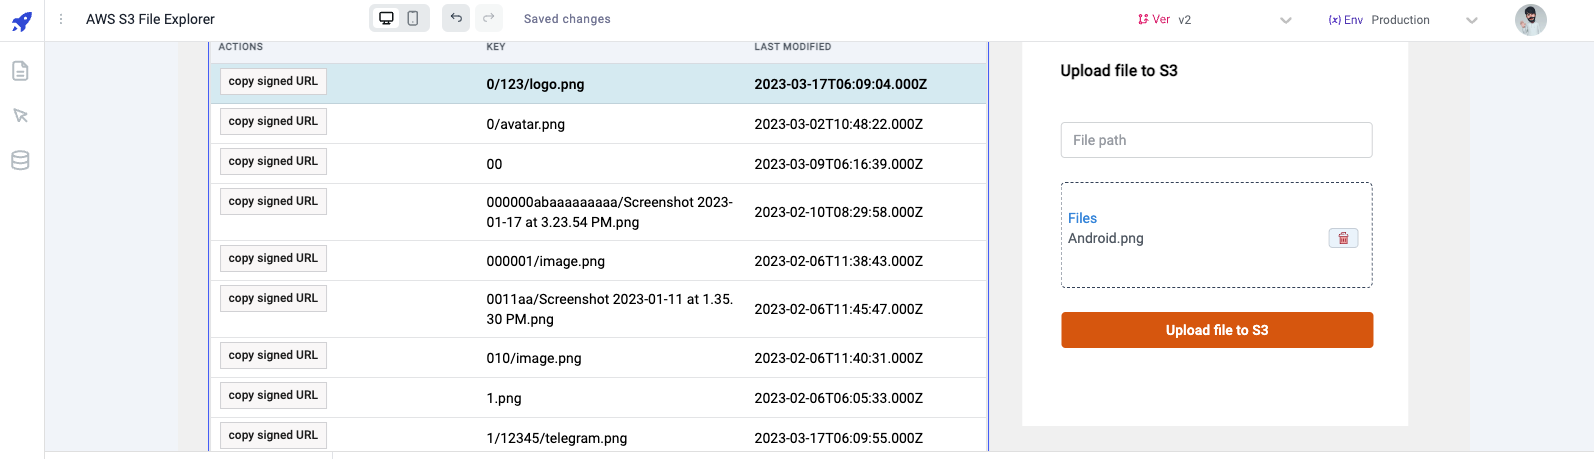
Select a bucket from the dropdown and click on the Fetch files button to list all the files from the selected bucket on the table. The Fetch files button has the event handler added that triggers the s32 query, the s32 query uses the List objects in a bucket operation, and the bucket field in the query gets the value dynamically from the dropdown.
-
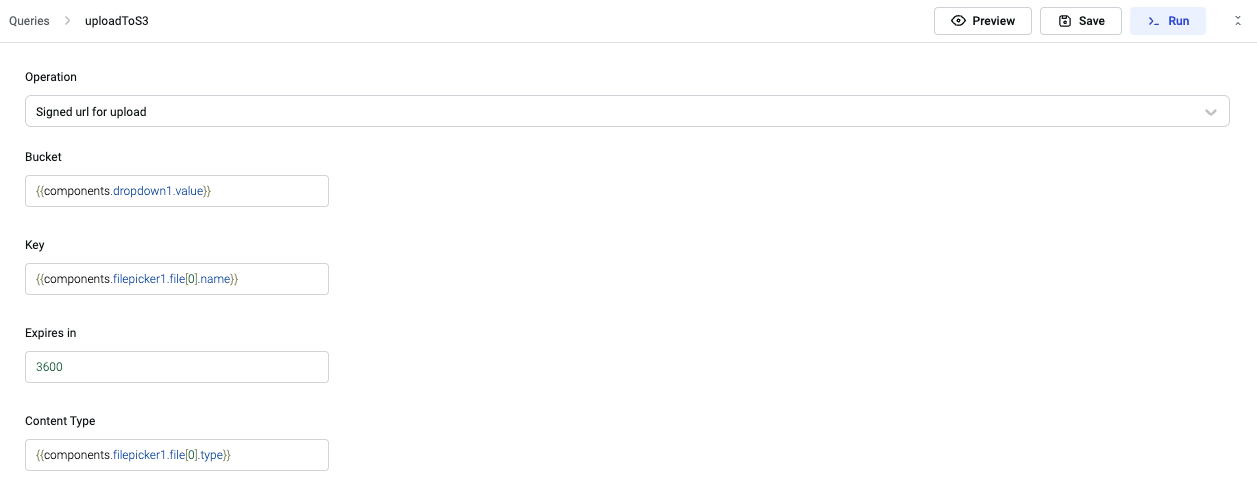
Let's go to the uploadToS3 query and update the field values:
- Operation: Signed URL for upload
- Bucket:
{{components.dropdown1.value}}this will fetch the dynamic value from the dropdown - Key:
{{components.filepicker1.file[0].name}}this will get the file name from the filepickers exposed variables - Expires in: This sets an expiration time of URL, by default its
3600seconds (1 hour) - Content Type:
{{components.filepicker1.file[0].type}}this will get the file type from the filepickers exposed variables
-
Create two RunJS queries:
- Create a runjs1 query and copy-paste the code below. This query gets the base64data from the file picker and convert the file's
base64Datato intoBLOB, and returns the file object.
const base64String = components.filepicker1.file[0].base64Data
const decodedArray = new Uint8Array(atob(base64String).split('').map(c => c.charCodeAt(0)));
const file = new Blob([decodedArray], { type: components.filepicker1.file[0].type });
const fileName = components.filepicker1.file[0].name;
const fileObj = new File([file], fileName);

return fileObj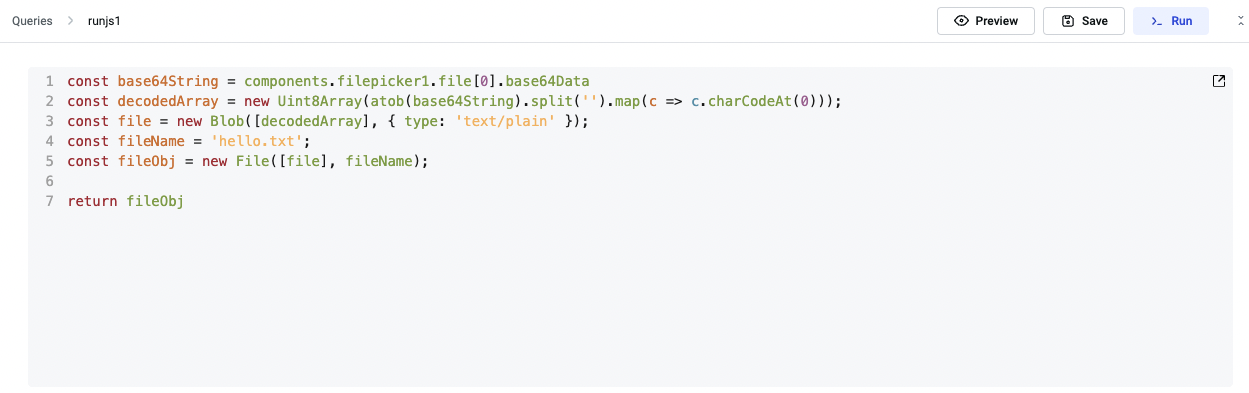
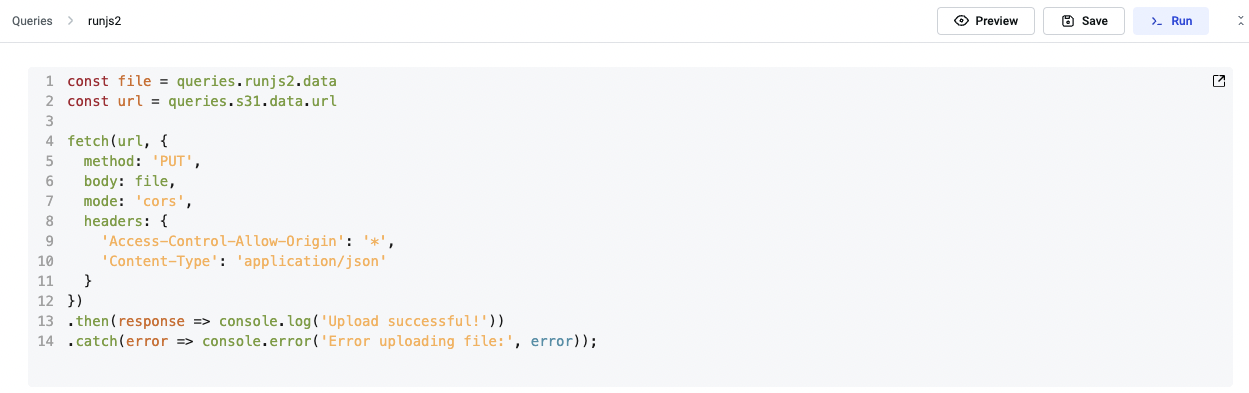
- Create another runjs2 query and copy-paste the code below. This query gets the data(file object) returned by the first runjs query, the url returned by the uploadToS3 query, and then makes PUT request.
const file = queries.runjs2.data
const url = queries.s31.data.url

fetch(url, {
  method: 'PUT',
  body: file,
  mode: 'cors',
  headers: {
    'Access-Control-Allow-Origin': '*',
    'Content-Type': 'application/json'
  }
})
.then(response => console.log('Upload successful!'))
.catch(error => console.error('Error uploading file:', error));
Enable Cross Origin Resource Sharing(CORS)- For the file to be uploaded successfully, you will need to add the CORS policies from the Permissions tab of your Bucket settings. Here's a sample CORS:
[
  {
      "AllowedHeaders": [
          "*"
      ],
      "AllowedMethods": [
          "GET",
          "PUT",
          "POST"
      ],
      "AllowedOrigins": [
          "*"
      ],
      "ExposeHeaders": []
  }
]
- Create a runjs1 query and copy-paste the code below. This query gets the base64data from the file picker and convert the file's
-
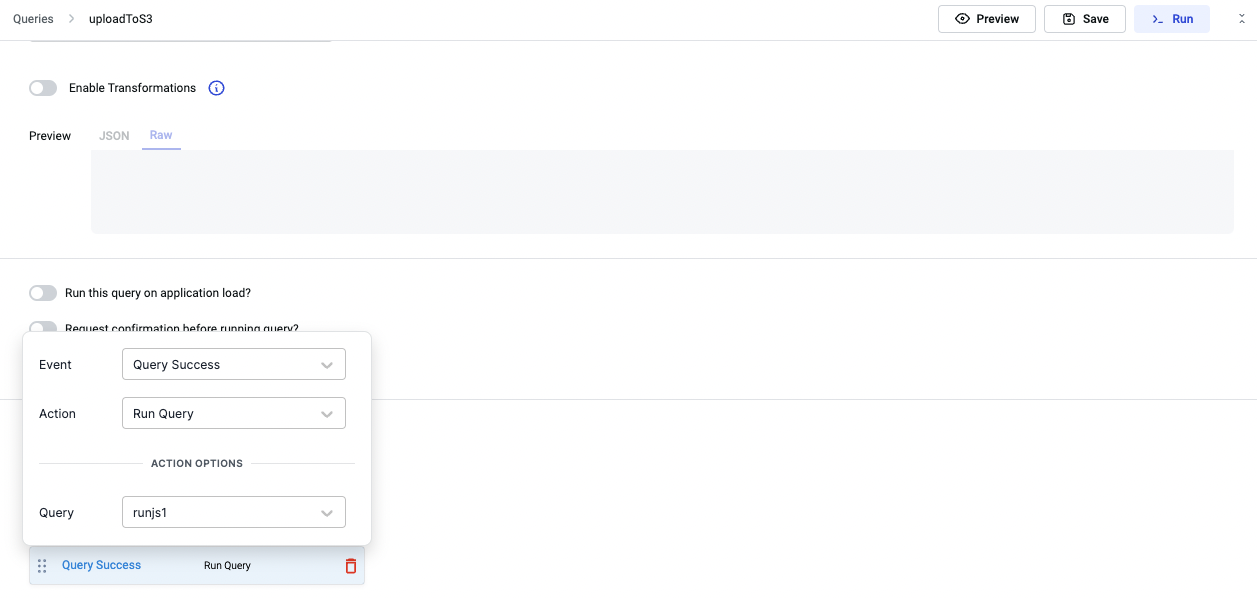
Go to the uploadToS3, scroll down and add an event handler to the uploadToS3 query. Select the Query Success event, Run Query as the action, and runjs1 as the query to be triggered. Save the query.
-
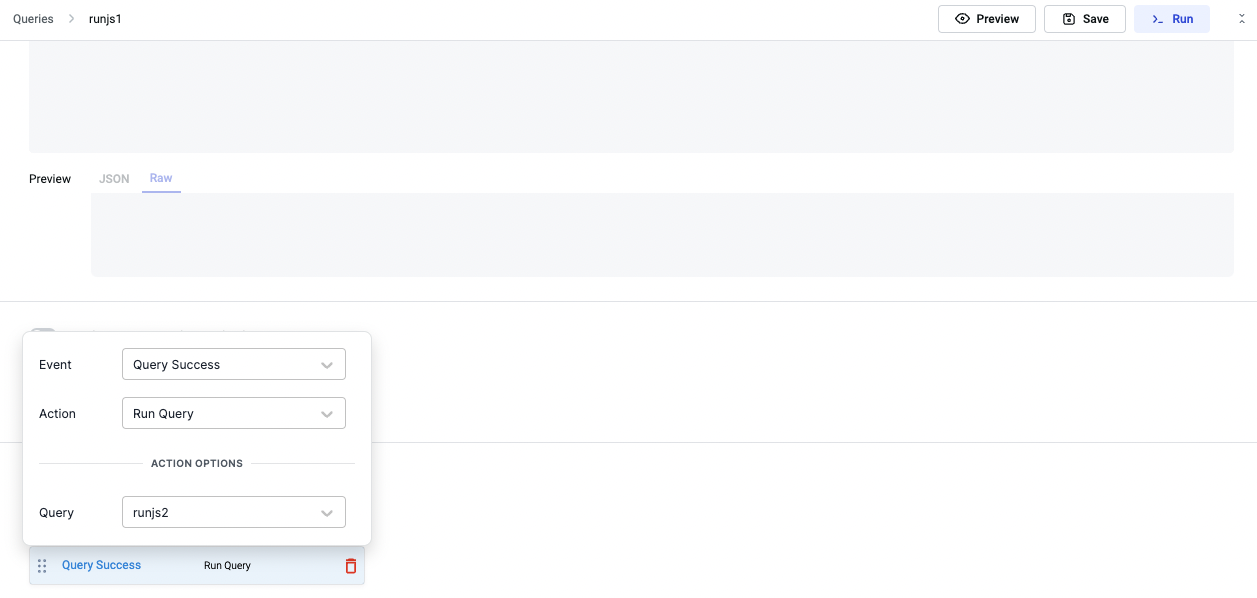
Let's go to the runjs1 query and add the event handler to run a query on query success event, similar to how we did in the previous step. In the event handler, choose runjs2 query. Save the query.
-
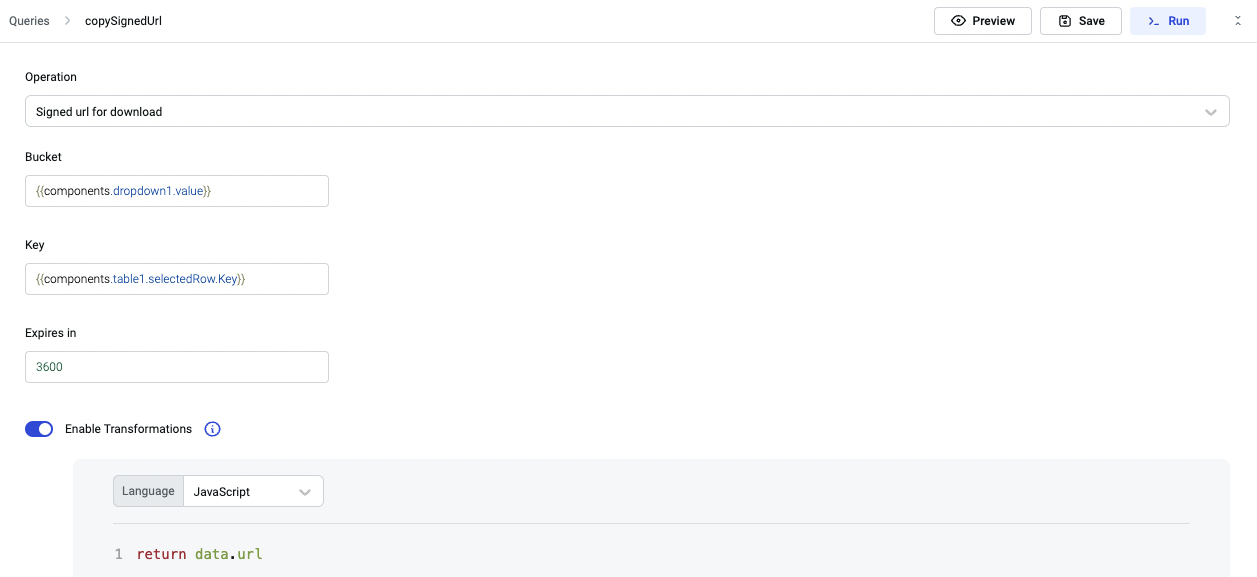
Now, let's go the final query copySignedURL that is connected to the table's action button. This query copy's the generated Signed URL for download onto the clipboard.
-
Now that we have updated all the queries, and connected them through the event handlers. We can go ahead and pick a file from the file picker. Click on the file picker, select a file and then hit the Upload file to S3 button.
-
Once the button is clicked, the uploadToS3 will triggered along with the runjs1 and runjs2 queries in sequence since we added them in the event handlers.
-
You can go to the table and click on the Copy signed URL action button on the table, this will trigger the copySignedURL query and will copy the URL on the clipboard. You can go to another tab and paste the URL to open the file on the browser.